It is very easy to take floors in the commercial buildings in Melbourne from looking absolutely dull to shining with the help of floor sanding and polishing Melbourne which gives them extra shine. A lot of commercial as well as industrial properties owners who have cleaners already understand that the industry professionals are a wonderful addition to the janitorial supplies.
In addition to floor polishing, you can always use floor scrubbers for daily maintenance and upkeep. These can be handled by the cleaning department and prevent the accumulation of serious dirt, grime, and filth on the floor surface. Floor scrubbers are a simple, effective, and cost-affordable solution to help keep your floors shining, clean and proper. These are ideally suited for large commercial floors.
Reasons why people are considering floor polishing
Using the industrial flooring machines many times brings a lot of shine as well as sparkle to the floors of the building. Renting out commercial polishers will help you wax or polish your floors often. However, purchasing a machine for your personal use would offer you a lot of flexibility by helping you to conduct regular clean-ups of the floor as your schedule allows. This, in turn, would help in converting to the low cost of cleaning by eradicating the whole need of outsourcing the job to the contractor. Investment in industrial polishers helps in paying for itself each time.
The latest machines and tools are very convenient and handy to be used. Gone are the days when you had to use huge, difficult-to-control machines. The modern-day machines are extremely light in weight, very easy to be controlled, and very simple to be used for maximizing the experience of the users. You just need to add polish or wax into the machine and then plug it into the socket. Some of the models even feature multiple motors which help in applying the wax at different levels of speed for maximizing finish and shine.
With the help of the industrial polishing machines which you can buy in Melbourne, you can easily protect as well as safeguard your flooring from any kind of long-term damage. The tiny particles like dirt and dust might stay on your floorings even after they have been swept. The foot traffic would grind the debris into the flooring, causing irreversible and huge damage eventually like permanent scratches as well as marks. With the help of these polishers, you can give a protective coat to your flooring. This would help in keeping the flooring from being damaged or scraped. Along with hygiene as well as safety, the flooring machines would also maintain the exterior of the surfaces as well as floorings.
Because of all these reasons, people prefer this option
The flooring of the property is the very first thing that people see as soon as they enter. Thus, for ensuring that they leave a good impression on the visitors, you need to use different kinds of floor polishing tools that are easily available in Melbourne. You should use them regularly so that they are protected. They would look their absolute best with the help of these tools.
Conclusion
Floor polishing helps in keeping the floorings look new and shiny always. You should keep using them regularly so that the flooring may be safeguarded from long-term damage.
Lucia Patterson is the woman behind TheLegalGuides, a blog solely focused on legal guides, tips, and advice. Lucia loves essay writing and blogs at EssayWritingGuides from her college days.
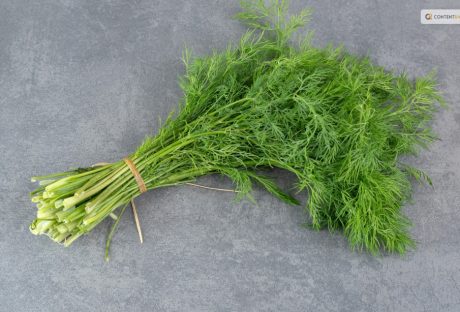
The tender, fern-like leaves of dill almost beg to be touched. If you want to cook them, trim the fresh dill foliage and gather the seeds for pickling. Or you can chop the feathery leaves and yellow umbels for attractive bouquets of homegrown flowers.
In addition, black swallowtail caterpillars love to feed on it. Its tiny yellow blooms are great at drawing in a wide range of pollinators. Dill grows as an annual for summer harvests in USDA Hardiness Zones 2–8. In other parts, it may self-seed and is hardy in the winter in Zones 9–11.
Here is everything you need to know about how to harvest dill. Keep reading for a comprehensive guide.
How to Harvest Dill?
Fresh dill clips easily, but it soon starts to droop. Sounds familiar to Cilantro, right? Its flower umbels may look lovely in a mixed bouquet, but after a few hours, don't be shocked if they start to wilt. When harvesting dill for recipes, use it as soon as possible because its flavor starts to fade after a few days.
Cut off the flower stalks of dill after the yellow blooms have faded but before the seeds start to ripen and come away from the umbel. Cover the entire flower head with a small paper bag that has a few tiny holes for ventilation.
Hang the plant upside down in a cool, dry place. Watch for the seeds to fall and collect them in the bag's bottom. The seeds should be kept in a cool, dry, and dark area in an airtight glass container.
When and How to Plant Dill?
Dill grows best outside and is simple to start from seed. Plant the seeds directly into the ground, 1/4 inch deep and spaced 1 to 2 inches apart, in the springtime following the last frost. If you want the dill plants to be able to self-sow, plant the seeds in tufts so the seeds can fall and sprout the following year.
Or you can plant them in rows spaced about 6 inches apart. You might want to think about succession planting if you want a reliable supply of dill. During the growing season, start by planting a small number of seeds from the packet at a time and then a few more every week.
Typically, seeds take 7 to 14 days to germinate. Also, dill can be grown from transplants grown in nurseries planted in the ground or in containers in spring. You can plant dill outside a few weeks before the last predicted spring frost because it can withstand light frost.
To achieve lush growth and stop crowded seedlings from producing seed heads, which stops the production of foliage, thinning is essential. Every 12 to 24 inches, reduce the number of seedlings to just the strongest one once they reach 3 or 4 inches in height.
As they get bigger, some start to flop. Plants can be kept upright by placing a stake or a sturdy twig in the ground close to the plant's base. To loosely secure the plant to the stake, use garden twine.
You can start the dill seeds indoors four to six weeks prior to the last frost. And you can move the seedlings to the ground once the risk of frost has passed. Transplanting mature dill does not work well, so plant your seedlings where they will be able to grow and thrive.
Where To Plant Dill?
Dill should be planted in a spot with well-drained soil and at least 6 to 8 hours of daily full, direct sunlight. Particularly for cottage gardens, the delicate foliage gives garden beds and borders textural interest. Choose a location for your dill that will shield it from the wind if possible.
Just like spinach, high winds can easily damage its stalks if you do not stake the dill. You can plant dill's fragrant foliage in perennial garden container plantings. Or you can plant them alongside other herbs or vegetables in a traditional kitchen garden.
In an edible garden, cruciferous vegetables such as Brussels sprouts, collard greens, broccoli, and cabbage are good companion plants for dill. Dill draws beneficial insects like ladybugs and bees and drives away common brassica pests like loopers and cabbage worms.
But avoid planting dill close to carrots. Carrots can be stunted by dill, and because they are closely related, dill can cross-pollinate with carrots to produce inferior hybrid plants. Planting dill close to tomatoes is also not recommended.
Mature dill will probably stunt your tomatoes' growth, even though some studies have indicated that tomatoes and dill can be beneficial companions when they are young.
How to Propagate Dill?
Seed is the most effective method of dill propagation. Cuttings can also propagate Dill, though this isn't as dependable.
Seed: Direct sow the dill seeds in early spring at a depth of 1/4 inch in a prepared garden bed. Dill does not tolerate transplanting well. Thin the seedlings so they are 12–24 inches apart when they are 3–4 inches tall.
Cuttings: Using shears or scissors, cut off the stem with at least 3 to 4 inches of new growth to take a dill cutting. Place the cutting in a water-filled container, making sure to remove any leaves below the water's surface, and allow the roots to grow for two to three weeks.
Fertilizer and rooting hormones are not required. Plant the dill in a container or on the ground once the roots are 2 to 3 inches long.
Is Dill a Type of Weed?
No, I am not talking about WEED weed (read: marijuana). Although dill isn't technically a weed, some individuals and spice companies call the plant dill weed, possibly due to its feathery leaves. Dill weed is a dried or fresh foliage plant. Flower umbels are yellow and used to make dill seeds.
How Should Dill Be Stored for Optimal Quality?
You can keep fresh dill in the fridge by wrapping its leaves in a moist paper towel. Or you can tuck its stems into a container of water. Fresh dill can be frozen by submerging it in water in ice cube trays. Place the cubes in cooked dishes that have enough moisture to withstand them.
Dill seeds and leaves can also be easily dried for later use, though the flavor is a lot more muted.
Water and Soil
Sow dill in soil that is moist but well-drained. If there is a lot of clay in your soil, add organic matter to the top few inches to aid in drainage. If you have trouble with poor soil drainage, plant this herb in raised beds or containers. Growing dill requires proper irrigation.
As the seeds germinate, keep the soil evenly moist. Dill plants require one to two inches of rain or extra water each week once they begin to grow.
Humidity and Temperature
Dill tolerates temperatures as low as 25ºF, but 70ºF is the ideal temperature for it. Dill often bolts, sending up flower stalks to set seeds when temperatures rise. This annual herb dies after it flowers and produces seeds. Get rid of the flowers to prolong the plant's growing season.
Apply Fertilizer
While most herbs, including dill, don't require extra fertilizer, you can give them once or twice during the growing season by applying a balanced 10-10-10 fertilizer. When planting, either mix a liquid fertilizer with water or etch a time-release fertilizer into the soil.
Refer to the product label for instructions on how much to use.
Trimming
Dill should be pruned early in the growing season to prevent limb bending. Cut off the top leaves of the plant to promote more growth of the lower leaves. Food preparation and cooking can be done with anything that has been pruned.
Repotting and Potting
You can grow dill in pots on a sunny balcony or deck, even if you don't have an outdoor garden. Due to the deep taproot that dill plants have, choose a container that is at least 12 inches deep. Because clay and terracotta pots don't retain as much moisture as plastic or glazed ceramic pots.
They are ideal for growing dill. Make sure the container you select has good drainage and is big enough to allow you to space your plants 12 to 24 inches apart. It is best to start over in a new, larger container. Especially if your dill plant outgrows its current one because it does not take well to transplant.
If the temperature where you are planting is not too high, you can keep planting seeds into the summer.
Types of Dill
Dills can be of many types with each of their distinct looks and flavors. Here are the three different types of dill you can grow in your kitchen or backyard.
Long Island Mammoth
Also known as Long Island Mammoth this one is an old-time favorite. Its fern-like leaves can be dried and stored for a long time, or they can be harvested fresh. It produces big clusters of yellow flowers with flat tops. They turn into brown seed heads, and they can reach a height of five feet.
Fernleaf
Grown to a height of only 18 inches, Anethum graveolens, or Fernleaf, is a highly productive dwarf variety. It works well in container gardens or small in-ground beds. Its feathery, delicate foliage has a great flavor of dill. From midsummer into fall, it blossoms.
Bouquet
The 'Bouquet' cultivar produces plants up to thirty inches tall with fine bluish-green foliage. The enormous, six-inch-diameter yellow flower heads are ideal for drying, creating an enduring arrangement. Or you could chop them for fresh floral arrangements.
How to Keep New Dill Fresh?
Dill weed quickly wilts after harvesting and gradually loses its distinctive flavor and aroma. If you know how to store your freshly harvested dill, this shouldn't be a problem. Here are two straightforward techniques that you can use:
Put It in the Crisper Drawer of the Refrigerator
Loosely wrap the recently cut and cleaned leaves in damp kitchen towels before putting them in a container or sealed bag. Put the container in the crisper drawer of the refrigerator, which has a lower humidity than the other sections of the appliance.
Utilize the herbs before they begin to wilt and dry out, which should happen in a few days.
Put It in Water
To make this method function, when harvesting the herb, you must cut off the entire stem. After gathering the stems, put them in a glass of water and seal the opening with a plastic bag. Every day, change the water. Unlike potatoes, dill leaves can remain fresh for up to a week when stored in this manner.
How to Freeze Fresh Dill?
Freezing is the best way to preserve extra dill for later use if you've harvested more than you can use at once or in a few days. Dill freezes most effectively when chopped into smaller pieces and added to ice cube trays with just enough water to cover the freshly minced dill.
This allows the herbs to be kept for four months or longer. This will ensure you always have dill on hand for when a recipe calls for it.
How to Dry Fresh Dill?
Dried fresh dill is a popular method if you're searching for another way to store dill for a long time. The herb has many uses, even though it won't have as much flavor as when it's fresh or frozen. All year long, you can use it as a herb in cooked dishes or to make tea.
Stick to hang-drying if you don't want much of the flavor to be lost. This is a very easy method to use. All you must do is gather a few dill leaves and then bind them with a string. Later, place them in an area with adequate ventilation upside down.
Place them in an airtight container once they're crumbling and dry. Even though fresh dill is always preferable, make sure to save some for later use. Particularly if you don't have a year-round indoor herb and spice garden.
Wrapping Up
Growing dill is a great way to add flavor to fish and seafood dishes. A little goes a long way because fresh dill leaves have a strong licorice flavor. It is best that you add dill toward the end of cooking, in salads, or as a garnish for soups. Because once cooked, it tends to lose its flavor.
If you have thoughts to share or questions to ask about how to harvest dill, please leave a comment below. We would love to hear from you!
Read Also:
Asparagus 101: When, How, And How Often To Harvest?
How To Harvest Sunflower Seeds: A Fun And Easy Activity For The Whole Family
How TO Harvest Lemongrass: Tips AND Tricks FOR Growing AND Using This Versatile Herb
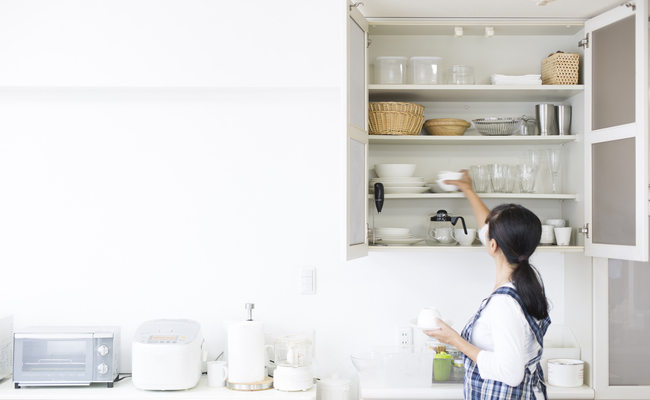
Are you sure that your home is thoroughly clean? Maybe, it's not! There are several reasons for having a clutter-free home.
Perhaps, your home is looking clean, but have you checked all the hidden areas that you may not look adequately due to your hectic lifestyle?
If you often feel stress and other health issues when looking at your messy home in Santa Cruz, then it's the right time to hire Anita's Housekeeping services in Santa Cruz; they'll clean it right away!
Different Ways Clutter-Free Home Can Make Things Easier For You
There are several ways Clutter-Free home can make things easier for you when you want to stay in your dream home.
You Will Feel Peaceful:
You may don’t realize the reason of getting stress and anxiety often. It is because of the huge mess inside your home as the level of stress directly linked to your area you are living in. Remember, visual chaos lead to mental stress. You may think to live with the piled on things, but they are most influencing intensely than you notice.
Moreover, it is advantageous for your overall health as clean home drives no health issues in the long run. Thus, do plan and check to clean your home from time to time. Especially if you have a small area, you can go for self-storage units to put your random stuff inside it.
Clean Home=Better Health:
Your body has a natural tendency to crave for junk food when you are feeling stressed. What have you done so far to reduce these bad cravings? If nothing, then here's what you have to do:
Your kitchen should be your priority to make sure that it is super clean so that you will feel encouraged to cook something healthy.
Clutter and untidiness are stressful, cleaning up not only means to stop craves bad food but also really help encourages nutritious choices.
The clutter-free home also doesn’t let insects, germs, pests, and bacteria to enter in that benefit your health.
You Will Not Get Ill:
If you don’t want to become sick often then cleaning and dusting your home regularly is a must. A tidy space gives no chance to bacteria and germs to hide. Adding to your carpets, bedding, and curtains carry most of the dust, so make sure to clean it regularly.
Vacuuming should not be the only task; decluttering your floors is also essential. Try to keep fewer items in your home or organize them to their specific places. It makes your job easy to remove dust and sanitize open items.
You Will Be More Active:
Don’t you feel more energetic and productive when you find less cleaning work at your home?
Disordered home makes it simple to procrastinate something you have seen. When everything is organized, you will think to do some other stuff, and you will less indulge yourself in cleaning.
A clean home makes you physically involved in some tasks rather sitting in your bed. A clean home will make you active and productive throughout the day. You will be more proactive towards other work like cooking, watering plants, and other household work.
Dust-Free Home Reduce Breathing Issues:
It is not necessary that you should clean your home only if you have some health issues. Even when you don’t, keeping your home clean and area around like garages and basements is a must. Dust and dirt sitting on the floor or your things can drive allergic reactions, bad air quality, and encourage breathing problems.
You are more likely giving scope to dust to enter if you have clutter all around on the floor. It actually helps you not to become sick if you clean your home regularly.
Conclusion:
We hope all of the above health benefits of a tidy home give you some motivation in your home-cleaning step. You will definitely feel the difference once you are done. Happy cleaning!
Read Also:
7 Tips To Increase The Value Of Your Home
7 Benefits Of A Clean And Decluttered Workspace
5 Tips On Effectively Picking A Tile Floor Cleaning Machine
When the summer approaches, we can enjoy the summer’s sunsetting sitting on our armchair. This is a really enjoyable and exciting experience of our life. But what if there are full of insects both harmful and harmless that can cause great harm to your health. The Zapping Light Bulbs can help you to get the maximum light in a short span of time. In this case, you may adopt some ways to repel and sometimes kill them. In this article, I will discuss some ways to get rid of irritating insects.
There are a lot of ways to keep harmful insects including bugs, mosquitoes and many other things away from you. Some of them are fast and at the same time pollutes our environment as well while others may be environment-friendly ways too.
The main concept of removing bugs by bug zapper light bulb is not so difficult. As they emit ultraviolet and infra rays, insects get attracted by the ultraviolet rays and enter into the trap and at last, they are being caught in the trap. This is as simple as water.
Types of zapping light bulb
But there are of two types of zapping light bulbs out there. One of them entices insects inside the zapper to kill them. On the other hand, yellow zapper light does not kill them but repel them. So, if you are searching for a solution to repel bugs from your living area, you can select the second one which does not kill them. As a result, useful insects for your environment go away from your area without killing. And the first one works not only as a device to repel them but kill them and at the same time pollutes our environment as well.
Nowadays, there are other types of bug zappers which produce carbon dioxide as well to attract mosquitoes as well. Bug zapper lights that can emit only ultraviolet and infra rays to lure insects except for mosquitoes. That’s why new devices have been invented that produce both ultraviolet rays and carbon dioxide too. Now it is easier to repel and kill any insect into the zapper.
Which zapping light bulb should be good for?
According to me, a bug zapper light bulb is more effective and environmentally friendly than a bug zapper. A zapper can kill a larger number of harmless and useful insects entirely. Besides, if you do not keep it away from your living or dining space, it will pollute the area and as a result, your health may fall in danger. While killing the insects inside a zapper attracting by the ultraviolet rays, there produces a ‘mist’ which may pollute your living as well as your dining space.
But if you can replace your thought of removing bugs from your living place and do not want to kill them, only the bug zapper light should be your best choice. It does not pollute your environment.
Let’s talk about the effectiveness of the device:
Are the bug zapping light bulbs are effective anyway?
Well. Yes, they are more effective to repel annoying bugs from your surroundings. The main concept of repelling bugs using yellow lights are not new at all. Yellow lights attract bugs form a long distance and they come forward and cannot see further. As a result, they stuck there without being killed which is very effective not only for the environment but also for the useful insects as well.
The intensity of the lights may be lower or higher. And they can attract bugs from a long distance depending on the intensity of the lights. Also, they can cover a larger part of your area.
It may not repel mosquitoes:
Carbon dioxide attracts mosquitoes and they find us following the carbon dioxide trails. When we breathe, we leave carbon dioxide. Besides, they also find us when we sweat.
Anyways, zapper does not attract mosquitoes most. If you place a zapper near you and you sit beside the zapper, you will see that mosquitoes are not going towards the zapper leaving you. But there are zappers now in the market available that can produce both carbon dioxide and ultraviolet rays at the same time to kill the harmful and annoying mosquitoes too. The zapping light bulbs can make things happen in your favor.
Conclusion:
We use a lot of devices in our daily life to make our ways of living comfortable and enjoyable. But at the same time, we have also to think about our planet. We should always go for the green that will make our planet-friendlier. So, before using any device, think at least one time whether we should go for it or not.
Zapper light bulb is without any doubt effective and as they do not kill the helpful and useful insects that can make our environment more efficient for us. Otherwise, we should think about our future of the present world to make it greener making any harm to the lovely planet.
Read Also:
A Rundown Of The Basic Led Lighting
The Right Light Set-Up For Your Band
Las Vegas Electricians Share Fun Lighting Ideas For Your Home