More Motivation, Less Distraction: How To Pack For Temporary Storage

by

17 August 2021

Home & Garden

Pack For Temporary Storage

You’re among one of the thousands of Americans who find themselves faced with packing for temporary storage. You’re not alone… Maybe you’re staging your home for a quicker sale, making room for a home office or a temporary classroom amid the Pandemic, or desire the peace of mind that comes from a space that is free of clutter.

With so many changes in the worldwide landscape, self-storage has become an asset to homeowners and apartment dwellers. Temporary storage offers flexibility while creating room in your home and free space in your mind.

All of those distractions not only lead to lower productivity but also lead to feelings of overwhelm that disempower us from reaching our goals. Feeling encumbered by stuff is a growing trend since so many of us are faced with how many things we actually have during a shelter in place! The good news is that by utilizing temporary storage, you don’t have to wait for a bigger home to create that spacious feeling.

Whether you’re packing for temporary storage due to a transition in your personal life, or just want to free up some space in your home in you home, it can feel overwhelming to do the research necessary to begin the process.

How To Pack For Temporary Storage?

Here is a full-step guide to pack for temporary storage. read the points below to know everything about it in detail. Clearing some space in your home would also help you concentrate on doing something meaningful to your life.

Step 1: Assess the space you have

Create a flow in your home.  Your things should fit neatly into the space you have. Although it may be tough to decide what you need, storing things offsite means that your stuff is not gone forever!

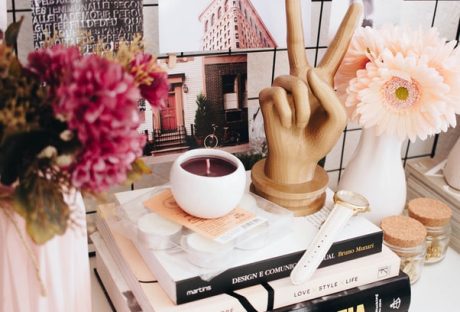
Get Rid of the clutter! Clutter can be overwhelming to deal with when starting to pack your belongings for storage. Once it’s out of the way, it makes the packing process so much easier. Even a few hours of decluttering can make things run a lot smoother. Try getting the family involved, and make it a game!

Read Also: Moving home checklist: What you need to know

Step 2: Categorize & Inventory

Making lists as you categorize your items for temporary storage will make it easier for you to find them as you need them. As you gather items from each category, make a list, or take a photo of what you pack in each box. Label your boxes with a number, and mark your photograph or list with the same number for a visual index. Having a list and documentation is also an asset in the event that an unfortunate or unexpected event should occur and you need to file an insurance claim.

Things you use seasonally

Your surfboard, your kid’s inflatable pool, or your Bermuda shorts won’t be of much use when it’s snowing outside! Group all seasonal items by season, including decorations, clothing, and footwear together. When these items are packed together, and labeled, it’s so simple to swap out a few boxes at the change of season.

Sentimental Items You Don’t Need Right Away

High School Yearbooks, Stacks of your kid’s artwork, and other items that have value but are rarely used in daily life can be prepared for temporary storage, so you can access them when you need them!

Things You Need, Just Not Right Now

Heirloom furniture, boxes of books, or clothes -you’re saving for the next baby can all be stored off-site!

Step 3: Gather Materials and Pack

Following your inventory, pack items of each category together following these instructions for the safekeeping of your items.

When packing, it is important to consider that life changes quickly, and although you are packing for temporary storage, you may enjoy the spaciousness this brings and decide to keep your items packed away longer than 3-4 months! Packing items to be stored indefinitely not only safeguards your items but can offer you peace of mind in the event that plans change. Since things often take longer than expected, you can rest assured knowing that your valuable items are safe.

Be sure to use sturdy boxes, and always, always make sure the bottom is taped securely shut! Don’t overpack boxes, and make sure boxes can be comfortably lifted and moved. Pack lighter items on the top so they do not crush the contents beneath them. Fill any empty space in the box so it does not collapse.

Furniture

Clean each piece of furniture, removing any dust, debris, or food remnants. Condition any wood or leather items, and be sure to vacuum all upholstery.

Disassemble any furniture. Often the assembly instructions are long gone, so it is helpful to take photos of each step along the way, documenting hardware as you go. When it comes time to reassemble, you can review your photos in reverse, making reassembly a breeze!

Use a drop cloth, or moving blankets, wrap your items carefully for transport and storage. While bubble wrap is useful for protecting mirrors and glass, avoid using plastic coverings directly on your furniture. Plastic can trap moisture, which can cause wood to warp and upholstery to mold or mildew. Use only white drop cloths to cover wood or upholstery, as the dyes can bleed in humid environments leading to discoloration of your furniture.

Electronics

Remove any dust or debris from the item using a dry cloth. If you are storing an electronic device that stores data, be sure to back up any important information before packing it away.

Secure packing of electronics is so important! In the event of any bumps or drops, you can be at ease knowing your electronics are secure in their packaging. Remove all cords, and wind them into a circle, securing with a tie.

If possible, pack electronic items in their original packaging. If that is long gone, use a box slightly larger than your item, and create a shock-absorbing buffer firmly around the item using packing peanuts or styrofoam. Avoid using any plastics that will trap moisture, and be sure to include several silica packs to absorb any humidity.

Always keep your electronics upright. Mark an arrow on the box with the correct direction to ensure that your item is stored and transported safely.

Once your device is placed securely in the box, you can place the corresponding cords on top of the packing, and tape your box closed securely.

Clothing & Specialty Worn Items

Books, Papers, and Photographs

Books Storage

Since mold is a common issue when storing books, and papers, it’s recommended to ensure they are totally dry. If you live in a humid climate. Paper objects can be stored in smaller, opaque plastic totes to ensure they are kept free from moisture and light, and rodents.

Pack larger books lying flat, and store smaller books upright, as you would on your bookshelf. Never store a book on its spine, as it can cause damage to the structural integrity of the book and damage it.

Protect your photographs by storing them in an archival album before storing to ensure your photos will be around for generations. To store larger photographs, carefully place them between layers of cardboard, and lie flat.

Instruments, Art, and Other Delicate Objects

To properly store delicate objects, it is important to have a facility tha is climate controlled, even for temporary storage. Make sure all packing is secure, keeping packing materials out of direct contact with any painted areas, wood accents, or delicate features.

You May Also Like: Small Kitchen Storage Ideas

Step 4: Finding A Storage Space

It can be difficult to conceptualize how much storage space you actually need. Many self-storage websites offer guides that can help you visualize how your things will fit in the space. Some storage units are multi-level, so be sure to ask about accessibility if you need a space that is on the ground level.

If you are storing any sensitive items like instruments, electronics, or antiques, be sure to rent a climate-controlled unit.

When people think of storage, the image that comes to mind is often a traditional storage facility. While traditional storage is an excellent option for many, there are alternatives that can offer some flexibility, convenience, or some sizable savings. Maybe you have a spare vehicle that never gets used sitting in your garage. Consider storing your vehicle, renting extra space from someone in your neighborhood, or asking a family member or friend to store belongings for you.

GetMeSeen & SEOGrowthEngine is an SEO service provider, trusted by 1000+ website owners globally. If you are looking for contextual backlinks from niche-specific blogs to build authority and drive referral traffic to your website, buy our 100% risk-free Guest Posting Services.

View all posts

Leave a Reply

Your email address will not be published. Required fields are marked *

Related

window panel color

Tips for Selecting a Window Frame Color

When you are renovating your home or building a new one, it’s easy to visualize the big details, like the color of the roof and the walls. Something you may not necessarily be thinking of immediately is the color of your window frames, and yet this is such an important color to consider. It may help to think of them as something similar to the frame on a painting — it adds a finishing touch to the artwork, or in this case, the house. If you are not sure how to choose a color, here are some tips that may help you in your choice. Choose a color palette: It helps to include the color of your window frames in the complete color palette you choose for your home. If the amount of color choices is overwhelming, keep it simple by choosing either a warm or a cool palette. Pick a color that highlights or hides: If you are repainting your home, you can highlight your beautiful window frames by painting them a color that makes them stand out. Conversely, if they are ugly as sin, paint them a boring white, or any color that makes them blend in with the walls. Select a color that complements your home’s exterior: Your walls should have a big say in what color you paint your window frames. If you have exposed brick walls, you should choose a bright contrasting color, and avoid warm browns and dark colors. For painted wood siding, it could work well to pick a darker accent color that complements the rest of the color palette of your home. Read More : Essential Things To Consider Before Hiring A Window Tinting Expert Consider neutral colors: Neutral colors are trendy again. The current variety is a far cry from boring beige, so you don’t have to fear to have a sterile hospital look. The new generation of beiges and grays are soulful and colorful, and they will prove to be timeless at the same time. No need to be embarrassed about bright lime or electric pink, or any such garish eyesores in a few years from now. Choose a color that fits the style of your home: It is very important to choose a color that is appropriate to the style of your house. Certain colors go well with certain types of architecture. A red brick building already imposes a limit on the color palette due to the characteristic hue of the walls. A historic manor would benefit from modest colors that fit in with the time period in which the house was built. If the architecture is more modern, choose colors that enhance that particular style. But if it’s just your typical family home without any noteworthy architectural provenance, you are free to choose colors that match your personality and sense of style. It should be something that you like, and feel comfortable looking at every day. Read More : Before You Forget : Things You Need To Consider Before Windows Replacement Use bold colors wisely: For most people who doubt their stylishness, it would be best to stick to neutral colors. But if you are brave and daring, and you are sure you can pull it off, bold colors can add an unexpected twist to your decor. Apex Window Werks is home and Commercial Window Repair Company with the headquarters in Chicago, IL. If you are looking for a reliable and experienced contractor to get the fog out of your windows, replace broken glass or repair rotten wood window frames, then AWW is your expedient choice. Feel free to give them a call to leave a message.

READ MOREDetails
Hardwood Timber Flooring: Gives a Classic Look to Your Home

Hardwood Timber Flooring: Gives a Classic Look to Your Home

Solid hardwood flooring is known for imparting an impressive look. Customers tend to prefer hardwood flooring since decades because it gives not only a unique but a classic look to the room. Hardwoods are usually used for construction purposes such as boat, furniture, flooring, and instrument construction. The hardwood variety is usually obtained from oak, maple, cherry, hickory or pecan trees. Thus, the hardwood timber flooring is known for imparting a sense of beauty to the room and also displays the sign of high status. Styles of Hardwood flooring The most popular hardwood flooring includes Solid hardwood flooring Engineered wood flooring Long strip engineered wood floors Each type of hardwood flooring is different from the others in regards to the advantages, durability, look and pattern. The solid hardwood adds charm, cordiality and value to the room, while the engineered hardwood flooring does not shrink easily and is more durable. The long strip engineered wood floors are known for their unique features, they are designed for the floating installation. The hardwood timber flooring is a magnificent product that can last for generations. However, proper care and regular maintenance are the two most important things that need to be considered when talking about timber flooring. How to increase the performance of the hardwood timber flooring?  Refrain from using hot water as it may cause serious damage to the floor. Use a damp mop by wringing out the extra moisture as this can hamper the flooring and wet patches can develop on the floor surface. Always mop in the direction of the wood grain to remove the entrenched dust more swiftly. Refrain from using harsh chemicals, detergents or floor cleanser; instead, look for cleansers that are mild and are meant for this type of flooring to remove stains. Use gentle nonscratch microfiber mops for cleaning the hardwood timber flooring. Sweep the floor regularly with a soft-bristle broom or vacuum cleaner.  Some more facts about hardwood timber flooring The furniture and the other appliances should be placed after 48 hours from the last coat of varnish on the hardwood timber flooring. The furniture and the other appliances should have protective pads to prevent marks on the floor. The rugs or the carpet can be placed at least after 2 weeks from the last coat of varnish on the hardwood timber flooring. Guard the floor against direct sunlight by using window curtains or by using rugs and carpets. This prevents the hardwood timber flooring from getting discolored. Maintain a normal temperature to prevent gaps and cupping. Ensure that no one uses pencil heel shoes or sharp-pointed heel shoes on the floor as it may create a dent on the floor surface. Trim the nails of the pets in the house to prevent scratches on the hardwood timber flooring. [caption id="attachment_627" align="aligncenter" width="650"] Hardwood Timber Flooring[/caption] Advantages of hardwood timber flooring Selecting a good quality hardwood timber flooring can last for several years in fact through generations. The hardwood timber flooring is easier to clean and is highly cost-effective. The hardwood timber flooring increases the resale value of the home. Good quality hardwood timber flooring keeps the room warm and cozy and is more hygienic compared to other flooring materials. How to choose hardwood timber flooring?  When choosing the hardwood timber flooring for your home, Check the color and pattern to match the décor of the room. Check the timber wood based on select, standard and feature grade. Check for the coating that can be used based on oil or satin finish. Thus, the hardwood timber flooring is ideal for imparting a classic look to the room. Read More: Additional Ways To Keep Your Home Warm Home Hacks: Stuff You Can Clean In One Hour Or Less How To Make Your Home Look Like A Splendid Hotel? Best 5 Designer Secrets To Make The Most Of Small Spaces

READ MOREDetails
Staircase Design

Tips To Choose a Staircase Design

Staircases tend to be a huge and important part of a home. A good staircase will allow one to have access to the building's upper levels. It allows one to do this safely. The staircase is also a major feature of a home. We usually do not need to select a new staircase often. But if you need to, you may be confused about where to start. Staircases are available in many varieties. When selecting the type of stairs that you want, it is important to choose wisely. The following are some points to keep in mind when selecting an amazing staircase: 1. Your budget matters This is one main factor that will influence the type of staircase you will get. This will aid you in choosing the type of materials that will be employed for the stairs along with the style of your stairs. Aluminum metal staircases tend to be more cost-effective in comparison to solid timber ones. There are also certain mixtures of the two materials that fit within the various price ranges. Look for the type of staircase that you like then get some quotes. This will help you know if the budget you have given to the stairs is enough for the one you like. 2. Space available You need to keep in mind the space that you have available. This will aid you in figuring out a design that will not end up taking much space. If the area that you have is larger, you can even choose a larger as well as more decorative type of staircase. A straight staircase will take up more space within the room below and will need a thin and long rectangular opening within the ceiling above. Spiral staircases actually take up less space within the downstairs area and need a square or maybe circular opening present in the ceiling above. This may sometimes end up taking more space particularly in the area above. 3. Safety matters It is important to keep in mind the safety of the stairs. Look at present building regulations that are made to help, giving minimum width needs for certain applications. The regulations also make sure that no gaps should be present on the staircase that are above 100mm therefore not letting kids be able to climb through the balusters. You should know that a spiral staircase is actually as safe as any standard staircase. It should not be thought to be dangerous in any way. 4. Occupants are important You need to keep in mind the occupants of the property. For instance, if there are any seniors and kids in the family, you can consider stairs that have landing plates as well as handrails. The above are only some points that you should consider when choosing a staircase design. You can look at a staircase design in Melbourne if you want to get some ideas. Work with a good company who will be able to help you get the staircase that you want. Read Also: Top 10 most wonderful houses of 2021 7 Ways to Add Character and Style to Your Home Things To Do In Israel That You Must Know

READ MOREDetails