5 Tips to Give your Hairstyle a Perfect Look

Published on: 10 September 2018 Last Updated on: 18 March 2020
Hairstyle

Having your hair looking flawless at all times gives you a great feeling and creates a sense of self-confidence. No matter the hair type, texture or color, we all would like to have our hairstyle groomed by a salon expert as frequently as possible. No one can resist the reward of perfect locks done by a professional, especially when preparing for that special event or appointment – it can actually be your winning charm. However, visiting your hairstylist on a regular base is very expensive and time-demanding. All is not lost! The following tips can help achieve the same flawless look in any situation, from your home and without breaking the back.

5 Tips to Give your Hairstyle a Perfect Look:

1. Learn how to Wash Your Hair Correctly :

Though cleaning your hair regularly is important to remove dust, debris and excess oil which may have accumulated on the strands, avoid daily hair wash. Over-washing can be damaging as it removes all the natural oils leaving the hair dry and weak. Washing twice a week is enough or three times a week if you apply mouse, gel, anti-frizz or hair sprays. You must choose the best shampoo for straight, curly, thick and coarse hair depending on your hair type. To ensure the best results:

  • Massage your scalp gently with shampoo for about a minute. The massage prevents dandruff as well as increases circulation. If you have curly or wavy hair, it is advisable to use sulfate-free products to prevent frizz and rinse with clean water.
  • Rub conditioner from the hair edges to the root. You may leave the conditioner for about 10 minutes if you want your hair to look soft and silky.
  • Use slightly warm water to wash the hair and rinse it with cold water. This locks in moisture giving your strands a shiny look.
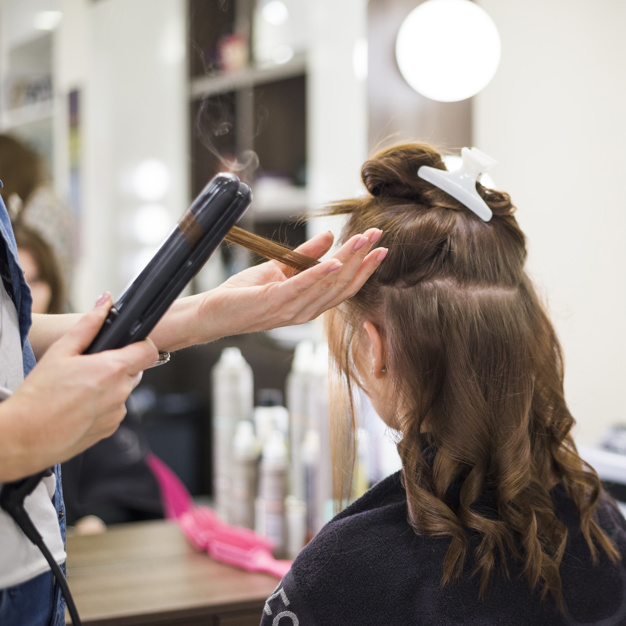
  • Blow-dry your hair correctly – Using the cool setting and holding the dry a distance to protect the hair from excess heat.

2. Know the Hair Styles that Works Best for You :

You can make or break your appearance with a hairstyle. It is, however, important to know the best style that matches your facial shape, hair type and lifestyle. Some styles may look elegant for the office, some for an athlete while others are only fit for the artist, so it is critical to consider your professional among other daily activities you are involved in. You can try on several styles and choose at most three that are suitable for you or consult a professional stylist on the best style for your hair type.

3. Choose your Care Products Carefully :

Maintaining your hairstyle naturally can be the best option whenever possible. At times you may have to use a range of products for various reasons. It is important to choose products that only make your hair better. Products made from natural ingredients such as olive oil, green tea, avocado and coconut oil among other works the best.

4. Eat Health Food :

Your hair’s health starts with a good diet. If you want your hairstyle to look flawless at any time, you need to take in foods that are rich in nutrients and minerals that support hair growth. These include:

  • Fatty acids such as omega-3 fatty acids which promote healthy nails, hair and skin.
  • Vitamins B6, B12 and folic acids found in bananas potatoes, spinach, meat, fish, chicken, dairy products and fruits.
  • Proteins from red and white meat, soybeans and egg yolk.

5. Stick to the Golden Haircare Tool Rules :

You need to invest in quality tools to keep your hairstyle neat and impressive. You can get the best hair tooltips from hairclippersclub.com with the best recommendations for your budget. Buying the best hair trimmer, comb, brush and any other necessary hair grooming equipment make your self-grooming experience smooth and hassle-free. Learning how to use the tool correctly and for the right purpose is also very important to avoid hurting your hair or damaging your hair.

Read Also : 

Content Rally wrapped around an online publication where you can publish your own intellectuals. It is a publishing platform designed to make great stories by content creators. This is your era, your place to be online. So come forward share your views, thoughts and ideas via Content Rally.

View all posts

Leave a Reply

Your email address will not be published. Required fields are marked *

Related

Richard Mille

What Is The Most Expensive Richard Mille Of All Time?

Richard Mille, a name that rolls off the tongue like the gentle hum of a finely tuned Swiss watch, is a brand synonymous with luxury and precision. Famed for their groundbreaking timepieces that fuse traditional Swiss watchmaking artistry with revolutionary techniques, Richard Mille watches are not for the faint-hearted or the light of pocket. A Brief History of Richard Mille Born in France in 1951, Richard Mille, before creating his eponymous brand, had already left a significant imprint on the watchmaking world through his work with prestigious houses like Finart SA and Mauboussin. However, it was in 2001 that the Richard Mille brand came to life, quickly becoming a beacon of innovative horology. The brand's success is largely attributable to its uncompromising commitment to using the most advanced materials, technologies, and craftsmanship, usually inspired by the worlds of Formula 1 and aerospace industries. This dedication has resulted in some of the world's most intricate, robust, and, quite frankly, expensive wristwatches. The Pinnacle of Luxury: Richard Mille Watches The cost of a Richard Mille watch is a testament to the brand's exclusivity. These are not mass-produced timepieces; they're meticulously crafted works of art that are as rare as they are extravagant. With the brand's watches often sold in limited editions, their scarcity only increases their value. A typical Richard Mille watch ranges from £100,000 to £500,000, with many models far exceeding the latter mark. However, these figures pale in comparison to the most expensive Richard Mille timepiece ever sold. Richard Mille RM 56-02 Tourbillon Sapphire: The Crown Jewel The RM 56-02 Tourbillon Sapphire, launched in 2014, holds the title of the most expensive Richard Mille watch to date. Retailing at a staggering £1.6 million, it was swiftly snapped up by watch aficionados. However, when one occasionally appears on the pre-owned market, it commands prices significantly higher than its original retail value, testifying to its enduring appeal and rarity. Its astronomical price tag can be largely attributed to the incredible sophistication of its design and the use of groundbreaking materials. Its case is milled from blocks of sapphire, a process that takes nearly 1000 hours of machining for each watch. The transparent case offers a panoramic view of the complex tourbillon movement within, a spectacle that is nothing short of captivating. However, it's not just about aesthetics; the RM 56-02 utilizes a groundbreaking cable and pulley system to suspend its movement within the sapphire case. This novel mechanism was inspired by the construction of suspension bridges and it brings a whole new dimension to the concept of shock resistance in watchmaking. The mystique of the Richard Mille brand is undeniable. To fully appreciate the RM 56-02 Tourbillon Sapphire, or any other Richard Mille creation for that matter, one must find out more and delve deeper into the brand's history, philosophy, and relentless pursuit of innovation. Wrapping Up: The Unrivalled Exclusivity of Richard Mille For many, owning a Richard Mille is the ultimate expression of success and a testament to a love for horological sophistication. And while the RM 56-02 Tourbillon Sapphire, the most expensive Richard Mille of all time, might be out of reach for most of us, it stands as an incredible testament to the boundary-pushing capabilities of one of the world's premier watchmakers. In conclusion, Richard Mille's watches are more than just timekeeping instruments; they are a blend of art, science, and luxury that few brands can match. The RM 56-02 Tourbillon Sapphire, with its unparalleled design and exclusive materials, is the epitome of this blend and remains the most expensive Richard Mille watch ever crafted. Read Also: What to Buy To Dramatically Improve Your Footwear Game Best Rolex Watch Models to Pair Up With Any Suit Kurta Pajama Styles To Amp Up Your Party Look

READ MOREDetails
what is builder gel

What Is This Magic Product Salons Are Using? What is Builder Gel?

What is builder gel? It could be your whole personality right now. I mean, that’s the prime function of beauty, though. Most importantly, it can change your nails big time. I just felt everyone should get to know more about it. So, here I am with the details!  Firstly, it is a magic product, no doubt. Most licensed nail teachers and professional salon experts say this viscose polish strengthens your nails. The nails can grow without breaking. In technical terms, we call this- building your apex. Some refer to builder gel extensions as adding structure or creating structured overlays.  What is an apex? You now know what builder gel is. But what is an apex? In the terminology of nail care, the apex is the highest point of nail extensions. It is added to your nail to give it strength and balance it simultaneously.  To understand an apex better, you can think of it as the arch or dream curve of the nail. It is the thickest segment of your nail and the most challenging part of your nail palette. Once you get the apex right, you can pull off any of the nail designs 2024. How Do You Apply Builder Gel? Don't confuse it with the application of nail polish. Firstly, we apply nail polish in vertical strokes. However, builder gel is much more viscose. Hence, we use horizontal strokes while applying it.  As a result, the policy expands across the whole nail. There are three types of builder gel. These are hard, medium, and soft gels. If you’re using the hard gel, then use a separate brush for the same.  Let's clarify another confusion here. Some builder gels need you to apply a base coat first and then apply the gel on the top. However, builder gels manufactured by brands like Halo need nothing.  Once applied correctly, the hard gel helps you keep your manicure safe for a long span. However, some experts say using a rubber-based base coat is always better. It helps you to achieve the correct adhesion and take good care of your nails.  Why does builder gel lift? There are many reasons why the builder gel coating can lift from the nail top. Firstly, you must know that it is not as flexible as the natural nail. Therefore, the gel coat may lift at any time. The same may happen when you don’t apply a base coat to make the natural nail more adhesive.  Generally, we call the lifting of gel- “pocket lifting.” The center of the enhanced nail lifts away from your natural nail. Well, we understand that the builder gel coat may ward off any time.  But we apply it to give our nails strength, shape, and safety. So, we must know why the nail coating comes off. Otherwise, our builder gel treatments would be in vain. Here are some of the main reasons I’ve noticed over the years:  Inaccurate nail preparation You can’t achieve proper adhesion if you don’t remove your ail cuticle debris; moreover, not buffing the surface properly leads to the same outcome. Therefore, I suggest using a hydrator properly and avoiding such outcomes especially if you’re into French manicure acrylic nail ideas. Imperfect application I’ve always suggested visiting experienced nail experts. They know the proper application techniques. Frail treatments like builder gel applications may go wrong if you don’t know the accurate application technique.  However, the exact flaws that amateurs make are not properly curing the portions between the layers. The process takes time and patience.  Poor products  Are you using cheap or non-compatible gel primer? Even poor topcoats can also cause poor adhesion. Hence, the builder gel coat can be lifted easily.  Quality of natural nails  Often, your nails are naturally damaged. Some of the people have fragile natural nail layers. In that case, the nail additions can easily ward off. So, you must apply a good hard gel and a base coat of the right consistency. The same is also important for ombre nail designs 2024. Poor Curing Quality Did you use weak UV to cure the gel? It may be one reason your builder gel came off before time. When you don’t apply the UV for long, it makes the polymerization process weaker. As a result, it leads to easy lifting.  Benefits of Using Builder Gel There are many benefits to using builder gels. By now, you know what builder gel is and its uses. Now, it is time to find out what are the most expected benefits of the builder gel application: a. strengthening natural nails if your nails are skinny and weak  b. The nails can grow long, giving your fingers a premium finish  c. The thickness of your nails also improves when you apply a builder gel finish  d. Lastly, the builder gel nails become more durable. It can resist weathering, especially during severe winters.  Builder gels make your nails chip-resistant and much longer lasting. However, you have to make the application right. Remember the tricks I mentioned, and you can enjoy builder gel nails for a long time.  Application Process The application process is easy. It suits even beginners well. I suggest just following the steps below and having a safe and durable coat of builder gel. Start with preparing your nails for application. Do that by cleaning your nails and removing any existing polish or debris. After that, you have to do your nail buffing clinically.  Start with buffing the surface gently. After that, ensure you’ve achieved the right rough texture to help the gel sediment on your nails.  Thirdly, you have to apply builder gel. This is the most critical stop that we were all looking for. First, use only a thin layer of gel on each nail.  Remember, the gel is much thicker than regular nail paint or nail polish. So, don’t use the builder gel in very high concentrations. At the same time, know about the proper application strokes.  When you apply builder gel, the strokes go horizontally. However, the nail polish strokes are vertical. Lastly, use a sculpting form to extend it evenly across the edges, too.  Done the primary step? Now, think about increasing the life of your builder gel nails. You must cure your nails with a UV/LED lamp. It will harden the builder gel layer. To finish off, cover the tips of your nails with a short nail polish layer.  Always remember you must use a clean brush to remove the remains of the polishes applied beforehand. There might be small traces of polish inside the cuticles. Or on the sidewalls. So, use the brush well. Clean up and then layer the builder gel.  Maintenance and Removal Maintaining a builder gel is not challenging. Shrug off the terrors experts may be giving you. You can now easily keep your builder gel nails with some simple tricks:  1. don’t use any harsh chemicals on the nails.  2. Most importantly, don’t soak your nails in water for a prolonged time. It is enough to ward off adhesion. At least avoid doing that for the first 3 days after application.  3. Don’t forget cuticle oil. You must regularly apply cuticle oil to keep the nails hydrated for a long time. In the meantime, the same also keeps your nails healthy. At the same time, cuticle oil can help avoid hangnails or dry and choppy nails. Most importantly, it helps you to avoid cracked cuticles, too.  The removal of the builder gel coat is equally easy. Just soak the nails in an acetone remover. However, you can also remove the layer manually with a nail file and a cuticle pusher. This is, in fact, a gentler method. Hence it helps you to keep the health of your natural nails intact. Read Also: Fashion Style Every Modern Woman Must Know Types of Fashion Designing Courses You Should Know

READ MOREDetails
shapewear

Make Your Shapewear Last: A Guide To Caring For Your Shapewear

Shapewear from SheBird is a great way to enhance your curves and look your best in your favorite outfits. It can provide your outfit with a smooth, figure-hugging silhouette while also helping to sculpt and lift the body’s natural curves to create a sleek silhouette. To get the most out of your shapewear, it’s essential to take good care of it so it can last for a long time. Follow this guide for tips on how you can make sure your shapewear lasts as long as possible. Washing Your Shapewear When it comes to washing your shapewear, the key is to be gentle. You want to avoid damaging the fabric or stretching out the garment. Hand washing is the best option, but if you must use a washing machine, make sure to put your shapewear in a lingerie bag and use the delicate cycle. Use gentle detergents specifically designed for delicate fabrics. Avoid harsh chemicals like bleach or chlorine and fabric softeners that could damage the fibers of your garment and weaken the elastic, making them less effective over time. Drying Your Shapewear After washing, air-dry your piece until completely dry. It's important to let your shapewear air dry to avoid damaging the fabric or causing the elastic to lose its shape. Avoid putting your shapewear in the dryer, as the heat can cause shrinkage and damage the fabric. Storing Your Shapewear Storing your shapewear correctly is critical to making sure it lasts. The best way to store your shapewear is on a hanger or folded neatly in drawers that fit its size correctly. Never stuff it into small spaces where it may stretch out or become misshapen over time. Avoid hanging your shapewear in direct sunlight or a damp area, as this can damage the fabric and cause it to lose its shape. If you want to keep colors vibrant, avoid storing different colors next to one another, as colors can bleed onto each other during storage, which can cause permanent damage to the piece. Choosing The Right Size One of the most important things you can do to ensure your shapewear lasts is to choose the right size. If your shapewear is too small, it can stretch out the fabric and cause the elastic to lose its shape. It won't provide the necessary support if it's too big and may not stay in place. Check the sizing chart and measure yourself before purchasing shapewear. Rotating Your Shapewear Rotating your shapewear is a great way to make sure it lasts longer. Wearing different pieces on different days gives each piece a chance to rest and recover its shape. This rotation is especially important for shapewear designed to be very tight or compressive. Wrap Up Caring for your shapewear is essential to making it last as long as possible. Remember to be gentle when washing, air dry your shapewear, store it properly, choose the right size, and rotate it to prolong its life. By following these tips, you can keep your shapewear in great shape for longer than expected and continue to look and feel your best. Read Also: The Clever Consumer’s Guide to Shopping Online How to Plan Your Holiday Shopping to Actually Enjoy It 6 Benefits Of Buying Clothes Online – Why People trust online shopping

READ MOREDetails