How To Install Metal Roofing Over Shingles The Right Way?

by

29 August 2025

Blog

how to install metal roofing

Today’s topic: How to install metal roofing?

If you’ve been thinking about upgrading your roof without tearing everything off first, you’re not alone. One of the most common questions I hear as a roofer is: “Can you put a metal roof over shingles?” The answer is yes—you can, and when it’s done right, it can save you time, money, and a whole lot of mess.

I’ve spent years working on both residential and commercial roofing projects, and I can tell you there’s a right way and a wrong way to tackle this job. Let me guide you through the process step by step, with a few pro tips and common mistakes to avoid along the way.

Why Should You Consider Installing Metal Roofing Over Shingles?

Metal roofs have gained significant popularity over the past decade, and for good reason. They’re durable, energy-efficient, and they look sharp on just about any home or building. By installing metal roofing over shingles, you:

  • Save on tear-off costs (no dumpster rentals or labor for removing shingles).
  • Add an extra layer of insulation, which can help with energy efficiency.
  • Reduce installation time, since you’re working over an existing roof deck.

That said, this method isn’t right for every roof. Before you start, it’s essential to ensure that your roof structure can handle the added weight and that your local building codes permit this type of installation. Additionally, you may want to consider checking out Cleveland roofing companies, thanks to their reputation and expertise, especially if you are located in the United States. 

How To Install Metal Roofing Over Shingles?

So, without wasting time, let’s find out how you can install metal roofing over shingles. 

Step 1: Inspect Your Roof Before Doing Anything

Here’s the truth: the success of your metal roofing project depends on the prep work. Before laying down panels, conduct a thorough inspection.

  • Inspect the decking for signs of rot or soft spots. If your roof sheathing is compromised, it needs to be replaced.
  • Look for more than two layers of shingles. Most codes don’t allow more than two layers total.
  • Check flashing, chimneys, and vents for proper installation. Any existing leaks must be repaired before the new roof is installed.

Pro Tip: Walk the roof carefully. If you feel any spongy areas underfoot, you have decking issues that must be addressed first.

Step 2: Lay Down A Moisture Barrier

Although shingles already provide some protection, you’ll want to add a layer of underlayment before installing metal panels. This extra layer protects against condensation that can form under the metal.

I usually recommend using a high-quality synthetic underlayment. It’s lightweight, tear-resistant, and holds up better in the long run compared to traditional felt paper.

Step 3: As An Optional Step, Add Furring Strips

This is one of those “pro versus DIY” differences. Many homeowners skip this step, but furring strips (also called purlins) create a flat, even surface for the metal panels to sit on. They also improve ventilation, which helps reduce moisture buildup under the roof.

  • Install the strips vertically, spacing them every 2 feet or so.
  • Make sure they’re fastened securely into the rafters, not just the shingles.

Pro Tip: Furring strips are especially important if your shingles are uneven or curling. Without them, your new metal roof could end up looking wavy.

Step 4: Choose The Right Metal Panels

Not all metal roofing is created equal. The most common options are:

  • Corrugated panels: Budget-friendly and great for sheds or garages.
  • Standing seam panels: Sleek look, hidden fasteners, and very durable—perfect for homes and commercial buildings.
  • Metal shingles or tiles: Designed to mimic traditional roofing but with the strength of metal.

Your choice ultimately depends on your budget, style preferences, and the desired lifespan of the roof. Personally, I recommend standing seam if you’re planning to stay in your home for the long haul.

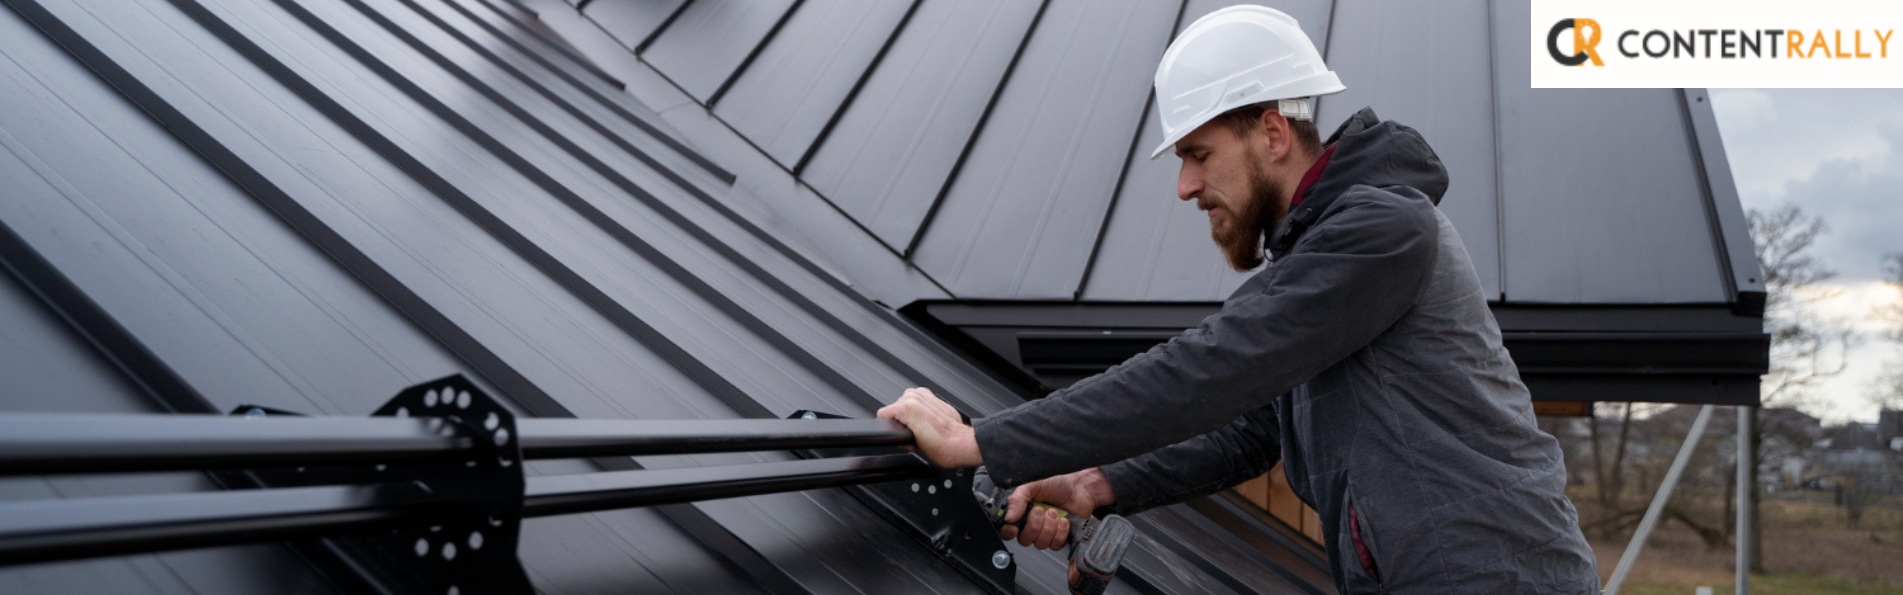
Step 5: Install The Metal Roofing Panels

Now comes the main event. Installing metal roofing over shingles isn’t overly complicated, but it does take precision.

  1. Start at the bottom edge (eaves) and work upward.
  2. Lay the first panel square with the edge of the roof. If your first panel is crooked, the entire roof will appear uneven.
  3. Overlap panels properly—follow the manufacturer’s guidelines for overlap distance.
  4. Fasten with the right screws. Use screws with rubber washers to seal holes, ensuring they penetrate solid decking or furring strips.
  5. Continue up the roof, checking alignment every few rows.

Pro Tip: Don’t overtighten screws. If the rubber washer is squished too flat, it won’t seal properly and may crack over time.

Step 6: Flashing And Trim Work

This is where many DIY jobs go awry. Flashing around chimneys, skylights, and valleys is critical for keeping water out. Trim pieces at the ridges and edges give the roof a finished, professional look.

If you’re unsure about flashing details, this is the step where you may want to consider hiring a professional. A metal roof is only as good as its weakest point, and improper flashing is the most common cause of leaks.

What Are The Common Mistakes To Avoid?

I’ve seen many metal roofs fail due to simple errors. Here are the top mistakes to watch out for:

  • Skipping the underlayment. This leaves your roof vulnerable to condensation.
  • Using the wrong fasteners. Nails or cheap screws won’t hold up—always use roofing screws with rubber washers.
  • Poor alignment. Once panels are on, it’s tough to fix crooked lines. Take your time.
  • Ignoring ventilation. Without proper airflow, you risk moisture damage and reduced lifespan of your roof.

How To Maintain Metal Roofs? Tips

Now that you know how to install metal roofing, the next issue is: how to maintain it? One of the perks of a metal roof is its low maintenance, but that doesn’t mean zero maintenance is required.

  • Inspect screws and fasteners yearly. Tighten or replace any that have loosened.
  • Keep gutters clean. This prevents water from backing up and damaging flashing.
  • Trim overhanging branches. Metal roofs are tough, but falling limbs can still cause dents or scratches.
  • Wash occasionally. A simple rinse with a hose keeps the roof looking sharp and removes debris.

Know How To Install Metal Roofing In 2025!

If you’re handy and comfortable working on a roof, installing metal over shingles is a doable task. But here’s my honest advice: it’s not for everyone. Working on a roof is inherently dangerous, and even a minor mistake can result in significant financial consequences down the road.

As a roofer, I’ve fixed plenty of DIY jobs that started with good intentions but ended up leaking or looking crooked. If you’re unsure about any part of the process—especially flashing and sealing—don’t be afraid to call in an expert.

Installing metal roofing over shingles can be a smart move if it’s done right. You’ll save money, boost curb appeal, and enjoy a roof that could last 40–50 years.

If you’re ready to take the next step, don’t hesitate to reach out to a professional roofer. Whether you just need advice, an inspection, or a full installation, we’re here to help. After all, a roof isn’t something you want to gamble on—it’s what keeps your family, your business, and everything inside safe and dry.

Read More:

Barsha Bhattacharya is a senior content writing executive. As a marketing enthusiast and professional for the past 4 years, writing is new to Barsha. And she is loving every bit of it. Her niches are marketing, lifestyle, wellness, travel and entertainment. Apart from writing, Barsha loves to travel, binge-watch, research conspiracy theories, Instagram and overthink.

View all posts

Leave a Reply

Your email address will not be published. Required fields are marked *

Related

Money-Saving Driving Tips

5 Money-Saving Tips for Houston Drivers

Purchasing cheap car insurance in Houston need not be such a chore. With increasing expenses and Houston's specific road hazards, many Houston motorists are in search of options in an effort to minimize their monthly expenditures.  Luckily, there are some sound money-saving driving tips that will help Houston motorists minimize their premiums without compromising on necessary coverage.  Car insurance will protect you financially when you drive. It is necessary that you make sure you are getting the best deal possible, whether you are choosing some of the basic liability insurance or full auto coverage.  Understanding Houston's Unique Insurance Landscape Houston does pose some challenges to drivers and to insurers as well. Houston's size results in most of its people having a longer drive to work, and the Gulf Coast placement provides seasonal weather-related risks.  Its traffic is among the worst in the country, and all of these have an impact on insurance rates throughout the metroplex.  The good news? Those who understand these factors can make smarter choices about their coverage and might qualify for reduced rates. Info is power when purchasing cheap car insurance Houston.  Money-Saving Driving Tips: Smart Ways to Save on Auto Coverage Before discussing money-saving driving tips and car insurance, you should know that personal driving habits play an important role in determining the amount of gas or other safety equipment that you need. Here are the things that can save you a hefty amount. 1. Shop Around Before Renewal Time One of the largest errors Houston drivers commit is renewing automatically with their existing agent without comparing competitors' prices. Insurance firms use various formulas to calculate premiums, thus premiums can be widely varied among companies for similar coverage.  Set a calendar reminder 3-4 weeks before your policy expires to compare quotes from multiple companies. This simple habit could save hundreds of dollars annually. Many local providers offering Houston car insurance have competitive rates that national companies can't match.  2. Adjust Your Coverage Based on Vehicle Value If your vehicle is an older model, you could be paying too much for coverage that you do not require. For vehicles worth less than $4,000, collision and comprehensive coverage will cost you more in the long run than the possible payout for an accident.  Consider canceling these coverages on older cars and retaining only liability coverage, which is still mandated by Texas law. This approach will be especially well-suited for households with multiple vehicles, where one may be a whole lot older than others.  3. Take Advantage of Available Discounts Most insurance providers offer discounts that many customers never claim simply because they don't know about them. Common discounts include:  Safe driver discounts (for accident-free records)  Multi-policy bundles (combining home & auto insurance)  Good student discounts (for young drivers maintaining solid grades)  Professional organization memberships  Paperless billing and automatic payment enrollment  Defensive driving course completion  These discounts can stack up, potentially reducing premiums by 15-25% when combined. Ask your agent for a comprehensive list of available discounts and which ones you qualify for.  4. Increase Your Deductible Strategically Your deductible—the amount you pay yourself before insurance comes in—also plays a role in your premium. Increasing your deductible from $500 to $1,000 will decrease your premium by 10-15%.  Though this should be done judiciously, raise your deductible only to what you can afford in case of an emergency. Saving the premium charge difference in a special savings account provides a buffer for possible payment of the deductible and lower monthly premiums.  5. Improve Your Credit Score Although it has absolutely no bearing on driving, Texas insurers can utilize credit scores in their calculation of premiums. Studies indicate that high-credit drivers are more likely to be claim-free, and hence lower premiums result.  Small gains to your credit can pay big dividends in terms of insurance savings over the long term.  Prioritize making on-time payments, lowering your current debt, and disputing any inaccuracies on your credit report. Even a 50-point boost in your credit score could lead to visible premium decreases.  Finding the Right Local Provider Now that you know the best money-saving driving tips, you should find a local provider. Location is significant when choosing an insurance company. Insurers with real offices in Houston will be more aware of local road conditions and may have better-suited coverage options.  For example, rush hour traffic congestion on I-610 or flooding problems within specific neighborhoods might lead to coverage recommendations. Local agents particularly familiar with Houston's unique issues are better positioned to tailor policies to also cover such niche risks.  The majority of Houstonians enjoy working with companies with local offices. The office at 156 FM 1960 Ste F reflects many North Houston communities with personalized service, which national call centers can only aspire to offer.  The Bottom Line for Houston Drivers Purchasing cheap vehicle insurance is all about striking a balance between paying and coverage. One has to save money, but underinsurance can bring ruin in its wake after a bad crash.  The ideal solution is a mix of cost-cutting approaches without compromising sufficient protection for your particular case. Allowing an hour or two of research can help you with money-saving driving tips, without compromising enough coverage.  Houston drivers are also challenged, but with a bit of research and the right carrier, quality insurance doesn't have to be pricey.  Take a few minutes to dig into your policy, ask questions about discounts available, and consider whether providers in your region might be more valuable than their national relatives.  Keep in mind that insurance requirements change along with you. Life events such as marriage, home ownership, or adding a teenager to your policy are great times to review coverage to make sure you are getting the most bang for your buck.  READ MORE: Car Shakes At Idle But Smooths Out While Driving – How To Fix This Problem? Navigating The Road With Prudence: Top Tips For Responsible Driving What Type Of Vehicle Is Ideal For Off-Road Driving?

READ MOREDetails
Trading Indicators

Top 5 Indicators Every Trader Should Know

Trading without indicators is a bit like driving down a dark road with no headlights. Sure, you might make it to your destination, but it’s going to feel unnecessarily risky—and honestly, stressful. That’s where technical indicators step in. Think of them as your GPS in the financial markets, helping you make sense of price moves and pointing out opportunities you might have missed otherwise. Successful traders usually aren’t winging it on gut feelings. They lean on tools that have proven their worth time and time again. Now, indicators won’t magically guarantee profits (if only it were that simple), but they do give you a clearer view of what’s really going on in the charts. Moving Averages Moving averages help smooth out the chaos in price action so you can actually see the bigger trend. Instead of staring at a chart that looks like it’s having a bad day, you get a clean line that shows where things are generally headed. The two most common types? Simple moving averages (SMA) and exponential moving averages (EMA). The SMA treats every price in the period equally, while the EMA gives more weight to recent prices—so it reacts quicker to current market shifts. Traders often watch both, depending on how much detail they want. RSI indicator RSI (Relative Strength Index) is a momentum tool that basically tells you how fast and how strong price movements are. It runs between 0 and 100, and the classic rule of thumb says anything over 70 could mean “overbought,” while below 30 might mean “oversold.” But here’s the catch: those numbers aren’t magic. In a strong trend, RSI can hang out above 70 or under 30 way longer than you’d expect. Another cool part of the RSI indicator is spotting divergences. If price makes a new high but RSI doesn’t follow, that can be a warning sign that momentum is fading—and sometimes that’s the nudge before a trend flips. Volume Volume is simply how many shares or contracts were traded in a given time. But don’t let the simplicity fool you—it’s one of the best ways to gauge how much conviction is behind a move. Big push upward on high volume? Buyers are serious. Sharp drop on heavy volume? Sellers mean business. On the flip side, when prices move on low volume, it often feels flimsy. Those moves can reverse quickly. That’s why seasoned traders like to see volume confirming what price is already showing. Without that confirmation, the move might not be as strong as it looks. Fibonacci Retracement Fibonacci retracement levels might sound complicated at first, but they’re basically lines drawn on a chart to show possible support or resistance spots during pullbacks. They’re based on ratios from the Fibonacci sequence (math nerds love this part), but traders mostly care about how price reacts around those levels. The popular ones are 23.6%, 38.2%, 50%, 61.8%, and 78.6%. Out of these, the 38.2% and 61.8% lines tend to attract the most attention. Why do they work? Honestly, it’s partly because so many traders are watching them. When a huge number of people expect price to bounce or stall at the same place, it often does. MACD The MACD (Moving Average Convergence Divergence) is a bit more complex, but it’s a favorite among traders. It’s made up of two lines and a histogram. The MACD line comes from subtracting a longer-term EMA from a shorter one. Then you’ve got the signal line, which is just an EMA of the MACD line itself. When the MACD line crosses above the signal line, it’s usually seen as bullish. Crosses below hint at bearish conditions. The histogram (those little bars) shows the difference between the two lines, which helps traders spot when a crossover might be on the horizon.

READ MOREDetails
when to replace siding

How Often Should You Replace Your Siding? The Whole Homeowner’s Handbook

Your siding's not a paint-and-done affair — it's the weather, bug, and good ol' wear-and-tear front line of defense for your home. It dries out your home frame.   It keeps dollars off your electricity bill, and it does the trick for curb appeal. But that's the million-dollar question: When to replace siding?  The answer isn't so simple as providing you with a list of dates. It will be based on the material, where you are located, how much it is going to cost to maintain, and how fast you are to do maintenance.   This book is going to walk you through replacing siding material and maintaining it at its best function (and functionality).  Why Siding Replacement Matters? Now, prior to discussing timelines, let's just briefly get an idea of why siding replacement is so important:  Saves structural integrity – Water can seep into cracked siding into walls, leading to mold, rot, and expensive repairs.  Saves energy – Buckled or cracked siding allows air to escape, making your HVAC system work overtime.  Provides more value to the home – New siding contributes to curb appeal and resale.  Saves bigger checks – Holding out will actually cost repairs a great deal more money than the siding in the long term.  Average Life Expectancy by Type of Siding Depending on what material the new siding is constructed of, the replacement primarily depends on.  Type of Siding Average Lifespan Comments Vinyl 20–40 years Hard and cheap, but flaky if it's exposed to extremely high temperatures. Wood 20–30 years Must be coated or repainted from time to time; turns rotten and termite infested. Fiber Cement 30–50 years Very durable, fire and termite resistant but heavier and more costly to install. Aluminum 30–50 years Termite resistant but will dent. Stucco 50–80 years Holds up well but will break down where there is excessive ground movement. Engineered Wood 20–30 years More affordable than natural wood but needs maintenance. Brick Veneer 50+ years They are durable but will require joint replacement.  Pro Tip: Regardless of how great the siding is, it will never make it to its life span if you don't provide a bit of TLC.  Key Signs You Need to Replace Your Siding Rather than waiting two years, watch for these signs you need to replace.  1. Warping or Buckling If your siding is peeling or buckling from your home, it's water damage or poor installation.  2. Cracks, Chips, or Holes Small imperfections don't resemble the world but will be water damage and termites before long.  3. Soft Spots or Rotting Wood siding is most susceptible to rot when it's loaded down with water that it can't shed.  4. Peeling or Bubbling Paint This would in normal situations imply water entered behind your siding, where it can collect as a mold.  5. Repainting Is Often Necessary Frequent  If you're finding yourself replacing siding every 3–5 years (rather than 8–10), the material is likely deteriorating more quickly than it should.  6. Soaring Utility Bills Leaks from damaged siding can send heating and cooling utility bills through the roof.  Climate Considerations Where you reside will be an important consideration in determining when to replace siding.  Cold Weather: Freeze-thaw action would cause paint to blister or crack vinyl earlier.  Warm & Sunny Climates: The painted siding will bleach and parts of the siding material will get brittle.  Humid Areas: Rot, mildew, and mold are fostered by water, particularly with wood siding.  Coastal Areas: Salt air will rust metal siding and facilitate wear.  Extending Siding Life Tips The earlier you repair issues on your siding, the longer it will remain — usually by its projected lifespan.  Clean every year with low-pressure spray or soft-bristled brush.  Paint or re-coat wood siding 5 to 7 years.  Check after storms for wind, hail, or blown debris.  Trim plantings so they won't get too large or grow onto siding.  Seal cracks in and around joints, windows, and doors to exclude rain.  Should You Repair or Replace? All the spoiled items do not need to be replaced and must be repaired. A portion of the spoiled wood — i.e., some of the soft rot or an area of rot about the size of a pinhead — can usually be repaired.  But if there is widespread rot, extensive work, or outrageous utility bills, replacement will be the cheaper long-term solution.  Professional Installation Matters Even quality siding will not function if it is installed correctly. Quality work done by a quality contractor will last your siding for its lifespan and do its job, which is to insulate your house.   To have top-grade exterior cladding put on your house, you'll need to hire https://www.commercial-nds.com/our-services/exterior-cladding/.  Costs to Consider Cost to replace siding by:  Type of materials  Size of house siding  Labor rates charged by workers in your area  Retriever repairs (i.e., replace sheathing or add insulation)  Homeowners shell out $5,000 to $15,000 for complete siding replacement.   Frequently Asked Questions (FAQ: When to Replace Siding) Here are a few questions that others have asked on the topic when to replace siding, that you might find help as well. 1. Can siding live longer than its average lifespan? Yes — if you are diligent to maintain your siding in good condition, get it cleaned regularly, and address repairs that are necessary in a prompt manner, you can add a couple of years onto the life of your siding.  2. Is replacing siding worthwhile? Yes. It is not only good for your home, but it also has one of the best return on investment of any type of exterior remodeling that you can have done.  3. Do I need to replace my siding when I sell my house? Replacing siding when siding is weathered, worn, or rotten will make the house gorgeous and stunning to potential buyers and will enhance its value as well.  Knowing When To Replace Siding It's not a matter of years but a matter of circumnavigating your house from time to time and acting on it before it becomes a gigantic problem.   Having some notion of the amount of time your specific kind of siding will last, getting information of what the siding is decaying on, and shelling out the dough to get the professional job done will have your house secure, handsome, and operational for decades to come. Read More: Technologies For Creating A Startup Idea Tips On How To Hire The Ideal HVAC Contractor Financial Planning For Contractors: Ensuring Project Viability

READ MOREDetails