Elevate Your Roof’s Health With Aerial Roof Inspections

Published on: 15 December 2023 Last Updated on: 04 March 2024
Aerial Roof Inspections

In the realm of property ownership, maintaining the health of your roof is paramount. Aerial roof inspections emerge as a game-changer, providing a unique perspective that goes beyond traditional methods.

In this comprehensive guide, we will be discussing what aerial roof inspection is all about and how it benefits. So, what are we waiting for? 

Let’s delve into the world of aerial inspections and discover how they can revolutionize your roof maintenance routine.

What Is Aerial Roof Inspection?

Automated aerial systems or vehicles that work remotely generally do not need human intervention. But, most often, the inspector has to take control of his devices to ensure safety. With the advancement of technology, aerial roof inspection came into being. 

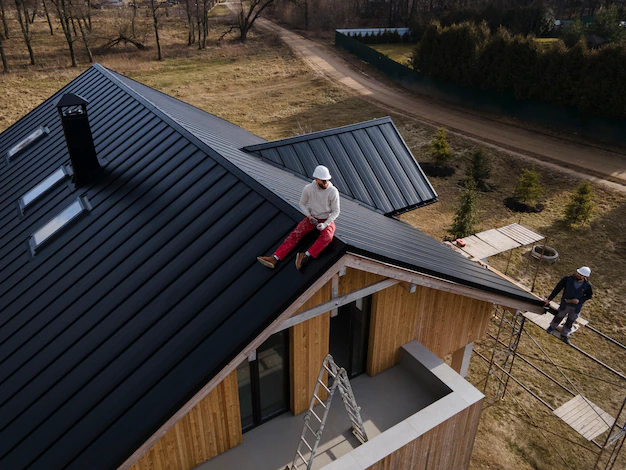
The drone is helpful in reducing risks because it provides a 360-degree view of the roofs. Moreover, it can trace even the smallest faults at the earliest. In the next section of the article, we will be discovering the advantages of inspecting roofs aerially.

How Does A Typical Aerial Roof Inspection Process Look Like? 

A general roof inspection is a bit different. Here, the contractors and building professionals make use of off-the-shelf drones accompanied by software applications. Other steps included in the roof inspection procedure are as follows:

  • The pilot, operator, or estimator uses the application to make a flight plan. It is possible to do this either on-site or within the workplace. Furthermore, it includes building address specifications and defining the roof’s perimeter. 
  • After the plan is ready, the pilot confirms the proper order of everything. They make use of the mobile app or controller to control and launch the drone. 
  • Next, the drone follows the path automatically along with collecting images and other relevant information. This basically depends on the inspection’s cause and the sensors. 
  • After 10 minutes, the drone automatically lands as per the program and transfers the data to other devices. 

What Are The Benefits Of Aerial Roof Inspection?

Roof inspection plays a critical role in ensuring the longevity and durability of your house. Conventionally, these inspections are a bit expensive. But even after the price factor, there are some advantages of aerial roof inspection. Check them out here:

Unlocking Precision with Aerial Insights

Aerial roof inspections leverage cutting-edge technology to scrutinize every inch of your
roof with unmatched precision. Drones equipped with high-resolution cameras soar
above, capturing detailed imagery that might be easily missed during ground
inspections. This method ensures a thorough examination, leaving no room for
oversight.

Bolstering Structural Integrity

One of the key advantages of aerial roof inspections is their ability to detect structural vulnerabilities early on. By identifying potential issues such as cracks, leaks, or weakened areas, proactive measures can be taken to address these concerns promptly. This not only safeguards your property but also prevents costly repairs down the line.

Time and Cost-Efficiency at Its Finest

Traditional roof inspections often involve time-consuming processes and extensive
manpower. Aerial inspections, on the other hand, streamline this operation. The swift deployment of drones reduces the time required for a comprehensive assessment, translating to cost savings for property owners.

Embracing Sustainability in Maintenance Practices

Roof Sustainability in Maintenance Practices

In an era where sustainability is paramount, aerial roof inspections align seamlessly
with eco-friendly practices. The minimized need for physical access to the roof reduces
the carbon footprint associated with maintenance activities. Property owners can
contribute to environmental conservation while ensuring the longevity of their roofs.

Supporting Innovation and Progress

As we navigate the realms of modern technology, embracing innovative solutions
becomes imperative. Aerial roof inspections showcase a commitment to progress and
efficiency in property maintenance. Property owners adopting this method not only
enhance their roof health but also position themselves at the forefront of
technological advancements in the real estate landscape.

Transitioning to Aerial Excellence

In conclusion, aerial roof inspections stand as a beacon of progress in the realm of
property maintenance. From precision to efficiency and sustainability, this method ticks
all the boxes for an optimal roof care strategy.

Elevate your roof asset management by embracing the power of aerial insights – your roof deserves nothing less. Remember, a well-maintained roof is not just an investment in your property; it’s an
investment in peace of mind.

Read Also:

Content Rally wrapped around an online publication where you can publish your own intellectuals. It is a publishing platform designed to make great stories by content creators. This is your era, your place to be online. So come forward share your views, thoughts and ideas via Content Rally.

View all posts

Leave a Reply

Your email address will not be published. Required fields are marked *

Related

House siding

Best options of House siding and its characteristics

Siding option is the best idea to modernize the home exteriors. Consider the important things of durability, affordability, style, and maintenance included in the requirements of siding material. With the unique climate of rainy, humid winter, a sunny temperature in Vancouver knows the quality and the different siding characteristic to fit in the roof of residential. There are different sidings products are available in the market to hold up against the appropriate weather conditions. The factors of the siding will make a difference in front planning and long-run. Here the tips to choose the best siding among the different materials are explained below. What are the types of siding is available and it is suitable for? The following types of siding offer a vast array of visual styles to roof with different impacts. Make research before choosing the upfront siding material and installation requirement. A strong base of siding material and understanding their differences will affordable to protect home along with the beautiful look. Fiber-Cement Siding: Fiber siding method includes the material of cellulose fiber, fiber-cement, cement and sand for exterior siding provides the result of strong durability and comparatively affordable than other siding materials. There is lap, shingle, vertical and panel siding methods are available in the good range of colors with styles in the fiber siding. Vinyl Siding: Choosing vinyl siding for home is the ideal choice to get a great balance and affordability in the roof. Its durability provides leading to share roofs by the method of vinyl service, gutters, and roofing characteristic. There is some tip to choose the ideal vinyl siding as listed below Doesn’t need to Scrapping and repainting Improved Exterior insulation Free maintenance of color from fading Durability Vitality Metal Siding: A moderate upgrade from vinyl siding that gives enhanced durability with low maintenance in stylistic choices. It’s eco-friendly material and easy to recyclable than vinyl.  Metal siding is made up by the combination of an aluminum material comeback and brings it with the several steel styles. The process of appealing the metal siding takes less time than wood siding. Wood Siding: Wood siding types are the most common siding types used as an Ideal siding Vancouver, which consist of pine, Western Red cedar, and Douglas fir. Cedar Siding – Instantly connotes timeless for a warm house with the natural look. Wood siding needs commitments on maintenance. Stone Siding: Stone siding is made by the constant style it never seems to go out from the manufactured veneer. Installing this siding takes a long time but it gives the absolute look of rustic articulate. The polyurethane molded stone siding is advanced by the technology and competitive for real stone siding. Stucco and faux siding: Stucco is a plaster mater for siding made-up with cement, limestone, and sand. It restricts the damages caused by insects and fire. Faux stones are blocks of cement blends with iron oxide pigments to provide the thing as cultured stone. Mortar-less stack stone options are available in the faux stone siding, durability and half the weight from stone siding makes to work easier in installation. Read Also: 7 Unexpected Ways To Use Glass And Wood For Your Home Top 5 Motorhome Tips 7 Tips To Increase The Value Of Your Home Home Decor Is An Art Itself – Things To Know

READ MOREDetails
Vegetables

5 Best Vegetables You Should Try Growing In Your Garden

There is nothing that beats the taste of a freshly picked tomato from your garden compared to produce that is bought from a grocery store. Growing your vegetables in the comfort of your garden is one of the activities that balance indulgence and practicality. Aside from the convenience, growing your vegetables allows you to get more nutrition as well. Vegetables start to lose their nutrients the moment they are harvested, and their quality decreases as sugars will turn into starches. Hence, if you are aiming for veggies with the best nutrition, try growing your own. That being said, here are a few of the best vegetables that are best to grow in your garden. Rhubarb Rhubarb is a vegetable that is renowned for its red firm stalk and sour taste. Like celery, it is edible, especially when you add a lot of sugar to it. Although it is technically a vegetable, it is commonly used in sweet and tart recipes. There are also different types of rhubarb that you may choose to grow for personal consumption. Rhubarb best grows in well-draining and fertile soil that is abundant in organic matter. Constant moisture is necessary, but it doesn't like too much wetness. These plants spread out; therefore, it should be placed 3-4 feet apart from each other when planting.  It does not contain a lot of essential nutrients, but it is an excellent source of vitamin K1. Tomatoes Fresh, homegrown tomatoes are one of the few reasons many gardeners decide to get into gardening. Nothing could match eating a perfectly ripe tomato from your backyard. It is also unbelievably good for us, with it being rich in vitamins A, B6, and C, niacin, fiber, potassium, magnesium, iron, and the antioxidant lycopene. Tomatoes are ideal for growers with small balconies or gardens as they do not require too much space to grow. They typically take 12 weeks until they can be harvested. Aside from this very speedy growing period, its plant can produce tomatoes daily for up to six years. It would be best to watch out for tomato horns as these large caterpillars can be a problem. Broccoli Broccoli is a vegetable that belongs to the cole crop family along with kohlrabi, kale, Brussels sprouts, cabbage, and cauliflower. It grows best during the cold season of the year. It is known to be high in vitamins A, B6, C, magnesium, calcium, and iron. As a matter of fact, a cup of raw broccoli gives 130 percent of a person's regular vitamin C requirement. Broccoli is best to grow during early spring and fall and can be set in an in-ground garden or container. Place these plants 18 inches apart from each other. You may also want to get a location that has fertile soil and has easy access to water. A moisturized soil is also best for broccoli, therefore water it for 1 to 1.5 inches every week. Red Bell Pepper Most of the gardeners would agree that every time they planned their vegetable garden, one of the plants they want to include is a bell pepper. Who would not? Peppers are great in all types of dishes, cooked and raw. Red bell peppers are high in vitamins A, B6, C, riboflavin, and potassium. You may want to take note that a cup of it contains 93% of the required vitamin A and 317% of vitamin C daily allowance. Although growing this vegetable is not as problematic compared to other plants, temperature plays an important role. They may be easy to grow, but its plant care, especially in the early stages, is crucial. Bell peppers flourish in warm seasons, and it is vital to be sure that the chance of frost in your area is long gone since frost might hinder pepper growth. Beets Beets are one of the vegetables that can grow quickly and do not require you to wait long before you can harvest them. Apart from its roots, you can also eat its green tops, making it a dual-purpose crop. Young beets can be added to a salad, while the larger ones can be sauteed as a side dish. Beetroots are very rich in vitamin C, potassium, and iron. Beets are the best option for northern gardeners as they can survive near-freezing temperatures and frost. For beginners, it is best to look for bolt-resistant, especially in warm weather. You can also start harvesting them once they are about the size of a tennis or golf ball as larger roots may be woody and tough. Takeaway Growing and maintaining your vegetable garden may seem overwhelming to some people, but it is easier than it sounds. Even if you only have a small garden, you may still be able to grow the vegetables we provided in this article. Additional guides can also be found all over the internet. Read Also: Looking for a Gardener: 8 Questions to Ask Before Hiring a Professional DIY Ways to Control Pests in Your Garden How to Choose the Right Containers for Your Container Garden

READ MOREDetails
kitchen-2619008_960_720

Installing A Kitchen Tile Splashback – The Basics

Adding wall tiles to a backsplash can be a really simple and effective way to spruce up your kitchen sink area, as well as protecting the surface as well. Here we look at the basics. Home improvements needn't be expensive, all it takes is a little research and time and you can make a significant difference to the house you live in. Choosing tiles for a kitchen splashback can be a really simple and effective way to spruce up your kitchen sink area, as well as protecting the surface as well. For a project like this, you are likely to need little more than a couple of days to complete it, and a minimal amount of money to achieve a great result, depending on the equipment you already have. Before You Start Prepare The Wall Before you start, clear everything out of the way that may obstruct the job and/ or get broken or damaged while you work. You should also check that the wall is good for tiling as well – chances are you will choose porcelain tiles, which are heavier than more traditional ceramic tiles so the walls need to be up to support their weight. If there is any level of condensation you must wait for the wall to completely naturally dry out before you begin tiling. If the drywall you're working with isn't sound, you must repair it before you do any tiling. Plan The Design You'll need to plan your design before you can purchase your equipment or begin the project. Measure how high you want the backsplash to be from the countertop and consider the type of tiles you would like to use. If you are unsure, take a look at sites like Pinterest for inspiration. Get Your Equipment When buying your equipment, especially your wall tiles, try to start with more than you need. With porcelain floor tiles or wall tiles, it is always good to have extras in case some get damaged during the job or even years after and you need a replacement tile that matches. In order to determine how much tile requires you need to measure the length and width of the area, you are putting a backsplash on. Simply multiply the length by the width to get your desired wall tile amount. If you don't know what type of equipment you need for the job, speak to an advisor at the shop or warehouse and they will be able to advise you on the best tools for the job. Read also: Close Look At Top 5 Roofing Materials – Pros And Cons Install Once you have done all the correct preparation, it's time for you to install your backsplash. Safety First The first thing you need to do is make the area you are working in safe. All electrical appliances nearby should be either turned off if they are permanent fixtures, or moved away if they are temporary. Read also: Making Your Office Safer For Workers Clean The Area Using a clean cloth, gently wipe the area with warm water and let it dry naturally. Apply The Adhesive Using the manufacturer's instructions, apply your tile adhesive using a tile trowel. Make sure the adhesive is spread thinly and only apply enough adhesive for the area you are tiling, or it will dry before you have applied all the tiles. Lay The Tiles Place the first tile at the bottom of the backsplash in the middle. Firmly push the tile on to encourage it to settle into the adhesive and use a level to make sure it isn't wonky. Use a spacer or piece of cardboard on each corner of the tile and push them into the adhesive well. Continue to lay the tile's row by row, taking care to remove any adhesive that pushes up through the tile gaps. Ensure you are leaving enough room for grout and checking constantly that the tiles are level. Cut Tiles Away In A Separate Area Depending on the equipment you are using, you need to ensure you follow all safety procedures to ensure you are working safely. Ensure you only score tiles where the scored section won't be showing, and only score tiles when you need to, as the measurements needed may change as the job progresses. Wipe Once all the tiles have been laid you can wipe away any adhesive that has seeped out using a clean, damp cloth. Leave The Tiles To Dry You must leave the tiles to dry according to the time stated by the adhesive manufacturer. Trying to skip this process will result in an uneven backsplash and tiles that will not remain stable. Grout When mixing grout you should be wearing appropriate safety equipment such as gloves, goggles and a mouth mark. Grout the tiles precisely and carefully, taking care to wipe away any excess once it becomes firm. Once the grout has dried, you can then wipe the tiles off completely. Well Done! You should now have a fancy new backsplash to enjoy in your kitchen! Remember, if you take the time to do the job right, you should end up with a well-done backsplash that will look fantastic and last for years to come.

READ MOREDetails