How Often Do You Need A Roof Inspection?

Published on: 12 December 2023 Last Updated on: 13 December 2023
Roof Inspection

For home maintenance, it’s important to know the roof’s age to maintain the house in good condition.

The roof is an essential part of the house. It holds the overall structure of the house together, and it is essential to maintain your roof and keep it safe from roof damage. So how often should you inspect your roof in Crestview, Niceville, Milton, Pensacola, Pace, Florida? 

If you inspect your roof regularly, you can save money that will cost you later when the house is rebuilt. It can lead to extending the roof’s life if taken good care of. Issues should be identified at an early stage to avoid the extra cost of major repair. 

Regular maintenance & inspection of the condition of your roof can help inspect a roof for wind damage, and inspect a roof for hail damage and structural damage.

Keep reading to learn how often to inspect the roof of your house. 

Frequency of Roof Inspections

Do you ask yourself this question ‘How often to inspect the condition of your roof?’ or ‘How often are roof inspections needed?’ During damp seasons of the year, it’s important to regularly inspect a roof for leaks. It can detect any algae growth or water leaks. This should be done at least twice a year. These inspections can be of advantage in saving cost and also saving the structure of the house. A weakened or damaged roof might endanger the safety of homeowners and their loved ones. 

Frequent inspections can assist in locating possible safety risks, such as loose or damaged shingles, and guarantee that they are quickly fixed. It should be done for the increased safety of the people. A yearly inspection helps homeowners remain on top of any existing issues while getting wiser to larger risks coming in the way. 

You need to inspect your roof at least once a year, ideally in the spring or autumn. This way, you’ll be able to determine whether your roof is prepared for the seasons that bring more severe weather.

Signs That Indicate the Need for a Roof Inspection

Several signs indicate that your roof needs inspection. For house owners, waking up to a leaking roof is no less than a nightmare. To avoid such circumstances, it is crucial to pay attention to the roof, and ask for a repair or inspection.

  1. Gutter Issues
  2. Damaged Shingles
  3. Discoloration of walls
  4. Stained Ceilings
  5. Wind damages
  6. visibly curling of shingles
  7. Dark streaks or other leaks in the attic
Roof Inspection Sign

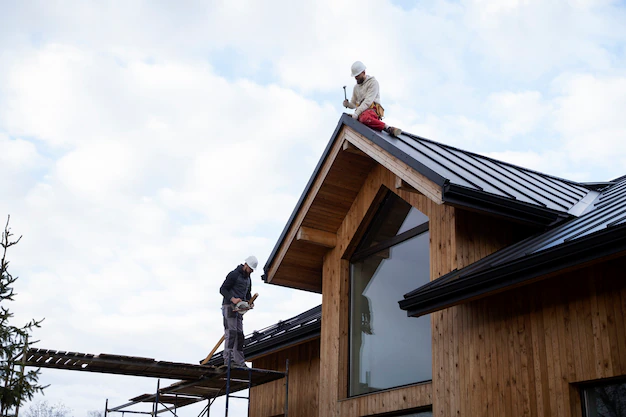
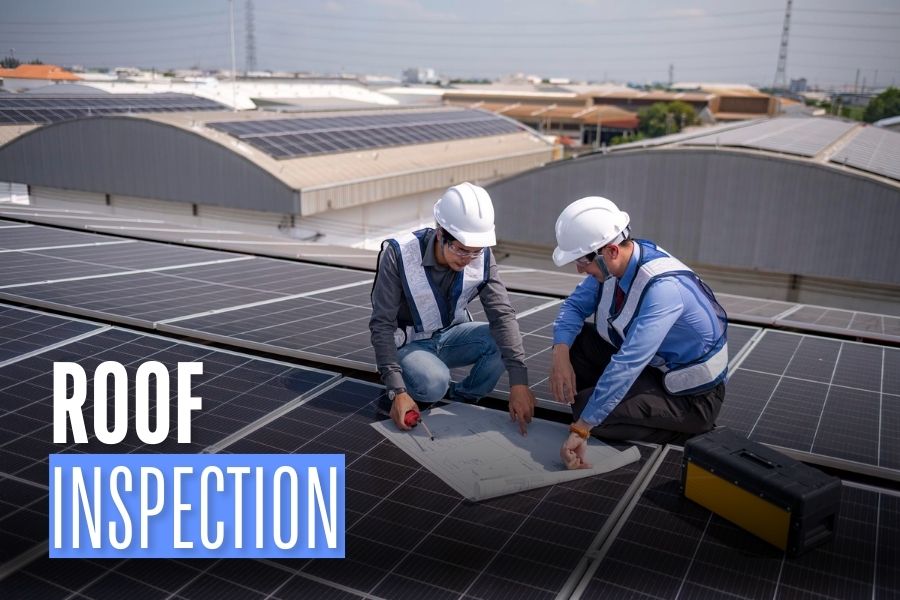
Professional vs. DIY Inspections

DIY projects might help you save money. But before you start a DIY roofing job, you might want to consider it seriously. You probably lack the tools and expertise required for the task unless you’re a licensed roofing contractor in Destin, FL

You may make a costly or hazardous error on your roof. Rolled roofing is one of the cheapest roofing materials that can be purchased. Additionally, it is one of the few types of roofs that most homeowners can install themselves, although in a limited fashion.

There are certain things that a roof inspector will look for when doing an inspection professionally.

  1. Surface Materials. 
  2. Decking and Frame.
  3. Roof Penetrations.
  4. Fascia and Soffits.
  5. Attic.
  6. Ventilation System.
  7. Gutter System.
  8. Age of Roof.

Regular roof inspections are an essential part of home maintenance, it helps you ensure that the roof is in good condition. DIY inspections can assist you in staying vigilant. But that’s certainly not all! It also ensures to catch smaller issues early, although they must not replace proficient inspections. Professional roofing contractors bring expertise, experience, safety, and documentation to the table.

What to Expect During a Roof Inspection?

The purpose of roof inspections is to find any problems as well as gauge the remaining life of the roof. A professional roof inspection should look at every part of your roof, inspect the walls and ceiling for damage, analyze the structural integrity of the roof, and analyze the roofing material. 

A structural inspection, an interior inspection, a material inspection, and a workmanship inspection should all be part of it.

Conclusion

The age of the roof, the local climate, and the kind of roofing material used are some of the variables that affect how frequently a roof is inspected. Generally, having a roof inspection at least once a year is generally advised. 

Frequent inspections can aid in the early detection and resolution of possible problems, averting eventual more serious and expensive damage. Additionally, it’s a good idea to arrange for a quick inspection to determine any potential damage following severe weather events like storms or a lot of snowfall.

To sum up, regular roof inspections are an essential part of house upkeep since they encourage early detection and prompt repairs. In order to evaluate their particular needs and create an appropriate inspection schedule that takes into account the particulars of their roofing system and the local climate, homeowners should collaborate with certified professionals. 

In the long run, regular inspections and maintenance can save homeowners money by extending the roof’s lifespan and improving overall condition.

FAQ block

 Some of the most common questions we get about roof inspections are:

  1. How long does an inspection take?

It usually takes 45 minutes to inspect a roof properly, but depending on other factors, such as roof size and age, it may take a few hours. You should meet with the inspector to know the estimated time according to your house.

  1. Is roof inspection expensive?

The average cost of a roof inspection ranges from $100 to $400, depending on the size, complexity, and type of inspection—physical, infrared, or drone. A roof certification extends the roof’s lifespan and can be added for $75 to $200.

  1. Is professional inspection necessary?

Roofs are prone to damage from storms, aging, and other problems that can erode their structural integrity over time. Ensure your roof is safe and long-lasting by scheduling routine inspections by the licensed roofing company.

  1. Do I need frequent inspections? How often should you inspect your shingle roof?

It is essential to schedule an annual roof inspection to ensure your roof is in good condition. A professional inspection is recommended once a year and may be more frequently conducted based on the age of your roof, any damage you find, or any significant storms. Do it immediately if you need help remembering when you last had a roof inspection.

  1. What will the roof inspector do?

To ensure your roofing material is still functioning as intended, a roof inspector will examine its state. For instance, if your roof is made of asphalt shingles, they will search for moss, stains, or rust in addition to curling, loose, or missing shingles.

Read Also:

Ankita Tripathy loves to write about food and the Hallyu Wave in particular. During her free time, she enjoys looking at the sky or reading books while sipping a cup of hot coffee. Her favourite niches are food, music, lifestyle, travel, and Korean Pop music and drama.

View all posts

Leave a Reply

Your email address will not be published. Required fields are marked *

Related

Drywall

What You Need To Know About Ceiling Textures And Drywall Options

Drywalls are those construction materials that are used to create walls and ceilings of your home. Not all that but, drywalls also come in handy if you want to create design features like eaves, arches, or any mind-blowing architecrequireigns!!! Do you know the best part about drywalls? These are super easy to install, highly durable, and only require simple repairs when damaged. So drywall is a flat component composed of calcium sulfate dihydrate, typically extruded between thick sheets of facer and backer paper, used to construct interior walls and ceilings. Through this article, I’ll be talking about the ceiling textures and the drywall options you can choose for your home!!! The Ceiling Textures And Your Drywall Options Decorating your home can be a real challenge for many!!! And choosing the right drywall finish or texture can prove to be a hard nut to crack. And it’s very natural to get at a state of indecision if you are handpicking it for your new home or renovation project. There are so many options that it feels like you are “searching for a pearl in an ocean.” Making up your mind about whether or not to go for texturing your ceiling can be a tough job. And even if you choose to texture your ceilings, there are chances you’ll be confused about which one to go for!!!! And remember, getting the drywall right is the first step of tiling projects?”. But No Need To Worry!! This article will guide you to choose the perfect texture and drywall option for your ceilings to look elegant more than ever!! 1. Sheetrock Texture: Old Is Gold Sheetrock ceiling texture is a drywall ceiling texture that has been famous since 1917. The reason this drywall texture is so awesomely renowned is because of the artistic look that it gives to your ceiling And the best part, you don’t need to use and sort of spray paint in this case. You can achieve this texture by using your artistic hand technique and without using any special brushes. This texture is perfect for any room. There are no restrictions of use for this ceiling texture. 2. Stipple Brush Texture: A Test of Your Skill This texture is not as easy as it seems. You need skills for this texture to be created. In order to create this texture, you need a roller and slap brush. The fascinating fact about this texture is it can cover the bumps and holes on your ceiling. And if you have the skills, then this texture can surely make your ceiling look gorgeous than ever!! 3. Swirl Texture: Creativity Taken To A New Level In order to achieve this texture, you need either a roller or sprayer. You can also do this by using a technique called “the basic swirl” method. But one thing that you need to keep in mind is while creating this texture, you’ll need a lot of patience to get the best result. And the difficult part is you need to create the pattern before the mud dries. So make sure to have a helping hand by your side. Overall, the texture can really give that awesome look on your ceilings if you do it in the right way!!! 4. Orange Peel Texture: A Color of Choice The name suggests all, the color of orange skin, but sometimes it’s also called “an eggshell” ceiling texture. If you really love this color, then this can be on the top of your favorite lists. In order to create this texture, you need to apply thin mud to the ceiling using a spray gun set at very high pressure. The more artistic mind you have, the artistic look it has got!!!! 5. Smooth Textures: Choice of Many If you are someone who wants the best at a cheap cost, then this texture is just the right choice for you. Moreover, you don’t need to have much skills to create this texture design. The look of this texture is just mind-blowing, and if you are someone who likes things to be consistently gorgeous, then this is the texture you can have for your ceiling. This texture is effortless to remove and is also perfectly suited for any room. 6. Tree Bark Texture: Beauty of Nature If you are someone who loves nature and wants to bring the reflection of nature inside your home, then this textured style is just the option you can have. This ceiling has the look of a tree. You can create this texture just by using a heavy roller. The texture might look simple, but it’s very artistic and can surely catch the eyes of many. If you have a farmhouse, then this texture will double the beauty!!!!! 7. Slap Brush Texture: Slap The Beauty Out Artistic, gorgeous, beautiful, and elegant are the nicknames you can give to this texture. A complete package of beauty!!!! To get this texture, you’ll be needing a brush with very stiff bristles and thin mud. Firstly, you have to cover your ceiling with mud using a roller, then take the brush and slap the ceiling from the edge. This can be a hard nut to crack because if you don’t get it right on the first shot, the whole ceiling might end up looking messy. 8. Popcorn Texture: Cottage Cheese This texture, also known as the “cottage cheese” or “acoustic” ceiling texture, is probably one of the most famous ceiling textures ever!!! If you look closely, you’ll see it’s kind of a look-alike of “popcorn.” That’s why it’s called “popcorn texture.” In order to achieve the correct texture, you need to use a sprayer to apply to your ceiling. This contains Styrofoam with mud which gives that puffy effect. But it will require you to have a lot of skill to achieve this effect. That’s because the “popcorn texture” is both challenging to apply and remove. I hope this article will help you to know about the needs of ceiling textures and drywall options. And now I believe you’ll be able to get yourself the perfect texture for your ceilings. Read Also: Here’s How to Turn Your Garage into a Bedroom on a Budget! Turn your attic into a living space

READ MOREDetails
Homemade Mosquito Trap

How to Make a Homemade Mosquito Trap

Though mosquitoes are little creatures on earth, they disturb not only human beings, but others are also biting. A homemade Mosquito Trap can reduce the problem of your health disorder due to mosquito bites. They can inject a few viruses which can cause great damage to us. Some diseases may result in you lying on the bed for days whereas others may have an untold health impact on your overall health. But you can get rid of these annoying creatures by adapting some steps. There are various ways to drive these little vampires away. They may be hazardous for your health as they emit harmful chemicals. There are environment-friendly ways too to drive them away. According to my, homemade mosquito trap is the best mosquito trap among them. And, in this article, I am going to assist you on how to make a homemade mosquito trap at home easily. Homeowners, as well as commercial establishments, should realize the dangers of mosquitoes. There are many serious dangers and diseases that you can end up contracting. From malaria, and dengue to encephalitis, not only can it ensure that you stay bedridden for weeks, but in extreme cases, it can prove to be life-threatening. This is why you need to look at the best mosquito trap to help you keep these dangerous insects away from yourself and your family at all costs. Dump and wetlands are the main sources of mosquitoes' breeding place. So, make sure there are no spaces inside or outside your house where water is logged or dump areas. If you find any, try to clean them fast before they increase their number immensely. Carbon dioxide is a gas that attracts mosquitoes and following carbon dioxide traces; they find their victims out to bite us. We leave carbon dioxide at the time of our inhaling. How does a homemade mosquito trap work? Cool! The concept is very simple, and anyone can do it without any hassle. In this trap, a plastic water bottle is needed to make it. In it, there is a mixture of yeast and sugar. When the yeast consumes the sugar, it started to produce carbon dioxide continuously. As the little bugs attract carbon dioxide, they fly in the water bottle and get stuck. After a few times, they die inside. This is the basic concept of making and executing a trap that can attract mosquitoes. After clearing the main concept of the trap, I would like to describe to you the ways of making the mosquito trap. To do the entire process, all you need are a few materials along with a water bottle (a maximum of 2 liters can do the job perfectly). So, let’s get started…. Materials you need: An empty 2 liters plastic water bottle Scissors or box cutter or razor knife Duct tape A marker (red or black will do) ¼ cup brown sugar 1 cup of hot water (need to make it cool later) 10-gram brewer yeast As you have arranged all the materials mentioned above, it is time to start the next steps. Cutting the water bottle to make a funnel: With the help of scissors or a box cutter, you can cut the bottle at the desired point. To make it easier, you can use a marker to make a circle on the bottle where it needs to be cut. You should cut the bottle 4 inches from the lid of the bottle. Do it carefully as there are no unfinished zigzag edges that may cause harm to your hands. Now, if you put the top part of the bottle facing down, it should look like a funnel through which mosquitoes will enter. Water, brown sugar, and brewer yeast: With the measuring cup, take 1 cup of water into a pot and boil. Allow it a few moments to be cool and then pour brown sugar with the water to make a mixture. You should wait a few moments to dissolve the sugar. When it dissolved, add yeast to the mixture and let it be cool again. Make sure you have put the mixture into the lower part of the bottle (bigger part). Now place the top lid onto the bottle facing down so that it can make a funnel. Use duct tape to wrap the uneven edges as they can harm your hands while moving. The trap is ready for the action: As the funnel to trap mosquitoes is almost ready to use, and the yeast is ready to consume sugar to produce carbon dioxide, the play begins. Keep one thing in mind that carbon dioxide will produce as long as the yeast eats all the sugar up. After that, it will not work as a trap. In this case, you can reuse the trap again and again. The yeast may take only two weeks to eat up all the brown sugar and end producing carbon dioxide. But you should not worry about it as you can replace all the materials, again and again, to rejuvenate the trap for attracting the little vampires. In this way, drive the annoying mosquitoes away and keep your surroundings these little bugs-free to lead a healthier and happier life. Now, you can enjoy the summer vacation sitting on your armchair at the time of sunsetting. A homemade mosquito trap can ease the chances of your disease rate. If you do not want to get your hands dirty or do not have time to invest in the creation of such tools, there is an easy way out. You can always look at some cost-efficient and affordable residential mosquito removal services that guarantee peace of mind and great hygiene for your home. Read Also: 10 Pest Control Tips To Keep Pests Away This Summer What You Should Expect From A Pest Control Visit

READ MOREDetails
Driveway

Updating the Driveway on Summer Time: What You Need To Know

Does your driveway look worn out? Or is it starting to fade and crack? If that’s the case, you should note that your driveway can affect the curb appeal of your property. Sadly, most people hold on to repairing their driveways until they start noticing major issues like water drainage problems and potholes. However, this should be the case. You should always schedule periodical driveway upgrades—especially during the summertime. Generally, summertime is the perfect period to update your driveway and address some of these issues. With that said, let’s look at some of the things to keep in mind when upgrading your driveway. Paving material The first thing you need to consider is the paving material. While concrete comes in various options, it can be quite difficult for you to find a pre-fab material that perfectly matches your budget. Here are some of the most common materials used when upgrading driveways: Asphalt pavement - This paving material tends to be less expensive than other types. However, asphalt can fill up with water rather easily, leading to drainage problems down the road. On the upside, asphalt pavements come in various textures and designs, allowing you to choose a layout that best fits your property. Pea gravel - Though this option is slightly more expensive than asphalt pavements, it’s far more durable. However, it also tends to be less aesthetically appealing. Concrete pavement - This paving material is typically the most expensive and durable choice for your driveway—especially since you can customize the layout and design as you like. On top of that, concrete comes in a wide range of textures and colors—so it’s easier to find something that perfectly matches your property. Drainage solutions If there are no major drainage issues on your property, then you’re all set to begin work on updating your driveway. However, before you start this process, it’s important that you first mark where each water outlet is located—such as drains and downspouts. This step isn’t 100% necessary; however, it makes sense because it can help prevent any work from happening near these areas—which could ultimately cause damage to both outlets and the new surface of your driveway. Also, note that if there’s stagnant water anywhere on your property after setting up temporary markers, then this means that there are some drainage issues on your property. Lastly, if you’re experiencing major issues with water drainage on the property—such as pooling or puddles—after completing updating your driveway, then it may be time to get in contact with a professional who will help encourage the proper flow of water throughout your property. Even though there are ways to fix these drainage problems on your own, it is best to leave these issues up to a professional. This is because they usually have more advanced tools at their disposal—which can make solving these types of problems much easier for them from the very beginning. Sealer Once you have marked the location of all necessary outlets, it’s time for you to mark off where new layers will be placed—which includes marking off where any new edges need to be placed around your driveway. Also, you should use spray paint or chalk to draw out how much space is required between each layer—this step helps ensure that you don’t accidentally apply any materials on top of one another during this part of the process. Then after applying the sealer, it needs at least 24 hours to dry up before applying any additional layers of paint. Add layers As mentioned before, you should create some space between each layer as you apply them on top of your existing driveway. If anything overlaps, then this could cause issues with both texture and color—and may even lead to added expense if extra materials need to be purchased for re-applying the materials properly onto the surface of your driveway. This is the main reason why you must use a large enough tarp to ensure that all materials are applied at a safe distance from one another. Once everything is dry or completely hardened, it’s time to add additional material around the edges of your property—this step helps ensure that water doesn’t run off the sides of your driveway when it rains. To make this part of the process easier, you should use a garden hose to help draw out where the edges will be placed to learn how much materials are needed. Then once that’s finished, it needs at least 24 hours (ideally longer) for everything to completely dry up before applying any sealer. There’s one more thing you need to know about updating your driveway. If there was ever a time when you experienced foundation damage on your property from natural elements—such as water, weeds, or vegetation—then get rid of all grass and weeds near the affected area before adding any new surface layers on top of paint on its own. The reason being is that these things will probably grow out of control on top of your driveway, which can lead to additional maintenance problems. Bottom Line According to the Florida asphalt paving experts from ABC Paving, upgrading your driveway around summertime doesn’t always need to cost a lot of money. Sometimes, it can be as simple as making sure you use the proper materials for protecting your existing driveway before adding new layers on top. Suppose there are any issues with drainage or standing water after doing so. In that case, getting in contact with a professional is usually the best solution—and this also applies regardless of whether you live in an urban area or rural location because everyone will benefit anyway. Read Also: Asphalt Pavement Maintenance Tips Floor Cutting Using Diamond Saw: What You Need To Know All You Need To Know About Concrete Repair Solutions And Services

READ MOREDetails