How to Choose the Best Heat Pump for Your Home?

Best Heat Pump

Heat pumps serve dual purposes. They heat the home when it is cold outside and cool it when the temperature rises. These units are energy efficient and good for the environment because they don’t burn fuel. However, the homeowner needs to ensure they get the correct unit for the home. 

The Concept Of A Heat Pump 

The Concept Of A Heat Pump

The heat pumps are becoming more and more popular these days. If you still don’t know about them and are trying to look for more information before buying a heat pump for your house, then you have landed yourself on the right page. 

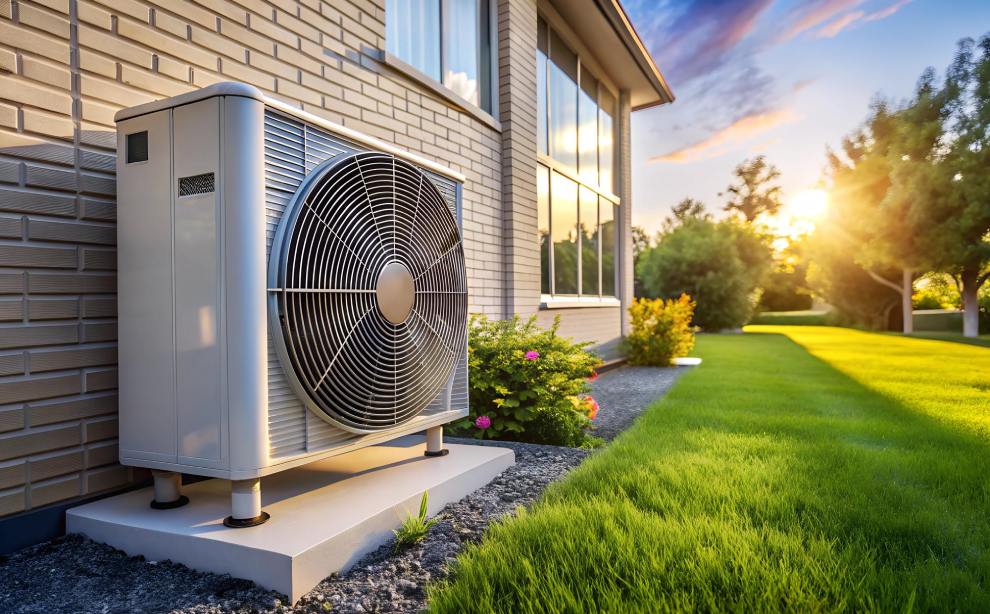
An electric air source heat pump is an outdoor unit. You can use this unit to keep your home both heat as well as cool your home. This totally depends on the weather. 

The heat pumps are a great alternative to your central air conditioner or your furnace systems. This technology is specifically used in a refrigerator or an air conditioner. The unit extracts heat from a specific source. 

It can be from the surrounding air, nearby sources of water, or eleven geothermal energy. Once it is done collecting the heat, it further amplifies it and then transfers it to the space where it is necessary.    

How Do Heat Pumps Work? 

How Do Heat Pumps Work

Most heat pumps pull heat from the air and move it to the desired location. When heating the home, the unit takes the hot air from outside and brings it indoors. When cooling the house, the unit removes hot air from the home and transfers it outside. 

They use less carbon than other heating options and work best when set at a consistent temperature. To see the optimal results, homeowners must ensure their houses are properly insulated and sealed. What else should they know before requesting a heat pump installation

Heat Pump Options

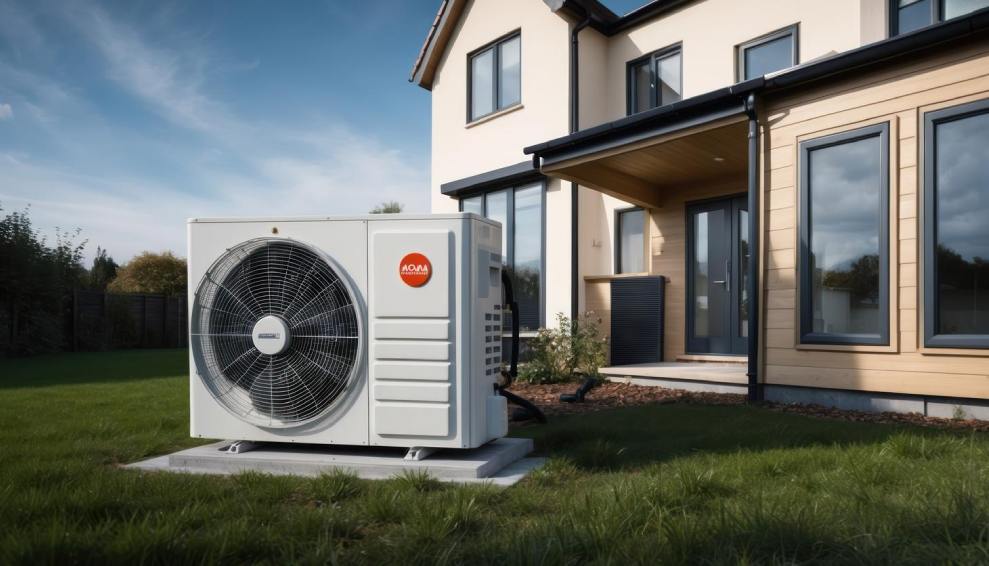
Air-to-air heat pumps are the most common air-source heat pumps used in America today. They come in two forms. 

Ducted air-source heat pumps function like central AC units. Treated air is distributed throughout the home with the help of ductwork. 

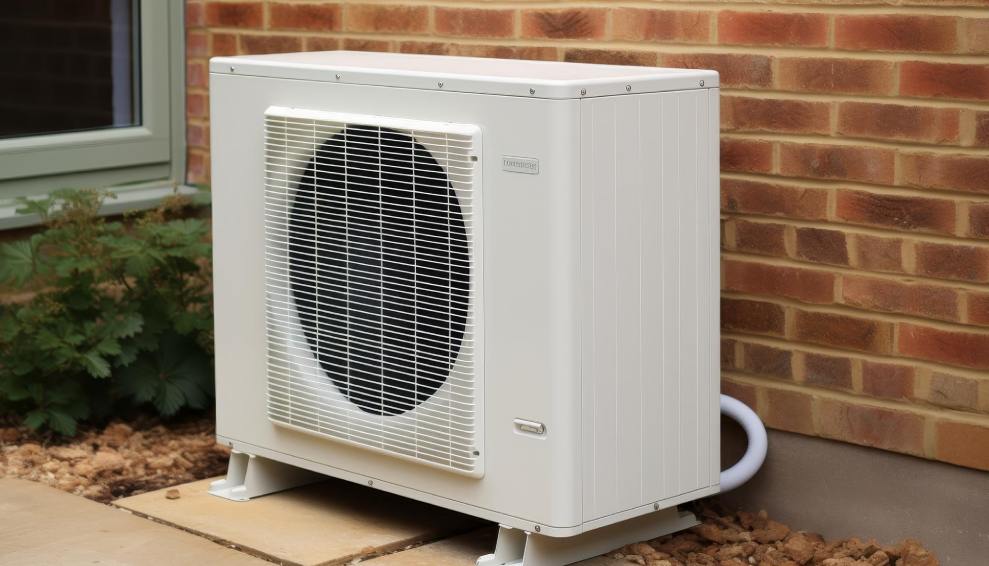
Ductless or mini-split air-source heat pumps are the second option, increasing in popularity. No ductwork is needed when a homeowner selects this option. However, other options exist. 

Geothermal heat pumps pull heat from the ground to warm a home and release heat into the ground to cool the house. 

These systems are highly efficient, but they often cost more to install. Water-source heat pumps are similar to ground-source units but are installed at the bottom of a pond. Air-to-water heat pumps use a hot-water radiator system to distribute heat throughout the home. 

The Benefits of Heat Pumps

The Benefits of Heat Pumps

Heat pumps are easy to install and work in most homes. The mini-split system is ideal for those without ductwork because the house won’t have to be modified during installation. 

Moving to a heat pump will significantly reduce the owner’s carbon footprint, and many areas offer subsidies for those who choose to upgrade to this type of unit. 

Let’s learn about the benefits of the best heat pump: 

Energy Efficiency 

Many users have agreed that heat pumps show more efficiency than all traditional furnaces. These heat pumps help to move the heat from the outside air or ground into your home. 

As a result, you can easily save a lot of money on the overall energy bills. 

Improved Air Quality 

The heat pumps can both filter and then deodorize the air. This helps you to reduce allergies as well as asthma. 

Quiet Operation 

The heat pumps are an excellent choice for your home and businesses as they generate less noise and are typically quieter than the other systems.  

Easy Maintenance Process  

The heat pumps do not require much attention and are very simple to manage. It does not need regular servicing. 

P.S. Heat pumps can be expensive, and you may face difficulties installing the system. Otherwise, the system and its benefits make it a perfect long-term investment. 

When Not to Install Heat Pump?

When Not to Install Heat Pump

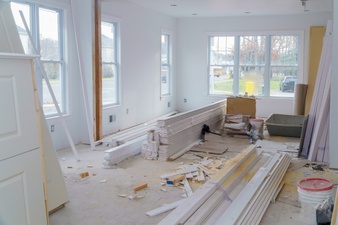
A poorly insulated home or a leaky one will not benefit from a heat pump because drafts and cold spots are often an issue. 

Homeowners must research their electrical service to ensure it can handle the heat pump load, as upgrading the electrical system to install this unit will add to the cost. 

Finally, individuals in cold climates may find their heat pumps cannot keep up. The Department of Energy has established eight climate zones for the United States. In zones 7 and 8, homeowners need to consider other options. 

Choosing a Heat Pump

Homeowners must consider several factors when choosing a heat pump. You must consider the size and capacity of your space. If you fail to choose the best heat pump of the proper size, it will cost more to run. Moreover, it won’t keep the home at the desired temperature. 

The determination of the right size heat pump involves two kinds of measurements: 

1. Manual J Load calculation 

      HVAC technicians widely use this specific kind of calculation. They consider certain factors that help them to understand how much heating and cooling your home needs before choosing the best heat pump. These factors are as follows: 

      • The square footage measurement of your home
      • Ceiling height 
      • Insulation of your house 
      • The climate type and the number of days you might need the heating or cooling 
      • How often the space is being used? 
      • The number of people who use the space
      • The total number of heat-producing appliances that you have in your room 
      • Number of windows and doors. 

      The technicians consider these values and further enter them into a formula to get the precise result. 

      2. Square Footage Calculation

        The calculator might seem a bit simpler, but it is not precise enough to calculate the required heat pump capacity. 

        For instance, if your total house space is around 1500 square feet, then you would need a 3-ton unit. BTUs, or British Thermal units further measure these ton units. 

        An experienced technician can help the homeowner determine the BTUs needed for the house.  

        Home size (sq. ft.)Size of the heat pump (in tons)Size of the heat pump (in BTUs)
        500 sq. ft.1-ton 12000 BTUs. 
        1500 sq. ft.3-ton36,000 BTUs
        2500 sq. ft.5-ton 60,000 BTUs

        Apart from these calculations, compressor type is important when choosing the best heat pump. Most homeowners choose a variable-speed compressor, which automatically adjusts to maintain the selected temperature. 

        Efficiency is also a consideration when choosing the best heat pump. Look for a high SEER rating to save on energy bills. 

        Learn about each unit’s climate performance and research the noise level. Finally, the reliability of each unit must be considered to ensure the heat pump will work when needed. 

        Once a heat pump has been selected, choose a contractor. Ensure they are trained to handle this task and have been in business for a while. 

        Doing so ensures best heat pump will be installed correctly, and help will be available if problems arise. When homeowners take these steps, they will have peace of mind knowing their unit will work when needed.

        Additional Reading:

        Content Rally wrapped around an online publication where you can publish your own intellectuals. It is a publishing platform designed to make great stories by content creators. This is your era, your place to be online. So come forward share your views, thoughts and ideas via Content Rally.

        View all posts

        Leave a Reply

        Your email address will not be published. Required fields are marked *

        Related

        Pillow Top Mattress

        What To Look For In A Pillow Top Mattress

        Want to add a pillow top mattress on your bedding? best idea! The pillow top mattress is the additional layers of padding that is stitched right on top of the mattress. The pillow top mattress is the best way to add softness and luxury on your bedding. These layers are not stitched to the end. They are just an extra padded addition to enhance the aesthetics of the bedding. If you are searching for a comfy pillow-top mattress, make sure you are conducting thorough research to ensure the ideal buy. There are several factors you need to consider, right from the material, filling, firmness to the appearance and touch of the pillow top. Pillow tops are known for its well-constructed outer look that describes the perfection. Although, you have enormous options in the t6he market, choosing the best mattress store can get you the one you want to own. You can also look for online mattress stores that consist an array of different pillow top mattresses. However, here is the list of qualities you should look for in a pillow top mattress: List of qualities you should look for in a pillow top mattress   There are several qualities you should look for while using a pillow top mattress. Do not make your choices in the wrong direction. 1. Comfort : The first and foremost thing you need to adhere is the comfort of a pillow top mattress. Although there are different types of pillow top mattresses you will see. But natural pillow top mattress is the one that has got the maximum features to ensure the utmost comfort. Natural wool pillow tops, cotton pillow tops are some of the best examples of organic pillow tops. 2. Durability : Another thing you need to consider is the longevity of the mattress. Again, the material is the primary aspect that ensures the quality structure of the mattress that is further responsible for long-lasting pillow top mattresses. Although there are several synthetic pillow top mattress, you should go for natural pillow top mattresses. 3. Balanced warmth : It is important that you choose a pillow top mattress that provides balanced warmth in both the seasons-winter and summer. Ordinary pillow top mattress such as memory foam mattress may leave excessive heat. But, a natural wool pillow top has the ability to balance the heat. It will provide warmth in winters yet don’t leave heat in summers. 4. Ingredients : One Of the factors that most people do not give much adherence is the ingredients of the pillow top mattress. There are different pillow tops mattress that is filled with toxic ingredients, mostly in synthetic products. So, when you are choosing for pillow top mattress make sure you are asking for the ingredients you can read the detailed description. 5. Durability : The quality mattress lasts for many years. Again, the material is the primary factor that ensures product durability and sustainability. The natural wool pillow top is more durable than that of the cotton, memory foam or polyester. Summing Up : If you are planning to buy a pillow top mattress, make sure you are considering the above qualities. So, conduct thorough research, compare the quality and price and make a wise choice. Read Also :  The Best Memory Foam Mattresses For Staying Cool This Summer Five Easy Steps When Cleaning Your Mattress

        READ MOREDetails
        Appliances

        Best Practices That Extend The Life Of Your Appliances

        Replacing your home appliances might not be an appealing endeavor because it carries a hefty price tag. When your appliance has been experiencing frequent breakdowns, you know that unit replacement is the only option you have. There are factors that determine the longevity of your units such as the brand, type, and age. Home appliances can serve you for many decades. However, the manner you are using your home appliances can either shorten or lengthen their lifespan. Your air conditioner, for instance, needs regular servicing. An AC repair technician should inspect your unit to find out if there are underlying problems that can cause the unit to breakdown. As for other home appliances, giving them TLC should be the best practice to follow. Even simple practices can definitely make a huge difference in extending the lifespan of your appliances. Clean and unplug your appliances: The simple and yet most frequently forgotten practices are cleaning and unplugging your appliances when not in use. It is important for your appliances to be as clean as possible because dust, stains, and grease can negatively impact your appliances. Whether it is a food processor, oven, fridge or air conditioner, all of them needs regular cleaning. When you are finished using an appliance, do not forget to clean it right away. Cleaning your home appliances might have already slipped your mind but it is an important practice that can keep your appliances in tip top shape. Keep your washing machine at a matching level: All appliances have moving parts which are the ones that wear out first. Even your washing machine has these moving parts and they need to be well taken care of so they stay fully functional. Your washing machine can only get longer lifespan if you consider keeping it level. Check the surface of your washing machine using a spirit level. Be sure to adjust the legs so you can keep them at a matching level to prevent fewer breakdowns and to maximize the performance of your washing machine. Your washing machine's internal motor and drum will thank you for it. Avoid putting firm items your food processor: Your food processor allows you to blend ingredients and speed up food preparation. However, your food processor's lifespan can be shortened if you use it for cutting hard ingredients like nuts or coffee beans. These ingredients might blend but they can have a negative impact on the food processor's blades. Avoid blending them whole. You should cut them into smaller pieces before you put these ingredients in your food processor. Your food processor will continue to serve you if you use it the way it is intended. pre-wash dishes before Placing them in the dishwasher: You can save time when you use your dishwasher for washing dirty dishes. However, if you directly put your dishes in the dishwasher without pre-washing them, this practice can do serious damage to your appliance. Dishes with sticky food items need to be prewashed as the dishwasher might not be able to wash them off completely. Not only will you reduce wear but also ensure that your dishes are free from grease or oil. Scheduled maintenance: Regardless of your home appliance, maintenance is sure to prevent untimely repairs or replacement. While home appliances are expected to last for a decade or even more in some cases, your appliances will stop functioning as they should if you do not consider scheduling regular maintenance. The purpose of maintenance is to ensure that minor problems are properly addressed before they become severe. Problems with your appliances that are not immediately addressed can be the reason for considering replacement earlier than you expected. While DIY maintenance can save you money, there is no guarantee that you have thoroughly inspected all aspects of your home appliance. You still need to consider calling a professional to do the job. They have the tools, knowledge, and expertise to ensure that your appliances will be in working condition. You do not have to buy new appliances if you know how to take good care of the existing ones. By following these practices, you can be sure that your home appliances will make your life easier even in many years to come. Read Also: How Can Appliance Repair Services Help You Smart House Technology For Saving Energy 5 Easy Ways To Detect A Water Leak In Your Home 7 Smart Tips To Improve The Efficiency Of Your Refrigerator

        READ MOREDetails
        Drywall

        Elevate Your Home With Unique Ceiling Textures

        Drywalls are those construction materials that are used to create walls and ceilings in your home. Not all that, but drywalls also come in handy if you want to create design features like eaves, arches, or any mind-blowing architectural requirements!!! Do you know the best part about drywalls? These are super easy to install, highly durable, and only require simple repairs when damaged. So, drywall is a flat component composed of calcium sulfate dihydrate, typically between thick sheets of backer paper, and facer, used to construct interior ceilings. Let’s talk about the ceiling textures and the drywall options you can choose for your home!!! The Ceiling Textures And Your Drywall Options Decorating your home can be a real challenge for many !!! Therefore, choosing the right drywall finish or texture can prove to be a hard nut to crack. And it’s very natural to get in a state of indecision if you are handpicking it for your new home or renovation project. There are so many options that it feels like you are “searching for a pearl in an ocean.” Making up your mind about whether or not to go texturing your ceiling can be a tough job. And even if you choose to texture your ceilings, there are chances you’ll be confused about which one to go for!!!! And remember, getting the drywall right is the first step of tiling projects?”. But No Need to Worry!! This article will guide you in choosing the perfect texture and drywall option for your ceilings to look more elegant than ever!! 1. Sheetrock Texture: Old Is Gold Sheetrock ceiling texture is a drywall ceiling texture that has been famous since 1917. The reason this drywall texture is so awesomely renowned is because of the artistic look that it gives to your ceiling And the best part is you don’t need to use any sort of spray paint in this case. You can achieve this texture by using your artistic hand technique and without using any special brushes. This texture is perfect for any room. There are no restrictions on the use of this ceiling texture. 2. Stipple Brush Texture: A Test Of Your Skill This texture is not as easy as it seems. You need skills to create this texture. To create this texture, you need a roller and slap brush. The fascinating fact about this texture is it can cover the bumps and holes on your ceiling. And if you have the skills, then this texture can surely make your ceiling look gorgeous than ever!! 3. Swirl Texture: Creativity Taken To A New Level To achieve this texture, you need either a roller or sprayer. You can also do this by using a technique called “the basic swirl” method. But one thing that you need to keep in mind is while creating this texture, you’ll need a lot of patience to get the best result. And the difficult part is you need to create the pattern before the mud dries. So, make sure to have a helping hand by your side. Overall, the texture can really give that awesome look on your ceilings if you do it in the right way!!! 4. Orange Peel Texture: A Color Of Choice The name suggests all the colors of orange skin, but sometimes it’s also called “an eggshell” ceiling texture. If you really love this color, then this can be on the top of your favorite lists. To create this texture, you need to apply thin mud to the ceiling using a spray gun set at very high pressure. The more artistic mind you have, the more artistic look it has got!!!! 5. Smooth Textures: Choice Of Many If you are someone who wants the best at a cheap cost, then this texture is just the right choice for you. Moreover, you don’t need to have many skills to create this texture design. The look of this texture is just mind-blowing, and if you are someone who likes things to be consistently gorgeous, then this is the texture you can have for your ceiling. This texture is effortless to remove and is also perfectly suited for any room. 6. Tree Bark Texture: Beauty Of Nature If you are someone who loves nature and wants to bring the reflection of nature inside your home, then this textured style is just the option you can have. This ceiling has the look of a tree. You can create this texture just by using a heavy roller. The texture might look simply, but it’s very artistic and can surely catch the eyes of many. If you have a farmhouse, then this texture will double the beauty!!!!! 7. Slap Brush Texture: Slap The Beauty Out Artistic, gorgeous, beautiful, and elegant are the nicknames you can give to this texture. A complete package of beauty!!!! To get this texture, you’ll need a brush with very stiff bristles and thin mud. Firstly, you have to cover your ceiling with mud using a roller, then take the brush and slap the ceiling from the edge. This can be a hard nut to crack because if you don’t get it right on the first shot, the whole ceiling might end up looking messy. 8. Popcorn Texture: Cottage Cheese This texture, also known as the “cottage cheese” or “acoustic” ceiling texture, is probably one of the most famous ceiling textures ever!!! If you look closely, you’ll see it’s kind of a look-alike of “popcorn.” That’s why it’s called “popcorn texture.” To achieve the correct texture, you need to use a sprayer to apply to your ceiling. This contains Styrofoam with mud which gives that puffy effect. But it will require you to have a lot of skill to achieve this effect. That’s because the “popcorn texture” is both challenging to apply and remove. I hope this article will help you to know about the needs of ceiling textures and drywall options. And now I believe you’ll be able to get yourself the perfect texture for your ceilings. How Can I Remove Old Ceiling Textures Safely? Removing old ceiling textures can be a big job, but it doesn’t have to be intimidating! If you want to update your ceiling and get rid of that outdated texture, I’m here to help. No matter if you have popcorn, stipple, or another type of texture, this process takes a little bit of care, but don’t worry! Here’s a step-by-step guide on how to remove an old ceiling texture without breaking your back or the bank. Step 1: Test For Asbestos Before you get out any tools…safety first!  Remember, many older ceilings (especially those with popcorn texture installed prior to 1980) contain asbestos. Before doing anything else, have your ceiling tested for asbestos. You can hire a pro to test the ceiling or buy a self-test kit. If asbestos is present, halt all work and consult pros immediately. Asbestos removal is not a do-it-yourself job because it poses serious health risks if mishandled. Step 2: Clear The Room If there’s no asbestos present, it’s time to get the room ready. Cover all the furniture. You’d be amazed at how far a fine mist of water, compound, and paint can travel! Also, plastic should be removed from the floors, and tape should be around any ceiling fans or lights that are not being removed. I can personally tell you we didn’t do this. We found dried white dust on our bedspread when we were stripping the wallpaper in our bedroom, and we had to clean up all the residual dust a little too late. It was wild! Step 3: Soften The Texture For Better Finish Here’s where the fun starts! To make that texture easier to remove, you’ll need to soften it. Fill a spray bottle with warm water and mist the ceiling. You don’t want to drench it. If you put too much water on the ceiling, it could end up damaging the drywall underneath. Allow the water to sit for about 15–20 minutes or so, giving it time to penetrate and loosen up that texture material. Don’t rush this step. It’ll only cause more work for you in the long run. Step 4: Clean Your Work Grab a wide putty knife or scraper and start scraping off the texture. Do small sections at a time, and scrape at a shallow angle so that you don’t gouge the drywall underneath. If it’s not coming off well, spray some more with the water bottle and let it sit for a little longer. This step can be kind of messy and time-consuming, but have patience because, in the end, you will have a nice smooth ceiling. Step 5: Patch & Sand Once the texture is gone, you may notice a few dings or dents in the ceiling. Don’t worry! Just fill them with some joint compound, sand it smooth, wipe away any dust and you’re ready for a new ceiling. And that’s it! A fresh, smooth ceiling in no time! Read Also: Here’s How to Turn Your Garage into a Bedroom on a Budget! Turn your attic into a living space

        READ MOREDetails