Advantages Of Using A Water Heater At Home

by

13 December 2018

Home Improvement

Water Heater

Your home will never be complete without water fixtures. Your household will need a clean source of water to drink, wash their clothes with and basically, just function as an individual every single day. Undeniably, water is a valuable resource regardless of the activities you and your family take on every day. This is the reason why most homeowners decide to install a water heater at home. For them, despite paying for water heater repair Dallas once in a while, the benefits a household can experience from using a water heater certainly outweigh the disadvantages. But as a homeowner yourself, should you take on the same path, as well?

Installing a water heater at home is an investment. This water fixture doesn’t come with a cheap price tag and buying one might require you to break the bank. To help you come up with a sound decision whether to purchase a water heater or not, consider the following benefits:

1. A water heater can help reduce energy costs:

This might come as a surprise, but yes, a water heater can actually help reduce your energy costs at home. There are a lot of water heaters available in the market today, and some of these are very high efficiency which means that these water heaters usually use 50% less energy compared to older models. The newer the water heater model is, the more advanced its functions are. If your budget allows it, make sure that you buy a highly efficient water heater as this can become an excellent investment in the long run. It might require a large amount of money upfront but since you’ll be paying for lesser energy costs, you’ll be saving money over time.

2. A water heater doesn’t really need too much maintenance:

Contrary to popular belief, water heaters at homes don’t require too much maintenance. Sure, a regular check-up should be in place, but if the water heater is used correctly, there’s no need to worry about paying for regular maintenance costs. And as mentioned, since newer models of water heaters are popping out, you buy a water heater which can work correctly even without maintenance.

3. A water heater can help lessen water wastage at your home:

Unlike traditional water heaters, newer models of water heaters don’t need to store gallons of water just to function. Today, a tankless high-efficiency water heater can be bought anywhere – and with the amount of water it uses every time you switch this one, it’s probably a good thing to have one installed right away.

A tankless water heater only “heats” water the moment someone is using your water fixtures at home. Traditional water heaters, on the other hand, heats up stored water even when not in use. As a result, your house will heat up more than the needed amount of water which can also translate to higher energy bills. This is one of the most obvious reasons why a tankless water heater remains to be the favorite among many homeowners.

4. A water heater can be very convenient:

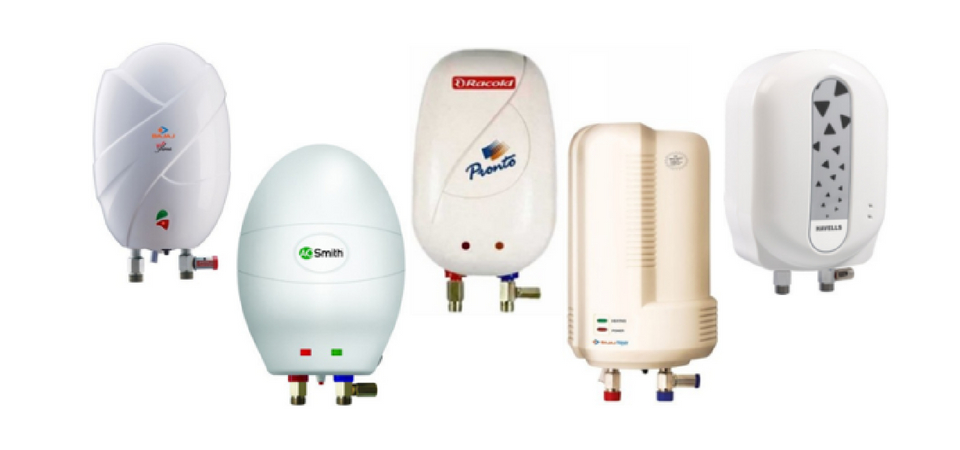
Gone are the days when water heaters take up the entire space in your basement. Today, there are now water heaters which are small and compact and yet, very powerful. You can even install a water heater on your own. The manufacturer will usually set up the water heater with the regulated temperature, and once this is installed, you’re ready to use it the right way.

5. A water heater can be very durable:

Everything in your home should be an investment. You shouldn’t buy anything which will only last for a couple of weeks or months because aside from wasting money, low-quality products can also bring unwanted stress to you and your family. Fortunately, buying a high efficient water heater can help you steer away from this situation. Because newer water heaters are equipped with the latest technologies, you can guarantee that manufacturers have created this product with the best quality possible. Usually, a high-efficiency water heater can last up to 25 years.

Think Long-Term:

When you’re a homeowner, it’s typical to become very cautious with your expenses. Being a homeowner isn’t a one-time investment, it’s actually a long-term commitment. You’ll still have to think about the bills and maintenance costs, just to name a few. But with the number of advantages you can experience from a water heater at home, it’s safe to assume that buying one is a smart move. As long as you know how to take care of a water a heater at home, you’ll surely get your money’s worth!

Read Also:

Featured Image: readerslogic.com


Content Rally wrapped around an online publication where you can publish your own intellectuals. It is a publishing platform designed to make great stories by content creators. This is your era, your place to be online. So come forward share your views, thoughts and ideas via Content Rally.

View all posts

Leave a Reply

Your email address will not be published. Required fields are marked *

Related

Organized After A Move

Tips To Unpack, Stay Organized After A Move

So you have finally moved into the house of your dreams. What next? Once your belongings are unloaded, you must figure out how to get organized after a move. This includes unpacking and organizing all of that stuff! Of course, this whole process can be a little too overwhelming. But Austin maid service has some organizing tips that might come in handy. Tips for Organizing a Move Before moving in, make sure the new home is completely spruced up to welcome its new members. This includes wiping down shelves, countertops, cabinets, and floors. The bathroom and kitchen should be completely clean and smell good. Once you have stepped into your new home, it’s time to unbox the essentials first. Forget everything else and unpack the essentials box that carries important stuff that you cannot do without. Little steps first Of course, you want to organize your new home right away. After all, it is your dream house and you wish to start enjoying your stay quickly. But it can be quite messy initially. If you try to start by organizing all rooms together, you may end up making no significant progress at the end of the day. So what next? Well, you must start with one room first and unpack your stuff accordingly. For a family of small kids, you may start with unpacking the nursery. Try to maintain a sense of normalcy so kids do not find moving overwhelming. Setup their rooms first and you can easily create a safe haven for them, where they can play and rest while you organize the rest of the space. After the kid’s room, you can start with the kitchen and your bedroom. Other rooms can still wait. Give rooms a purpose In order to stay organized after a move, the next step is to plan how to store your belongings. In this regard, you can assign different purposes for each room, including the pantry, basement, garage, hallway, and bathroom. Now start unpacking things and assign everything a new home. Start with larger items Bulky stuff takes up a lot of space. So start with arranging larger items. You do not want to hit a bed or dressing table every now and trip and fall. Move dining tables, beds, dressers, and solid pieces of furniture to their respective rooms. This should clear up space and make you feel a little relaxed. It’s absolutely fine to delay organizing the smaller stuff. Take some rest and then unpack smaller items, including books, clothes, utensils, and accessories. Install all larger kitchen appliances first. This includes the fridge, dishwasher, stove, food processor, washer, and dryer. Tackle the kitchen When looking for tips to organize home after a move, your priority should be to unpack the kitchen stuff. What is the most essential cookware? What else is most commonly used in the kitchen? You want to organize the essentials first. Organize those in easily accessible drawers. This includes pots and pans, coffee mugs, cereal bowls, and plates. Keep all dishwashing soaps and sponges handy. Do not forget the kitchen cleaning supplies as well. Unpack remaining rooms Once your most important rooms are in order, it’s time to organize the remaining space. Tackle one room at a time and then move to the next. It is a good idea to keep the task of organizing storage areas for last. Since home organizing after the move is a huge task that may take days, this will ensure you have a clean uncluttered space for dining and resting. The storage space can still wait. Don’t forget the entryway Organize this space once you are done with the cleaning aspect of all major rooms. If you continue to ignore this area, it might turn into a complete mess with a pile of stuff that you have been delaying organizing. So when you wish to get organized after a move, place a small basket by the door. This should collect all of the mail that reaches your new home. Bring some hooks to organize items that can be easily lost. This includes keys and dog leashes.  When installing hooks at the entryway, keep a few points for coats, jackets, and umbrellas. You don’t want this type of stuff to crowd your chairs and sofas. Place a shoe rack at the entryway. You do not want any viruses to enter your new abode with shoes, right? In these coronavirus times, it becomes even more important to drop your shoes at the door. Place a rug or mat at the entryway to avoid bringing dirt, snow, and slush into your abode. These tips for organizing after a move can make life a little easier for you and your family. You can always rely on dependable professional services for the job if the task seems a little overwhelming. Read Also: 10 Steps to Move in Your New House Moving home checklist: What you need to know Factors To Consider While Preparing For A Move

READ MOREDetails
Toilet Flush Button

Toilet Flush Button: Understanding The Nuts And Bolts

Though our bathrooms play a critical role in daily life, they're often forgotten until a problem arises. Of all its components, one that stands out is the toilet flush button's use - and understanding. This article looks closely at its workings, maintenance needs and replacement considerations. The Fundamentals Of The Toilet Flush Button What Exactly Is A Toilet Flush Button? A toilet flush button is the mechanism responsible for initiating the flushing process in your toilet system. Situated on the tank's exterior, we press or push this component when using our toilet to flush out its contents into the sewage system. By activating this flush button, we begin an action chain within our bathroom that sends water from its tank into our bowl to flush away its contents into sewer lines. How Does The Flush Button Work? The magic of the toilet flush button lies in its ability to control a more complicated mechanism. Pressing it lifts a lever connected to a chain inside the tank; that chain connects to a flapper (or flush valve seal), covering up drain holes at the bottom. When the flapper is raised, water stored in the tank begins rushing from its source into the bowl through its drain hole and siphon tube into the sewage system. As soon as this process completes, however, the flapper falls back down, sealing off its drain hole once more - and replenishing its supply in readiness for another flush cycle. Maintenance Of The Toilet Flush Button Regular Cleaning Regular cleaning of your toilet flush button is vital to its optimal operation, as dirt can clog the switch and make it less responsive, leading to inconvenient situations for users. A non-abrasive cleaner and soft cloth should be used for exterior cleaning; internal components should be checked regularly to avoid build-up and potential mechanical problems. Checking For Wear And Tear Given how often flush buttons are used, wear and tear are inevitable. Look for signs of damage, such as cracks or looseness. If the control becomes less responsive when pressed or sticks down without returning up when released, this may indicate internal components need to be reviewed for potential problems. Troubleshooting Common Problems Is The Button Hard To Press, Or Is It Sticking A toilet flush button that is difficult to press or sticks down often points to a problem with the connected lever or chain inside the tank. It could be that the chain is too tight or too slack, or the lever needs to be aligned or fixed. A careful inspection and adjustment of these components usually solve the issue. The Button Doesn't Activate The Flush If the button doesn't activate the flush, the issue could be that the switch is no longer effectively connected to the lever, or the flapper isn't lifting. A look inside the tank should reveal the issue. The button, lever, or flapper may need to be replaced. Replacing The Toilet Flush Button When Should You Replace The Button? As with any mechanical component, toilet flush buttons have a finite lifespan. Over time and through regular use, their controller may wear out or become damaged, requiring replacement. Signs to replace it include physical damage to its housing and sticky buttons or ones that no longer activate flushing actions. Looking for a portable toilet rental might also be necessary if you need to fix your toilet for a couple of days. Toilet Flush Buttons: More Than Meets The Eye Though seemingly simple, toilet flush buttons are critical in maintaining sanitation in homes and public spaces. Understanding their inner workings helps us better appreciate their importance, maintain them properly, and effectively troubleshoot any potential issues with them. So next time you press one, remember its critical function while giving it some love and consideration. Conclusion: Understanding how a toilet flush button works may initially seem complicated, but understanding its mechanics is crucial to efficient bathroom operations and sanitation practices. Knowing their inner workings could save us from future inconvenience or repair costs. Maintaining the toilet flush button regularly is vital to prolonging its lifespan and guaranteeing reliable performance within a plumbing system, thus streamlining home maintenance. By periodically inspecting it for signs of wear and tear, individuals can identify and address potential issues early on and prevent more significant ones from developing into larger problems later. By taking proactive measures like this one, individuals save both time and money on costly repairs and ensure an effortless toilet operation experience. Maintaining a flush button is an accessible DIY project for anyone, provided they possess basic knowledge and the appropriate tools. Even if it eventually succumbs to wear or damage despite regular maintenance efforts, replacing the button remains straightforward, making this an achievable DIY project for homeowners. Read Also : Mirror Decorating Ideas To Style Your Bathroom Using Feng Shui In Your Bathroom Design The Different Kinds Of Toilets

READ MOREDetails
Clothes Dryer Maintenance

9 Clothes Dryer Maintenance Tips

Taking care of your appliances is the key to saving money, time, and effort. The clothes dryer maintenance is among essential major assistants in your household. While it works, you don’t notice it. When it breaks down, you face a disaster. The life expectancy of an average dryer is about 13 years. However, the majority of these appliances last much less. The reason is the lack of proper operation and maintenance. It’s not enough to plug the unit in and forget about it. If the only thing you do for your dryer is clean the lint filter, your appliance is likely to demand repair in just a few years. In this article, we’ll share top clothes dryer maintenance tips to keep your dryer working for as long as possible. Here are the 9 Clothes Dryer Maintenance Tips: 1. Run Full Loads Only The more you run your dryer the faster it will give out. It’s as easy as that. Since you are unlikely to limit the number of times you do laundry, you can at least add some efficiency to the process. By ensuring you only run full loads, you don’t just extend the lifespan of your clothes dryer, you save energy as well. Don’t rush to do laundry when you have free time. Wait until a full load is available. On the other hand, don’t overload the dryer. In the rush to finish laundry quicker, many homeowners overload washers and dryers. As a result, the motor strains, dryer becomes misbalanced and eventually stops functioning. 2. Opt for Professional Installation With numerous DIY videos overwhelming the Internet, homeowners often opt for DIY appliance installation to save money. Even though installing a dryer may appear straightforward, it’s not as easy as it sounds. You may not notice the mistakes you make during the process. They’ll become obvious after several uses. By that time, your dryer could already be damaged. Proper venting is highly important for a clothes dryer. You would need to select the right material and size for the venting tube and install it properly. Meanwhile, you should make sure the appliance is perfectly balanced. It’s especially important if you are placing it on top of the washer. 3. Clean the Dryer Vent The dryer vent is the most important part of your appliance. It needs regular maintenance. Ideally, you should hire professional technicians to check and clean the vent at least once a year. However, some owners do it on their own. Cleaning the vent involves disconnecting it from the dryer. After that, you would need to use a long-handled attachment to ensure penetrability. Special dryer vent cleaning brushes exist to remove clogs. Be careful about reinstalling the duct properly after the cleaning is done. If you fail to do it, the dryer won’t function. Consider hiring professional dryer vent cleaners to avoid mistakes. According to experts from Jacksonville appliance repair services, if ducts aren’t cleaned regularly, the dryer’s motor can burn out leading to costly repairs. 4. Limit the Number of Dryer Sheets While dryer sheets are an excellent way to keep your clothes static-free and soft, they aren’t harmless. These products have a wax layer that melts when the dryer heats up. If you use too many of them, the wax settles on the appliance’s interior walls and clogs the venting system and the lint trap. Removing this layer may be tough. No matter how many dryer sheets you use, it’s important to clean your dryer once a week even if you don’t see any dirt inside. Failure to clean the dryer regularly is the top cause of dryer-related fires in households. 5. Clear the Lint Trap Lint trap is one of the most important parts of your clothes dryer maintenance tips. Cleaning it regularly is the key to the appliance’s longevity. Wipe the lint filter clean after EACH load. Even if you are planning to do two loads in a row, clean the trap between them. At least once a week, remove the lint screen and vacuum the trap. You can use a brush to loosen the residue. Every one or two months, remove the lint filter and soak it in warm soapy water for about an hour or so. This can help remove wax, which appears after using dryer sheets and residue that settles after using a fabric softener. 6. Inspect the Appliance Weekly A visual inspection of the dryer can help prevent damages. Make sure no moisture is trapped around the door seal. If there is any, wipe it off gently. In fact, you can wipe the door after each load is done to prevent mold formation and bacteria growth. When checking the appliance, pay special attention to the doors seals. If they are cracked, ripped or damaged, the dryer is struggling to maintain the right temperatures. It may be straining the motor and overusing electricity. Replacing door seals is much easier and cheaper than repairing the motor. 7. Listen to it Work One of the first signs of dryer problems is the change in its operating noise. If you hear that something seems off, turn the appliance off immediately and check what’s happening inside. The reason for the change of sound could be overstuffing dryer with clothing or a sleeve caught up in an improperly installed lint trap. If everything seems to be in order, but the dryer continues to make strange noises, call professional technicians. 8. Check Exterior Vents Every month or so inspect the exterior vent of your dryer. While the appliance is working, go outside and check if the air is flowing freely through the vent. If something seems wrong, the pipe may be clogged. If you have a plastic vent, consider replacing it with a metal one. A plastic vent is a fire hazard. 9. Find a Professional Repair Service Some clothes dryer maintenance tasks require an expert’s assistance. Spend some time looking for a reliable repair service before anything breaks down. Knowing whom to call in case of an emergency could prevent further damage to your dryer. Start following the above clothes dryer maintenance tips today, and your dryer will serve you for at least a decade. Read Also: How to cut down your home decor costs? Read here Knowing Your Vehicle: 5 Maintenance Tips for Porsche Owners Tips on How to Avoid Hoarding and Get Rid of Clutter

READ MOREDetails