How To Save Money On Your Air Conditioning Costs This Summer

Published on: 13 September 2020 Last Updated on: 29 October 2024
Air Conditioning Costs

For most people, summer is the most joyful of all seasons. There’s something precious about those warm evenings, whole days spent swimming, and enjoying the great outdoors. Unfortunately, summer’s not all sunshine and flowers.

As a lot of homeowners know, during the summertime our bill tends to spike as our air conditioning costs keep piling up. But what if you could cut those costs by as much as half. In a lot of cases, high AC costs are the result of improper maintenance and malfunctioning AC systems. The experts at Howell’s were kind enough to share a few useful tips that can help you save this cooling season.

Look For Leaks In The Ducts

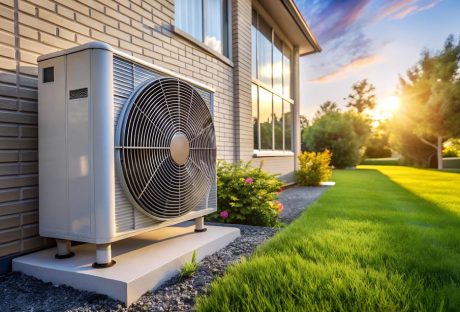
If your cooling bills unexpectedly start to spike, there could be a technical issue behind it. Central AC systems use ductwork to deliver any cooled air throughout your home. However, as they age ducts become more susceptible to tears and fissures. This not only makes the AC less efficient but demands more power to keep the required temperature levels in your home. This is usually the main reason behind increased energy bills. If you haven’t inspected your ductwork in a while and are paying more than usual, have a professional determine whether leaks in the ductwork are to blame.

Replace Your Air Filter

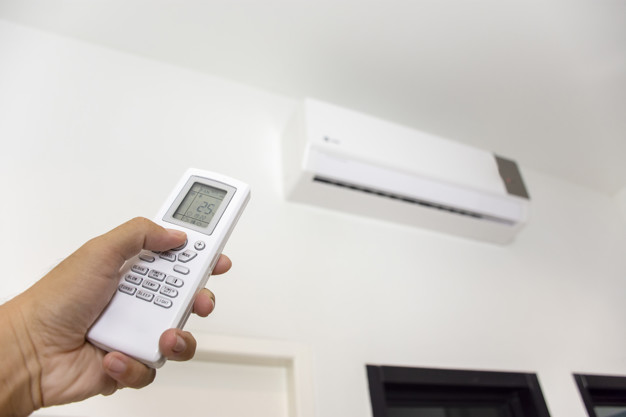
One of the things homeowners are most likely to forget about is the air filters in their AC systems. When is the last time you replaced or at least cleaned your filter? If your answer is “I don’t remember” now is the right time to do so. A clogged filter may make your air conditioner less effective as it struggles to push the cooled air through the filter. This will likely result in an increased energy bill, but poor air quality as well.

If you want to keep your energy bill low, make a habit of replacing your air filter at least once every two months. If you are not sure how to do this, you can always hire a professional.

Have A Professional Tune-Up

Another often neglected part of owning an AC system is having regular inspections and tune-ups. With a professional tune-up at least twice a year you can be sure your AC will be up to standards and working properly. This way you won’t spend a cent more than you need to in order to enjoy the comfort in your home.

A tune-up entails a professional testing every component of the system to make sure everything is working in harmony. If any part of the AC system is malfunctioning, professionals can detect this early and prevent expensive repairs down the line. Finally, they will clean the entire system, replace the filters, and offer valuable advice on proper AC maintenance.

Having your AC system running at optimal conditions is perhaps the best way to ensure that you don’t end up spending more money on it than necessary. As the old adage goes, sometimes you gotta spend money to make money; well, in this case, save money.

Read Also:

Content Rally wrapped around an online publication where you can publish your own intellectuals. It is a publishing platform designed to make great stories by content creators. This is your era, your place to be online. So come forward share your views, thoughts and ideas via Content Rally.

View all posts

Leave a Reply

Your email address will not be published. Required fields are marked *

Related

Painting Interior Doors

Tips for Painting Interior Doors

Freshly painted doors can enhance the makeover of any house. You can paint your doors on your own or hire a professional painter to do it for you. Many people prefer painting their doors themselves as they want to enjoy painting them on their own. However, if you don’t have any experience or want high-quality paintwork, you should always hire professionals for complete painting service. If you choose to paint or spray paint your interior doors, you need to know some tips and skills to do the job right. Let us explore some tips by professional painters that you can use to paint your doors. Remove or cover the door handles: Paint can stain the door handles and locks. So, it is better to remove them or cover them with painter’s tape to prevent them from getting stained. You will need a screwdriver with multiple heads to remove the handles and locks. Call a locksmith to remove the inbuilt lock systems as they are difficult to remove. Removing these things will make it easy to clean, sand and then paint the doors. Fill the cracks and holes: If there are any holes or cracks in your doors, you can fill them with a wood filler, gypsum plaster, or a filling compound. Put a small amount of wood filler or filling compound on a putty knife and put it into the hole or crack uniformly. Place it as uniformly as possible and leave it to dry for at least two hours. Check the filling the next day, and it requires more filling, add the required amount of filling compound to fill the space completely. Sand the surfaces: The old paint gets worn and imperfections develop with time on the door surfaces. That is the reason why homeowners want to repaint their doors. Sanding removes the worn paint and imperfections easily and prepares the surfaces for a clean and uniform finish. Start painting with a Roller: If you have already chosen the paint color, mix several cans in a bucket so that you can have the same shade on every door. Sometimes, the shade in different cars can vary a little, although not noticeable in the interiors in low light. Use a 4-inch roller to apply a thin layer of paint on the door starting from an edge. If you want to paint the trim first, you can use a 2-inch brush. To remove any lines, move the lightly loaded brush or roller from bottom to top. Using this technique will help you paint quickly and uniformly while leaving a wet edge. Painting a paneled door: Many homes have paneled doors and the technique to paint them is different from painting a flat door. Paint every panel beginning from the upper left side downwards in a sequence. Always use a brush of appropriate width to paint a paneled door. Don’t worry if you paint a bit outside the edges of a panel. Once the edges are painted, use a small roller to paint the space between the panels. If the rollers of appropriate size are not available, use a 2-to-4-inch brush to paint the center of the panels. Minimize the drying time: Paint in light and uniform coats to minimize the drying time. Thick coats of paint take a bit longer to dry and may look nonuniform after drying. If you are using a brush, you should dip its bristles halfway in the paint and tap the brush against the container edge slightly to remove the excess paint. If you plan to use a roller, place it in a pan and use the back-and-forth strokes to paint uniformly without soaking it. Let the paint dry before installing knobs and locks: Let the paint dry completely before installing the doorknobs and locks. Also, tell your kids and family members not to touch the doors until they dry completely. Once they dry up completely, you can install the accessories and start using the doors as you use them normally. Final Words: Painting the doors is not difficult, even if you are painting them for the first time. All you need to do is to follow the correct sequence of steps, use the right size of tools and prepare the surfaces before grabbing a brush or roller. Following these tips can help you to paint your interior doors easily and conveniently. Read Also: 10 Pro Tips To Minimize Commercial Door Repair & Maintenance Cost All About Commercial Fire Doors Why Should you Consider Security Doors for Your House?  

READ MOREDetails
Epoxy Flooring

7 Advantages of Reflective Epoxy Flooring

Flooring trends come and go, and that’s not a bad thing when you think about the decade in which orange and brown patterned carpet was all the rage. It’s proof that not every trend is a good one, but some are more withstanding of changing tastes and times than others. Epoxy floors are a great example of flooring that stands the test of time despite the trendy nature of this type of concrete floor. If you’re thinking about epoxy concrete, here are some of the biggest benefits of this type of flooring. 7 Advantages of Reflective Epoxy Flooring: 1. It’s Durable: Durable flooring is hard to find when you have kids, pets, and even high heel shoes on the floor all the time. Reflective epoxy floors are among the most durable. They are able to withstand significant wear and tear, which means they are more affordable than other floors, too. You don’t have to replace them as often, which means less money comes out of your own pocket. 2. It’s Strong: When you use epoxy on your concrete floors, you make them strong. They’re less likely to break down when you use them, and the chemicals in the flooring are not going to break down as quickly. Furthermore, the chemicals you use to clean this kind of floor will not cause erosion, breakdown, or damage. That's big if you are into clean floors at home. 3. It’s Affordable: Imagine you have a beautiful home, but the floors are less than attractive. The builder used a builder-grade carpet, and you can’t handle it anymore. However, you don’t have the budget to redo the floors with tile or wood. Why not go with epoxy to save some money? It’s easy to rip out the old floor, spruce up the concrete below, and add epoxy to the top. It’s strong, beautiful, and it’s more cost-effective than other flooring options. 4. It’s Safe: What makes some people feel nervous about adding concrete epoxy floors to their home is the safety feature. Aren’t they slippery? Won’t you have a higher risk of falling? Will a small spill turn your home into a danger zone? The answer is no to all of the above. Epoxy is strong and safe. It’s not susceptible to slippage, impact, fire, and even temperatures that are extreme in nature. Your home is safer with this on the floor. 5. It’s Aesthetically Appealing: You want your home to look good, and you want it to show well when you host friends and family. This type of flooring gives you just that. It’s bright, it’s beautiful, it’s attractive, and it comes in any color, pattern, and design imaginable. You get to customize your own floors, and you can add anything you want. Imagine adding your family crest to the floor by the front door for added appeal. It’s almost too good to be true, but it’s easily done with a stencil. It’s even easier if you hire a professional to do the work for you. Renucrete Sydney Polished Concrete can help you create the perfect epoxy flooring in your home. 6. It’s Low-Maintenance: One of the most common misconceptions homeowners have regarding epoxy floors is about maintenance. Many people assume it’s hard to take care of it. It’s not easy to deal with, and it takes a lot of work. The truth is that it does none of the above. It’s exceptionally easy to maintain, and it can be cleaned regularly without the risk of damage. The epoxy removes the porous aspect of the concrete, which means your floors are even easier to maintain. 7. It’s Easily Changed: If you remodel your home and spend thousands of dollars on trendy wood floors, you love them for years. What happens, however, when you decide that grey wood flooring you loved so much a decade ago is no longer in style? You’re spending thousands more to replace it with something else. Your epoxy floors, however, aren’t like that. You don’t have to rip up the old floor if you decide you’re tired of it. You simply add whatever you want to the top, and you can always go back to the concrete if you choose. Epoxy floors are not just for industrial spaces. They’re making homes feel larger, airier, and more modern every day. It’s not something you might consider until now, but adding epoxy floors at home might be exactly what you’ve been looking for to turn your house into a home. Read Also: 5 Factors To Consider In Choosing The Right Floor Colors

READ MOREDetails
Iron Clothes

How to Use Iron Clothes With Steam

Believe it or not, the amount of people that don’t know how to iron clothes is amazing. There’s no shame on it since most of us were thrown into society without really practicing skills that would definitely help us fight back as we become independent. These skills include things like cooking a proper meal before going to work, knowing what groceries to buy without spending all our money on unnecessary things, being able to pay bills accordingly without becoming a mess, cleaning the house every now and then, and of course, knowing how to use steam irons and what to do to properly iron our clothes to not look like folded toilet paper. Don’t worry though! In this guide, I’m going to teach you the essentials of how to iron, and how to deal with different types of fabric. To be honest, ironing is not something as complicated as many think. It’s all about knowing what to do, which is what most people lack. The process may require a little preparation and patience, though, so be prepared to practice with different pieces of clothing to get the main idea. One thing is sure, though. You have to be careful when using an iron because they can be harmful if dealt with without precautions! How to Prepare for It The first thing you’ll need is a flat surface where you can prepare your clothes to be ironed. Try to have everything neatly organized to avoid possible accidents, and if you can, try to do it on an ironing board. Some clothing is too delicate for the heat produced by the heated metal of the device, so have a piece of fabric to protect these. Read more: A Complete Guide on Using IRON on Transfer Paper Connect the Iron Irons can take some time before they are ready to be used. They usually show a sign that they are ready, so be sure to be attentive about them while you take care of the next step. Never try to do it before its ready, since it’ll lead to a slower and far less efficient process. Know the Differences Between Materials, and Sort Them Beforehand Depending on the type of fabric you are dealing with, you might want to change your approach while ironing. You can’t deal with a silk piece the same way you would deal with a cotton one, for example. Some pieces of clothing will require you to use the lowest setting of heat possible, while others may require even more heat. Separate silk, wool, rayon, and acetate to be dealt with the lowest settings. Wool clothes may require the protection of another piece of fabric that was previously dampened, so take that in mind! For polyester, go with the medium heat setting, and for cotton, you can go either medium and high heat setting. Both of them should be dampened to be protected from the heat. Before the iron is ready to go, you should have them sorted out. How to Iron Clothes When you deal with shirts with a collar, you should start with it. You can start with a pattern that follows the inside part of the collar, starting from the center of it, until you reach the edges. Then, fall back to the center, and keep moving between both sides. Once you’ve finished with it, you can work the outside. Lay down the shirt in a way that you can flatten it with the iron with simple movements. After that, you have to work your way down, slowly moving the shirt. Then, work the sleeves then the cuffs. Pants are much easier than shirts with a collar. You just have yo lay them down in a way that you can work both legs at the same time. Start with the waist, gently work with the pockets, and go your way down. Repeat the process until you are satisfied with the results, but make sure to be gentle and careful with the heat and the ironing. Considering that there are way too many types of clothing to teach all of the proper methods and techniques to iron them accordingly, you should check this guide on how to do it without fail. Safety Recommendations Ironing can be a pretty dangerous process if you are not attentive while you do it. If you don’t take safety measures, you might harm yourself or others, so make sure to pay attention to this part of the guide. The very first thing you should always make sure is that the iron is unreachable for children. Children can be curious and do things without knowing, so you will be the one to blame if you allow them to get closer while they are heated up. This is important even after you’ve finished ironing. These devices tend to remain heated up even after disconnecting them, so you should still be attentive to any possible situation. I recommend you to wait at least 10 minutes before taking your guard off. Remember to check just in case. While it rests, don’t leave it face down. You might burn something or damage the iron if you do. If an accident happens and you burn yourself or someone else gets burned, treat the burn with cool water for as much time as you can. 20 minutes should be more than enough. Don’t use things like butter or oil, since it might infect the injury. if the burn is too big, you should check yourself with a doctor. Read Also: How To Choose A Washing Machine? How to Pack Clothing Properly for Shipping Choose The Latest Collection Of Women Clothing For a Stylish Look 6 Benefits Of Buying Clothes Online – Why People trust online shopping

READ MOREDetails