Disinfection and Cleaning Strategies for Reopening Commercial Buildings

Published on: 22 September 2020 Last Updated on: 30 October 2024
Disinfection

Cleaning and Disinfection have never been more important than amid the COVID-19 pandemic. And, with quarantine restrictions beginning to loosen, many businesses that were shuttered during lockdown will start resuming operations. As this happens, the biggest challenge for commercial building owners is being able and ready to return buildings to use swiftly and safely. Reducing the risk of exposure by cleaning and disinfecting is an integral part of reopening commercial buildings as the safety of occupants remains a key priority.

With this rising demand for clean environments, commercial buildings will have to come up with safe and effective cleaning strategies that will assure occupants of their safety even as the threat of the virus continues to linger in our minds. With so much uncertainty surrounding the spread of the coronavirus and how people can protect against it, it’s not worth it to take any risks. You can find professional cleaning, sanitizing, and disinfecting services at www.excelpestservices.com. Cleaning and disinfecting commercial buildings for reopening will involve developing a plan, implementing the plan, as well as maintaining and revising the plan.

Develop Your Disinfection Plan:

There’s no one-size-fits-all cleaning and disinfection plan as commercial buildings are structured differently and for different purposes. You will need to evaluate your building to determine the surfaces and materials that make up that area. This will guide you in choosing the appropriate cleaning and disinfection method suitable for each.

Implement Your Plan:

Once you have the right cleaning and disinfection plan for your building, it’s time to put it into action. We have mapped out a few key strategies that will help you navigate this issue and ensure optimal cleaning and disinfection service. Without further ado, let’s get started:

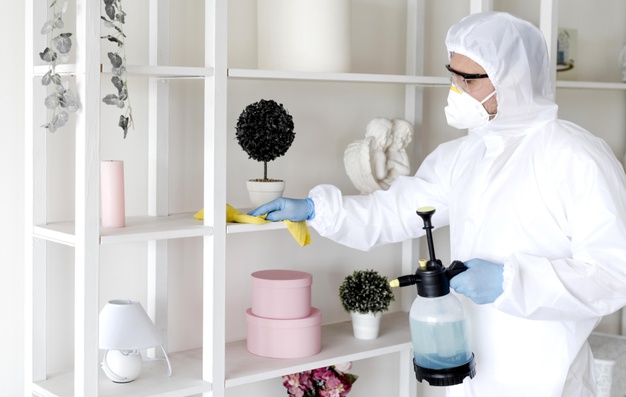
Wear appropriate PPE (personal protective equipment):

Whether you are contracting a cleaning service or using in-house janitorial staff, the cleaning crew must wear appropriate PPEs like gloves, masks, goggles, and so on. That’s because they are at a higher risk of being exposed to COVID-19 (given that it can stay on surfaces for days) and the toxicity of cleaning/disinfecting products. Not wearing PPEs also means asymptomatic carriers could spread pathogens to clean areas. It’s also important for the cleaning crew to receive training on the proper use of PPEs, cleaning equipment, and cleaning products to ensure efficiency.

Apply normal routine cleaning on visibly dirty surfaces:

It’s important to clean surfaces and objects with soap and water before disinfecting. And, be sure to clean soft and porous materials according to the manufacturer’s instructions.

Determine what you need to disinfect:

While some surfaces and materials are cleaned with just soap and water, others must be disinfected. Scientists have proven that coronavirus can also live on various surfaces for up to a couple of days. People can contract it by touching contaminated surfaces and then touching their eyes, mouth, or nose.

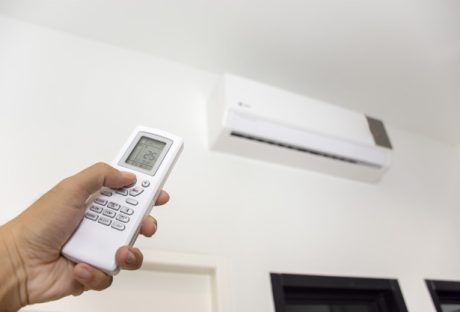
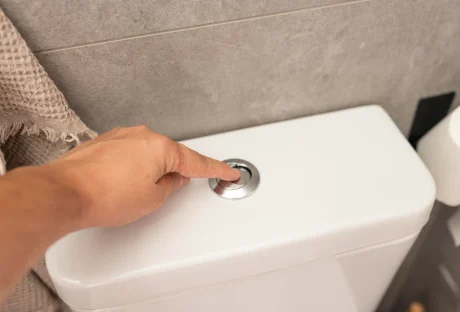
Start by disinfecting high-touch surfaces as they are the main source of spreading pathogens. This includes doorknobs/handles, elevator buttons, restroom facilities, trash can lids, faucet handles, floor surfaces, light switches, tables/countertops/desks, handrails, and so on. Additionally, areas unique to your building may also require disinfecting. For instance, retail occupancy will require disinfecting shopping cart handles and payment touchpads while offices will need to disinfect computer monitors, keyboards, conference tables, etc.

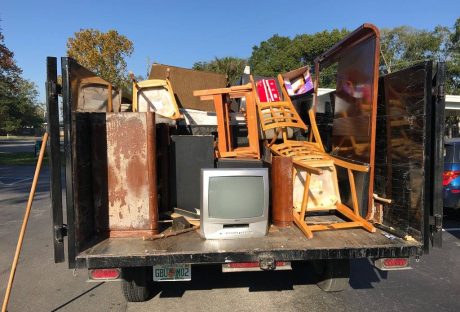
Soft and porous materials in high-traffic areas like carpets, upholstery, and curtains can be germ reservoirs and will need to be disinfected as well.

Use EPA-Approved cleaning/disinfectant products:

Not all cleaning products are suitable for removing pathogens, particularly traces of COVID-19, from building surfaces. It’s important to look at EPA’s suggested products as they are both effective and non-toxic. If EPA-approved disinfectants are not available, you can use a diluted solution of household bleach or 70% Isopropyl Alcohol (IPA).

Use products effectively:

It’s important to follow the directions on the label with regards to the application method (concentration and dilution), contact time, as well as any other precautions to take when applying like good ventilation and appropriate PPE to wear. This will ensure the effective and safe use of cleaning and disinfecting products. Avoid mixing cleaning and disinfection products as this can result in very dangerous fumes that could cause serious injury or even death.

Avoid over-disinfection:

It is possible to over-disinfect surfaces while trying to ensure no pathogens are left behind. And although these products are great at removing pathogens, their overuse can have serious side effects in humans. Disinfectants can pose an immediate risk to some people, including those who are asthmatic or suffer from migraines, allergies, suppressed immune systems, or immune disorders. They may experience symptoms like headaches, nausea, and vomiting, irritability, difficulty breathing, mood swings, memory loss, seizures, etc.

Outdoor areas require normal routine cleaning:

Many outdoor surfaces will not be touched; as such, disinfecting them is a waste of supplies. However, some areas like bars and restaurants will require disinfecting. Pools and other water play areas must also be well-maintained, for example disinfecting with chlorine or bromine.

What about an unoccupied building?

Properties that have not been occupied for over 7 days will do with normal routine cleaning, meaning there’s no need for disinfecting. That’s because the coronavirus cannot survive on surfaces for longer than this time. But once you reopen, you will have to develop and implement a disinfection plan to keep everyone safe.

Work in zones:

It’s important to separate areas in the building by how likely they are to contain pathogens. Then start with low-risk zones moving into high-risk areas to help avoid cross-contamination.

Maintain and Revise the Plan:

Once you reopen, it’s important to maintain the above disinfection strategies to minimize the risk of contracting COVID-19 and other pathogens. This should be done in conjunction with other safe practices like social distancing, wearing masks, frequent hand washing, and more. Be sure to revise and update your cleaning and disinfection plan based on the current circumstances (level of COVID-19 exposure in your building) and updated guidance by the local and federal governments.

Read also:

Content Rally wrapped around an online publication where you can publish your own intellectuals. It is a publishing platform designed to make great stories by content creators. This is your era, your place to be online. So come forward share your views, thoughts and ideas via Content Rally.

View all posts

Leave a Reply

Your email address will not be published. Required fields are marked *

Related

Oil Heater vs. Fan Heater: Which Is Better

Oil Heater vs. Fan Heater: Which Is Better

A dependable heater may make all the difference in keeping your home warm and inviting during the bitterly cold winter months when the frigid air bites your nose. However, it might not be easy to select the best heater for your needs, given the variety of products on the market. Oil heaters and fan heaters are two standard options, each having pros and cons of their own. This article will examine the differences between oil and fan heaters to see which is better. Oil Heaters: The Basics Oil heaters also referred to as oil-filled heaters, work by heating a particular kind of oil inside the metal fins of the device. Because of the effective heat retention of this oil, the heater can continue to provide warmth long after it has been switched off. Oil heaters give a steady, soft warmth that many people find comfortable, although they usually take longer to heat up than fan heaters. Fan Heaters: The Basics In contrast, fan heaters operate by drawing air over a heating element and then using a fan to distribute it around the space. Fan heaters are renowned for their ability to heat a space quickly, increasing the ambient temperature. They can, however, occasionally produce a dry heat, which some people may find less comfortable. Here are the various considerations before you buy oil heaters online: Energy Efficiency And Cost-Effectiveness The energy efficiency of oil heaters is highly praised. The heater's oil holds heat efficiently after it reaches the proper temperature, reducing the frequency of on and off cycles. As a result, there may be a decrease in energy use and, eventually, heating costs. Furthermore, oil heaters can contribute to energy conservation by maintaining a comfortable temperature without continuously using power because they generate heat even when shut off. Meanwhile, fan heaters use more energy even though they are good at warming a space rapidly because they run continuously. Using a fan to disperse heat is another way that using more electricity might increase. But thanks to developments in fan heater technology, more energy-efficient models with eco modes and thermostat controls have been created to help reduce energy use. Cost Comparison Fan heaters are typically less expensive upfront than oil heaters, which makes them the more logical option for consumers on a tight budget. The long-term operating costs, however, must be taken into account. Oil heaters are typically more energy-efficient because they use a heating element soaked in oil, which maintains heat well and permits less frequent cycling. As a result, this may lead to decreased energy use and cheaper heating costs over time. Improvements in fan heater technology have created more energy-efficient versions with features like eco modes and thermostat settings, which help partially offset their higher energy usage. Consequently, even though fan heaters could be less expensive initially, the overall cost-effectiveness of the two differ based on several variables, including usage habits, energy costs, and the particular model. Heating Performance And Comfort Known for its capacity to deliver even, delicate warmth, oil heaters are highly recommended for use in living rooms, bedrooms, and other spaces where keeping a comfortable temperature is crucial. Many people describe the warm, comforting, radiant heat that oil heaters create as ideal for resting and relaxing. Meanwhile, fan heaters are excellent at quickly heating a space, making them ideal for short bursts of heat in areas like bathrooms or home offices that need to be warmed up immediately. However, some people might feel that the dry heat of fan heaters is less comfortable, mainly if they use them for an extended period. Safety Considerations Because of how they are made, oil heaters are typically considered safer than fan heaters. The oil-filled fins encase the heating element, reducing the possibility of fire or burns from direct contact with the hot surface. Oil heaters usually have automatic shut-off systems and overheating prevention to prevent further mishaps. Unfortunately, burn risks are increased by fan heaters, mainly when they come in contact with skin or explosive objects. Fan heaters can also be dangerous due to their exposed heating element and moving parts, so they must be positioned steadily, away from potential threats. Read Also: What To Do When Your AC Unit Stops Working Impact On The Environment Due to its higher energy consumption and shorter lifespan, fan heaters typically have a more significant environmental impact. Carbon emissions are increased when electricity is used to run the fan and heating element, mainly when that electricity is produced from non-renewable resources. Nonetheless, the environmental impact of fan heaters can be reduced by selecting and operating them wisely. Oil heaters are often seen as being more environmentally friendly. They are quieter to operate and have less emissions since they use radiant heat instead of forced air. Fan Heaters vs Oil Heaters: In Summary It's critical to consider your unique heating requirements and preferences when choosing between oil and fan heaters. An oil heater can be a better option if you need constant, soft warmth in larger areas, including living rooms or bedrooms. Oil heaters are excellent at producing radiant heat that heats the surrounding space gradually, making it seem friendly and suitable for rest or sleep. However, a fan heater can be a better option if you're searching for a rapid and effective heating solution for smaller spaces or regions that need instant warmth, such as home offices or restrooms. Fan heaters are renowned for their speedy heating qualities, allowing them to relieve chilly air and raise the room's temperature instantly. Make The Right Choice There must always be a clear winner in the age-old comparison between oil and fan heaters. The ideal option ultimately relies on your preferences, budget, and particular heating demands. Each type of heater has a mix of benefits and drawbacks. Whichever kind of heater you use, you must always take safety precautions. By researching and using your heater sensibly, you may have a warm and comfortable house all winter while consuming the least energy and having the least damaging effect on the environment. Read Also: What You Should Know about Solar Energy for Schools Benefits The Benefits of Solar Lighting in a Nutshell Everything You Need to Know About Portable Solar Power

READ MOREDetails
Toilet Flush Button

Toilet Flush Button: Understanding The Nuts And Bolts

Though our bathrooms play a critical role in daily life, they're often forgotten until a problem arises. Of all its components, one that stands out is the toilet flush button's use - and understanding. This article looks closely at its workings, maintenance needs and replacement considerations. The Fundamentals Of The Toilet Flush Button What Exactly Is A Toilet Flush Button? A toilet flush button is the mechanism responsible for initiating the flushing process in your toilet system. Situated on the tank's exterior, we press or push this component when using our toilet to flush out its contents into the sewage system. By activating this flush button, we begin an action chain within our bathroom that sends water from its tank into our bowl to flush away its contents into sewer lines. How Does The Flush Button Work? The magic of the toilet flush button lies in its ability to control a more complicated mechanism. Pressing it lifts a lever connected to a chain inside the tank; that chain connects to a flapper (or flush valve seal), covering up drain holes at the bottom. When the flapper is raised, water stored in the tank begins rushing from its source into the bowl through its drain hole and siphon tube into the sewage system. As soon as this process completes, however, the flapper falls back down, sealing off its drain hole once more - and replenishing its supply in readiness for another flush cycle. Maintenance Of The Toilet Flush Button Regular Cleaning Regular cleaning of your toilet flush button is vital to its optimal operation, as dirt can clog the switch and make it less responsive, leading to inconvenient situations for users. A non-abrasive cleaner and soft cloth should be used for exterior cleaning; internal components should be checked regularly to avoid build-up and potential mechanical problems. Checking For Wear And Tear Given how often flush buttons are used, wear and tear are inevitable. Look for signs of damage, such as cracks or looseness. If the control becomes less responsive when pressed or sticks down without returning up when released, this may indicate internal components need to be reviewed for potential problems. Troubleshooting Common Problems Is The Button Hard To Press, Or Is It Sticking A toilet flush button that is difficult to press or sticks down often points to a problem with the connected lever or chain inside the tank. It could be that the chain is too tight or too slack, or the lever needs to be aligned or fixed. A careful inspection and adjustment of these components usually solve the issue. The Button Doesn't Activate The Flush If the button doesn't activate the flush, the issue could be that the switch is no longer effectively connected to the lever, or the flapper isn't lifting. A look inside the tank should reveal the issue. The button, lever, or flapper may need to be replaced. Replacing The Toilet Flush Button When Should You Replace The Button? As with any mechanical component, toilet flush buttons have a finite lifespan. Over time and through regular use, their controller may wear out or become damaged, requiring replacement. Signs to replace it include physical damage to its housing and sticky buttons or ones that no longer activate flushing actions. Looking for a portable toilet rental might also be necessary if you need to fix your toilet for a couple of days. Toilet Flush Buttons: More Than Meets The Eye Though seemingly simple, toilet flush buttons are critical in maintaining sanitation in homes and public spaces. Understanding their inner workings helps us better appreciate their importance, maintain them properly, and effectively troubleshoot any potential issues with them. So next time you press one, remember its critical function while giving it some love and consideration. Conclusion: Understanding how a toilet flush button works may initially seem complicated, but understanding its mechanics is crucial to efficient bathroom operations and sanitation practices. Knowing their inner workings could save us from future inconvenience or repair costs. Maintaining the toilet flush button regularly is vital to prolonging its lifespan and guaranteeing reliable performance within a plumbing system, thus streamlining home maintenance. By periodically inspecting it for signs of wear and tear, individuals can identify and address potential issues early on and prevent more significant ones from developing into larger problems later. By taking proactive measures like this one, individuals save both time and money on costly repairs and ensure an effortless toilet operation experience. Maintaining a flush button is an accessible DIY project for anyone, provided they possess basic knowledge and the appropriate tools. Even if it eventually succumbs to wear or damage despite regular maintenance efforts, replacing the button remains straightforward, making this an achievable DIY project for homeowners. Read Also : Mirror Decorating Ideas To Style Your Bathroom Using Feng Shui In Your Bathroom Design The Different Kinds Of Toilets

READ MOREDetails
Home Improvement Hacks

Budget Friendly Home Improvement Hacks To Save Your Pockets

Home improvement is a big deal now, with more people embracing their creativity and letting it show in the places they live. This has led to the rise of incredible trends and hacks that provide the perfect opportunity for people to work in their homes. However, with all this development, it also gets confusing and daunting for some people. This is mainly because they have no idea where to start or some of the hacks they can include in different areas. These hacks are meant to be easily doable tasks that will transform your space when implemented. We’ve categorized these hacks in terms of placement and application. Some of them include: Floors In the home, floors play a big role in how the home looks and the general style you’ll be working with. A few tweaks here and there can completely change the look of your floors and add style and character. Some of the most versatile hacks to include for your flooring include: Peel And Stick Tiles When it comes to finding the perfect flooring for that annoying red floor or just need a new look, peel and stick tiles will do the trick. These tiles are amazing given that you can easily install them yourself. They are designed to give off the illusion of regular tiles without having to deal with grout, glue, and other tedious processes. You can get them in different colors, styles, and patterns making them the perfect option. Replacing Your Tile Grout When dealing with tiles for your flooring, you may find that the grout may get stained and turn to a different color which becomes hard to clean. However, you have the option of replacing the grout with a new one in the same color or a different one. Adding A New Finish This is especially a great idea if you are dealing with wooden flooring. With this, it is easier to add a new finish when needed to give the floors a new and vibrant look. Lighting One of the most understated hacks is the ability to switch out your light fixtures and improve the overall look significantly. Most people don’t know what role lighting plays in your space. You need to improve your lighting situation, which will give your space more life. To make it more appealing, consider getting light fixtures that feature some detail and a unique design. Additionally, you could also include under-cabinet lighting for your kitchen featuring the use of custom led lights. You also have the option of choosing to go with statement chandeliers, floor lamps, wall lights, and pendant lights among others. When it comes to lighting, you are spoilt for choice and can easily improve your space. Walls Adding some style to your walls is another great way to improve the overall look of your home. For this, you have a few options to choose from that are easy to work with and get quality results. They include: Adding a Fresh Coat of Paint Paint is a great easy way to get a different look when working on your walls. With this, you have the option of working with a variety of colors depending on the vibe you are going for. Additionally, you could paint one wall a different color and have that as your accent wall. This will improve the look of your room significantly. Adding A Wallpaper Wallpapers provide a layout, especially if you don’t want to do a paint job on your walls. They come in different types, patterns, and designs to ensure that they cater to everyone’s needs. With this, you can choose to cover all your walls or use them on one wall that will serve as your accent wall. Hanging Art Art is another great way to bring your taste and style into your home. For this, you can create your art piece or purchase one made by another artist. Entryway When it comes to your entryway, the first thing you need to consider is your storage options. Once you get into the house, where do your shoes, bag, coat, and keys go? Having a station where all these items can be kept will keep the home tidy and add a great design aspect to your space. Additionally, you can also add other decor items to make your entryway arrangement more visually appealing. Patio When it comes to dealing with the outdoors, one of the most effective ways to change it is by adding a seating area. Be creative with this and go for something that portrays who you are. Don’t be too rigid and only stick to what’s normal. Find what works for you and add it to your space. Play around with colors and create a cozy space to relax with family and friends. Greenery Adding some green aspects to your home is an amazing way to improve the look and add some character. The best part about adding greenery to your space is that it will help improve air circulation. When working with greenery, you need to take the time to water them to ensure they are healthy at all times. You could also opt for fake plants, given that they will add the same look and style. Adding Budget-Friendly Feng-Shi To Home-Decor Are you looking to bring more balance and good vibes into your home without breaking the bank? Feng Shui is all about creating harmony in your living space, and you don’t need to spend a fortune to make it happen. With just a few budget-friendly changes, you can invite positive energy, or "Chi," into your home and make it a calming, welcoming space. Clear The Clutter The first and easiest Feng Shui tip: declutter! It’s amazing how much difference a tidy room can make. When you get rid of the excess, you’re not only creating physical space, but you're also allowing the energy to flow freely. Take a walk around your home and ask yourself: Do I really need this? Less clutter equals more clarity and positive energy. Maximize Natural Light Good lighting is key to great Feng Shui. Natural light boosts the energy in any room, so open up those curtains and let the sunlight pour in. If you’re working in a space that doesn’t get much natural light, don’t worry. You can place mirrors strategically to reflect and amplify what little sunlight you have. Mirrors are like energy boosters! Bring in Some Green Plants are a staple in Feng Shui. They not only clean the air but also represent life, growth, and vitality. Even a small potted plant can make a huge difference. If you’re not exactly a plant person (hello, brown thumbs!), opt for easy-to-care-for plants like succulents or snake plants. And don’t worry; artificial plants can also work if they look realistic. Use Soft, Calming Colors You don’t need to repaint your entire house to improve the flow of energy. Start by adding calming colors like soft greens, blues, or neutrals in small touches, think cushions, throws, or wall art. These tones promote peace and relaxation, which is exactly what you want in a balanced space. Arrange Furniture With Intention Did you know that where you place your furniture can affect the energy in a room? Try to arrange your furniture so that you can see the door from where you’re sitting or sleeping. It promotes a feeling of safety and control. Plus, don’t block pathways with furniture, as it interrupts the flow of energy. Ready to try it out? Let Feng Shui transform your space! Improve Your Living Space! Investing in your home and interior design is essential to ensure that you are content with your living space. This is something you can do by implementing a few hacks here and there. Take your time to go through them and add them to your space one at a time. Transformation is a gradual process which means you’ll need to keep at it until you get to your desired outcome. Read Also: How To Increase The Value Of Your Home Important Things to Know Before Starting a Home Improvement Project Home Sweet Home Improvement: How to Find the Best Home Improvement Loans

READ MOREDetails