Why Metal Studs are More Suitable for Your Construction Works

Published on: 17 August 2019 Last Updated on: 24 February 2020
Metal Studs

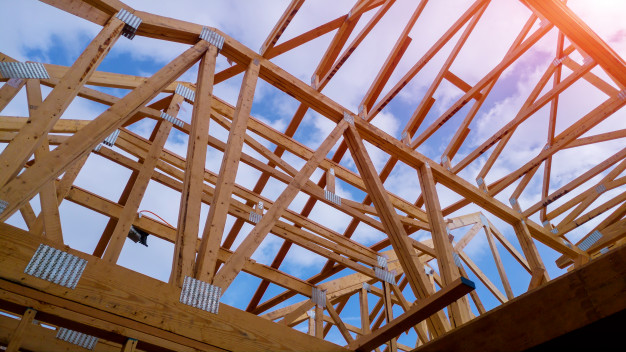
When it comes to building structures, it is preferable to consider using metal studs in place of wooden studs for non-load bearing walls. Research shows that more than 50% of structures are built with metal studs made from cold-formed sheets.

However, metal studs conduct cold, but builders prefer using metal studs in place of woods for the following reasons.

1. Metal studs are lighter than wooden studs and convenient to work:

wooden studs

Metal studs are lighter in weight than wooden studs because of their hollow shape. This makes them less bulky than wooden studs in terms of transportation and storage.

When cutting metal studs using aviation snips, there are no sawdusts, unlike cutting through wooden studs. But it is advisable to protect your hands from sharp ends using gloves, especially during galvanized steel frame building construction.

2. Metal studs are easier to handle:

In terms of installation, metal studs weigh far less than wooden studs and are held in place with screws. Therefore, it easy to correct installation blunders with metal studs.

3. Metal studs are less prone to attacks from atmospheric elements:

Metal studs are not inclined to stresses and uneven shrinkage. Unlike wooden studs, which are susceptible to such factors with time. Also, metal studs are more resistant to mold and rot, which are common wooden infections. Although metal studs rust with time, this is preventable by installing a vapor barrier on the concrete floor. This explains the durability and sturdiness commonly enjoyed with galvanized steel frame building.

4. Metal studs have a higher tensile strength than wooden studs:

Metal studs have a higher tensile strength and flexibility than wooden studs. Therefore, they are preferred for construction in wind prone areas and seismic zones like the Gulf Coast states of the USA.

5. Metal studs are resistant to fire and insect attacks:

Metal studs are not prone to insect attacks like carpenter ants and termites, which can cause grave damages to wooden studs. Also, in terms of fire outbreaks, metal studs are fire resistant and do not burn in the case of a fire outbreak, unlike wooden studs.

6. Metal studs have a higher cost advantage:

Wooden studs cost 15% lesser than metal studs, but metal studs offer cost advantages in other areas. These advantages cut across warranty call-backs in the sales of metal studs are much reduced because metal studs are not susceptible to shrinkage, and additional stress-related factors.

Buildings built with metal studs do not have cracks or nail pops to fix after completion. Therefore, scraps are significantly reduced. Up to 20% wastage is recorded when wooden studs are used in construction. Hence the cost of disposing of discarded materials is decreased considerably.

7. Higher insurance discounts:

Owners of buildings built with metal studs enjoy a higher insurance discount due to lower risk factors. Unlike buildings built with wooden studs, which attracts a higher insurance premium because of their higher susceptibility to fire and other environmental factors.

Conclusion:

Metal studs are preferable for buildings because they are environmentally friendly compared with wooden studs. They can be recycled and are readily available in similar wooden dimensions.

Read Also:

Content Rally wrapped around an online publication where you can publish your own intellectuals. It is a publishing platform designed to make great stories by content creators. This is your era, your place to be online. So come forward share your views, thoughts and ideas via Content Rally.

View all posts

Leave a Reply

Your email address will not be published. Required fields are marked *

Related

Mounted Glass

Create Wall Mounted Glass Shelves with Custom Cut Glass

Mounted Glass shelves are very handy in improving the interior décor of your space in a classical manner. Glass shelves have been in use for many years now and technological advancement has led to the generation of advanced glass version with more desirable features and greater strength. This implies that glass materials today can support more weight and withstand higher pressure than earlier pure glass versions. One important feature of glass shelves is that they can fit the walls of rooms and there are many designs from which one can pick from. The main consideration when choosing the best wall mount glass shelf design is the purpose of the shelf as well as where and how the shelf will be mounted to the wall. This paper discusses the various designs of wall mount glass shelves that can be created using different custom cut glasses. The shape of Glass Shelves The glass shelves can be made with glass cut in different shapes. Rectangular and square glass shelves are the most common. Rectangular glass shelves can be installed in various places like the bathroom, in the living room, kitchen, office, and in the bedroom as well. Square shelves are mostly installed at the corners of rooms to provide sufficient anchoring for shelve. There are also specific shapes of glass shelves designed specifically for installation at corners. They include triangle, corner pentagon, and quarter circle glass shelves. It is important to consider the purpose of the shelf when choosing the glass material for the shelf to ensure the material chosen can support the required load without breaking. Glass shelves can also be L-shaped and these are fit into or onto corners of rooms. There are many types of glasses to choose from for wall mounted glass shelves. Tempered glass is the commonly used type of custom cut glass for glass shelves. This type of glass is hardened to increase durability and resistance to high temperature and pressure. Tempered glass also breaks into blunt square pieces that are less likely to injure people as opposed to angled sharp pieces obtained when ordinary glass breaks. The other suitable glass type for wall-mounted glass shelves is the acrylic glass. Acrylic glass consists of a very transparent material that allows the glass to allow more light to pass through it than normal glass. The downside of acrylic glass is that it scratches easily but the scratches can be removed by buffing. Other types of custom cut glasses suitable for glass shelves are low-iron glass, textured or frosted glass, as well as colored glass. Various Types of Mounted Glass Shelves Uses         There are also various wall-mounted glass shelf designs dependent on the shape of the horizontal cross-section of the glass. Some glass shelves are bent like the eclipse and triumph shelves. Eclipse glass shelves are slightly curved forming an arc while the triumph glass shelves have a bookend on one end, and are designed for keeping books and magazines. Another glass shelf type is the Fiora glass shelf which has a straight surface like the rectangular glass shelf. Fiora glass shelves are available in clear and colored glass materials. The other type of glass shelves is the Roya glass shelf which is simply rectangular in shape. Bent glass shelves are very decorative and are mostly used in the bathroom for keeping light-weight objects. Installation or Mounting to the Wall      The glass shelves can either be mounted directly into the wall of the building or attached using brackets. Glass shelves with straight edges are the most suited for direct fixation into the wall of the building. When fixing glass shelves directly to the wall, a groove is first to cut into the wall using a chisel and hammer if the wall is masonry. The glass shelf is then fixed into the groove and a suitable adhesive applied to stick the glass to the wall. The other types of glass shelves are attached to the wall using brackets. The brackets are made of a strong durable material like stainless steel. Brackets are screwed or riveted to the wall and the glass shelves fixed to the brackets. Other types of glass shelves can be mounted to a frame which is then fixed to the wall. This type of glass shelves is manufactured as a set that is first connected together then fixed to the wall. Mounted Glass shelves can also be hanging at the top. This type of glass shelves is referred to as the hanging glass shelves. The shelves are fixed to a frame that is suspended from the top of the building. Hanging glass shelves are manufactured as a set in the factory and are suitable for rooms where the wall is not strong enough for mounting the glass shelves directly to it. Also, when the walls are filled with other things, using the hanging glass shelves provides extra space for storing stuff. Choose the Right Glass Thickness As stated in the introduction, the intended purpose of the glass shelf and where it will be installed determines the type of glass material that will be used. The material chosen should be strong enough to support the anticipated load. The thickness of the glass also determines its ability to support a given weight with thicker glass shelves being able to support higher loads than thinner glass shelves. It is also crucial to consider the material that makes up the wall on which the shelf will be mounted as it has a direct relationship to the weight that the shelf can support. Brackets should be attached to hard materials like concrete, or masonry walls to ensure maximum strength. Mounted Glass shelves have many designs from which people can choose from. In addition to providing more storage space, glass shelves including bent glass shelves, add aesthetic value to a room making it possible to display one’s collections with ease. The shelves allow light to pass through them helping to maintain the room well-lit which helps to brighten the mood of the place. One can also consider finishing the corners of the shelves in different shapes to make them more stylish and appealing. When installed properly, glass shelves match perfectly with any interior design theme. Read Also: 7 Unexpected Ways to Use Glass and Wood for your Home 10 Fabulous Ways to Update Your Home Interior Using Wallpaper

READ MOREDetails
ducted

Ducted Cooling Systems For Superior Control

The choice between ducted or split air conditioning systems can be narrowed down by considering the specific requirements.  If you intend to spend more of your time indoors, it would be a good option to go in for ducted air conditioning systems.  Some of the advantages include better energy efficiency, improved cooling and smart interfaces for better optimization and control.   Another advantage of using ducted air conditioning is the ability to do away with multiple systems and installation. Installation at the time of construction : Ducted air conditioning systems need to be typically installed at the time of construction. While it is actually possible to also install the systems after the construction, it would require a certain level of modification and changes to the decor. By relying on the services of a professional service provider, it would be easy to ensure that the whole process comments and concluded without any hassles, in the most cost-effective manner. Active liaison with architects and contractors : The featured site offers specialist air conditioning services for the installation of ducted systems. This is achieved by liaison with architects and contractors who are involved in the construction of the premises. By discussing and working in tandem with architects and contractors,  the service is able to install the ducted systems in a manner that improves the aesthetics of the building while offering maximum cooling efficiency.  Installation of ducted systems during the construction itself will keep the cost of installation low while offering homeowners the option of choosing the best decor for their homes. Combine with smart solutions : One of the highlights of this ducted system is the ability to combine it with smart solutions.  This means that individual rooms can be optimized with customizing settings as far as cooling efficiency or requirements are concerned.  For instance, if a particular room has a number of people at a given time, it is possible for the user to readjust the settings remotely thereby increasing the cooling efficiency within the particular room.  Similarly, if a common area is typically used for a specific time, it is possible to set timers for that particular room.  This will ensure that power consumption will be reduced, without affecting the need for cooling. Reduction in noise levels : With the ducted system, homeowners need not have to put up with heavy noise levels.  And these systems typically require the installation of a single unit.  This is a huge advantage when compared to split systems which will require multiple units and separate controlling mechanisms for each individual unit.  Split systems are suitable for homes where the requirement is only for a limited number of rooms.  If there is a need for cooling for very large premises, it would be a better option to choose ducted systems.  Retrofitting involves additional costs : However, homeowners need to consider the fact that retrofitting of ducted systems may involve additional costs of redoing the interiors after the retrofitting installation is completed.  It is always a better option to use ducted systems at the time of construction itself.  If you find the need to retrofit an existing premise, it would be a good idea to use the services of an expert to analyze and give you the best options in terms of cost-effectiveness and cooling efficiency. Read Also: What To Look For With Stroke Treatment In Dallas Online Ordering Systems Setting the Trend for Restaurants

READ MOREDetails
Flooring Installation Process

Flooring Installation Process Transforming Your Space With Elegance

When it comes to renovating or building a new space, one of the most crucial aspects is the flooring installation process. The type of flooring you choose can significantly impact the overall aesthetics, functionality, and durability of your space. In this comprehensive guide, we will walk you through the intricate process of flooring installation toronto, providing valuable insights and tips to ensure a successful transformation. Selecting The Right Flooring Material The first step in the flooring installation process is choosing the right material. Whether you opt for hardwood, laminate, vinyl, tile, or carpet, each material has its unique features and benefits. Consider factors such as your budget, the room's purpose, and your design preferences when making this decision. Measuring And Preparing The Space Before the installation begins, accurate measurements of the room are crucial. This step ensures that you purchase the right amount of flooring material. Additionally, you'll need to prepare the space by removing any existing flooring, baseboards, and furniture. A clean, level surface is essential for a smooth installation. Acclimating The Flooring Many flooring materials, especially hardwood, need to acclimate to the room's temperature and humidity levels before installation. This process prevents the flooring from warping or expanding after installation. Follow the manufacturer's recommendations for acclimation time. The Installation Process Subfloor Preparation A stable subfloor is the foundation of a successful flooring installation. Ensure that the subfloor is clean, dry, and free of any irregularities. Repair any damaged areas and add an underlayment if necessary. Layout And Design Planning the layout of your flooring is crucial for achieving a polished look. Decide whether you want a diagonal, herringbone, or straight pattern, depending on your design preferences. This step is especially important for tile and hardwood installations. Cutting And Fitting Precise cutting and fitting of the flooring material are essential for a seamless finish. Use the appropriate tools, such as a saw or cutter, to trim the material to fit the room's dimensions accurately. Pay special attention to corners and edges. Installation Method The installation method varies depending on the type of flooring you've chosen. For example, hardwood may be nailed or glued down, while laminate often features a click-and-lock system. Follow the manufacturer's guidelines and use the appropriate adhesives or fasteners. Finishing Touches After the main installation is complete, it's time for the finishing touches. Install baseboards and transitions to create a polished look. Seal gaps and joints to prevent moisture and dirt from seeping underneath the flooring. Maintenance And Care Cleaning And Maintenance Proper maintenance is crucial to ensure the longevity of your new flooring. Regularly sweep or vacuum to remove dirt and debris. Use manufacturer-recommended cleaning products to maintain the flooring's finish. Repairing Damage Accidents happen, and flooring can get damaged over time. Whether it's a scratch on hardwood or a chipped tile, knowing how to repair minor issues can extend the life of your flooring. Consult with professionals for major repairs. The flooring installation process is a transformative journey that adds beauty and functionality to your space. By carefully selecting the right material, preparing the space, and following the installation steps, you can achieve stunning results that will stand the test of time. Read Also: How To Pick The Perfect Flooring For Your New Home How to Protect Your Wood Flooring in a Busy Household List of Most Durable Kitchen Flooring

READ MOREDetails