How to Decorate a Room with no Cost

Published on: 07 March 2019 Last Updated on: 03 September 2024
Decorate a Room

It is hardly found a person who does not like to stay in a bedroom. Most of the people in the world like to spend at least one-third of their life in the bedroom. So, it is highly important to decor your bedroom according to your desire. Redecorating your bedroom creates a relaxing environment and helps you to provide a better night’s rest. For making a stylish bedroom, you don’t have to spend a lot of money.  There are several ways to decorate a room. Now you can take a look at our ideas. Pick the favorable ideas for you.

Different Ways You Can Apply To Decorate A Room 

There are multiple ways you can apply to decorate your room in the best possible ways.

1: Take the dimension of your room and furniture:

room and furniture

To do this, you can use a measuring tape to measure the room dimensions. You can use graph paper to sort out and write your taken measurement.

This measurement may include:

  • Floor plan, size of doors, windows, etc.
  • You can take the measurement of the furniture. Written your taken measurement on the graph paper. At that time, determine which furniture should go at which area of the room.
  • Before rearranging, sort out which furniture is not required anymore. After planning that, you can get some free space. Now it is time to decide which new furniture is required for filling your available space. ( Consider suitable free space for walking, playing with children. etc)

2: Tools requirement:

You need some important hand tools to run the work. For working at the room, list the available tools you have or you have not. Purchase the unavailable tools from the market. It is not a waste of money. These tools are your permanent asset.

3: Cleaning the room:

Cleaning the room

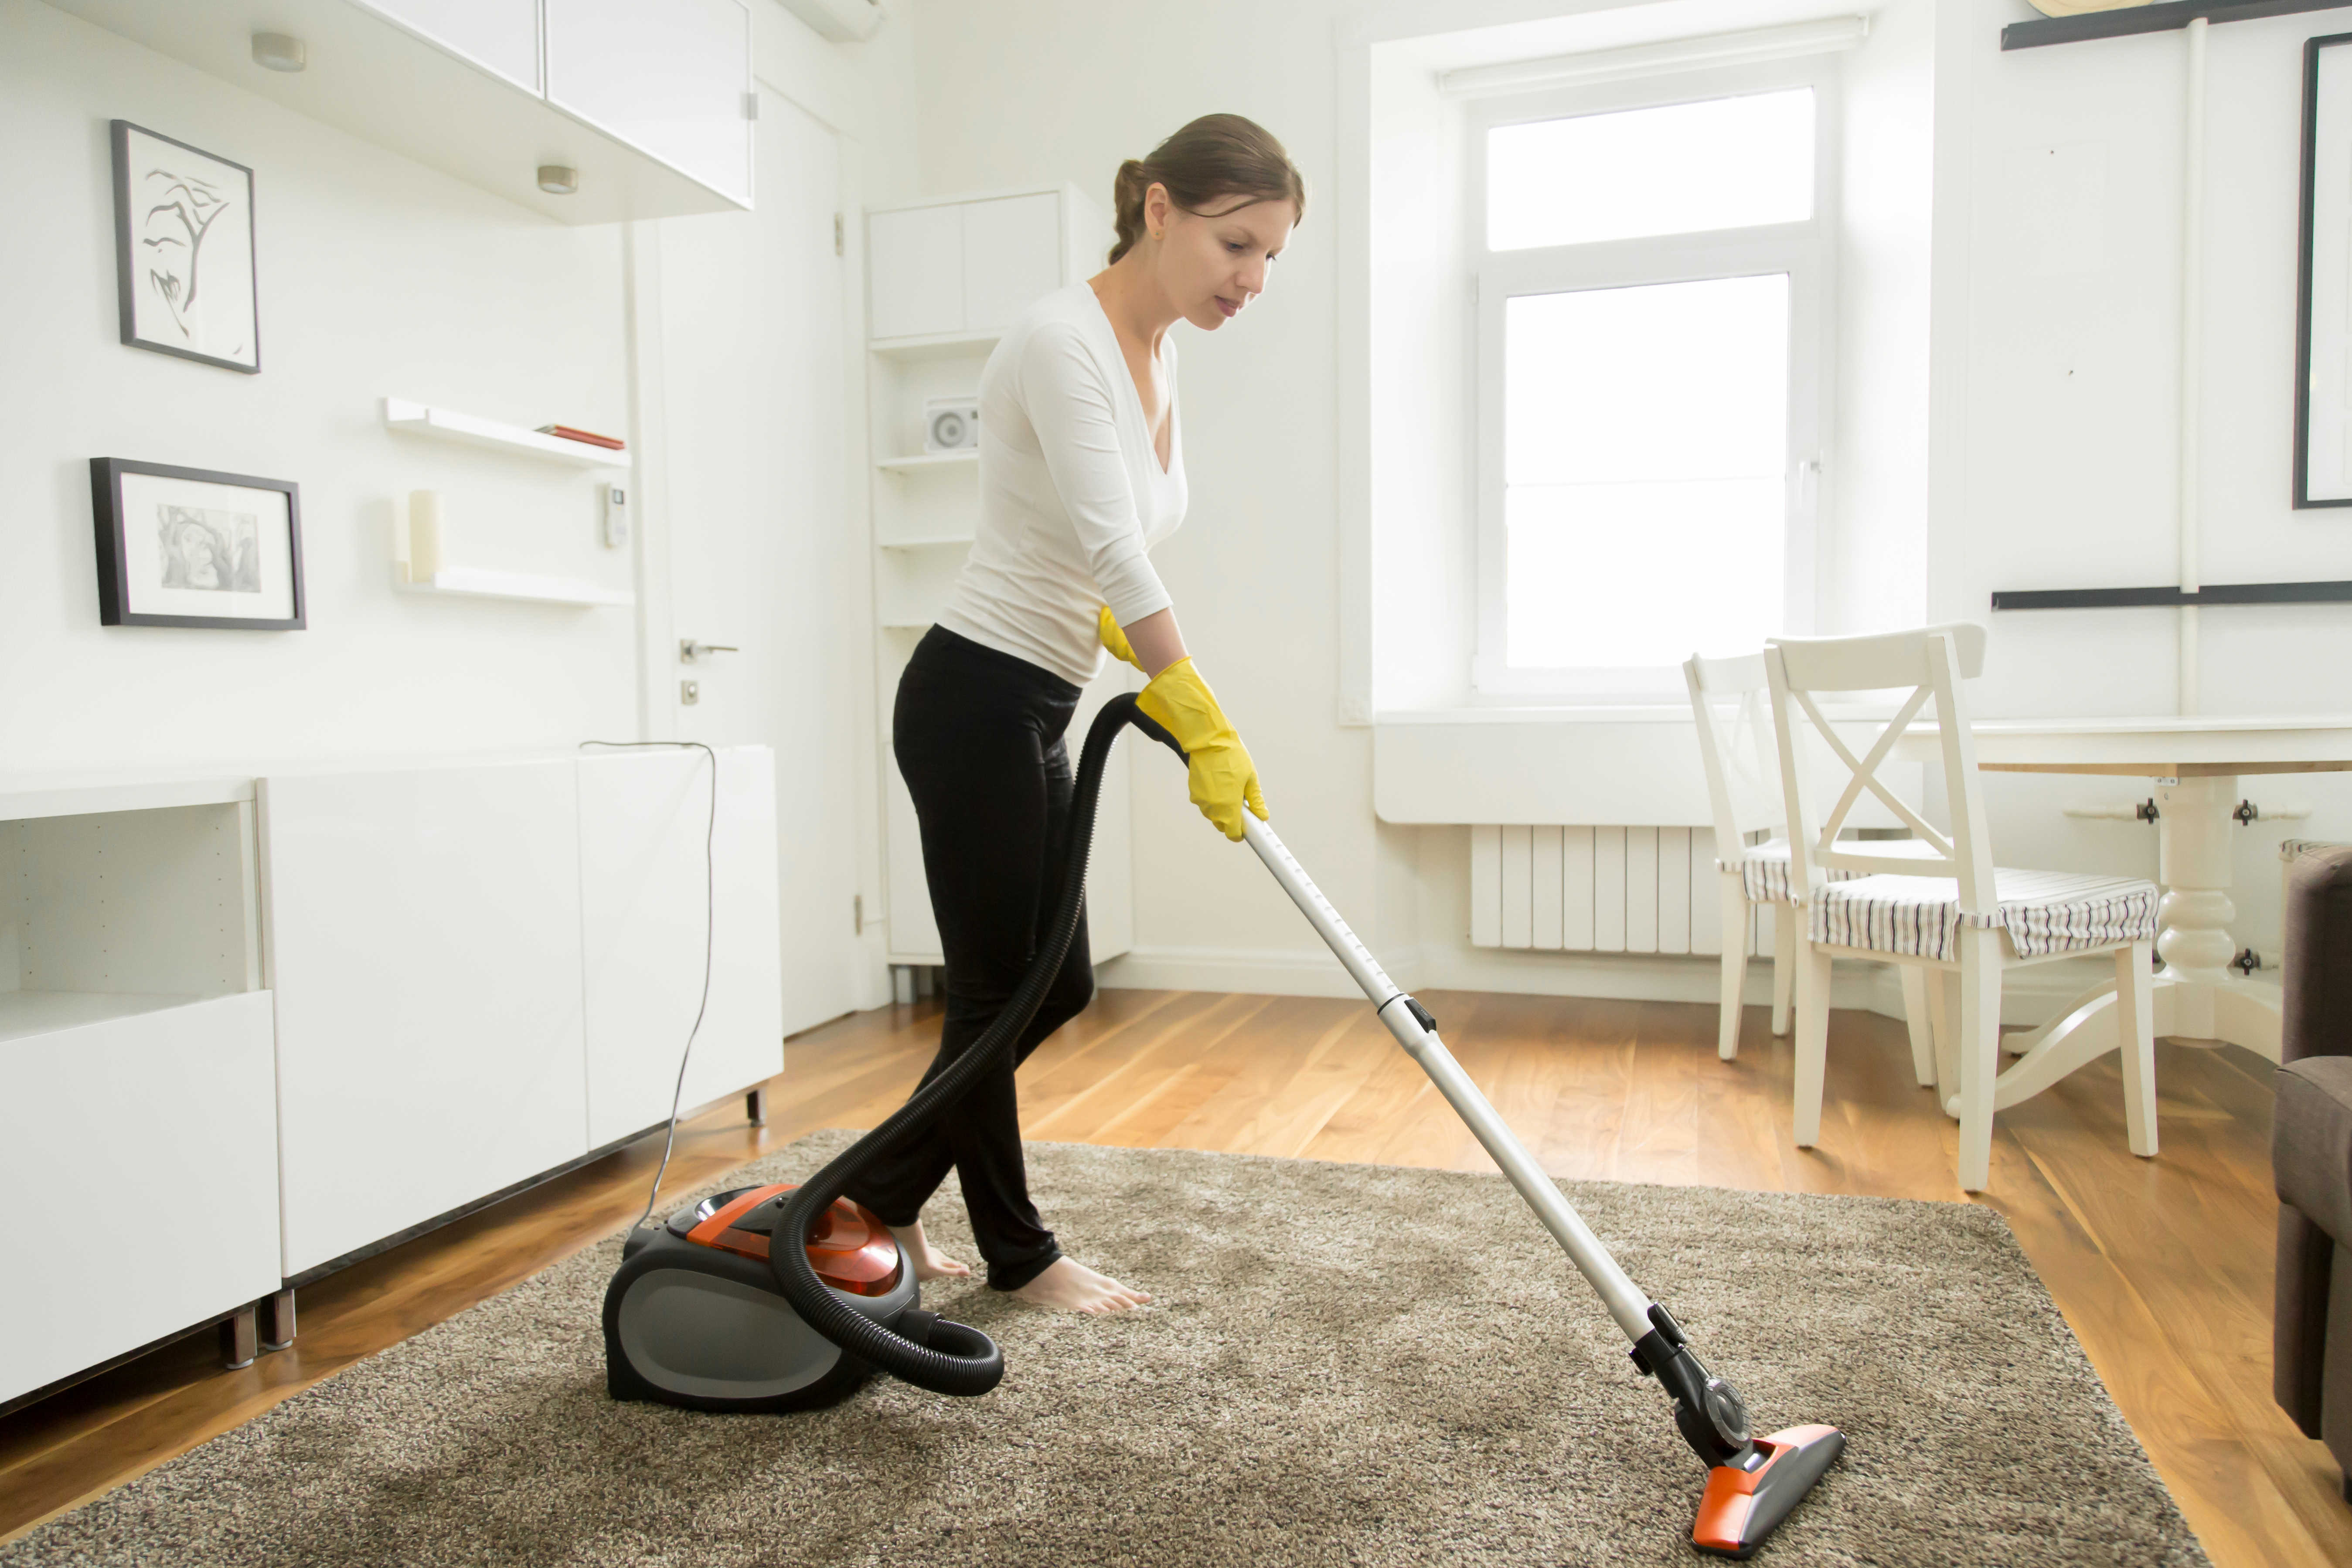
Unnecessary items can be donated. If you find something that is not usable anymore, throw it out. You may clean out all the areas in your room as well as under your bed. If you get some newspapers, books, those are not required anymore; you can sell off these items. The important newspapers, books should be arranged on bookshelves.

4: Color the walls:

Color the walls

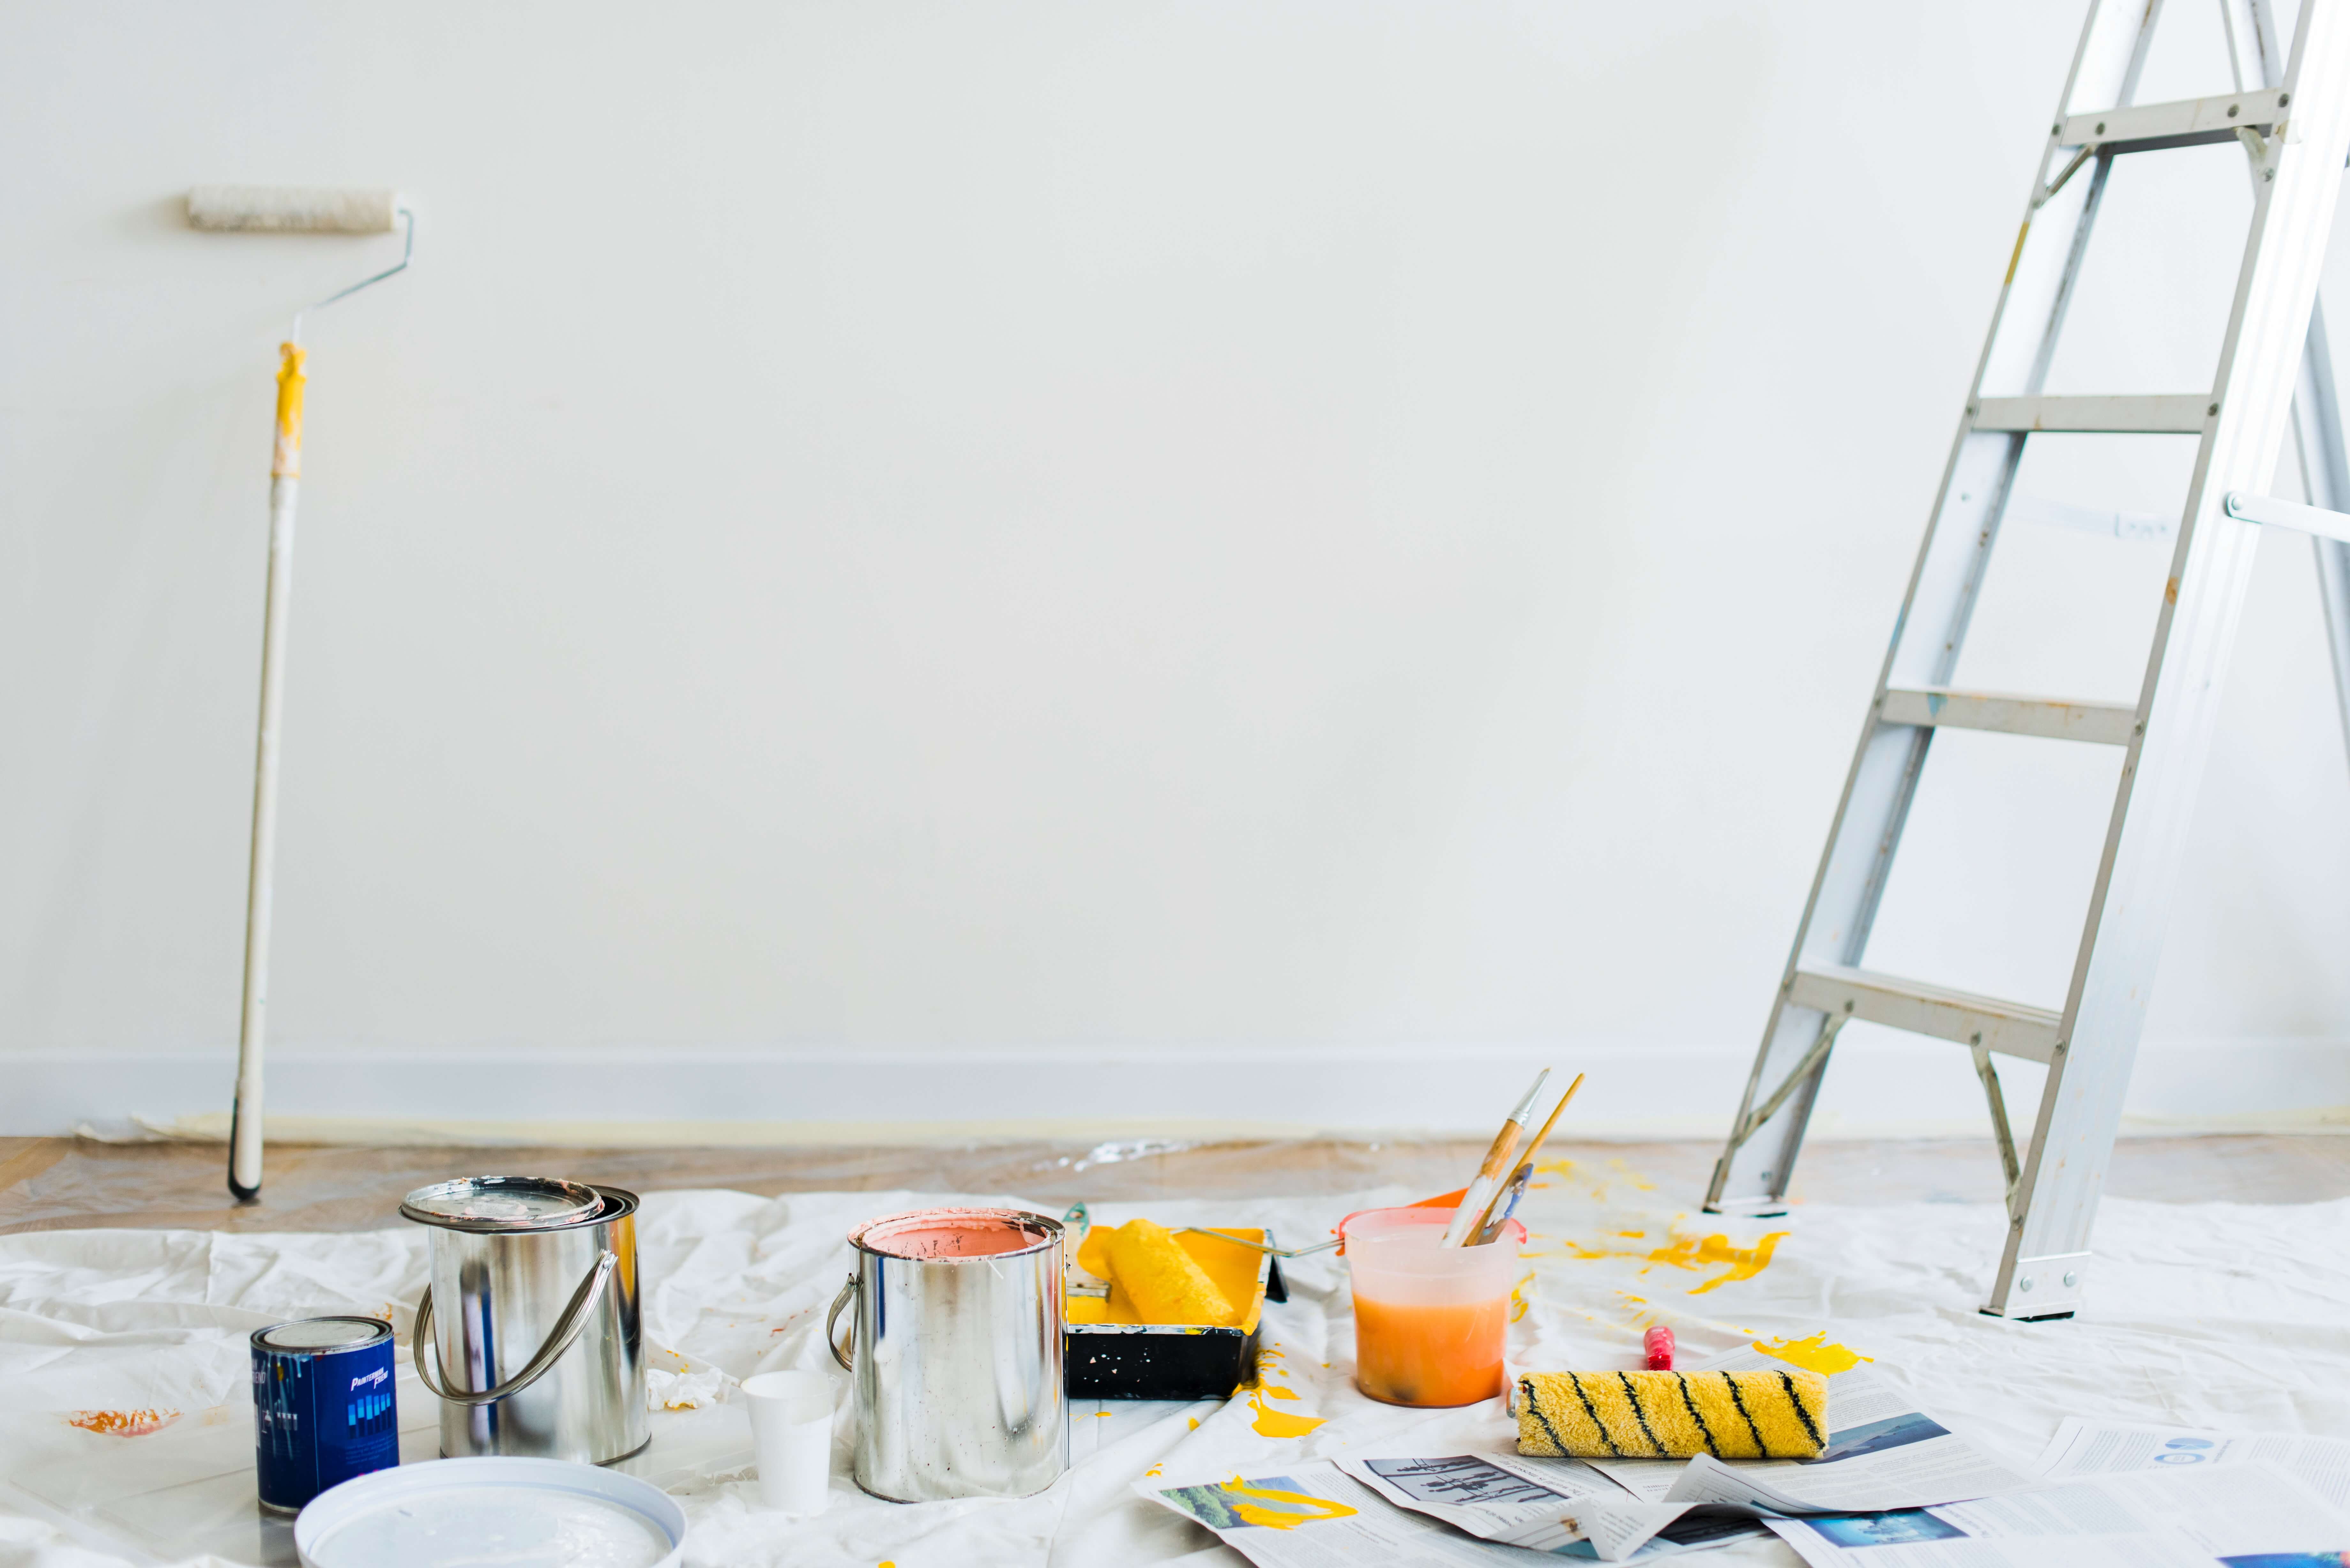
You can use different types of color for your room. You can use a single color for all walls or the different color for a different wall. Normally, white color or similar to white color reflects the light. Black color or similar to black color reduce the reflection of light. An important thing that does not give chance to feed the color of your bedroom. Repainting your wall before getting it fed. Red, black, navy blue color should be avoided. At the time of coloring the room, match the walls color with your furniture, curtains, and carpets.

5: Color the furniture:

Now, you need to recolor your furniture. You can use different types of color for your furniture. You can use a single color for all furniture or a different color for different furniture. Normally, you should use wood color, white color, black color or any other shining color. At the time of coloring the furniture, you should try to match the furniture color with your walls, curtains, carpets.

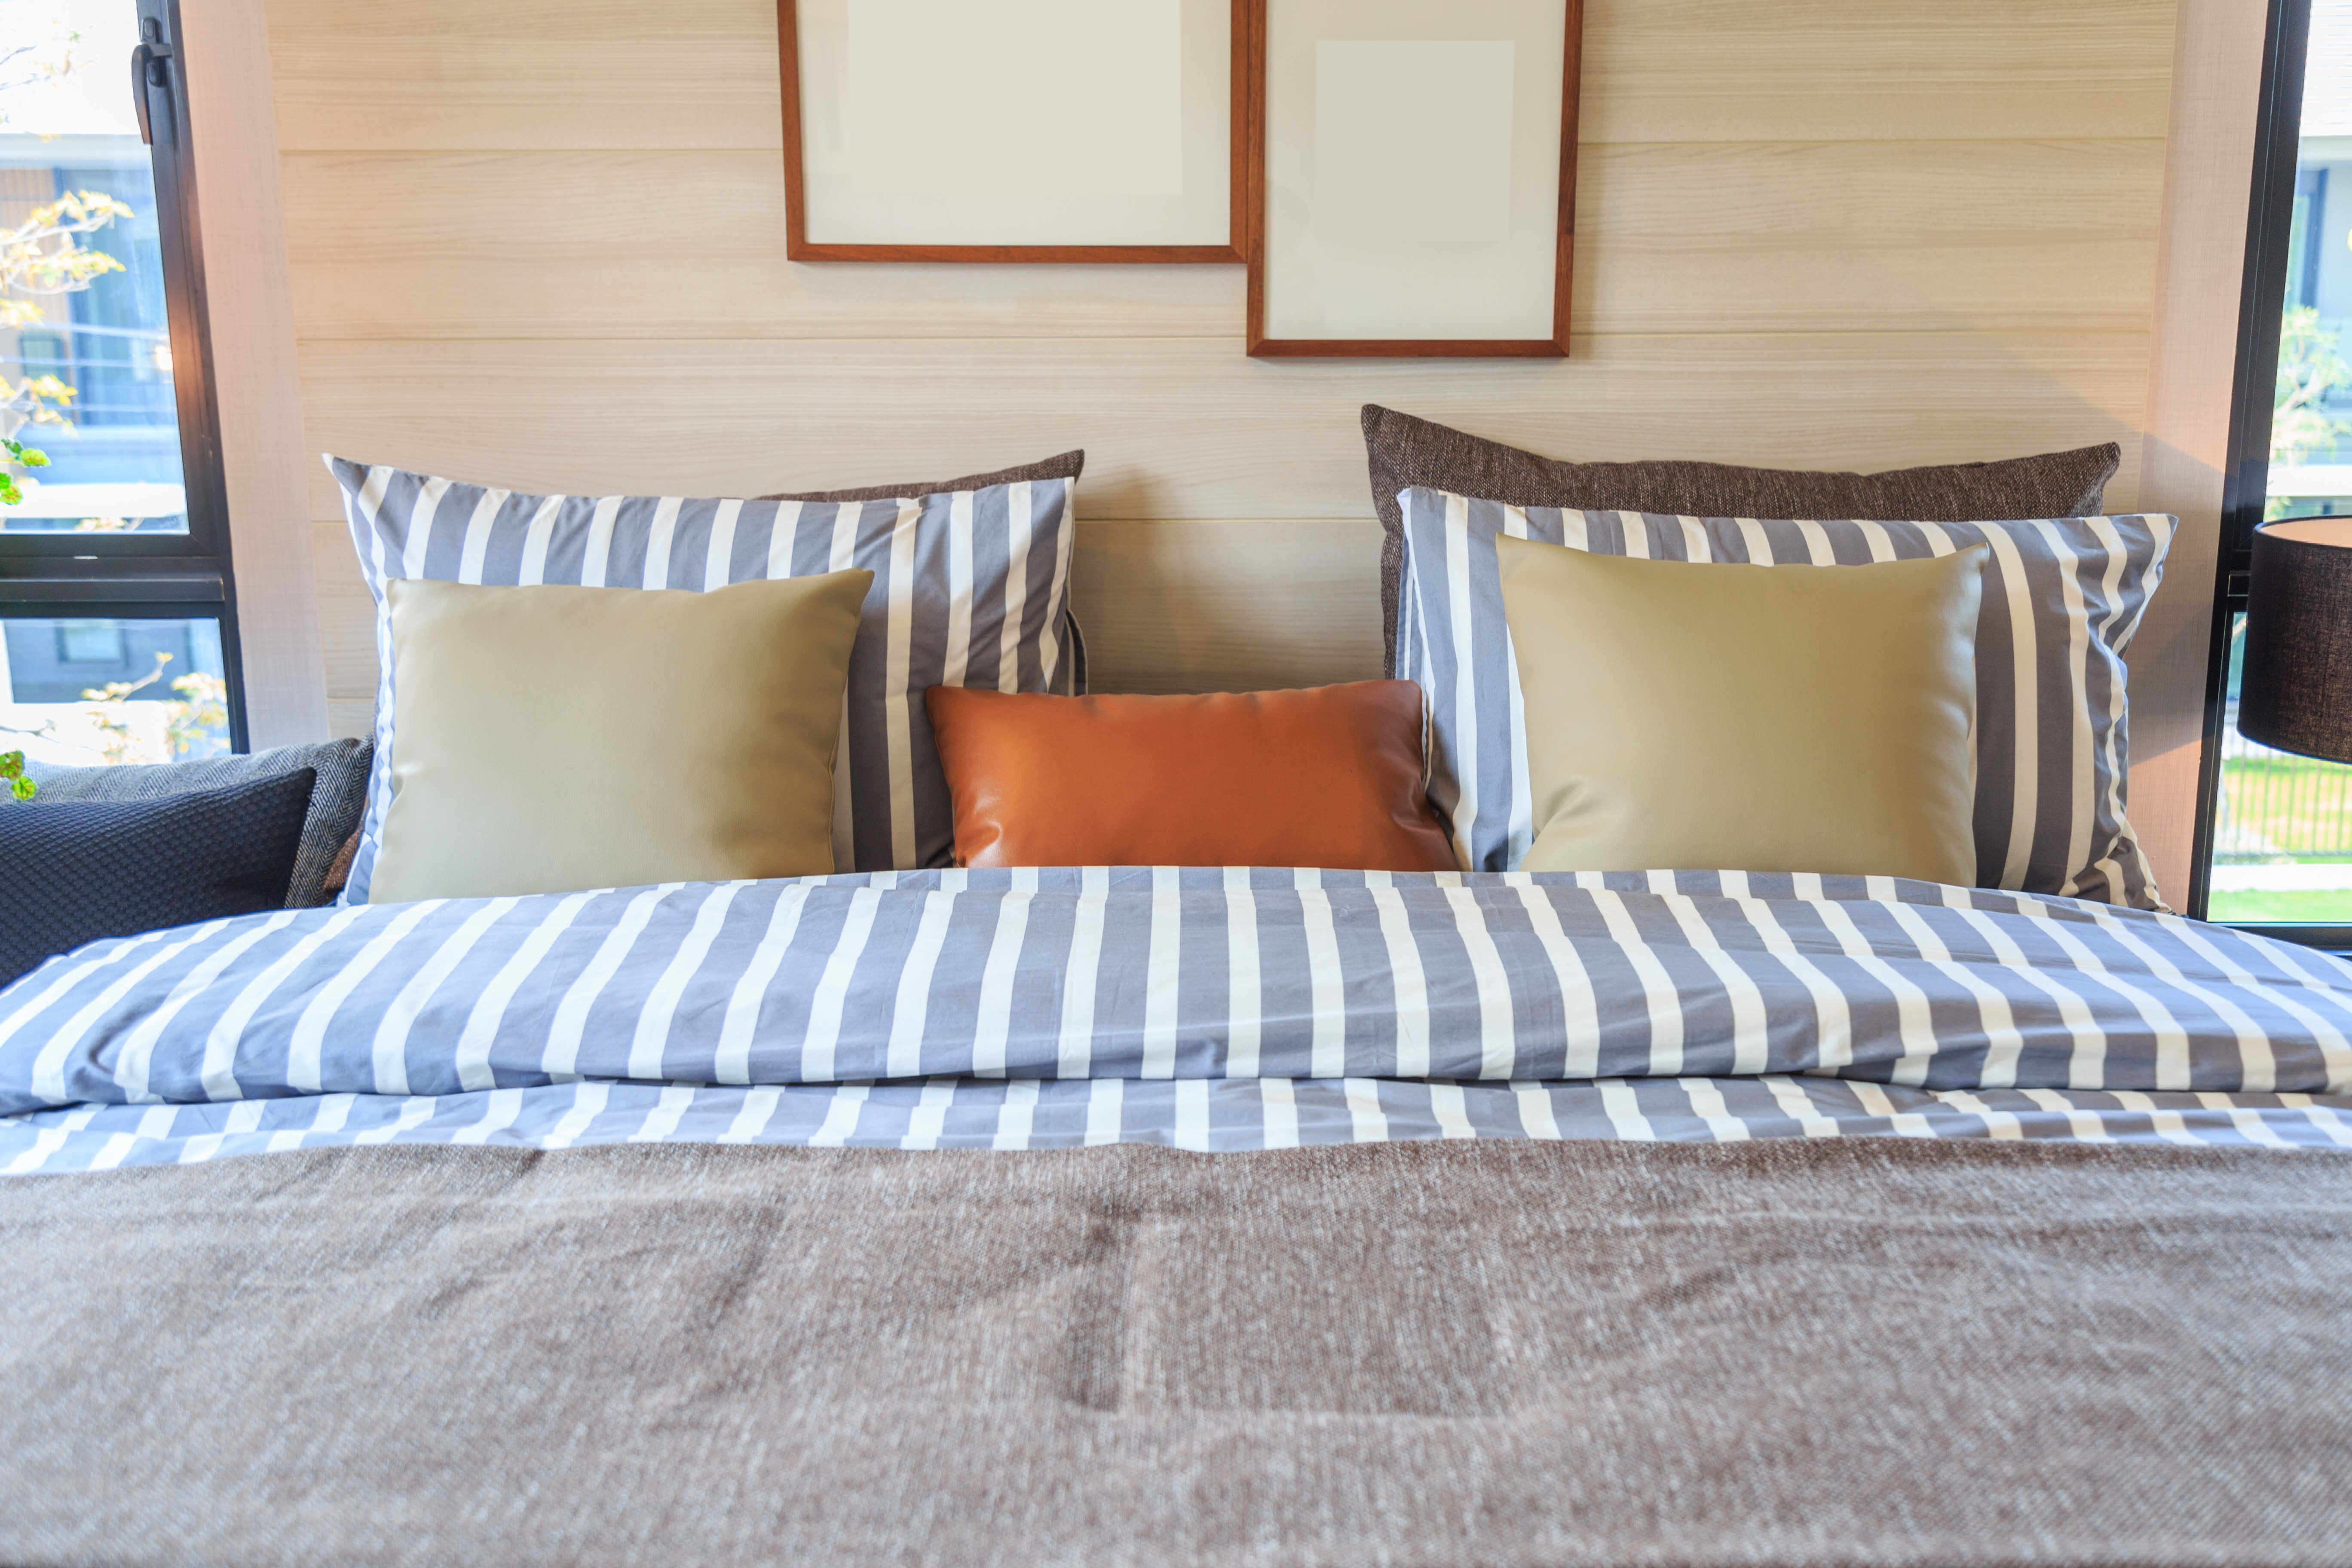
6: Place the bed with related furniture:

Now, you should place your bed based on your preference. Some people prefer to place the bed against the wall. Some people prefer to place the bed on the side of the window. Some people prefer to place the bed in the middle of the room. So, you should decide for yourself. If there are free spaces available on both side of the bed, you may place a chair and a small table on one side. This table is set for reading books. On the next side, you can place a storage drawer with a table lamp and flower. You may also plan for utilizing the free space available under the bed. For storing things under the bed you may add a bed skirt. You can buy a bed with all related amenities at https://www.pillowbedding.com/

For placement of bed in the room, you should follow other guidelines also:

  • The bed should not be placed in an area where sunlight shines directly.
  • Avoid placing mirror against your bed.

7:  wood headboard:

wood headboard

You can easily buy wood from the market.  Even you can get as a gift from neighbors or relatives. And simply you can make a headboard on the back wall of your bed.

8: Added extra shelves:

For Maximizing each and every corner and area of your room, you may add extra shelves. That not cost you much. You can purchase plastic storage bins. You can attach hooks on the back of the door. If you added wooden storage bins, attach hooks on the side of the wooden shelves. You can utilize vertical free space for installing shelves. You may label the bin for a specific item. So, for storing Each and every item, you will get a specific place. This will provide you a organize structure of the room.

9: Stylish bookshelves:

Stylish bookshelves

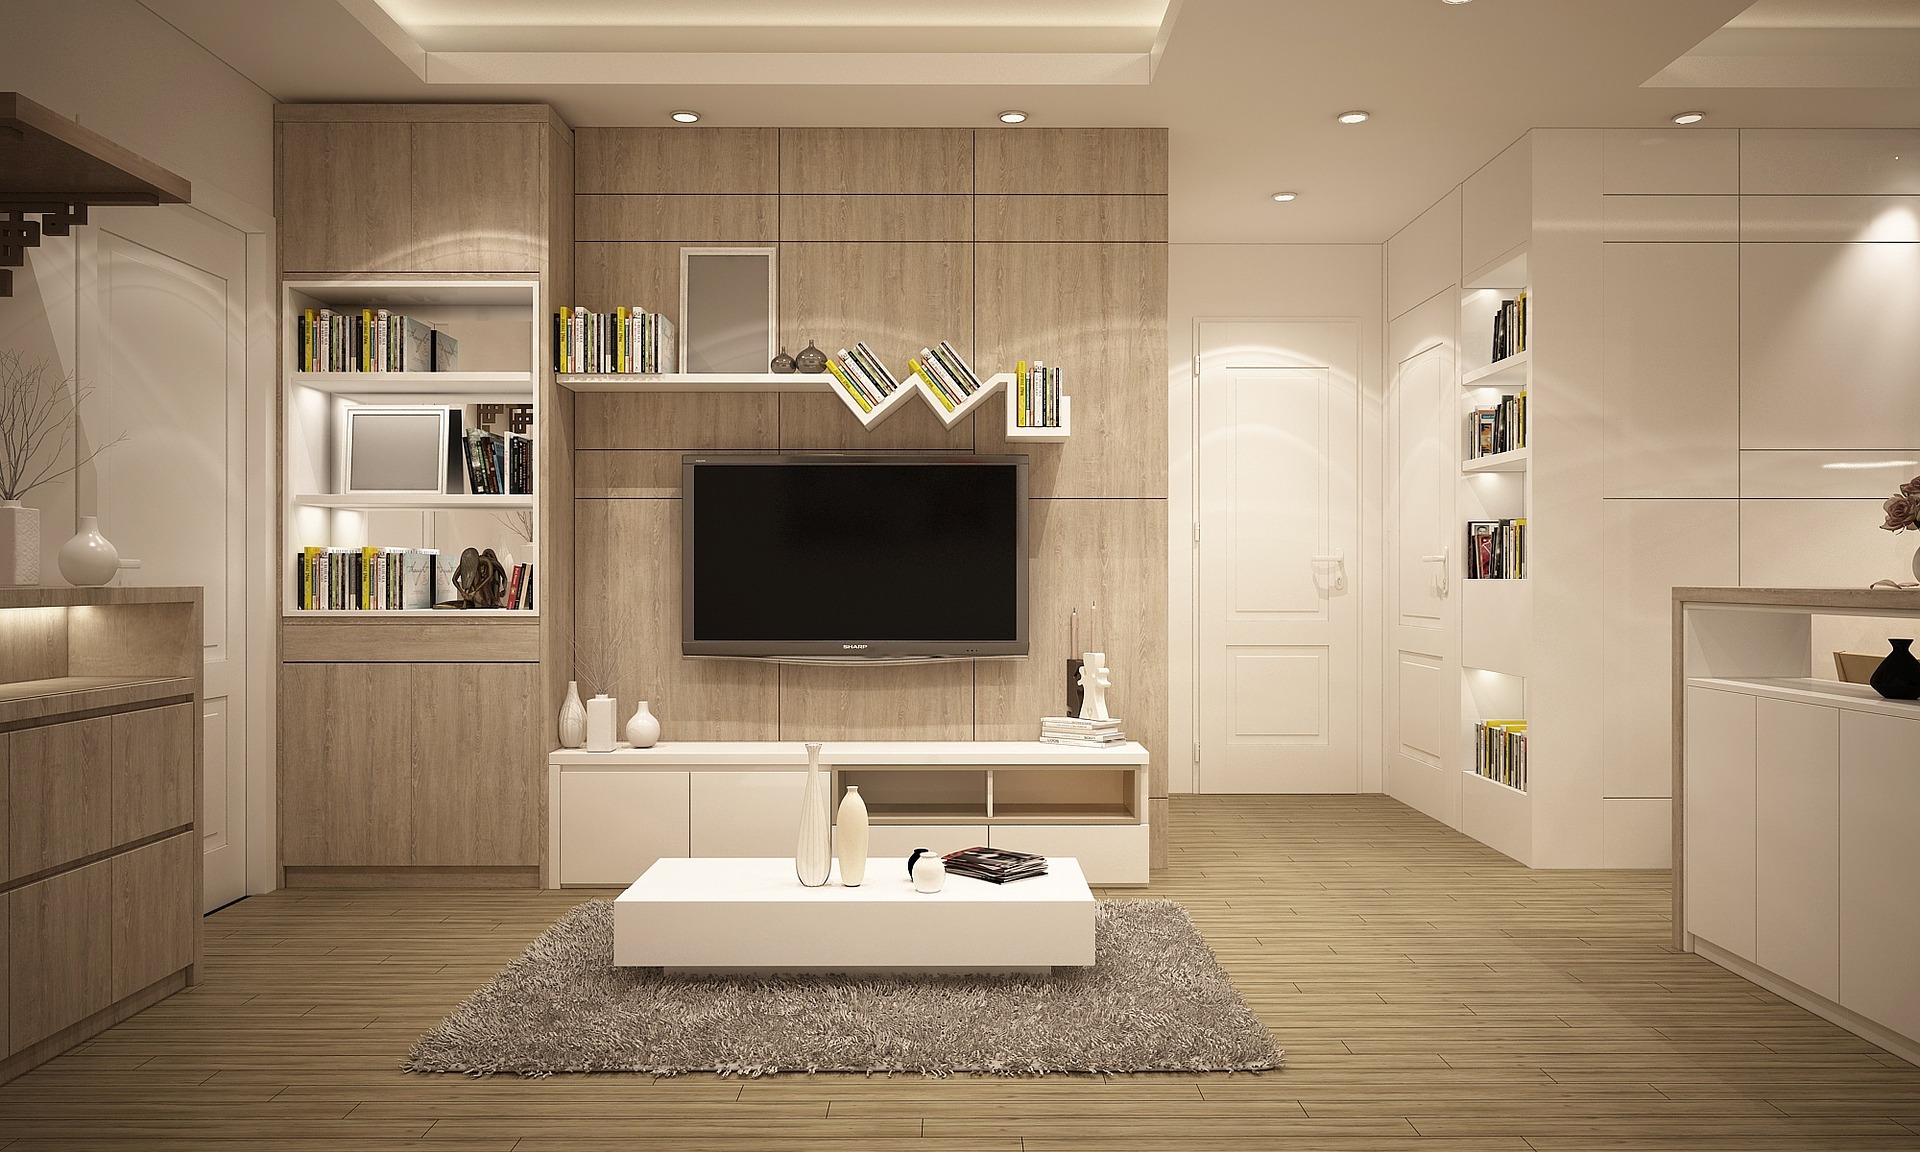
Try to decor your bookshelves with some decorative items. For example, if your bookshelves have six racks. Try to decorate the upper two racks with pottery or framed photos. You may use the middle two racks for books. If you have some unattractive items to display, such as DVDs etc, cover it by boxing. You can leave one or two bin of each shelf empty.

10: hanging a shelf beside your bed:

It is a simple idea. Does not require much cost. You may tie driftwood with some rope and hang it besides the bed. It provides an apical view of your bedroom.

11: add carpet to the floor:

It is also a simple idea. Does not require much cost. You can easily purchase a carpet from a shop or even you can get as a gift from neighbors or relatives. And simply you can cover some portion of your floor by carpet. It provides an epical and stylish view to your bedroom.

12: You can use washi tape to Decor small accessories:

You can use washi tape for decorating some accessories. With no cost, it increases beauty to your room.

13: Flower arrangement:

The flower is for beautification. You can go to the gardener for purchasing flower with tub. You can make an arrangement on the side of the window. You can also make a garden in front of your room.

14: Arrange a jewelry tree:

You can gather dry branches of small trees in a vase over the dressing table. For making the vase more stable, you can fill it with pebbles. You can decorate the vase and tree with different ornaments.

Read Also:

Content Rally wrapped around an online publication where you can publish your own intellectuals. It is a publishing platform designed to make great stories by content creators. This is your era, your place to be online. So come forward share your views, thoughts and ideas via Content Rally.

View all posts

Leave a Reply

Your email address will not be published. Required fields are marked *

Related

Install Cabling

Practical Guide to Install Cabling in Your New House

Cable installation is a complex process that requires a licensed contractor for successful completion. Doing it yourself is risky, as it may lead to faulty wiring. Proper planning will save you extra work, money, and time. Use the guide below to comfortably install cabling in your house. 1. Prepare high-quality cable products Before cable installation can commence, you need to source cable products. Currently, numerous companies make cables for sale. However, if you want the best quality cables, you need to consider Infinity Cable Products. These cable products are durable and contain more copper and material compared to others. 2. Contact a reliable company When installing cables in your new house, efficiency is critical. Cables supply communication services and vital electrical power, hence requiring great attention and time from the contractor. Ensure you contact a highly reputable company that is well-equipped with the necessary tools for installation. This will increase the accuracy, reliability, and durability of the cables. 3. Draw a wiring diagram It is crucial to have a plan for the cable installation process. Draw a wiring diagram that shows a clear and practical path of the cables to all outlets. The design will provide a reference point for the contractor as they work. 4. Install conduits Be sure to have the contractor install cable conduits in every place that may require wires. Cable conduits will allow you to run video cable, speaker wire, and network cable in the house. The best way to avoid wasting conduits is by running the longest wires in the walls first even if you don’t expect to use them immediately. Each wire should be set from upstairs and pulled through to the basement. This way you will avoid using a ladder to push the cables up between floors. An experienced contractor will know to leave at least a foot of extra wire to make it easier for you in case you want to change your house arrangement later. 5. Determine your outlet count Identify how many switches and outlets will extend to each circuit. This will aid in purchasing sufficient Infinity cable products for your new home. It is advisable to have six outlets per 110-voltage circuit in the living area. However, the kitchen has appliances with more wattage; hence requires not more than two outlets per circuit. 6. Drill cable holes Ensure you know what is on the other side before drilling through a wall to avoid damaging water pipes, ductwork, or more. The drilled holes provide a path that the cables will travel for connectivity throughout the house. Remember that more outlets provide for a safer home. 7. Pull the cables to the outlets Once the holes are drilled pull the cables to the outlets in the house. When attaching wires to outlets, use wire strippers to cut out the outer plastic coating. Infinity cable products come with instructions to help make the process easier. Are you prepared to install cabling in your new house? Now that you have read through the guide on how best to install cables in your house, you can begin the process. Remember to have the job tested after completion of the installation to ensure it is done to perfection. We wish you well as you convert your house into a comfortable home. Read Also: What’s a Good USB Cable? What is type c cable, and is it worth buying How Fiber Optic Cables Are Used

READ MOREDetails
Toilet Flush Button

Toilet Flush Button: Understanding The Nuts And Bolts

Though our bathrooms play a critical role in daily life, they're often forgotten until a problem arises. Of all its components, one that stands out is the toilet flush button's use - and understanding. This article looks closely at its workings, maintenance needs and replacement considerations. The Fundamentals Of The Toilet Flush Button What Exactly Is A Toilet Flush Button? A toilet flush button is the mechanism responsible for initiating the flushing process in your toilet system. Situated on the tank's exterior, we press or push this component when using our toilet to flush out its contents into the sewage system. By activating this flush button, we begin an action chain within our bathroom that sends water from its tank into our bowl to flush away its contents into sewer lines. How Does The Flush Button Work? The magic of the toilet flush button lies in its ability to control a more complicated mechanism. Pressing it lifts a lever connected to a chain inside the tank; that chain connects to a flapper (or flush valve seal), covering up drain holes at the bottom. When the flapper is raised, water stored in the tank begins rushing from its source into the bowl through its drain hole and siphon tube into the sewage system. As soon as this process completes, however, the flapper falls back down, sealing off its drain hole once more - and replenishing its supply in readiness for another flush cycle. Maintenance Of The Toilet Flush Button Regular Cleaning Regular cleaning of your toilet flush button is vital to its optimal operation, as dirt can clog the switch and make it less responsive, leading to inconvenient situations for users. A non-abrasive cleaner and soft cloth should be used for exterior cleaning; internal components should be checked regularly to avoid build-up and potential mechanical problems. Checking For Wear And Tear Given how often flush buttons are used, wear and tear are inevitable. Look for signs of damage, such as cracks or looseness. If the control becomes less responsive when pressed or sticks down without returning up when released, this may indicate internal components need to be reviewed for potential problems. Troubleshooting Common Problems Is The Button Hard To Press, Or Is It Sticking A toilet flush button that is difficult to press or sticks down often points to a problem with the connected lever or chain inside the tank. It could be that the chain is too tight or too slack, or the lever needs to be aligned or fixed. A careful inspection and adjustment of these components usually solve the issue. The Button Doesn't Activate The Flush If the button doesn't activate the flush, the issue could be that the switch is no longer effectively connected to the lever, or the flapper isn't lifting. A look inside the tank should reveal the issue. The button, lever, or flapper may need to be replaced. Replacing The Toilet Flush Button When Should You Replace The Button? As with any mechanical component, toilet flush buttons have a finite lifespan. Over time and through regular use, their controller may wear out or become damaged, requiring replacement. Signs to replace it include physical damage to its housing and sticky buttons or ones that no longer activate flushing actions. Looking for a portable toilet rental might also be necessary if you need to fix your toilet for a couple of days. Toilet Flush Buttons: More Than Meets The Eye Though seemingly simple, toilet flush buttons are critical in maintaining sanitation in homes and public spaces. Understanding their inner workings helps us better appreciate their importance, maintain them properly, and effectively troubleshoot any potential issues with them. So next time you press one, remember its critical function while giving it some love and consideration. Conclusion: Understanding how a toilet flush button works may initially seem complicated, but understanding its mechanics is crucial to efficient bathroom operations and sanitation practices. Knowing their inner workings could save us from future inconvenience or repair costs. Maintaining the toilet flush button regularly is vital to prolonging its lifespan and guaranteeing reliable performance within a plumbing system, thus streamlining home maintenance. By periodically inspecting it for signs of wear and tear, individuals can identify and address potential issues early on and prevent more significant ones from developing into larger problems later. By taking proactive measures like this one, individuals save both time and money on costly repairs and ensure an effortless toilet operation experience. Maintaining a flush button is an accessible DIY project for anyone, provided they possess basic knowledge and the appropriate tools. Even if it eventually succumbs to wear or damage despite regular maintenance efforts, replacing the button remains straightforward, making this an achievable DIY project for homeowners. Read Also : Mirror Decorating Ideas To Style Your Bathroom Using Feng Shui In Your Bathroom Design The Different Kinds Of Toilets

READ MOREDetails
ceiling light

How You Can Choose the Ideal Ceiling Light for Your Living Area

Your house can certainly benefit from the right lighting – lighting is, after all, essential for any living space. With the proper lighting, you can have warmth and homeliness in your abode, but you can also have an entirely functional element that can help you perform certain tasks and see everything clearly. But lighting can have an impact on other elements as well, and it can affect your space's wall color to the color of your flooring or carpet. It is therefore essential to have an ideal plan for your lighting, especially when it comes to your living area. The correct light can go a long way in giving your home the ambiance and serenity it needs, and it can lend a great atmosphere to your living space as well. The ceiling light you choose, in particular, can make a huge impact. Here, then, is how you can select the ideal ceiling light for your living area. How You Can Choose the Ideal Ceiling Light for Your Living Area: The height of the ceiling and the available space: Firstly, you should try to figure out how you use the room and the time of day you often spend there. It is also important to note the available space – how big or small it is – as well as the height of the ceiling. If, for instance, the ceiling in your living area is low, a large fixture such as a chandelier may not be such an ideal choice, as it may make your living room appear cluttered and smaller. On the other hand, if you have a high ceiling, a small ceiling fixture may look awkward and may even 'disappear' in a room with a high ceiling. If your living area has a low ceiling, you could go for semi-flush mount or flush mount lighting fixtures, as these kinds of fixtures have a small drop and don't extend too far from the ceiling, which adds to the illusion of a higher ceiling or space. For high ceilings, big, bold chandeliers or lighting fixtures are an excellent option. The type of lighting: You should know that different ceiling lights will have a variety of functions, which leads us to the different types of lighting. You should ask yourself this important question as well: what is the purpose of your ceiling light, especially when taking into consideration the kind of ambiance you would like your living area to have? Essentially speaking, there are three major types of lighting: task lighting, accent lighting, and ambient lighting. In general, a ceiling light in the living area provides ambient lighting because it gives a wide illumination, and you can also control it with the use of a dimmer. You can complement ambient lighting with the use of layers in the lighting scheme and design of your living area. You can add layers with lighting fixtures such as lamps (both floor and table lamps), sconces, drop lights, downlights, and recessed lighting. Lamps serve well as both accent and task lighting too. The bulb: The bulb you choose also makes a difference, as any expert will tell you – and many of us make the error of overlooking the bulb, even though it can impact the overall elegance of our lighting design. Modern lighting often involves the use of LED bulbs, as they are bright and energy-efficient, and they can last for a long time. Living areas can definitely benefit from the use of LED bulbs, because living room lighting is used almost every day, most especially at night, and LED bulbs are ideal for this type of use. There are decorative LED bulbs which you can also make use of, and they are often great for any living space – this is especially true for filament bulbs, which are trendy yet have a unique vintage appeal. Read Also: 3 Trendy Lighting Ideas For Your Kitchen Island The Benefits Of Solar Lighting In A Nutshell Las Vegas Electricians Share Fun Lighting Ideas For Your Home

READ MOREDetails