Why Kiln Dried Wood is Better for Furniture

Kiln Dried Wood

The process of kiln drying or drying logs in a heated chamber produces high-quality wood for furniture. It is because it results in less moisture in the wood, thus making it better and stronger. Problems such as cracking and warping are also less likely to happen. Proper dryness of wood is important to do furniture making a right.

Types of wood used for furniture:

There are three main types of wood used for furniture, namely hardwood, softwood, and engineered wood.

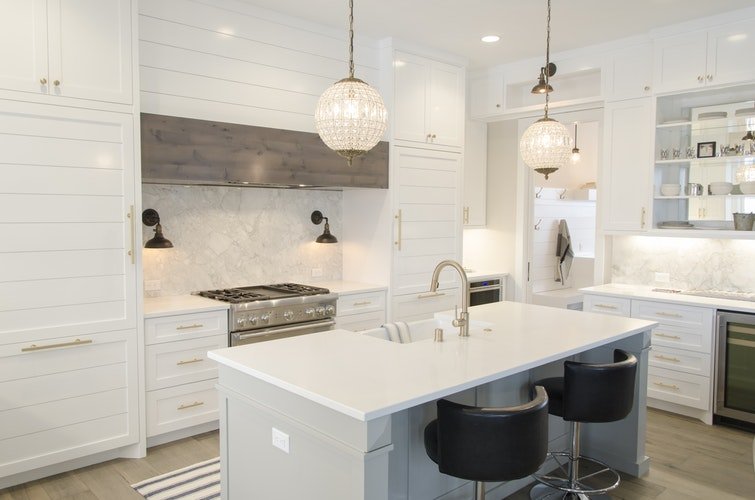
  • Hardwood. This wood comes from maple, oak, cherry walnut, and other deciduous trees. It is strong, so it is suitable for making furniture.
  • Softwoods. They come from pines and other evergreen trees. They can dent or bend easily, so they are not recommendable for use in furniture.
  • Engineered wood. As the name suggests, this type of wood is engineered to achieve a particular form. Plywood and particleboard are two forms of engineered wood. Plywood is stronger than particleboard and suits weight-bearing furniture.

What is kiln dried wood?

This type of wood undergoes the process of kiln drying, an artificial way to dry wood. A kiln is like a huge oven that controls air circulation, humidity, and temperature and heats the wood directly or indirectly. Direct heating uses natural gas or electricity while indirect heating makes use of heat exchangers and solar energy. This process makes it highly effective for use in furniture. It can remove about 93% of the moisture.

What makes kiln dried wood different?

Kiln drying makes the process of drying faster. Wood is hygroscopic, meaning it continually interacts with moisture for balance until it is completely sealed. It is natural for wood to be that way for a living tree has pathways inside to absorb moisture and nutrients from the roots up. The chopped logs lose moisture content as they dry and kiln drying makes that easier.

The significant reduction in the moisture content of wood is essential to avoid warping or shrinkage with changes in temperature and humidity. When used in furniture, it can destabilize or lose shape. Air-drying is also good when done right, but by using kiln dried logs, you can be sure, because the process is highly controlled.

Benefits of using kiln dried wood

Air-dried logs are also good for furniture, but you cannot really be sure if they are dry enough even if a supplier tells you so. With kiln dried logs, variable conditions are controlled, and drying takes place in a shorter time. Additionally, it kills harmful insects, mould, and fungi, making it safer to use.  Kiln dried wood makes the best quality furniture. Less moisture makes the furniture stronger and better looking. Problems such as cracking and warping are less likely to happen.

Drying can be difficult when done the natural way, especially in a wet climate. When buying furniture, it is best to know what type of wood they used to have a picture of how long it will last. The use of a moisture meter is important for manufacturers to address moisture-related problems. Modern times have made it possible for mankind to understand nature better, which is why the relationship of wood to moisture can now be understood and measured.

Read Also:

I enjoy writing and I write quality guest posts on topics of my interest and passion. I have been doing this since my college days. My special interests are in health, fitness, food and following the latest trends in these areas. I am an editor at Content Rally.

View all posts

Leave a Reply

Your email address will not be published. Required fields are marked *

Related

Drywall

What You Need To Know About Ceiling Textures And Drywall Options

Drywalls are those construction materials that are used to create walls and ceilings of your home. Not all that but, drywalls also come in handy if you want to create design features like eaves, arches, or any mind-blowing architecrequireigns!!!Do you know the best part about drywalls?These are super easy to install, highly durable, and only require simple repairs when damaged.So drywall is a flat component composed of calcium sulfate dihydrate, typically extruded between thick sheets of facer and backer paper, used to construct interior walls and ceilings.Through this article, I’ll be talking about the ceiling textures and the drywall options you can choose for your home!!! The Ceiling Textures And Your Drywall Options Decorating your home can be a real challenge for many!!! And choosing the right drywall finish or texture can prove to be a hard nut to crack.And it’s very natural to get at a state of indecision if you are handpicking it for your new home or renovation project. There are so many options that it feels like you are “searching for a pearl in an ocean.”Making up your mind about whether or not to go for texturing your ceiling can be a tough job. And even if you choose to texture your ceilings, there are chances you’ll be confused about which one to go for!!!! And remember, getting the drywall right is the first step of tiling projects?”.But No Need To Worry!!This article will guide you to choose the perfect texture and drywall option for your ceilings to look elegant more than ever!! 1. Sheetrock Texture: Old Is Gold Sheetrock ceiling texture is a drywall ceiling texture that has been famous since 1917. The reason this drywall texture is so awesomely renowned is because of the artistic look that it gives to your ceilingAnd the best part, you don’t need to use and sort of spray paint in this case. You can achieve this texture by using your artistic hand technique and without using any special brushes.This texture is perfect for any room. There are no restrictions of use for this ceiling texture. 2. Stipple Brush Texture: A Test of Your Skill This texture is not as easy as it seems. You need skills for this texture to be created.In order to create this texture, you need a roller and slap brush.The fascinating fact about this texture is it can cover the bumps and holes on your ceiling. And if you have the skills, then this texture can surely make your ceiling look gorgeous than ever!! 3. Swirl Texture: Creativity Taken To A New Level In order to achieve this texture, you need either a roller or sprayer.You can also do this by using a technique called “the basic swirl” method.But one thing that you need to keep in mind is while creating this texture, you’ll need a lot of patience to get the best result.And the difficult part is you need to create the pattern before the mud dries. So make sure to have a helping hand by your side.Overall, the texture can really give that awesome look on your ceilings if you do it in the right way!!! 4. Orange Peel Texture: A Color of Choice The name suggests all, the color of orange skin, but sometimes it’s also called “an eggshell” ceiling texture.If you really love this color, then this can be on the top of your favorite lists.In order to create this texture, you need to apply thin mud to the ceiling using a spray gun set at very high pressure.The more artistic mind you have, the artistic look it has got!!!! 5. Smooth Textures: Choice of Many If you are someone who wants the best at a cheap cost, then this texture is just the right choice for you. Moreover, you don’t need to have much skills to create this texture design.The look of this texture is just mind-blowing, and if you are someone who likes things to be consistently gorgeous, then this is the texture you can have for your ceiling.This texture is effortless to remove and is also perfectly suited for any room. 6. Tree Bark Texture: Beauty of Nature If you are someone who loves nature and wants to bring the reflection of nature inside your home, then this textured style is just the option you can have.This ceiling has the look of a tree. You can create this texture just by using a heavy roller. The texture might look simple, but it’s very artistic and can surely catch the eyes of many.If you have a farmhouse, then this texture will double the beauty!!!!! 7. Slap Brush Texture: Slap The Beauty Out Artistic, gorgeous, beautiful, and elegant are the nicknames you can give to this texture. A complete package of beauty!!!!To get this texture, you’ll be needing a brush with very stiff bristles and thin mud.Firstly, you have to cover your ceiling with mud using a roller, then take the brush and slap the ceiling from the edge.This can be a hard nut to crack because if you don’t get it right on the first shot, the whole ceiling might end up looking messy. 8. Popcorn Texture: Cottage Cheese This texture, also known as the “cottage cheese” or “acoustic” ceiling texture, is probably one of the most famous ceiling textures ever!!!If you look closely, you’ll see it’s kind of a look-alike of “popcorn.” That’s why it’s called “popcorn texture.”In order to achieve the correct texture, you need to use a sprayer to apply to your ceiling. This contains Styrofoam with mud which gives that puffy effect.But it will require you to have a lot of skill to achieve this effect. That’s because the “popcorn texture” is both challenging to apply and remove.I hope this article will help you to know about the needs of ceiling textures and drywall options. And now I believe you’ll be able to get yourself the perfect texture for your ceilings.Read Also:Here’s How to Turn Your Garage into a Bedroom on a Budget! Turn your attic into a living space

READ MOREDetails
Small Space

5 Tips How to Live Clutter-Free In a Small Space with Kids

Despite kid's petite size, they occupy a considerable amount of space including their toys and games, specifically if you live in a small space apartment. This can be a never-ending puzzle with each additional child if you don’t find your way to place all of the stuff where it is meant to be!Are you wondering how to take the maximum usage of the spare areas in your apartment?Then, take a look at the 5 most useful and practical tips to use all empty areas in your small space: Make Your Living Small Space Kid-Friendly: Making your apartment jam-packed with a lot of loose showpieces and vases is a big no-no. It looks not only messy but also not suitable for kids in terms of safety. Look at some interesting tips to make your small space looks more open and expanded:Do not put plenty of stuff together in every corner of your apartment. Instead, put small pieces of stuff maintaining the theme as well. You can even use colorful baskets in your living area to keep the trash away instantly; it will help you in keeping the area clutter-free always. Instead of using glass pieces and vases, use a wooden one! It will safeguard your kid from an accident while he is crawling or playing all around in the apartment.Use Smart Storage Ideas: If you still struggle with keeping rarely-used things within your home, then self-storage units are at your rescue. You can also choose an ideal size for your stuff with different sizes available. People at the facility understand any concerns you might have and make the process easier than you would think.Regardless of the weather, they make sure that your valuable storage remains safe and secured. These units are not only meant for keeping your stuff near you but also they are helpful in terms of relocating. Take Advantage of the Usage of Vertical Spaces: Making the maximum use of vertical spaces, whether it is in your bedroom, kid's room or kitchen is one of the best ideas! It will make your small space more presentable and well-organized.You can buy shelves and cupboards, or you can consider creating customized units with accurate dimensions, placing them in the most suited areas. It will not only make your apartment look wider and open, but also gives you plenty of space to throw on random stuff inside. Keep It Minimal and Classy: As we have already discussed above, that is, try to keep as minimal stuff as possible. For instance, instead of keeping big indoor plants on floors, put tiny ones on your shelves keeping in mind your kid's safety. Likewise, instead of putting huge and heavy furniture, use small customized furniture that you can lift without many efforts.To give your kids the maximum area to play in the living room is to show some creative side in wall designing and paintings rather than focusing only on floors. Play With Colors but Do Not Overdo It: You probably got numerous interior designing ideas on the internet, but do not splurge your money without even considering whether or not it suits your apartment. Keep it simple instead! Now, it doesn’t mean that you use only one color, but try to use subtle colors.Let's say, white color is something that looks more spread-out and gives an illusion of a bigger space.  When it comes to kids, bright colors will be more likely to make them joyful, so, why not give it a try into your kid's room!Read Also:4 Tips For Finishing A Basement 5 Home Decor Ideas For The Times When Kids’ Grow Up7 Ways To Add Character And Style To Your Home 5 Ways To Maintain And Decorate The Study Room For Kids

READ MOREDetails
Painting Interior Doors

Tips for Painting Interior Doors

Freshly painted doors can enhance the makeover of any house. You can paint your doors on your own or hire a professional painter to do it for you.Many people prefer painting their doors themselves as they want to enjoy painting them on their own. However, if you don’t have any experience or want high-quality paintwork, you should always hire professionals for complete painting service.If you choose to paint or spray paint your interior doors, you need to know some tips and skills to do the job right. Let us explore some tips by professional painters that you can use to paint your doors. Remove or cover the door handles: Paint can stain the door handles and locks. So, it is better to remove them or cover them with painter’s tape to prevent them from getting stained. You will need a screwdriver with multiple heads to remove the handles and locks.Call a locksmith to remove the inbuilt lock systems as they are difficult to remove. Removing these things will make it easy to clean, sand and then paint the doors. Fill the cracks and holes:If there are any holes or cracks in your doors, you can fill them with a wood filler, gypsum plaster, or a filling compound. Put a small amount of wood filler or filling compound on a putty knife and put it into the hole or crack uniformly. Place it as uniformly as possible and leave it to dry for at least two hours.Check the filling the next day, and it requires more filling, add the required amount of filling compound to fill the space completely. Sand the surfaces: The old paint gets worn and imperfections develop with time on the door surfaces. That is the reason why homeowners want to repaint their doors. Sanding removes the worn paint and imperfections easily and prepares the surfaces for a clean and uniform finish. Start painting with a Roller: If you have already chosen the paint color, mix several cans in a bucket so that you can have the same shade on every door. Sometimes, the shade in different cars can vary a little, although not noticeable in the interiors in low light.Use a 4-inch roller to apply a thin layer of paint on the door starting from an edge. If you want to paint the trim first, you can use a 2-inch brush.To remove any lines, move the lightly loaded brush or roller from bottom to top. Using this technique will help you paint quickly and uniformly while leaving a wet edge. Painting a paneled door:Many homes have paneled doors and the technique to paint them is different from painting a flat door. Paint every panel beginning from the upper left side downwards in a sequence.Always use a brush of appropriate width to paint a paneled door. Don’t worry if you paint a bit outside the edges of a panel. Once the edges are painted, use a small roller to paint the space between the panels.If the rollers of appropriate size are not available, use a 2-to-4-inch brush to paint the center of the panels. Minimize the drying time: Paint in light and uniform coats to minimize the drying time. Thick coats of paint take a bit longer to dry and may look nonuniform after drying.If you are using a brush, you should dip its bristles halfway in the paint and tap the brush against the container edge slightly to remove the excess paint.If you plan to use a roller, place it in a pan and use the back-and-forth strokes to paint uniformly without soaking it. Let the paint dry before installing knobs and locks: Let the paint dry completely before installing the doorknobs and locks. Also, tell your kids and family members not to touch the doors until they dry completely.Once they dry up completely, you can install the accessories and start using the doors as you use them normally. Final Words: Painting the doors is not difficult, even if you are painting them for the first time. All you need to do is to follow the correct sequence of steps, use the right size of tools and prepare the surfaces before grabbing a brush or roller. Following these tips can help you to paint your interior doors easily and conveniently. Read Also:10 Pro Tips To Minimize Commercial Door Repair & Maintenance Cost All About Commercial Fire Doors Why Should you Consider Security Doors for Your House?  

READ MOREDetails