Hardwood Timber Flooring: Gives a Classic Look to Your Home

Published on: 16 March 2016 Last Updated on: 10 September 2024
Hardwood Timber Flooring: Gives a Classic Look to Your Home

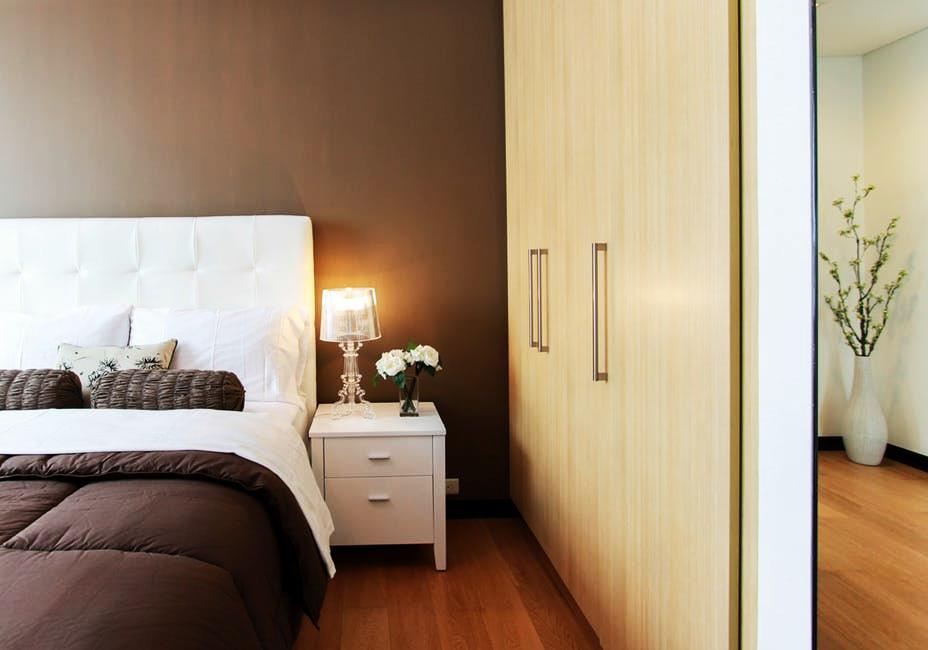
Solid hardwood flooring is known for imparting an impressive look. Customers tend to prefer hardwood flooring since decades because it gives not only a unique but a classic look to the room. Hardwoods are usually used for construction purposes such as boat, furniture, flooring, and instrument construction. The hardwood variety is usually obtained from oak, maple, cherry, hickory or pecan trees. Thus, the hardwood timber flooring is known for imparting a sense of beauty to the room and also displays the sign of high status.

Styles of Hardwood flooring

The most popular hardwood flooring includes

  • Solid hardwood flooring
  • Engineered wood flooring
  • Long strip engineered wood floors

Each type of hardwood flooring is different from the others in regards to the advantages, durability, look and pattern. The solid hardwood adds charm, cordiality and value to the room, while the engineered hardwood flooring does not shrink easily and is more durable. The long strip engineered wood floors are known for their unique features, they are designed for the floating installation. The hardwood timber flooring is a magnificent product that can last for generations. However, proper care and regular maintenance are the two most important things that need to be considered when talking about timber flooring.

How to increase the performance of the hardwood timber flooring? 

  • Refrain from using hot water as it may cause serious damage to the floor.
  • Use a damp mop by wringing out the extra moisture as this can hamper the flooring and wet patches can develop on the floor surface.
  • Always mop in the direction of the wood grain to remove the entrenched dust more swiftly.
  • Refrain from using harsh chemicals, detergents or floor cleanser; instead, look for cleansers that are mild and are meant for this type of flooring to remove stains.
  • Use gentle nonscratch microfiber mops for cleaning the hardwood timber flooring.
  • Sweep the floor regularly with a soft-bristle broom or vacuum cleaner. 

Some more facts about hardwood timber flooring

  • The furniture and the other appliances should be placed after 48 hours from the last coat of varnish on the hardwood timber flooring.
  • The furniture and the other appliances should have protective pads to prevent marks on the floor.
  • The rugs or the carpet can be placed at least after 2 weeks from the last coat of varnish on the hardwood timber flooring.
  • Guard the floor against direct sunlight by using window curtains or by using rugs and carpets. This prevents the hardwood timber flooring from getting discolored.
  • Maintain a normal temperature to prevent gaps and cupping.
  • Ensure that no one uses pencil heel shoes or sharp-pointed heel shoes on the floor as it may create a dent on the floor surface.
  • Trim the nails of the pets in the house to prevent scratches on the hardwood timber flooring.

Advantages of hardwood timber flooring

  • Selecting a good quality hardwood timber flooring can last for several years in fact through generations. The hardwood timber flooring is easier to clean and is highly cost-effective.
  • The hardwood timber flooring increases the resale value of the home.
  • Good quality hardwood timber flooring keeps the room warm and cozy and is more hygienic compared to other flooring materials.

How to choose hardwood timber flooring? 

When choosing the hardwood timber flooring for your home,

  • Check the color and pattern to match the décor of the room.
  • Check the timber wood based on select, standard and feature grade.
  • Check for the coating that can be used based on oil or satin finish.

Thus, the hardwood timber flooring is ideal for imparting a classic look to the room.

Read More:

  1. Additional Ways To Keep Your Home Warm
  2. Home Hacks: Stuff You Can Clean In One Hour Or Less
  3. How To Make Your Home Look Like A Splendid Hotel?
  4. Best 5 Designer Secrets To Make The Most Of Small Spaces

Abdul Aziz Mondol is a professional blogger who is having a colossal interest in writing blogs and other jones of calligraphies. In terms of his professional commitments, he loves to share content related to business, finance, technology, and the gaming niche.

View all posts

Leave a Reply

Your email address will not be published. Required fields are marked *

Related

Repairing Your Roof

Repairing Your Roof – How Should You Get Started?

Your house's roof is its ultimate defense against harsh weather, pesky creatures, and infestations.  If your roof is not in top condition, your entire house is at risk. It's crucial to schedule roof repair as soon as you notice a leak, even if it's small, as it can cause significant damage.  Repairing your roof is more cost-effective than replacing it entirely and is vital to maintain its integrity.  Left unaddressed, roof leaks can cost you tens of thousands of dollars.  This article will discuss the basics of roof repair, what you need, and how to do it. Ensuring your roof is in top condition is essential to protect your home from the elements and ensure its longevity. Steps For Repairing Your Roof Given below are the steps that will guide you in the process of roof repairing at your home— 1. Examine The Damage Following a systematic approach is vital when searching for a leak in your roof. Begin by surveying the visible damage to your roof, including shingles, gutters, and roof edges.  It's essential to start with the most obvious issues and progress to less apparent ones. Once you've assessed the exterior, examine the interior for signs of water damage.  Look for indications of water stains, dripping water, sagging, pooled water, and dampness. Inspect during rainy weather, as some leaks are intermittent and only occur when there is enough rain.  Access the attic using a flashlight to locate the water source through the roof deck. Check around all rafters for indications of water.  Water can travel through the roof decking and rafters due to the force of gravity, which may result in dripping in different areas. If you observe water dripping, trace it back to its origin. 2. Find A Reliable Contractor After a thorough inspection of your roofing system by a professional roofing consultant, you will receive an accurate and detailed bid or estimate.  The estimate will be based on the materials you choose for your roofing projects. Moreover, you must consider the unique measurements of your roof.  The roofing consultant will also consider any special conditions that may affect the cost. This can include the complexity of the roof design or any existing damage that needs repairing. Once you receive the bid or estimate, your roofing contractor should provide a written contract outlining the details.  This contract should include a comprehensive breakdown of the costs, the expected timeline for completion, and any warranties or guarantees included.  Therefore, you must carefully review and understand the contract before agreeing to any work to ensure everything is clear and fair for both parties. 3. Select The Suitable Material  It's crucial to have a complete set of roofing tools when undertaking any repair project. These hand tools have various uses throughout the house. They include the following: Roofing hammer. Pry bar. Nail puller. Utility knife. Shears. Tin snips. Handbrake. Tape measure. Chalk box. Roofing nails (also known as roofers). Speed squares. A pencil for notes or markings. A 10 oz clay gun. Choosing the right roofing sealant depends on the roofer's needs, but any kind will suffice.  While shingles are optional, matching them is optional. For flashing work, it's recommended to use aluminum coil stock, which is available in various colors at most box stores. A tape measure is recommended for all measurements and layout work, and a chalk box is ideal for snapping reference lines and general layout work.  Roofing nails, or "roofers," are recommended for their durability. The materials used for the roofing sealant, shingles, and aluminum coil stock are also essential. 4. Ensure That All Cracks Are Sealed Using an uncomplicated roofing sealant is important to seal any cracks on your roof.  To apply a sealant, you must pierce a thin aluminum membrane with the tube, allowing the sealant to flow.  Next, load the sealant into a caulk gun and aim it at the crack or hole to seal it.  The sealant will dry in a few hours and be set entirely in 24 hours without intervention.  Finally, you can cover the hole with shingles or flashing and move on to other projects. Ensuring that the roof sealant is compatible with your caulk gun is crucial. This is because some construction materials come in 28-ounce tubes that won't fit a standard 10-ounce gun. 5. Ensure The roof Is Insulated When planning to replace your roof, it's also a good opportunity to consider upgrading your insulation.  However, if you opt for new blown-in insulation, your roofing contractor will install it while they remove the decking.  This insulation process requires running a hose through the exposed roof and into your attic. It allows the insulation to be installed quickly and easily without causing any damage to your walls or ceilings.  Therefore, with the new insulation, you can enjoy improved energy efficiency and a more comfortable indoor environment. 6. Leave It Clean After the roofing crew installs your new roof, they should clean up any debris around your home. This includes loose shingles and nails and leaves them in their original condition.  They should also haul away old roofing materials for proper disposal. Additionally, you must ensure not to dispose of in landfills, which can contribute to pollution. The roofing expert must inspect the final product to ensure it meets all industry standards and building codes.  They should also check for potential leaks or damage and address any concerns. It is important to address any concerns and take steps to correct any issues. Therefore, ensure you’re completely satisfied with the new roof and its reliable protection for years. Can You Repair Your Roof Yourself? Understandably, as a homeowner, you may want to save money. Therefore, taking care of some home maintenance tasks can help you save a lot.  However, it is important to know your limits when it comes to your roof.  You may be capable of handling minor tasks such as replacing caulking or cleaning gutters. On the other hand, leaving any roofing projects to the professionals is highly recommended.  Moreover, roofing maintenance requires specific skills, knowledge, and equipment that only experienced and trained professionals possess.  Even a seeming DIY project can quickly spiral into a much bigger roof repair if something goes wrong.  Therefore, it's always wise to prioritize the safety of your home and family. Look for an efficient roofing service provider and explain the damage. You can get your roof cost-effectively repaired under expert supervision! Read Also: How Often Do You Need A Roof Inspection? Elevate Your Roof’s Health With Aerial Roof Inspections Choosing A Siding And Roofing Companies In Delaware

READ MOREDetails
Optimal Lawn

3 Keys To Achieving Optimal Lawn Nourishment

Achieving a lush and inviting lawn is something all homeowners dream of! While it can be tricky to properly take care of your outdoor space, one of the most important steps to having a magnificent lawn is fertilizing. Lawn fertilization services in Texas make your garden thrive, providing — you with the essential nutrients needed for vivid colors, growth, and most importantly — health. Here Are Three Prime Keys To Achieving Optimal Lawn Nourishment To support you along this process, here is our guide: three tips for successful lawn fertilization to make your outdoor area the envy of the block. 1. Uncover your lawn's essential needs It's essential to understand your grass type in order to achieve optimal lawn care. Take some time to figure out what type of grass is growing in your yard, as each one requires its own maintenance. A quick way to identify the type includes examining the shape of the blades, their color, and the growth pattern. With this knowledge, you can take proper steps in maintaining a healthy lawn all year round. Maintaining a lush, healthy lawn may require fertilizer specific to the type of grass in your yard. Warm-season grasses like Bermuda and Zoysia, as well as cool-season grasses like fescue and Kentucky bluegrass, have varying dietary needs. Knowing your lawn's grass type is essential for choosing the right fertilizer and following an appropriate application schedule. To ensure the soil's quality, it is vital to perform a soil test. Doing so will provide insight into what nutrients your soil is lacking, what adjustments need to be made to reach optimum growing conditions, and what type of plants would thrive best in the environment. 2. Adhere to the right fertilizer application techniques Utilizing fertilizer correctly is essential to enabling efficient nutrient uptake and averting any potential damage to your yard or nature. To guarantee the appropriate use of fertilizer, here is a breakdown of the key guidelines: All times demand that you employ the most appropriate spreader to ensure success. To achieve optimum results in your yard maintenance, it may be worthwhile to consider investing in a spreader. Typical models include drop or broadcast spreaders, both designed for specific lawn sizes and structures. According to manufacturer guidelines, you should set up the spreader for precise product application. 3. Accurately apply the prescribed rates The right amount of fertilizer is important for effective results. Don't be tempted to apply more than the recommended rate based on the nutrient content and area size. Over-application can cause over-fertilization, leading to nutrient burn and environmental damage. Make sure to pay close attention to the instructions on the packaging for optimal effects. Utilizing fertilizer at the correct moment is an essential element to consider for optimal plant growth. Applying the correct amount in the proper timeline will help your garden to flourish and thrive. For your lawn to reach its full potential, timing is of the essence when it comes to fertilization. During the times your grass is actively growing—fall and spring for cool-season cultivars, late spring and summer for warm-season types—apply the necessary fertilizers for the best results. Should you attempt to fertilize lawns that are not actively growing, your actions would be in vain; not only will the nutrients be wasted, but there's a risk of doing harm to the grass. Therefore, be sure to fertilize only when the conditions are right. Read Also: The Best Riding Lawnmowers: These Lawnmowers are for You Natural ways to get rid of flea in your lawn How To Prepare Your Lawn For Fall

READ MOREDetails
Ways to Make a Big Statement in Small Bedroom

5 Ways to Make a Big Statement in Small Bedroom

No matter how you want to redecorate your room, making a big statement in a small bedroom room is what you will find this post. And of course this article includes some ideas which can have an enormous effect and all the difference you would like to have in your bedroom by small changes. Despite the fact that it might appear to be anything but difficult to top off a little space with a negligible measure of furniture; yet, it is an fatiguing task for when one plans on putting forth a style expression. So, let’s see how it can be done. Idea # 1: A Nice Looking Bed Set Buying a nice bed set is never difficult and it’s so easy to change the look of your bed room with bright bed sheet, bed covers and pillows. It’s nothing like you need a big financial plan for it. Nice theme of a bed set can smoothly give your room an engaging look. You can try some hardwood bed set to make a statement in your room as well. Hardwood being utilized may turn out to be generally on an expensive side considering the two its sheer toughness and additionally high feel. However, it is justified regardless of each penny spent. Idea #2: Buy Some Gorgeous Looking Wallpaper A darker shade of wallpaper on one wall gives the room a bigger and better look. You can choose wall paper designs according to the overall theme of your room. You can use printed wall paper on one wall and keep the other walls plane. Idea #3: Have a Nice Bookshelf No room can turn out badly with a bookshelf joined inside. It isn't important to have a big book shelf in your room but including a small bookshelf inside will look great and noticeable. For rooms with a smaller size beautiful bookshelves can be fixed with traditional hardwood boards upon the divider. In a few cases, where the bed may comprise of a nice headboard, the book shelf can be made near the bed for best use of free space. Close by conventional sweet-smelling candles. Idea # 4: Get a Full Length or Big Sized Mirror Keep a full-sized mirror upon a whole divider or your preferred space. It is the most generally used secret and in addition the most seasoned trend to not just influencing the space to appear more outwardly engaging but also  influencing the space to seem bigger than it at first is. The impression of the room itself makes the ideal fantasy and also get intensifies, mirrors are best for adding more space to the premises of the little room. Idea #5: Lights/Chandeliers Lights, especially traditional chandeliers or side table lamps can change the look of your room. Lights help in making a comfortable atmosphere in your room. Mostly the essential lights may appear to be excessively cruel or too brilliant; some additional small lights like fairy lights, lamps or light chandeliers can really give your room a subtle look. Hanging up light fixtures of little to medium sizes upon the divider can help with better use of divider spaces. And additionally make a more traditional appeal in your room. It's not the size of your room you claim which matters. It is the manner by which you design it and also how you use free space in an imaginative way, which helps influence a room to appear sufficiently lavish. I hope you liked reading these bedroom decorating ideas. If you have some interesting tips to add, do let us know in comment section. Read More: Home Decor Is An Art Itself – Things To Know Mirror Decorating Ideas To Style Your Bathroom Top Expert Tips For A Stunning Condo Interior! 5 Essential Tips To Designing A Beautiful Front Yard Garden

READ MOREDetails