Published on: 16 March 2016
Last Updated on: 10 September 2024
Solid hardwood flooring is known for imparting an impressive look. Customers tend to prefer hardwood flooring since decades because it gives not only a unique but a classic look to the room. Hardwoods are usually used for construction purposes such as boat, furniture, flooring, and instrument construction. The hardwood variety is usually obtained from oak, maple, cherry, hickory or pecan trees. Thus, the hardwood timber flooring is known for imparting a sense of beauty to the room and also displays the sign of high status.
Styles of Hardwood flooring
The most popular hardwood flooring includes
Solid hardwood flooring
Engineered wood flooring
Long strip engineered wood floors
Each type of hardwood flooring is different from the others in regards to the advantages, durability, look and pattern. The solid hardwood adds charm, cordiality and value to the room, while the engineered hardwood flooring does not shrink easily and is more durable. The long strip engineered wood floors are known for their unique features, they are designed for the floating installation. The hardwood timber flooring is a magnificent product that can last for generations. However, proper care and regular maintenance are the two most important things that need to be considered when talking about timber flooring.
How to increase the performance of the hardwood timber flooring?
Refrain from using hot water as it may cause serious damage to the floor.
Use a damp mop by wringing out the extra moisture as this can hamper the flooring and wet patches can develop on the floor surface.
Always mop in the direction of the wood grain to remove the entrenched dust more swiftly.
Refrain from using harsh chemicals, detergents or floor cleanser; instead, look for cleansers that are mild and are meant for this type of flooring to remove stains.
Use gentle nonscratch microfiber mops for cleaning the hardwood timber flooring.
Sweep the floor regularly with a soft-bristle broom or vacuum cleaner.
Some more facts about hardwood timber flooring
The furniture and the other appliances should be placed after 48 hours from the last coat of varnish on the hardwood timber flooring.
The furniture and the other appliances should have protective pads to prevent marks on the floor.
The rugs or the carpet can be placed at least after 2 weeks from the last coat of varnish on the hardwood timber flooring.
Guard the floor against direct sunlight by using window curtains or by using rugs and carpets. This prevents the hardwood timber flooring from getting discolored.
Maintain a normal temperature to prevent gaps and cupping.
Ensure that no one uses pencil heel shoes or sharp-pointed heel shoes on the floor as it may create a dent on the floor surface.
Trim the nails of the pets in the house to prevent scratches on the hardwood timber flooring.
Abdul Aziz Mondol is a professional blogger who is having a colossal interest in writing blogs and other jones of calligraphies. In terms of his professional commitments, he loves to share content related to business, finance, technology, and the gaming niche.
When you have lost a loved one, the pain, the vulnerability and the sorrow you feel at that time are overwhelming and indescribable. As a result, planning the funeral becomes a real struggle. The planning process itself already carries a sense of defeat and evokes a deep dark hole in the heart. Therefore, when you are looking for funeral homes, it's easy to feel dazed and lose yourself only to make the mistake of choosing the wrong funeral home and end up overspending for substandard funeral and cremation services. While funeral directors will always try to make the process as simple and as comfortable as possible, it helps to know how to choose a funeral home without overpaying for funeral services.
Know How You Want To Say Goodbye:
To kick-start funeral planning, it is imperative that you know how you want to say your final goodbyes. Did your loved one have a plan for the funeral? If so, this will make things easier. There are various funeral and burial options available. Knowing what you want will help you express your wishes and give the deceased one last peaceful send-off. So, do you want a celebration of life or a day or mourning? Some of the options provided by funeral homes include:
Traditional funerals
Cremation
A celebration of life funeral
Green or buried under a tree funeral
Funeral Costs:
When dealing with the loss of a loved one, it's hard to be an excellent shopper. However, knowing the cost of funeral services before you start looking for a funeral home is a great strategy to save money - especially, since there is extreme price disparity between different funeral homes. Sometimes, even in the same region, the price difference can be thousands of dollars. To help cover the cost — at what is often an emotionally challenging time — plan ahead and shop around to make the process as affordable and stress-free as possible.
Choosing A Funeral Home:
When you know how much you can expect to spend on funeral and cremation services, it's time to pick a funeral home. Often, people who choose big-box funeral homes think that they will get excellent services, but they could end up disappointed. You'll want to do your homework before you choose to get your feet wet. After all, amid the tears, you want to work with someone who is friendly, sympathetic and considerate. Always opt for an experienced funeral home that will strive to go above and beyond when making the necessary arrangements for the celebration of the unique life of a loved one.
In most cases, people rarely think about funerals. As a consequence, when they lose a loved one, not only do they have to deal with grief but also have to make funeral arrangements for the first time. Besides, funerals aren't events that one can get used to. Even when the funeral is a celebration of life, things can get tough, and people can easily get caught up in the emotional upheaval of losing a loved one. So, pick a well-reputed funeral home to not only lighten the burden but also prevent you from scrambling.
Read Also:
7 Important Tips For Planning An Outdoor Event
Fact Or Fiction? 10 Intriguing Past Life Stories That Will Give You Goosebumps
Comply with OSHA Standards :
Employers are required to comply with OSHA guidelines and specifically to the Bloodborne Pathogen Standard. Employers must also create Exposure Control Plans. This is the case for any workplaces where employees are in contact directly with blood or other infectious body fluids while on the job.
Employees and workers that work in financial institutions and banks do not perform jobs where they have reason to believe they will come in contact with blood. In the event of an accident, these workers must know how to handle cleaning up blood properly.
Workers must learn how to use precautions and treat any blood or bodily fluids as if they are contaminated. They must treat them as though they have pathogens or are infected with HBV or HIV. Hepatitis B vaccines should be made available within 10 days of exposure on the job to pathogens.
As an employer, you have an obligation to follow the guidelines set forth by OSHA regarding biohazard waste. To be a good citizen, you must comply with all government regulations and make the health and safety of others your priority.
What You Need to Clean Minor Spills :
Before starting the process of cleaning up blood, be sure you have:
Protective equipment for all personnel
A registered disinfectant with the ability to clean broad-spectrum pathogens
Biohazard bags and labels
Brush and dustpan
Forceps and tongs
Leak-proof sharps containers
Disinfectant wipes
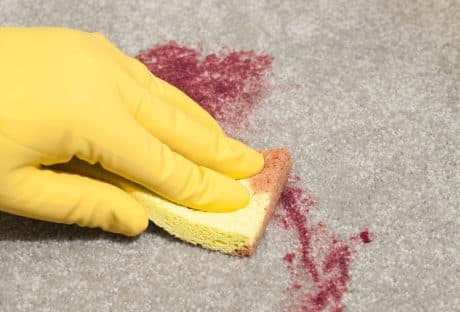
To clean a blood spill from a surface:
Equip Yourself Properly :
Use gloves, masks, gowns, and eyewear to protect yourself from splashes. Make sure that your protective gear fits comfortably and has no holes in it. You do not want pathogens to come into contact with your body.
Remove :
With your brush and dustpan or your forceps and tongs, remove any shards of broken glass from the area. You want to avoid ripping your protective clothing. Put each piece in the leak-proof sharps container. Do not remove them by hand once they are inside.
First Cleaning :
Use cloth towels to cover the blood spill and let them absorb as much as possible. The disinfectant will not work if blood is on the surface. Once covered and cleaned toss the towels in a bag designed for biohazards.
Second Cleaning :
Go on to the second cleaning only after the room has been properly ventilated. Pour the disinfectant on the surface and let it stay there for 10 minutes. Then, scrub from the outside to the center using cloth towels. Toss these towels in the biohazard bag after doing the second cleaning.
Third Cleaning :
Use more towels and disinfectant on the surface. Put these in a biohazard bag when you are through. Leave the surface to dry.
Disposal :
Dispose of any protective gear and equipment the same way you did the towels. Put them in a biohazard bag. Seal it and place into a second container. Be sure to label the container clearly and call the local health department for instructions on how to dispose of things correctly.
Decontaminate :
After doing this, use the registered disinfectant to decontaminate any brooms, buckets, dustpans or other items you can use again. Scrub the tools thoroughly and then rinse with water.
Check :
Do a final check to make sure no area of your body has been contaminated. Make sure no blood has splashed on your feet or on your shirt.
Wash Your Hands :
Wash hands thoroughly with water and disinfectant soap. Disinfectant wipes can also be used if you are not near a sink.
Report Incident :
This is crucial. Fill out the incident report clearly as soon as the cleanup is complete. File it as instructed, and be sure
It is important that you and your employees know how to clean up the blood in your workplace. Get help if you need it from a blood cleanup company. Keep your workers healthy and safe with the instructions in this guide.
Raising the value of your home can seem like an impossible task at first, particularly if you are working with a restrictive budget. However, it is not impossible. In this article, we will be looking into some of the simple ways that you can increase the value of your home with ease.
Replace The Doors And Windows
When looking to put your home on the market you want it to look its best. As a result, you may want to consider replacing the doors and windows, particularly if you are dealing with a draft of any kind. This will not only improve the curb appeal of your home, but it can also help to improve the energy usage of your home making it more appealing for those looking to purchase.
Makeover The Kitchen And Living Room
As the central hub of the home, the kitchen and the living room re the first two areas that you should consider modernizing. One of the easiest ways to do this is to paint the walls a neutral color. This will make the home more appealing to those hoping for a blank canvas, in addition to this, it is likely to brighten up the room as a whole. The living room can also be modernized and transformed by incorporating a custom-designed canvas using a next day canvas prints service for your home.
Improve The Look Of Your Garden
If you are lucky enough to have garden space, this needs to look the best that it can be at all times. By improving the front garden with flowers and taking care of the tress you are then making it seem more appealing to the buyer when they have a first impression. It is then time to consider the back garden. By mowing the lawn, tending to the flowerbeds, and removing any unwanted weeds in the patio, you can improve the curb appeal as well as the value of your home over time. Though this will take some man-hours, this will make it look more appealing to the listing.
Create A Driveway
The final way that you can boost the curb appeal for your home is to generate a driveway. If you have a vast amount of space outside the front of the house, sprucing up your driveway will make the home more appealing for those that have multiple cars or a family. Whether this is gated or just left open, this can help to limit on the road parking and raise the value of your home. IF you already have a driveway, it is recommended that you remove the weeds and clean the bricks or concrete to make it looks its best.
Whether you are in the process of selling, or you are considering it in the near future, some of these small little tips can help you to raise the property value of your home and sell it for the full amount that you would like.
Read Also:
Top Home Cleaning Tips
How To Pick The Perfect Flooring For Your New Home