Published on: 27 January 2021
Last Updated on: 24 December 2024
Throughout the year our gardens are constantly changing from season to season, which creates a fresh and exciting feel every month. From beautiful blooms in the spring to crisp, frosty layers during the winter, our gardens always provide a captivating aesthetic to enjoy. When it comes to the winter months, many people neglect their gardens and wait until the warmer days arrive again, but this shouldn’t be the case. There are lots of ways to keep your garden looking its best throughout the winter, including adding a deer fence to protect your garden and property from animals and wildlife, and here’s other tips…
Invest in a Greenhouse
Greenhouses are a must for anyone keen to continue gardening during the winter months and maintain a beautiful garden aesthetic. From the moment you introduce a greenhouse, you open up your gardening options, giving you the chance to work on all kinds of wonderful projects. You’ll also find that a greenhouse helps to bring character to the garden, adding to the overall look of your outdoor space. A greenhouse also enables you to work on projects that may need a little encouragement in a warm environment, before adding them back to your garden to help brighten the area and enhance the aesthetic.
Take a look at Two West’s wide selection of greenhouses here to find the right fit for your garden.
Embrace Winter Colour
Keep your garden looking bright and colorful by adding a selection of winter-blooming plants to your pots and beds. From winter-blooming daphne to pansies and cyclamen, you can bring an assortment of gorgeous winter colors to really bring life to your garden. Whether you opt to plant these bloomed plants during the winter for instant color, or you decide to plant your seeds earlier in the year for winter blooms, you can create a stunning aesthetic and add a trendy feel to your garden.
Find the perfect winter blooms here available at Dobies to bring a seasonal touch to your garden.
Install Outdoor Lighting
Having a display of outdoor lighting can really help to illuminate your exterior, not only adding to the overall aesthetic but also enhancing your home’s security. There are lots of different ways to introduce lighting, from subtle lights positioned neatly along the outskirts of your lawn or along the path, to brighter lights that stand tall and brighten the whole space. Do a little research into different types of outdoor lighting to see which would work best with your home’s style and layout and invest in the best style for you. It’ll be much easier to enjoy your garden on those darker evenings once you have your outdoor lighting fitted.
Visit Lights.co.uk here to find inspiration for outdoor lighting to introduce to your home and garden.
Frequently Sweep Up Leaves
Many people see sweeping up the leaves in the garden to be a pointless task, as sooner or later they’ll be back to sweep up again. This may be the case, but by sweeping up the leaves you are able to keep your garden looking its best, even during the winter. Leaves and generic debris can create a very messy, untidy look for the garden so it’s always beneficial to keep on top of sweeping them off to the side or removing them from flower beds and your lawn area. You’ll be amazed how much of a difference this small but practical task will make!
Content Rally wrapped around an online publication where you can publish your own intellectuals. It is a publishing platform designed to make great stories by content creators. This is your era, your place to be online. So come forward share your views, thoughts and ideas via Content Rally.
Fostering a connection between children and the great outdoors has become more important.
Playful landscapes offer a unique solution to this modern challenge by seamlessly integrating play areas into your lawn, creating a harmonious environment that encourages physical activity, creativity, and family bonding.
Choosing the right type of grass
When considering grass types for your playful landscape, opt for those that are hardy and resilient, able to withstand the wear and tear of active play. Bermuda grass and Kentucky bluegrass are excellent choices due to their durability and lush appearance.
These grasses recover well from foot traffic and require moderate maintenance, balancing playability and aesthetics. These grasses are available for purchase via the convenience of the Internet (http://www.naturesseed.com).
Designing play zones with natural elements
How often do we see playgrounds today? The answer is very rarely. Kids are nowadays trapped in technology and gadgets- they have almost forgotten the importance of playground. But as adults, we are responsible for keeping this feeling mortal in them. And what helps in doing so? Making the playgrounds more attractive with organic elements.
Integrate play areas with their natural environment using gentle slopes, mounds, and pathways. These additions improve the aesthetic value, pique kids' interest, and inspire creativity. Adding native trees and plants to playgrounds has multiple benefits, including aesthetics, environmental education, and biodiversity.
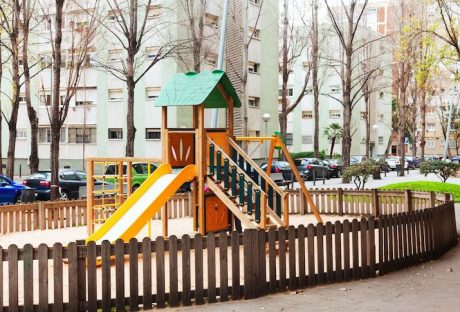
Incorporating safe play equipment
Playful landscapes must prioritize the installation of secure play equipment. You may put in swings, slides, and climbing structures suitable for different ages that still fit in with the architecture. Ensure everything is in working order and up to code before using it. A well-designed playground incorporating natural elements will encourage youngsters to play and learn.
Blending play areas with aesthetic appeal
Aesthetics shouldn't take a back seat to functionality while designing an entertaining and engaging environment. Use landscaping components like rocks, grasses, and flowers to help blend the playsets in with the rest of the yard. This method results in a space that is appealing to the eyes of both young and old.
Maintenance tips for a lively lawn
Your landscaping should be maintained regularly to keep it looking fresh and appealing. Maintain a proper mowing height, water the grass well, and immediately fix bald spots. You should consider aerating and overseeding the grass to keep it lush and healthy, so your kids will have a great place to play.
Environmental considerations
Make your landscaping more environmentally responsible without sacrificing fun. A greener and more sustainable playground is possible through rainwater collection systems, native plant varieties, and organic fertilizers. Instilling lifelong lessons of environmental responsibility in children through their play space is worthwhile.
Enhancing family bonding through play
An environment with play opportunities improves bonding among family members. Have a picnic, do some gardening, and compete against each other in fun contests. Children will remember these times fondly far into adulthood, and the relationships between family members will grow stronger as a result.
Boosting children's creativity and imagination
Playful landscapes inspire creativity and imagination by providing a constantly shifting canvas for play. Encourage children to make forts, nature-inspired artwork, and imaginative activities. The flexibility to experiment and explore promotes cognitive growth and problem-solving abilities.
Final words
Adding playsets to your yard may completely alter the vibe of your outdoor space, making it a more inviting place for kids to spend time and develop their interests. You may make a landscape that entertains, teaches, and enhances through careful planning and a balance between natural and artificial features.
Read Also:
The Secret To A Lush And Beautiful Lawn: Unveiling Littleton’s Best Lawn Care Services
Natural ways to get rid of flea in your lawn
5 Power Tools For New Homeowners
Transforming your outdoor space into a relaxing oasis begins with the right furniture. Outdoor furniture has evolved beyond functionality, with design trends now focusing on creating a visually appealing and comfortable outdoor environment.
Embracing Natural Materials
One of the prominent trends in outdoor furniture design is the use of natural materials. Wholesale furniture suppliers are increasingly incorporating materials like rattan, teak, and bamboo into their product lines. These materials not only provide durability but also offer a natural and organic aesthetic. Incorporating natural materials into your outdoor space can create a sense of harmony with the surrounding environment.
To embrace this trend, opt for furniture pieces made from these materials, such as teak dining sets or rattan loungers. Pair them with earthy-toned cushions and throws to enhance the overall organic feel of your outdoor oasis. Using natural materials not only adds visual appeal but also promotes sustainability, making it a win-win choice.
Blurring Indoor-Outdoor Boundaries
Designs that seamlessly merge indoor and outdoor spaces continue to gain popularity. Wholesale furniture manufacturers are now producing versatile pieces that can be used both inside and outside the home. This trend allows for a smooth transition between the two spaces and expands the usability of your outdoor oasis.
Consider incorporating outdoor sofas or sectionals that mimic the style of indoor furniture. By using similar colors and patterns, you create a cohesive flow between your indoor and outdoor spaces. To make the most of this trend, install bi-fold or sliding doors that can be fully opened, providing a seamless connection between your indoor and outdoor areas.
Comfort Is Key
When it comes to outdoor furniture, comfort is paramount. Design trends now prioritize furniture that offers the same level of comfort as indoor seating. Wholesale furniture suppliers are crafting outdoor lounge chairs and sofas with plush cushions and ergonomic designs, ensuring a cozy and relaxing experience.
To create a relaxing outdoor oasis, invest in seating that prioritizes comfort. Look for deep-seated chairs and loungers with thick cushions that will cradle and support you. With added features like adjustable backs and ottomans, you can customize your seating to suit your relaxation preferences. By prioritizing comfort in your outdoor space, you create a sanctuary where you can unwind and rejuvenate.
Versatile And Modular Furniture
Flexibility and adaptability are key considerations in outdoor furniture design. Wholesale furniture suppliers are catering to this demand by offering modular furniture sets that allow for easy reconfiguration. These versatile pieces can be rearranged to suit different entertaining needs and space constraints.
To maximize the flexibility of your outdoor space, opt for modular furniture sets that consist of individual pieces that can be rearranged as needed. This allows you to create different seating arrangements for various occasions. Consider adding a modular dining set that can transform into a cozy lounge area by rearranging or removing certain pieces. With versatile and modular furniture, you can easily transform your outdoor oasis based on your specific needs.
Adding Style With Accessories And Lighting
To complete the transformation of your outdoor oasis, pay attention to the finishing touches. Wholesale furniture suppliers often offer a range of outdoor accessories and lighting options to enhance the style and functionality of your space.
Consider adding outdoor rugs, throw pillows, and planters to elevate the visual appeal of your outdoor area. Opt for weather-resistant materials that can withstand the elements. Additionally, incorporate ambient lighting fixtures, such as string lights or lanterns, to create a warm and inviting atmosphere for evening gatherings.
Conclusion
Creating a relaxing outdoor oasis begins with the right furniture choices. By embracing natural materials, blurring indoor-outdoor boundaries, prioritizing comfort, selecting versatile furniture, and adding style with accessories and lighting, you can transform your outdoor space into a haven of relaxation and beauty. Whether you are a homeowner or a furniture wholesale business, these design trends and tips will help you create an outdoor oasis that your customers or family will love.
Read Also:
Your own space: decor ideas for your private place to relax
Home Improvement Hacks to Add to Your Space
TV Wall Mount Ideas for Living Room
Rubbish disposal is a crucial issue to address. Its proper implementation can control pollution, conserve natural resources and prevent diseases.
There are several different methods of waste disposal, including incineration and landfill. However, each method has its own drawbacks. For example, incineration releases harmful greenhouse gases into the environment.
What Are The Importance Of Proper Rubbish Disposal?
Rubbish disposal often causes unbelieving harm to nature. So for keeping the city safe for any living beings. Every industry should maintain proper guidelines for rubbish disposal.
Hazardous Materials
Hazardous waste is any material that, when improperly managed, could pose a threat to human health or the environment. It can take the form of solids, liquids, or sludges.
Hazardous waste is usually produced from industrial manufacturing processes but may also come from other sources. Some hazardous rubbish disposal is toxic, flammable, or explosive. Others are reactive or corrosive.
Products such as paints, oils, batteries, pesticides, and cleaners can be dangerous when disposed of wrongly. They can leak, explode, irritate the skin or lungs, cause fires, poison the water supply, and pollute the air. This is why it is important to make sure these items end up disposed of properly.
Some leftover products that are flammable, explosive, or toxic may be classified as household hazardous waste (HHW). Many communities have year-round HHW collection programs to reduce the risk of exposure to these chemicals.
The materials must be separated from non-hazardous wastes and placed in specialized landfills designed for these hazardous substances. This is to protect garbage collection workers and the surrounding community from exposure to hazardous waste.
In most cases, contaminated HHW is unrecyclable.
Health Hazards
When it comes to rubbish disposal, there are several health hazards that can be associated with the waste. These include infections, respiratory problems, neurological disorders, and cancers.
Symptoms of exposure to hazardous waste can range from a mild headache, dizziness, or stomach discomfort to unconsciousness and death. Although most symptoms are short-term and won’t last, it is important to take precautions to prevent these conditions from occurring.
There are many different types of waste that may be a health hazard, including pharmaceuticals, medical equipment, radioactive materials, and household chemicals. All of these should be collected separately and safely.
A comprehensive review of the literature on health effects from residential exposure to waste sites reported that the evidence is limited for cancers and overall congenital anomalies.
The evidence to conclude different exposure in the oil industry releasing high concentrations of hydrogen sulfide waste in highly crowded illegal dumping sites. These illegal dumpings are often associated with general acute symptoms such as lung diseases, skin and digestive system complaints, and neurological symptoms.
Hazardous waste is a complex mixture of contaminants that can have several effects on human health, depending on the type and level of exposure. This is particularly true for air pollutants and pesticides that can cause respiratory diseases or other health problems, such as cancer, heart disease, and neurological disorders. You can visit this site to learn more about neurological disorders.
It is therefore important to understand the health hazard associated with particular kinds of rubbish disposal, as this will help you choose the best way to dispose of it. It is also a good idea to follow the recommendations of your local government and/or environmental agency, as these can help you determine whether it is safe to dispose of certain types of rubbish in your area.
Environmental Hazards
Household waste is a major source of pollution because it contains harmful chemicals, toxic substances, and pollutants that can be leached into waterways. This can lead to health problems for residents of areas where garbage is disposed of in open drains.
In addition, waste that is buried in landfills can produce methane gas which has been linked to climate change. Landfills also attract vermin and cause litter.
It can also harm the health of waste collection workers, who exposed to hazardous materials found in the rubbish they collect. This leads to accidents and musculoskeletal disorders.
The health hazards associated with rubbish disposal can be reduced through better recycling practices and the use of alternative waste management methods. This will not only help protect the environment but will reduce the amount of waste that needs to be thrown away in the first place.
People who handle hazardous waste may become infected with hepatitis B or hepatitis C and other diseases that are transmitted through contact with contaminated waste. These diseases can be fatal if they are not treated properly.
Another hazard is the release of nitric oxide and nitrogen dioxide gas into the atmosphere. These gases are dangerous for human health and can affect plants, animals, water, and air quality.
Moreover, the emissions of these gases can be a source of respiratory infections and bronchitis for people who live near rubbish dumps or landfills that are leaking these gases into the atmosphere.
Poor waste management, ranging from non-existing collection systems to ineffective disposal, has significant impacts on air, water, and soil pollution. This can lead to serious environmental problems, such as air and water contamination, disease outbreaks, and the loss of biodiversity and habitats.
Recycling
Recycling is the process of breaking down waste into reusable materials, such as metals and plastics, which can then be used to manufacture new products. It saves natural resources, energy, and water while reducing pollution.
It reduces the amount of rubbish sent to landfill sites. It also prevents waste from going into incineration plants, which release a lot of harmful air and greenhouse gases.
Recyclable materials include paper, glass, metals, plastics, textiles, and tires. These are often collected from homes or businesses and then delivered to a recycling facility, where they're sorted, cleaned, and reprocessed into new raw materials for making products.
Most recycling facilities are designed to sort through the recyclables using various technology. These processes include rotating trommels that filter out unwanted materials, vacuums, and magnets. But some rubbish disposal, such as polystyrene and contaminated materials, cannot be recycled.
Some recycling plants also accept biodegradable waste, which can be made into compost. But this is a complex process because it's hard to determine the chemical makeup of organic materials.
The best way to make sure your rubbish disposal goes to a good place is to practice good recycling habits. You can do this by separating your waste into bins, containers, or bags that are labeled for recycling and disposing of them according to the proper guidelines.
If you're unsure about what goes where check with your local government. They should have a list of what they accept and may even have a searchable database.
You can also call a recycling company and ask them to pick up your waste. They'll be happy to take your trash off your hands for you, but they might charge a fee.
Most cities and towns have a list of what they accept for recycling, which you can use to learn what can go in your green or blue bins. However, certain items are not accepted because they can get tangled in machinery or because they are too contaminated to be processed.
Bottomline: Create A Better Green World!!!!
Practicing good recycling habits is not hard and can be beneficial to the environment and our communities. There are many ways to make the recycling process more efficient and reduce the amount of waste that goes into landfills.
Rubbish needs to be disposed of in the best and safest method in order to ensure the health of humans, animals, and the planet.
Read Also:
How Do Iot Devices Improve Warehouse Management?
Who Is An Intrapreneur? Definition, Characteristics, Pros/Cons, More
The Ultimate Commercial Cleaning Checklist: Everything You For A Spotless Workspace