5 Tips to Keeping Animals Away From Your Garden

Published on: 11 September 2018 Last Updated on: 05 September 2024
5 Tips to Keeping Animals Away From Your Garden

Animals might be cute, furry, and very pleasing to look at but they can seriously be destructive to your field, some of us may enjoy their company, others might want to kill them instantly! Either way, if you do not take care of who enters your garden, your plants may not thank you. Check out the rest of the article to understand what kind of animals can spoil your garden and how to restrict their movement.

Who are these animals?

are these animals

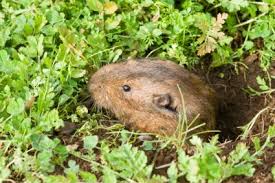
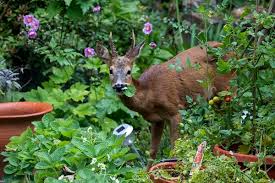
Some of the most common garden animals include chipmunks, squirrels, skunks, mice, moles, rats, and opossums. To learn more about possums, click get rid of possum. These animals dig holes into the ground, eat your fruits and vegetables, multiply or lay eggs in your garden, and generally wreak havoc. Other larger animals include dogs, deer, birds, snakes, etc. Just having them run around the garden can cause large-scale destruction.

Ways to get rid of animals in your garden

There are several ways to control the entry of animals in your garden. Some are more effective than others. To learn more about these methods, read on.

1. Identify the creature :

Identify the creature

The best way to control animals is to identify them first. This way you would know exactly how to deal with them by understanding their behavior and ways of living or multiplying. You can then target the animal with exactly the right technique that is needed to get rid of them. It is necessary to identify the animal to learn about its habitat, control them, and devise an effective solution.

2. Make your garden animal proof :

garden animal proof

By making your garden attractive to animals, you will invite more pests into it. Therefore, certain methods need to be adopted to make sure that the animals stay away. One such method is to cut down on places that can house such animals, like tall grass, bushes, or a pile of leaves. Some animals can even crawl under your deck or porch.

Minimize any food sources, like birdbaths and seed booths, where animals like squirrels may come to feed. Moreover, you should cover your compost pile that attracts raccoons and fruit and vegetable patches with nets to avoid dogs, cats, deer, etc.

3. Fences, nets, and traps :

Fences, nets, and traps

Fences are a great option to help minimize the entry of animals. For smaller animals, like rats, squirrels, rabbits, and more, small fences around your garden are enough. But for larger animals, like dogs and deer, larger and taller fences are required. Putting up taller fences can go a little heavy on your pocket, so securing plants is probably a better option.

Nets are a great way to prevent animals from actually feeding on your produce, like fruits and vegetables. Just adding a mesh or net around your patches can make a huge difference. Traps can be placed throughout the garden to catch animals with the help of baits. Use some food, like cheese, crackers, or biscuits, to lure animals into the trap, which then slams shut. Animals are also not harmed this way. It’s easy to catch possums, rats, squirrels, etc. with the help of traps.

4. Repellents :

Repellents

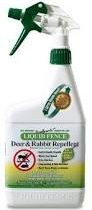
Some animals can be repelled using auditory techniques, like certain sounds, and repellents that smell a certain way, thus driving or scaring away the animal out of your garden. Some examples of repellents are – predatory urine, garlic clips, and castor oil. But these repellants need to be applied and monitored on a regular basis to make sure they are effective. Some of these repellents, however, can be toxic to humans, so be careful, which repellents you choose.

Auditory repellents include motion-sensitive water sprayers, ultrasonic repellers, and visual scare devices, such as reflective tape. The only problem with these repellents is that pests may become immune to these methods, and therefore they may decrease in effectiveness over time. Make sure you read all the directions given on any repellants or products before using them.

5. Do on the spot management :

For example, when moles create boroughs in your garden, you can place mothballs in the holes to repel them. Moles don’t eat your garden produce but their tunnels can cause your plants to die since plants may not find space to grow underneath the ground with enough nutrients.

If certain animals have entered your garden, immediately introduce the predator species into your gardens, such as cats and dogs, to scare away the pests. Cats and dogs prey on animals, like mice and rats. In some cases, you can hand aluminum foils with strings in your garden. The shiny material can scare away the animals. Again, the effectiveness of this method may die with time.

Pests are destructive to your garden and should definitely be identified and eradicated. However, there’s no need to kill these animals in order to get rid of them. You can also use humane ways to get animals out of your garden. Use the methods given above in order to get rid of animals, including possums, from your garden. This will help you get a more secure and flourishing garden in no time!

Read Also :

Content Rally wrapped around an online publication where you can publish your own intellectuals. It is a publishing platform designed to make great stories by content creators. This is your era, your place to be online. So come forward share your views, thoughts and ideas via Content Rally.

View all posts

Leave a Reply

Your email address will not be published. Required fields are marked *

Related

how to clean evaporator coil without removing

How To Clean Evaporator Coil Without Removing?

If you want your air conditioner to perform well at all times, you will need to ensure that you maintain and clean the parts of the air conditioner on a regular basis. If you schedule your maintenance as per the requirement of the AC, then it is great. However, in some cases, people like to clean their AC themselves. If you are one of them, you might be interested to know how to clean evaporator coil without removing it when you have a dirty evaporator coil. In this article, we will basically talk about why you need to clean your AC's evaporator coil and how to clean evaporator coil without removing the coil from the AC. Before that, you will also know about what happens to the air conditioner when the evaporator gets dirty. What Happens When Your AC Coil Gets Dirty? Image Source: lirp.cdn-website.com If the evaporator coil of your AC is unclean, it puts your AC at risk. It compromises the safety and working efficiency of the AC in general. In the first, an unclean evaporator coil slows down the speed at which the air blows through the AC, as it blocks the flow of the air. If the evaporator coil contains other materials and particles like pollen and dust, it limits the efficiency of the flow of air. The following things happen when there is an unclean evaporator coil inside the air conditioner: 1. If the evaporator coil is dirty or clogged with particles, then it reduces the flow of air into your home. If there is a reduced flow of air inside your home, it will lead to a lowering of the efficiency of the cooling system of the AC. Your room takes a lot of time to cool than it normally takes, probably your evaporator coil needs cleaning. 2. There might be some cases where your room is not achieving a good level of cooling, despite running the AC for hours at a stretch. In such cases, the problem is probably more than a delay in the cooling performance of the AC. Basically, it is a negative effect on the AC's cooling capacity. 3. Another great issue that happens when the evaporator coil of your AC gets dirty is that the operating pressure increases. This increases the temperature level of the AC, as the unit is working at hotter levels. This is not good for the AC as it damages the components of the AC. 4. An unclean evaporator coil creates wear on the AC system. If one important part of the AC fails to work properly, the other parts follow suit. This is because there is more pressure on the other components of the AC. Hence, the other parts are more likely to get damaged due to the failure of one part. Therefore, you will end up with a damaged AC altogether, and repairing it will be quite expensive for you. 5. If your AC’s evaporator coil gets compromised and does not work properly, then it affects the performance of the other parts of the AC. Hence, your AC unit will have a shorter life. If you want your AC unit to perform well and serve your home for a long time, you will need to ensure that every part of your AC is clean, especially the evaporator coil. Why Do You Need Your Air Conditioner Coil Clean? Image Source: www.cleanairprotx.com You will not need to spend a lot on the repairs of the AC. Regular maintenance will keep out the issues from the AC that need repair. Before any problem turns into a bigger one, you can fix it with regular maintenance. Apart from that, if you keep your evaporator coil clean always, it will not accumulate dust and hence will perform better as a result. How To Clean AC Coils? – Things You Need? Image Source: phyxter.ai The first thing you will obviously need for your AC cleaning is an air conditioner coil cleaner. Apart from that, you will need a cotton cloth for cleaning the coil. For your own protection, wear protective goggles, and wear gloves on your hand for better protection. Furthermore, ensure that you are following the instructions properly while you are cleaning your AC’s evaporator coil. How To Clean Evaporator Coil Without Removing? Image Source: snyderac.com The evaporator coil basically captures all the heat present in your home to condition the air inside. Apart from the evaporator coil, there is a condenser coil in the AC, which removes the air from the AC to the outside of the house. This is the way in which the AC works in colling the house. Since an evaporator is an important part of your air conditioner, hence keeping it clean will enable you to keep your air conditioner always efficient. However, if your question is, “How to clean AC evaporator coils inside house?” then you need to read the next subsection of this article. Read More: Here’s What Makes Package Units Better than the Other ACs AC Coil Cleaners - How To Clean Evaporator Coil Without Removing? Image Source: img.fruugo.com The following are the ways in which you can clean the evaporator coil of your AC without removing it from the AC: Step 1: Turn down the power of the AC, and unplug the machine from the electric port. You will not need an electricity risk for yourself while cleaning. Step 2: Remove the access panel from the AC to see the evaporator coil clearly. Go over the manual of the AC, if required. The manual has instructions on where you can find the access panel. Step 3: Take the access panel off, and remove the screws from the AC. Keep the screws in a safe place. Step 4: To blow the unclean particles off, try using a compressed air canister. This will help you to easily loosen the dirt on the evaporator coil. Step 5: Put back the screws, as well as the access panel. Your evaporator coil is clean. Summing Up Hope the article helped you in knowing how to clean evaporator coil without removing it from the AC. Cleaning your AC is a part of the maintenance operation of the AC. If you maintain your AC on a regular basis, it will offer you a lot of benefits. There will be less hassle and issues on your AC as a result of regular maintenance and cleaning. If you clean the parts of your AC, your AC will look and perform as if it is fully new. Read Also: Best Paying Jobs In Electric Utilities Central How to Brew the Best Beer with an Electric Brew System 13 Ways to Maintain the Coolness of Your Air Condition Unit

READ MOREDetails
Landscape Lighting Tips

Create A Stunning Outdoor Space With These Residential Landscape Lighting Tips

When you think about landscaping, you probably think about visiting a nursery to pick out plants or planting flowers to create a beautiful accent garden. Flowers, plants, and trees are only one part of the equation, however. You also need to think about how your landscape will look after the sun goes down. Residential landscape lighting can enhance the look of your home after dark, drawing attention to key architectural details of your house and highlighting the beautiful plants that surround it. Use these tips to boost your home's curb appeal today. Understand that landscape lighting goes beyond solar path lights Lighting up your landscape involves far more than just sticking a few solar lights along the edge of your sidewalk and calling it good. Instead, it is about creating a specific feeling in your yard after the sun goes down. When done correctly, landscape lighting can transform your outdoor space, turning it into a beautiful accent for your home. This type of lighting is not only meant to be functional but also to enhance the look and feel of your home. Decide what you hope to achieve Before you start picking out lights and deciding where to place them, come up with an overall plan for what you hope to achieve. Are you trying to make your yard safer by lighting up your sidewalk or patio area? Do you want to create a well-lit area where you can entertain? Do you want to draw attention to certain areas of your home, highlighting its unique architecture? Are you trying to improve the security of your property? By identifying your objectives before you begin, you can do a much better job of designing a lighting setup that will help you achieve your goals. Take care of an essential lighting first There are certain parts of your yard that should definitely be lit. Here are some of the key components that you should include in your overall design: Pathway lights. Any sidewalks, pathways, or entrances should be well lit to make it easy for people to see. Driveway lighting. You should incorporate plenty of light in your driveway area so that you can get to and from your car with ease. Stairs. If you have stairs leading up to your home, make sure that they are well illuminated so that people don't trip and fall. Patios or decks. Any outdoor gathering area should incorporate lighting so that it can be used after dark. Trees. If you have any trees that you want to highlight, you can easily do it with lighting. Key architectural features. You can use lighting to enhance the architecture of your home. If you have any water features on your property, you should also consider lighting them.  Choose LED lights Rather than going with halogen bulbs, opt for LED lighting. Not only do these bulbs last a long time but they are extremely energy-efficient. A single bulb can last as long as 100,000 hours. That means that you won't have to replace them often - an important consideration since outdoor lighting fixtures are not always easily accessible. LED lights can also stand up to the elements, making them perfect for use outdoors. No matter how bad the weather gets, you shouldn't have to worry about your lighting. Another advantage of LED lights is that they are extremely versatile. You can change everything from the color of the light to its intensity. This can allow you to create a completely customized look for your outdoor space. Read More : Secrets To The Perfect Bedroom Light Incorporate multiple types of lighting to create an interesting design Your residential landscape lighting design should include ambient lighting, which is lighting that shines over the entire space. It should also incorporate task lighting, which is used to provide illumination for tasks like cooking. Finally, it should also include accent lighting, which is used to draw attention to certain features of your yard. For instance, you could put a spotlight on a tree to draw attention to it. Incorporating all three types of lighting will help create a balanced, professional look that will set your yard apart from others in your neighborhood. Read More: Give Amazing Look Using Balloon Centerpieces In Wedding Smart Fun Gardening: How To Take Care Of A Money Tree Seven Simple Ways For Achieving Cozy Bedroom Environment: For Perfectly Night Sleep Using Feng Shui In Your Bathroom Design Experts Recommend: Top Interior Design Trends For 2017 Mirror Decorating Ideas To Style Your Bathroom  

READ MOREDetails
Repairing Your Roof

Repairing Your Roof – How Should You Get Started?

Your house's roof is its ultimate defense against harsh weather, pesky creatures, and infestations.  If your roof is not in top condition, your entire house is at risk. It's crucial to schedule roof repair as soon as you notice a leak, even if it's small, as it can cause significant damage.  Repairing your roof is more cost-effective than replacing it entirely and is vital to maintain its integrity.  Left unaddressed, roof leaks can cost you tens of thousands of dollars.  This article will discuss the basics of roof repair, what you need, and how to do it. Ensuring your roof is in top condition is essential to protect your home from the elements and ensure its longevity. Steps For Repairing Your Roof Given below are the steps that will guide you in the process of roof repairing at your home— 1. Examine The Damage Following a systematic approach is vital when searching for a leak in your roof. Begin by surveying the visible damage to your roof, including shingles, gutters, and roof edges.  It's essential to start with the most obvious issues and progress to less apparent ones. Once you've assessed the exterior, examine the interior for signs of water damage.  Look for indications of water stains, dripping water, sagging, pooled water, and dampness. Inspect during rainy weather, as some leaks are intermittent and only occur when there is enough rain.  Access the attic using a flashlight to locate the water source through the roof deck. Check around all rafters for indications of water.  Water can travel through the roof decking and rafters due to the force of gravity, which may result in dripping in different areas. If you observe water dripping, trace it back to its origin. 2. Find A Reliable Contractor After a thorough inspection of your roofing system by a professional roofing consultant, you will receive an accurate and detailed bid or estimate.  The estimate will be based on the materials you choose for your roofing projects. Moreover, you must consider the unique measurements of your roof.  The roofing consultant will also consider any special conditions that may affect the cost. This can include the complexity of the roof design or any existing damage that needs repairing. Once you receive the bid or estimate, your roofing contractor should provide a written contract outlining the details.  This contract should include a comprehensive breakdown of the costs, the expected timeline for completion, and any warranties or guarantees included.  Therefore, you must carefully review and understand the contract before agreeing to any work to ensure everything is clear and fair for both parties. 3. Select The Suitable Material  It's crucial to have a complete set of roofing tools when undertaking any repair project. These hand tools have various uses throughout the house. They include the following: Roofing hammer. Pry bar. Nail puller. Utility knife. Shears. Tin snips. Handbrake. Tape measure. Chalk box. Roofing nails (also known as roofers). Speed squares. A pencil for notes or markings. A 10 oz clay gun. Choosing the right roofing sealant depends on the roofer's needs, but any kind will suffice.  While shingles are optional, matching them is optional. For flashing work, it's recommended to use aluminum coil stock, which is available in various colors at most box stores. A tape measure is recommended for all measurements and layout work, and a chalk box is ideal for snapping reference lines and general layout work.  Roofing nails, or "roofers," are recommended for their durability. The materials used for the roofing sealant, shingles, and aluminum coil stock are also essential. 4. Ensure That All Cracks Are Sealed Using an uncomplicated roofing sealant is important to seal any cracks on your roof.  To apply a sealant, you must pierce a thin aluminum membrane with the tube, allowing the sealant to flow.  Next, load the sealant into a caulk gun and aim it at the crack or hole to seal it.  The sealant will dry in a few hours and be set entirely in 24 hours without intervention.  Finally, you can cover the hole with shingles or flashing and move on to other projects. Ensuring that the roof sealant is compatible with your caulk gun is crucial. This is because some construction materials come in 28-ounce tubes that won't fit a standard 10-ounce gun. 5. Ensure The roof Is Insulated When planning to replace your roof, it's also a good opportunity to consider upgrading your insulation.  However, if you opt for new blown-in insulation, your roofing contractor will install it while they remove the decking.  This insulation process requires running a hose through the exposed roof and into your attic. It allows the insulation to be installed quickly and easily without causing any damage to your walls or ceilings.  Therefore, with the new insulation, you can enjoy improved energy efficiency and a more comfortable indoor environment. 6. Leave It Clean After the roofing crew installs your new roof, they should clean up any debris around your home. This includes loose shingles and nails and leaves them in their original condition.  They should also haul away old roofing materials for proper disposal. Additionally, you must ensure not to dispose of in landfills, which can contribute to pollution. The roofing expert must inspect the final product to ensure it meets all industry standards and building codes.  They should also check for potential leaks or damage and address any concerns. It is important to address any concerns and take steps to correct any issues. Therefore, ensure you’re completely satisfied with the new roof and its reliable protection for years. Can You Repair Your Roof Yourself? Understandably, as a homeowner, you may want to save money. Therefore, taking care of some home maintenance tasks can help you save a lot.  However, it is important to know your limits when it comes to your roof.  You may be capable of handling minor tasks such as replacing caulking or cleaning gutters. On the other hand, leaving any roofing projects to the professionals is highly recommended.  Moreover, roofing maintenance requires specific skills, knowledge, and equipment that only experienced and trained professionals possess.  Even a seeming DIY project can quickly spiral into a much bigger roof repair if something goes wrong.  Therefore, it's always wise to prioritize the safety of your home and family. Look for an efficient roofing service provider and explain the damage. You can get your roof cost-effectively repaired under expert supervision! Read Also: How Often Do You Need A Roof Inspection? Elevate Your Roof’s Health With Aerial Roof Inspections Choosing A Siding And Roofing Companies In Delaware

READ MOREDetails