Published on: 25 January 2021
Last Updated on: 24 December 2024
There is nothing that beats the taste of a freshly picked tomato from your garden compared to produce that is bought from a grocery store. Growing your vegetables in the comfort of your garden is one of the activities that balance indulgence and practicality. Aside from the convenience, growing your vegetables allows you to get more nutrition as well.
Vegetables start to lose their nutrients the moment they are harvested, and their quality decreases as sugars will turn into starches. Hence, if you are aiming for veggies with the best nutrition, try growing your own. That being said, here are a few of the best vegetables that are best to grow in your garden.
Rhubarb
Rhubarb is a vegetable that is renowned for its red firm stalk and sour taste. Like celery, it is edible, especially when you add a lot of sugar to it. Although it is technically a vegetable, it is commonly used in sweet and tart recipes. There are also different types of rhubarb that you may choose to grow for personal consumption.
Rhubarb best grows in well-draining and fertile soil that is abundant in organic matter. Constant moisture is necessary, but it doesn't like too much wetness. These plants spread out; therefore, it should be placed 3-4 feet apart from each other when planting. It does not contain a lot of essential nutrients, but it is an excellent source of vitamin K1.
Tomatoes
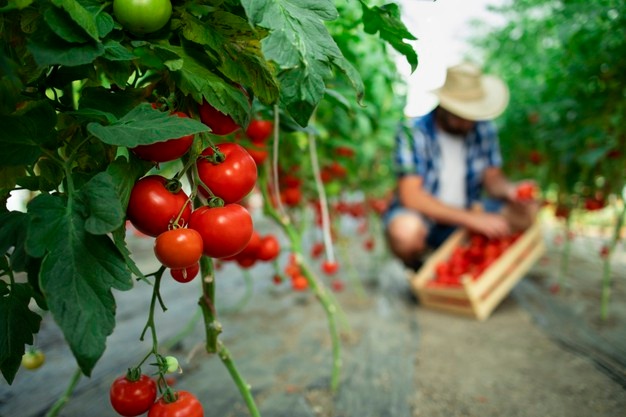
Fresh, homegrown tomatoes are one of the few reasons many gardeners decide to get into gardening. Nothing could match eating a perfectly ripe tomato from your backyard. It is also unbelievably good for us, with it being rich in vitamins A, B6, and C, niacin, fiber, potassium, magnesium, iron, and the antioxidant lycopene.
Tomatoes are ideal for growers with small balconies or gardens as they do not require too much space to grow. They typically take 12 weeks until they can be harvested. Aside from this very speedy growing period, its plant can produce tomatoes daily for up to six years. It would be best to watch out for tomato horns as these large caterpillars can be a problem.
Broccoli
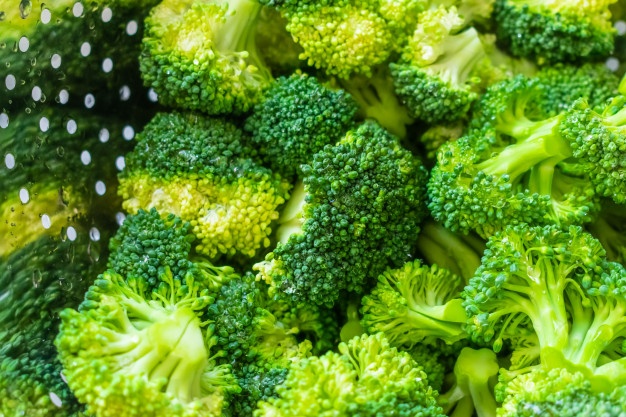
Broccoli is a vegetable that belongs to the cole crop family along with kohlrabi, kale, Brussels sprouts, cabbage, and cauliflower. It grows best during the cold season of the year. It is known to be high in vitamins A, B6, C, magnesium, calcium, and iron. As a matter of fact, a cup of raw broccoli gives 130 percent of a person's regular vitamin C requirement.
Broccoli is best to grow during early spring and fall and can be set in an in-ground garden or container. Place these plants 18 inches apart from each other. You may also want to get a location that has fertile soil and has easy access to water. A moisturized soil is also best for broccoli, therefore water it for 1 to 1.5 inches every week.
Red Bell Pepper
Most of the gardeners would agree that every time they planned their vegetable garden, one of the plants they want to include is a bell pepper. Who would not? Peppers are great in all types of dishes, cooked and raw. Red bell peppers are high in vitamins A, B6, C, riboflavin, and potassium. You may want to take note that a cup of it contains 93% of the required vitamin A and 317% of vitamin C daily allowance.
Although growing this vegetable is not as problematic compared to other plants, temperature plays an important role. They may be easy to grow, but its plant care, especially in the early stages, is crucial. Bell peppers flourish in warm seasons, and it is vital to be sure that the chance of frost in your area is long gone since frost might hinder pepper growth.
Beets
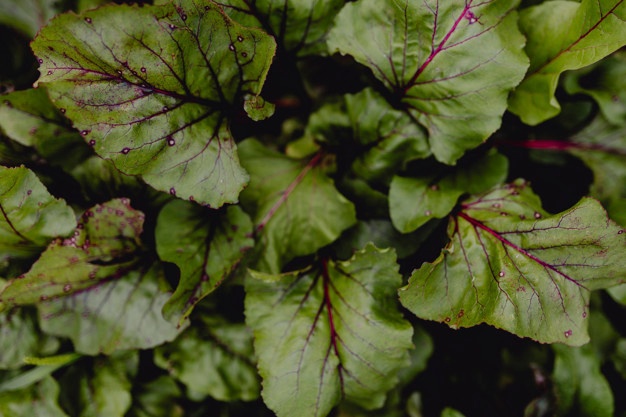
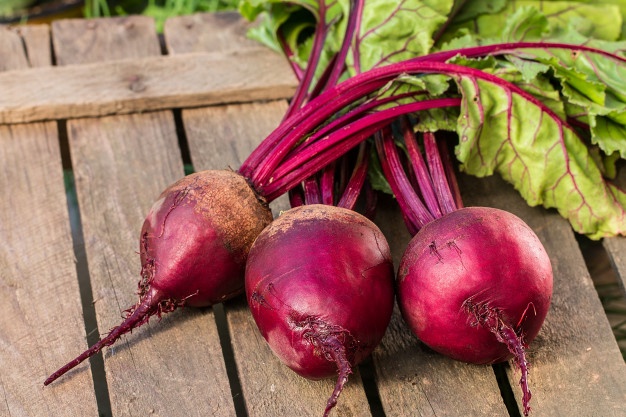
Beets are one of the vegetables that can grow quickly and do not require you to wait long before you can harvest them. Apart from its roots, you can also eat its green tops, making it a dual-purpose crop. Young beets can be added to a salad, while the larger ones can be sauteed as a side dish. Beetroots are very rich in vitamin C, potassium, and iron.
Beets are the best option for northern gardeners as they can survive near-freezing temperatures and frost. For beginners, it is best to look for bolt-resistant, especially in warm weather. You can also start harvesting them once they are about the size of a tennis or golf ball as larger roots may be woody and tough.
Takeaway
Growing and maintaining your vegetable garden may seem overwhelming to some people, but it is easier than it sounds. Even if you only have a small garden, you may still be able to grow the vegetables we provided in this article. Additional guides can also be found all over the internet.
Content Rally wrapped around an online publication where you can publish your own intellectuals. It is a publishing platform designed to make great stories by content creators. This is your era, your place to be online. So come forward share your views, thoughts and ideas via Content Rally.
Zebra blinds, also known as transitional shades, have emerged as a popular window treatment option for those seeking a harmonious blend of style and functionality. These versatile window coverings are gaining recognition for their unique design and ability to transform any space.
In this article, we will delve into the world of zebra blinds canada, exploring their features, benefits, installation, and maintenance. Let's embark on this journey to uncover the elegance that zebra blinds can bring to your home.
What Do You Know About Zebra Blinds?
Zebra blinds are a modern and innovative window treatment solution that gives homeowners optimal control over light and privacy. They consist of two layers of fabric with solid stripes and alternating sheer, giving them their distinctive appearance. The ingenious design allows you to adjust and control the position of the fabric layers, creating varying degrees of light filtration and privacy.
The Zebra blinds are available in different shades, transitional shades, alternating shades and others. These solid bands offer privacy and then block out the lights. It can help you get the soft, diffused glow in your space.
These zebra blinds are available in different options. You can fix them in different places, the living rooms, the bedrooms, the home office and others. They offer you a contemporary, modern look that complements the different design styles.
Benefits of Zebra Blinds
The Zebra blinds are available in different shades and styles, as we mentioned above. But they are more used for the advantages they carry. Here, we provide you with the advantages that you have with the help of the zebra blinds.
So, let's get started with the discussion to have a better understanding of the facts.
1. Light Control
Zebra blinds offer exceptional control over natural light. You can perfectly balance a well-lit room and a shaded private space by aligning the sheer and solid stripes. This adaptability is especially valuable for rooms with changing light conditions throughout the day. It requires mention that you need different shades of light for different occasions. If you have control over the amount of lights entering your house, you can undoubtedly be able to regulate the temperature of your home.
2. Privacy
Maintain your privacy without sacrificing natural light. Zebra blinds allow you to obscure the view from the outside while still enjoying the scenery outdoors. It's an ideal solution for homes in densely populated areas or those facing busy streets.
Among the top requirements that you have, privacy is undoubtedly one of them. From this aspect, the zebra blinds are of great benefit without a hint of doubt.
3. Stylish Aesthetics
Zebra blinds are not just functional; they also serve as a stylish design element in any room. Their contemporary look complements various interior styles, from modern to traditional, making them versatile. There are different categories of zebra blinds that define your core requirements. You have to be highly specific about your own requirements. They help you get the best look and feel.
But you can not shift your focus or attention from the aesthetics. This is the reason they are effective in terms of the overall look and feel of both your zebra blinds and at the same time, the aesthetics.
4. Easy Maintenance
Keeping zebra blinds clean is hassle-free. Regular dusting or gentle vacuuming is usually sufficient to maintain their pristine appearance. Their durability ensures they remain an attractive window treatment for years to come. What you simply need is to allocate some minutes, once or twice a week. It will be more than sufficient to provide you with the necessary maintenance.
Installation
Installing the zebra blinds has their own fun and, at the same time, their own challenge. You can say that there are both positives and the negatives. But you can not overlook the fact that you, too, have your own requirements.
Installing zebra blinds is a straightforward process that can be done by a professional or as a DIY project. Here's a basic guide:
1. Gather Your Tools
To begin, you'll need a measuring tape, a level, a screwdriver, and a pencil.
2. Measure Your Windows
Accurate measurements are crucial for a perfect fit. Measure the width and height of your window frame, noting down the dimensions.
3. Mounting Brackets:
Attach the mounting brackets to the top of your window frame, ensuring they are level.
4. Install the Blinds
Insert the zebra blinds into the mounting brackets and secure them in place.
5. Test Operation
Test the blinds to ensure they raise, lower, and adjust smoothly.
Another angle of this action is the availability of time. You may not have sufficient time for installation. Or it might be possible that you are not good at it and it's not your among your priorities. Then, in that case, you make the best of professionals. They have a thorough knowledge of the nitty-gritty of the art. They can help you out with the inputs.
Maintenance Tips
Buying aesthetically appealing zebra blinds will not be enough; you must also focus on maintenance. It involves your daily time investments. You must mop it daily or do it twice or thrice a week. It may be that you don't have sufficient time. But if you can not mange your maintenance, then in that case you must take the help of helping hands, be it the
To keep your zebra blinds in pristine condition, follow these maintenance tips:
Regularly dust or vacuum the blinds to prevent dust buildup.
Spot clean any stains with a mild detergent and a soft cloth.
Avoid using harsh chemicals or abrasive cleaners, as they can damage the fabric.
Conclusion
In conclusion, zebra blinds offer a unique combination of functionality and style for your windows. Their innovative design can help you control light and privacy effectively while adding a touch of elegance to your living spaces. Whether you're redecorating your home or simply looking for a practical window treatment solution, zebra blinds are an excellent choice. So consider these points while you look to select zebra blinds for your home.
Read Also:
Inspiring Window Treatment Ideas
Replacement Windows – Benefits of Vinyl Windows
10 Tactics To Maintain Clear Windows
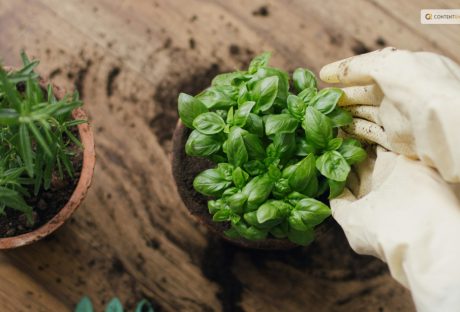
Basil is one of the most popular and versatile herbs you can grow in your garden or indoors. It has a fresh and aromatic flavor that can enhance any dish, from salads and soups to pizzas and pastas. Basil is also rich in vitamins, minerals, and antioxidants just like cilantro. It can benefit your health and well-being. But how do you harvest basil properly so that it keeps growing and producing more leaves?
If these are some of the things you want to know, I have you covered! In this article, I will answer all these questions and more and give you everything you need to know about harvesting basil! So, keep on reading this blog till the end to learn more…
How to Harvest Basil Leaves?
The first thing you need to know about harvesting basil is when to do it. The best time to harvest basil leaves is in the morning when the plant is still fresh and moist. Avoid harvesting basil in the afternoon or evening when the plant is dry and wilted. Also, avoid harvesting basil when it is raining or wet, as this can cause the leaves to rot or mold.
Steps to Harvest Basil Leaves
To harvest basil leaves, you will need a pair of scissors or a sharp knife and a basket or a bowl to collect the leaves. You can also use your fingers to pinch off the leaves, but be careful not to damage the stem or the plant. Here are the steps to follow:
Start from the top of the plant, and look for the stems with leaf clusters. These are called the terminal buds, and they are where the basil flowers will grow. You want to remove these buds, as they will make the plant stop producing new leaves and focus on flowering and seeding. This will reduce the flavor and quality of the basil leaves.
Cut or pinch off the stem just below the terminal bud, leaving about a quarter of an inch of stem above the next pair of leaves. This will encourage the plant to grow two new stems from the leaf nodes and produce more leaves. You can also cut or pinch off any other stems that are too long or leggy and leave about four to six pairs of leaves on each stem.
Repeat this process for all the stems that have terminal buds, and collect the leaves in your basket or bowl. You can also harvest some of the lower leaves but leave enough leaves on the plant to allow it to photosynthesize and grow. You should not harvest more than a third of the plant at a time, as this can stress the plant and reduce its growth and health.
After harvesting, rinse the leaves with water and pat them dry with a paper towel. You can use them fresh or store them for later use.
How to Harvest Basil So It Keeps Growing
One of the benefits of harvesting basil is that it stimulates the plant to grow more leaves and branches and prevents it from flowering and seeding.
However, you need to harvest basil regularly and correctly, so that it keeps growing and producing more leaves.
Here are some tips to follow. For instance, you must harvest basil:
At least once every two weeks, or more often if you see the terminal buds forming. This will keep the plant bushy and compact and prevent it from becoming woody and bitter.
From different parts of the plant, and not always from the same spot. This will ensure that the plant grows evenly and does not become lopsided or uneven.
Before it flowers. This is because the flowers will reduce the flavor and quality of the leaves. If you see any flowers forming, remove them as soon as possible. You can also pinch off the flowers and use them as edible garnishes or decorations, as they have a mild and sweet flavor.
Before the frost, as the cold weather will kill the plant. You can either harvest the whole plant and store it for later use, or bring it indoors and keep it in a sunny and warm spot. You can also propagate the plant by taking cuttings and rooting them in water or soil and grow new plants for the next season.
How to Harvest Basil Without Killing The Plant?
Harvesting basil is different from harvesting lettuce or other plants. The process is good for the plant and you, as you can enjoy the fresh and aromatic leaves in your dishes.
However, you need to be careful not to harvest too much or too often, as this can harm and kill the plant.
Here are some dos and don'ts of harvesting basil without killing it:
Do harvest basil from the top of the plant, not the bottom or the middle. This will allow the plant to grow stems and leaves from the lower nodes and maintain its shape and structure.
Don't harvest basil from the main stem or cut it too close to the ground. This will damage the plant and prevent it from growing new stems and leaves. Leave at least four to six pairs of leaves on each stem and about an inch of stem above the ground.
Do harvest basil gently and carefully, and not roughly or forcefully. This will avoid injuring the plant and exposing it to diseases or pests. Use a sharp and clean tool, such as scissors or a knife, and make clean and smooth cuts. You can also use your fingers to pinch off the leaves but be gentle and precise.
Don't harvest basil when it is stressed or unhealthy, such as when it is wilting, yellowing, or diseased. This will weaken the plant and make it more susceptible to further damage. Wait until the plant recovers and looks healthy and green before harvesting. You can also water and fertilize the plant to help it grow and thrive.
Do harvest basil when it is young and tender, not old and tough. This will ensure the leaves are fresh, flavorful, and not bitter or woody. Harvest basil when the leaves are about two to three inches long before they curl or turn brown.
How to Pick Basil Leaves?
Picking basil leaves is another way to harvest and use the leaves in your dishes. You can pick basil leaves with your fingers or with a pair of tweezers, depending on your preference and convenience. Here are some tips on how to pick basil leaves. For instance, you can pick it:
From the top of the plant, not the bottom or the middle. This will allow the plant to grow stems and leaves from the lower nodes and maintain its shape and structure.
From the stems that have terminal buds, not from those that have none. This will prevent the plant from flowering and seeding and producing more leaves. You can also pick some of the lower leaves but leave enough leaves on the plant to allow it to photosynthesize and grow.
Gently and carefully, and not roughly or forcefully. This will avoid injuring the plant and exposing it to diseases or pests. Use your fingers to pinch off the leaves or a pair of tweezers to pluck them off. Be gentle and precise, and do not pull or tug on the leaves or the stems.
When they are young and tender and not when they are old and tough, this will ensure the leaves are fresh, flavorful, and not bitter or woody. Pick basil when the leaves are about two to three inches long before they curl or turn brown.
How to Store Basil Leaves?
Storing basil leaves is a great way to preserve and enjoy them for later use. You can store basil leaves in different ways, depending on how long you want to keep them and how you want to use them. Here are some of the best ways to store basil leaves:
Refrigerate Them
You can refrigerate basil leaves for up to a week, by wrapping them in a damp paper towel and placing them in a resealable plastic bag or an airtight container. This will keep them moist and fresh, and prevent them from wilting or drying out. However, you should not wash them.
Freeze Them
You can freeze basil leaves for up to six months, by blanching them in boiling water for a few seconds, and then plunging them in ice water to stop the cooking process. This will preserve their color and flavor, and prevent them from browning or oxidizing. Then, pat them dry with a paper towel, and place them in a resealable plastic bag or an airtight container. You can also chop them and mix them with some olive oil, and freeze them in ice cube trays. This will make it easier to use them in soups, sauces, or dressings.
Dry Them
You can dry basil leaves for up to a year, by hanging them upside down in a warm and dry place, such as a closet or a pantry. This will dehydrate them and concentrate their flavor, and make them last longer. However, you should avoid drying them in direct sunlight, as this can bleach them and reduce their quality. You can also dry them in an oven or a microwave, but be careful not to burn them or overcook them. Once they are dry, you can store them in a glass jar or a spice container, and crush them or grind them before using them.
Make Pesto
You can make pesto with basil leaves, by blending them with some garlic, pine nuts, parmesan cheese, and olive oil. This will create a delicious and versatile sauce that you can use for pasta, sandwiches, salads, or dips. You can store pesto in the refrigerator for up to a week, or in the freezer for up to six months. You can also customize pesto by adding other herbs, nuts, cheeses, or spices, according to your taste and preference.
How to Cut Basil?
Cutting basil is a simple and easy way to harvest and use the leaves in your dishes. You can cut basil with scissors, a knife, or your fingers, depending on your preference and convenience.
Here are some tips on how to cut basil:
Wash and dry the basil leaves before cutting them to remove any dirt or insects. You can rinse them under running water or soak them in a water bowl with a few drops of vinegar. Then, pat them dry with a paper towel or spin them in a salad spinner.
Cut the basil leaves just before using them, to preserve their flavor and aroma. If you cut them too early, they will lose their freshness and wilt. You can also bruise or damage the leaves if you cut them too roughly or with a dull tool.
Cut the basil leaves according to the size and shape that you need for your recipe. You can either leave them whole or chop them finely or coarsely. You can also cut them into ribbons or strips, by stacking several leaves together, rolling them up, and slicing them thinly. This is called the chiffonade technique, and it creates a beautiful and elegant garnish.
Cut the basil leaves with a sharp and clean tool, such as scissors or a knife, and not with a blender or a food processor. This will avoid bruising or crushing the leaves and releasing their oils and juices. You can also use your fingers to tear or pinch off the leaves but be gentle and careful.
How to Use Basil Leaves?
Using basil leaves is a fun and easy way to add flavor and aroma to your dishes. You can use basil leaves in different ways, depending on your mood and occasion. Here are some of the best ways to use basil leaves:
Fresh
You can use fresh basil leaves to garnish and enhance your dishes, such as salads, soups, pizzas, and pastas. Also you can use fresh basil leaves to make salads, such as caprese salad with tomatoes, mozzarella cheese, and basil, or Greek salad with cucumbers, feta cheese, and basil. You can also use fresh basil leaves to make drinks, such as lemonade, tea, or cocktails, with basil, lemon, sugar, and water.
Cooked
You can use cooked basil leaves to flavor and season your dishes, such as sauces, stews, curries, and casseroles. Also you can use cooked basil leaves to make dishes, such as tomato sauce with basil, garlic, and onion, or chicken with basil, cream, and mushrooms. You can also use cooked basil leaves to make breads, such as focaccia with basil, olive oil, and salt, or muffins with basil, cheese, and eggs.
Preserved
You can use preserved basil leaves to store and enjoy them for later use, such as freezing, drying, or making pesto. Also you can use preserved basil leaves to make dishes, such as pesto pasta with basil, garlic, pine nuts, and parmesan cheese, or roasted vegetables with basil, olive oil, and salt. You can also use preserved basil leaves to make snacks, such as crackers with basil, cheese, and honey, or popcorn with basil, butter, and salt.
Wrapping It Up!
Basil is a wonderful herb that you can grow and harvest in your garden or indoors. It has a fresh and aromatic flavor that can enhance any dish, and a rich and nutritious profile that can benefit your health and well-being. By following the tips and tricks in this article, you can learn how to harvest basil properly, so that it keeps growing and producing more leaves, how to cut basil, pick basil leaves, and store them for later use, and how to use basil leaves in different and delicious ways.
Read Also:
Some Facts You Need to Know About Rainwater Harvesting
Asparagus 101: When, How, And How Often To Harvest?
Exploring Ideas For A Biophilic Home Design
Regarding lawn care, Littleton's best services take a strategic and scientifically grounded approach that results in lush, healthy, and beautiful lawns. These lawns become the envy of neighbourhoods, stand out in the summer sun, and sparkle in the winter frost. One may wonder, "What's the secret to such beautiful lawns?" The answer lies in various lawn care strategies, including weed control & fertilisation, liquid aeration, overseed, revive, winter mite control, and weed kill in rock/mulch beds.
Weed Control & Fertilization
The Importance Of Weed Control & Fertilization
Weeds are often the bane of any lawn owner's existence. They are hardy, pervasive, and can quickly overtake a lawn if not adequately controlled. Littleton lawn care services understand that effective weed control combines preventative measures and targeted treatments.
Preventative Measures
One of the keys to weed control is prevention. Instead of waiting for weeds to sprout and then trying to eliminate them, the best lawn care services take proactive steps to prevent weed growth in the first place. They do this by maintaining the right balance of nutrients in the soil and ensuring that the lawn is thick and healthy to crowd out any potential weed invaders.
Targeted Treatments
When weeds infiltrate a lawn, targeted treatments eradicate them without damaging the surrounding grass. This is where expert knowledge comes into play. Different weeds require different treatment strategies, and understanding this is crucial to effective weed control.
Fertilisation
Fertilisation goes hand in hand with weed control. It's all about providing your lawn with the necessary nutrients to thrive. Keeping your property well-fed makes it more resistant to disease, drought, and weed invasions. The best lawn care services understand that a proper fertilisation schedule is critical to maintaining a lush and healthy lawn.
Why Liquid Aeration Is Essential
Aeration is a technique that helps alleviate soil compaction, allowing your lawn to breathe, absorb nutrients and water more effectively. Traditional aeration methods can be labour-intensive and involve creating physical holes in the yard. However, Littleton's best lawn care services have adopted a more modern, less invasive approach: liquid aeration.
Understanding Liquid Aeration
Liquid aeration involves the application of a liquid solution that breaks up the soil at a molecular level. This process improves the soil structure and allows grass roots to penetrate deeper. The result is a stronger, healthier lawn with improved drought resistance.
Overseed
The Art And Science Of Oversee
Overseeding is a technique used to fill in bare patches in a lawn and improve its overall density and colour. Overseeding can bring life back to a tired, worn-out lawn by sowing new grass seed over existing properties.
Timing And Technique Matter
When it comes to overseeding, timing and technique are crucial. The best times to overseed are usually in the spring and fall, when temperatures are moderate, and the new grass has the best chance of survival. The best lawn care services understand this, know the right amount of seed, and the best techniques for spreading it to ensure even growth.
Revive
Revive: A Rescue Operation
Revive is a lawn care technique designed to bring back the vigour and health of a lawn under stress. This could be due to extreme weather conditions, disease, pests, or simple neglect.
A Tailored Approach
Revive operations must be tailored specifically to the condition of each lawn in Littleton. Littleton's top lawn care services excel at diagnosing issues plaguing properties and creating an effective revitalisation strategy; this might involve altering watering practices, changing mowing methods or applying specific treatments that address disease or pest issues.
Winter Mite Control
Battling The Invisible Foe
Winter mites are an increasingly prevalent lawn pest in Littleton and can significantly damage during the cooler months. Feeding on grass, these tiny predators feed off it resulting in discoloured, thinner properties come spring.
Preventing And Treating Infestations
Winter mite control involves both prevention and treatment. Lawns can be treated with products designed to deter mites, while watering practices may also be adjusted to make lawns less inviting to these pests. Should an infestation develop, targeted treatments can be utilised to get it under control quickly.
Weed Kill In Rock/Mulch Beds
Maintaining The Beauty Of Rock/Mulch Beds
Rock and mulch beds can be a beautiful addition to a landscape but can also become a haven for weeds. However, the usual weed control methods used for lawns aren't always suitable for these beds.
Tailored Weed Control Strategies
Littleton's best lawn care services have tailored strategies for weed control in rock/mulch beds. This might involve careful hand-weeding, using landscape fabric to deter weed growth, or the targeted use of weed-killing products that won't harm the desired plants.
Conclusion:
In conclusion, the secret to a beautiful lawn is professional knowledge, careful technique, and targeted treatments. By understanding and employing strategies like weed control & fertilisation, liquid aeration, overseed, revive, winter mite control, and weed kill in rock/mulch beds, the best lawn care services in Littleton can maintain and create lawns that are indeed a sight to behold.
read Also:
5 Reasons Why You Absolutely Must Have Houseplants In Your Life
How To Plant Grass Seed On Hard Dirt? – Latest Update 2022
10 Best Bedroom Plants To Buy In 2022