Published on: 23 December 2020
Last Updated on: 10 May 2021
A house with many family members is hard to manage as everyone loves to have their own space. But the limited space can make it crowded by giving your home giving an ugly look. All thanks to modern ideas which have introduced several ideas for crowded families. It makes the house look arranged while keeping in mind adjustments. The look involves the latest trends and lifestyles to develop my sense of styling while keeping my mind comfortable. Apart from these comes your pets, for whom a small kennel door with a dog door could be placed on the lawn of your house. In this article, we will discuss modern home design ideas for crowded families.
Ideal space for Teenagers
A crowded family must have children and teenagers who demand their own space. However, providing each one of them with their separate rooms may not be possible. To overcome this solution, the idea of the shared bedroom can be considered. The design of the bedroom should focus on the needs of children according to their age. To create more space, bunk beds are the most flexible options, leaving you with some empty spaces to play around.
Nowadays, study stable comes with multiples shelves fixed from the wall and can be closed when not in use while creating a good space-saving idea. These shelves are useful hacks for putting their stuff, toys, and books in a proper place. The sofa cum bed could also be turned on into a great option. The beds also come with lots of storage box options where new things, including sports or musical instruments, can be put on. Lastly, the wardrobe cabinet with multiple small shelves and space for hangers will store all their clothes methodically. If there are both boys and girls in a room, try keeping a neutral color of walls like calm grey, which would look pleasant without overly decorated.
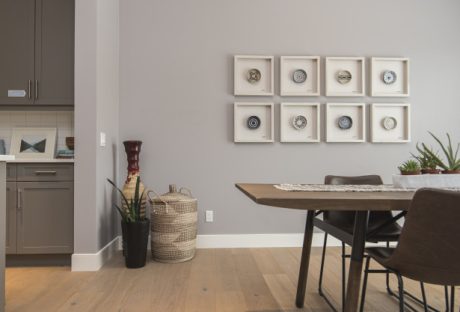
Give a multi-dimensional look to your dining room.
For a home with a large number of people, there is much need for multifunctional spaces. The dining spaces could be transformed into a games room or a corner used as a reading place. You can place an armchair with bookshelves placed on the walls. One needs to focus on the preferences of family members for doing so. A television set could also be placed on the other side of the wall there with a lounge for entertainment purposes. You can add some masterpiece painting, vases, or wallpapers to give a modern look in your room. Place a dining table where your family can fit in have a meal together. The buffet tables or smart dining tables with extendable chairs are a great way to save space.
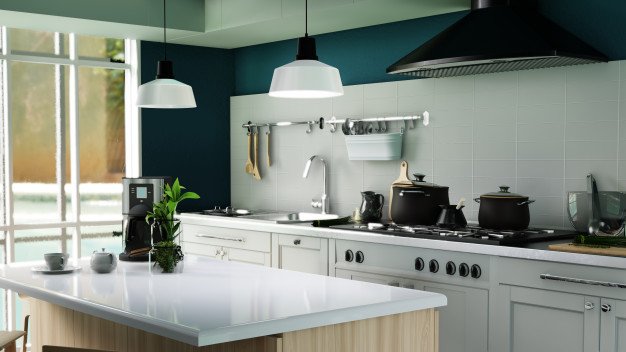
Go for an open kitchen
You can plan your dining room entrance just before the open kitchen as it will save a lot of space in the kitchen. The open kitchen doesn't make it look congested, and the dining room's access will recreate more space into it. It would be easy to serve food and won't create a mess around long pathways. You can place a covered shelves box or drawers in the wall and arrange all your cutleries there for storage options. Make sure to build cabinets below the kitchen slabs where you can store multiple ingredients along with a cylinder at the corner. Put your microwave in one corner and attach extended shelves or cabinets on the walls for keeping more utilities there. A larger counter place would eliminate high trafficking in a home where more than one person works. You can create a specific station in the kitchen for getting your work more organized.
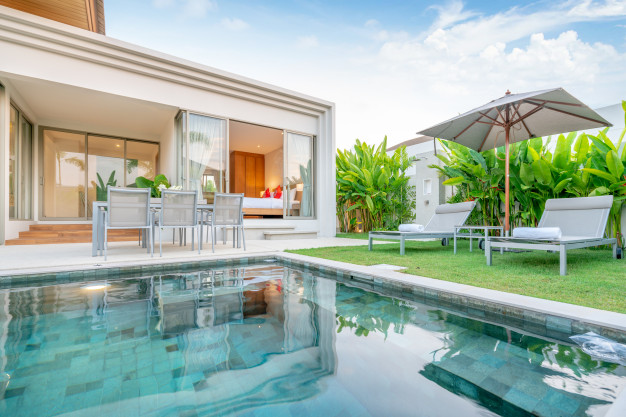
Turn out your lawn into a place to get together
For having a good time, a lounging area can be considered an entertainment room option. The large family tries to do everything together, so the lawn or balcony could be placed with comfy diwan and sofa sets. One could turn it up as a garden by putting up many plants, and the place would be great for a mini picnic spot. You can also add bean bags or swings and decorate them with warm lighting to create a unique evening look. The place would be great for barbeques, or a small get-together. If you don't have much space, you can create a window seat and do partitions using some fabrics to create a visual barrier.
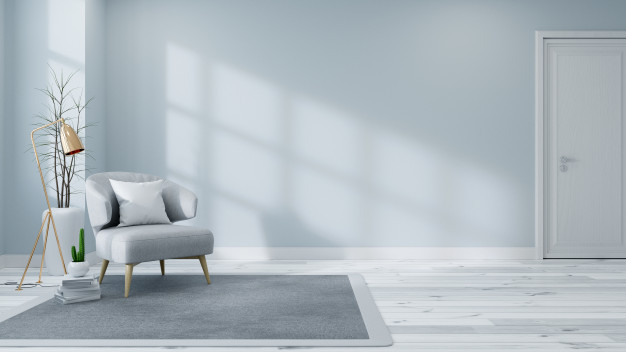
Create congenial public spaces
For your living thing, the best would be to go with L-shaped sofas. They are useful to handle the long stream of guests and can be placed with some more small seaters around. If you have a larger living space, you can break it into shorter sitting with cushions for private conversations. Make sure to use durable surfaces that would be durable and easy to clean the mess in a busy family. This setup will give a warm and comfortable space. You can also place a wall red sea aquarium to use the best of areas. Placing a wall aquarium will consume less space and it will be a center of attraction for everyone.
Conclusion
To avoid the mess, place a standard shoe stand. You can also use the garage's extra space as a storeroom by putting up the different things there. Utilize the basement of your house for this purpose. You can save more space by having shared bathrooms placed between the bedrooms.
Read Also:
Content Rally wrapped around an online publication where you can publish your own intellectuals. It is a publishing platform designed to make great stories by content creators. This is your era, your place to be online. So come forward share your views, thoughts and ideas via Content Rally.
The dining room is more than just a space where meals are taken. It is the heart of the home and the one place that brings people together. As a space where families get to spend time and enjoy delicious meals, it is only right that homeowners would want it to be stylish and luxurious. The modern dining room comes in two types; the formal dining room is a separate area from the kitchen. On the other hand, open-plan dining where the kitchen connects to the living space.
For the past years, the open plan dining has gained traction among homeowners, and the formal dining room is becoming more uncommon. Why? Because the large open plan is more practical and allows them to save space.
Thus, the modern dining room concept has typically become the kitchen area that transitions into the living area. So how do you proceed with creating a modern dining room? Whether you are doing an extreme dining makeover or making a few tweaks to make your dining room, there are so many options to explore to give your space a modern tone. These tips will help you give your dining space a refreshing modern vibe.
1.Add a centerpiece
When creating a modern dining room, it is essential also to decorate the dining table. A contemporary table centerpiece could spice up your dining room, giving it that modern look you are going for. Depending on your style, centerpieces go from a simple vase of flowers and candles to a decorative bowl with fruits.
You can even customize one by DIYing decorations. Greenery centerpieces like succulents or snake plants would also do an excellent job bringing life into space. A bonus is they are low maintenance, and you won't have to deal with withered plants frequently. Mixing different statement-making materials with bold and neutral colors to decorate the room will give it a sophisticated look. Apart from elevating the dining room's overall appearance, a fantastic centerpiece will transform your dining into a classy space.
2.Integrate wooden furniture
Wooden furniture has a lot to offer in the dining room. It's simple, and its natural attribute can bring style to the room. However, before you go in over your head with displaying cabinets and sideboards, start with the basics; dining table and chairs. However, you should consider adding a wooden dining table handcrafted to meet your preferred style and needs.
There is a vast choice of wooden dining tables you can add to update your dining area. A large dining design would do a great job adding comfort. Team your dining table with classic chairs to give your dining space a whole new look. Anne Quin furniture offers to handcraft modern style dining tables at affordable rates. If you crave a luxurious dining set, you can learn more about Anne Quin furniture on their site.
3.Light it up
One way to make a statement in your dining space is by adding a modern lighting fixture. Pendant lightings are on-trend, and most importantly, they work perfectly in the dining room. Always remember to choose a soothing light because you want people to be comfortable. The pro tip is the bigger you go, the better it is for the room's appeal.
You can choose a single large hanging pendant or install a group to make a bolder statement in the room. There are many shops filled with affordable lighting fixtures, so you have free reign, one that marries well with the existing décor and finishes in the area. A beautiful lighting fixture will bring the room together and boost its visual appeal.
4.Add a banquette
A modern dining space is about mixing different aspects: classic, elegant, and contemporary. Create a relaxed vibe in the room by adding a banquette near the dining table. A banquette is an ultimate steal when modernizing your dining space; homeowners get to enjoy a modern vibe while adding more storage space. It also offers a flexible seating option which is a bonus. You can top the banquette with colorful plush pillows to cheer up the area and add comfort.
5.A gallery wall
Modern dining styles are about breaking the norm, and many homeowners are embracing going bold in their dining areas. To give the room a purposeful look, you can choose to add modern art or a couple of picture frames.
Since most modern furniture tends to be sleek and cold, a wall of art would create a warm look and maintain a contemporary tone at the same time.
A beautiful piece of contemporary art will bring in some color to finish the dining room. Family photos or botanical-inspired prints could add personality to your dining space. However, ensure you use matching frames to give the room a cohesive look.
Trust us; displaying them in your dining room would look twice as good as it would on your social media.
How to Create a Cozy Dining for A Rented Apartment
Moved from your hometown for work?
Want to know how to create a cozy environment? Especially in the dining space? Here is how you can.
Moving to a new city for work is exciting. But first, you need an apartment.
Then, you’ll want to make that space feel like home — especially the dining area where you’ll gather for meals and memories. Here’s how to create great dining in a rented space.
Purchase a Compact Dining Set
In a rented apartment, the space is often limited! Yes, it is a nuisance, but we have to do the most
A small round-dining table with two comfortable chairs can make the space feel intimate, and it doesn’t take up that much space. You can choose it to your liking if you prefer modern, rustic or in between.
Think About your Lighting Options
Lighting is so important to help create a warm and inviting space. A great floor lamp or a simple set of string lights can add a nice glow to your dining area.
If you’re able to, I would love the idea of installing a pendant light above the table as well.
Use Rug To Define Space
Add some seasonal greenery or flowers. A geometric rug in neutral tones will ground a black dining room and contrast the heavy pattern of your living room.
Try to keep the rug color the same as your kitchen floor for a seamless blending. This also creates a focal point, which is where all the cooking and cleaning will go on.
Sometimes, less is more when it comes to a beautiful black dining room.
Add Personal Touches
Stop searching for the perfect inspiration from the latest AD. Just do what feels right to keep it cozy!
Make the space your own with personal decorations. A small gallery wall with your favorite photos, a vase of fresh flowers, or a few candles can add a homey feel to your dining area. These touches make the space uniquely yours, even in a rental.
Keep it Functional
Lastly, make sure your dining space works for you. When space is tight, use furniture that can serve double duty. For example, a bench with built-in storage or a table that you can fold & move out of the way when not needed.
There you have it – an inviting and cozy eating space in your apartment.
A place where you can enjoy meals, put your feet up, and recharge as you immerse yourself in your home sweet home.
Final Notes!
Even though the kitchen wins many people’s hearts, the dining area will always be a special place in the home. As seen above, the simplicity and minimalism that a modern dining design calls for taking.
Different forms. These are a slew of tips you can incorporate to give your dining area a modern feel.
Remember to go for designs that complement one another to give your room a seamless pattern. If you remember these things and find the right design combo, you should be good to go.
Have fun and happy redesigning!
Read Also:
Ideas to Give Luxury Feel to Your Condo
How to Make your Home Look Beautiful in the Upcoming Holidays
5 Tips For Designing a Tiny House
How You Can Choose the Ideal Ceiling Light for Your Living Area
If you have a small kitchen, you could find it challenging to organize it and keep your space clutter-free. When you continue to struggle with small kitchen storage, then it’s time to assess how you organize everything. This will help you maximize every inch of kitchen space and ensure that no valuable space is wasted. Top-rated house cleaning in Tucson goes over step by step how to accomplish this task.
How To Organize Small Kitchen
If you are struggling with storage space, here are a few affordable small kitchen storage ideas to make life a little easier.
1. Tension rod
No doubt, a small kitchen could mean having a tough time arranging essentials. But a tension rod can come in handy, especially to keep cleaning supplies safely. Hang your kitchen cleaning supplies from a short tension rod where they are easy to access. What’s more, you can hang rubber cleaning gloves on the tension rod. Your dish-drying towels too can be hidden from plain sight on a tension rod installed in the cabinet.
2. Use up the wall space
Another small kitchen storage idea is to leverage the wall space to store kitchen accessories. Free up the drawer space and use the walls instead of clutter-free storage. You may stash knives on a magnetic rack to make access easy when food preparation is underway.
3. Stack on the rack
One interesting small kitchen storage solution is to locate a bookshelf near the kitchen to store mist essential cooking supplies. You may leverage the space to stack spices, dishware, and even cookbooks.
4. Hang baskets
When it comes to organizing a small kitchen, baskets can come in handy to stack kitchen utensils and cleaning supplies. Better still, you may hang a couple of baskets above a sink to leverage the vacant space. It’s one of the best ideas to stack wet dishes and sponges for quick drying.
Another stylish kitchen storage solution is to hang a wire basket from the ceiling. It could be single or multi-tiered, depending on your storage needs. You can store potatoes, onions, garlic, and any other stuff that also adds visual interest to your kitchen.
5. Floating shelves
Another kitchen storage idea is to add a pair of floating shelves for that extra storage space. This comes in handy if your kitchen lacks room for cabinetry. Easy to install, floating shelves can be hung just about anywhere – even under the bottom shelf. You can hang hand towels, utensils, or coffee mugs.
6. Corner drawer
A small kitchen has little space. But with some creative ideas, you can create smart kitchen storage solutions. The corner drawer is one such space-saving storage idea in a small kitchen, especially for awkward corners. These drawers connect the corners diagonally. As a result, they can pack a lot of stuff that horizontal cabinets cannot.
7. Utensil drawer
When your small kitchen lacks space for crockery and silverware, opt for a built-in utensil drawer. One similar DIY solution, which is affordable as well, is to place stainless steel pots in a deep drawer that has little space. Use these pots for holding small kitchen accessories.
8. Adopt a pantry
Another way to make a small kitchen look bigger is to de-clutter the space by adding a pantry. It is a good storage solution that provides easy access while freeing up the burden on over-stuffed cabinets.
9. On-the-go space
A portable kitchen trolley is a handy addition to a small kitchen. Take it anywhere while it safely stores bulky items. It works like an excellent solution to wheel food to the dining table.
10. Wall-mounted cabinets
Get a little creative with the kitchen décor when you are looking for tips to organize a small kitchen. You may choose a mix of open shelves to show off your favorite cutlery and wall-mounted cabinets to keep stuff out of sight.
Leave some gap between the two to create the impression of extra storage. Picture ledges and hooks can free up the work surface and spruce up the décor.
11. Velcro strips
Velcro strips can come to your rescue in a small kitchen, where you are short on storage space. Attach these strips in two spots to hang towels and other similar stuff to save space.
12. File folders as racks
While a file folder sits empty in your garage, why not put it to the right use in the kitchen? You may be surprised to see that it can be used smartly to organize your kitchen. They come in especially handy to store your kitchen cleaning supplies. Just place all the supplies into the file folders and you do not have to worry about a shortage of space.
Read Also:
The New Trend: Drawer Boxes
7 Expert Hacks for Downsizing to a Smaller Apartment
Design your Kitchen According to Your Budget and Work in Organized Manner
Top Secrets That Slash Your Kitchen Remodeling Bill in Half
10 Unique Kitchen Hacks to Save your Time in Kitchen and Cooking
7 Unique Kitchen Design Ideas That Your Family Will Enjoy
Healthy living requires a clean and safe environment, but with the prevalence of many microorganisms such as mold damage, this can be challenging. This is because they are invisible to the naked eye and release spores into the air, which cause major health problems when inhaled.
Mold is a fungus that grows in the form of hyphae, which are multicellular threads. It is composed of microorganisms that can be found almost anywhere. They are useful outside for breaking down garbage and composite materials, but when found indoors, they are extremely detrimental to human health.
Mold damage produces allergic reactions or irritation and must be removed as soon as possible. To stop it from spreading, early detection and removal are essential. Mold remediation or removal is not something just anyone can do. To achieve a proper sanitization of the entire building to avoid the existence of mold, you will need to contact professionals or follow the complete guide about damp wall treatment procedures. This way, you will be sure that your home or office will be properly treated.
Finding a good remediation service is not always a stroll in the park, especially if you have not worked with one before. However, with the right guide handy, you can easily find a professional company that will properly clean and sanitize your building. If you do not know how to find a good company, and you need recommendations on reputable companies to work with, you can visit the Long Beach mold removal company for help.
Types of Molds Damage:
Here are some common types:
Aspergillus
This type does not need much ventilation and can be found in attics, textiles, walls, dry food, and basements. It has a powdery appearance and may be white, green, or gray in color, with dark dots. It has several carcinogenic forms, but when detected within the home, it causes serious respiratory problems.
Cladosporium
This can be found in both warm and cold places. It can also be found on carpets, clothes, wood, and heating and cooling ducts, among other things. The color is usually black, or green.
Alternaria
This fungus has a white background with black dots and can be found near windows, in fabrics, bathrooms, kitchens, air conditioning units, and wallpapers. However, it is commonly found outdoors.
Trichoderma
This fungus is commonly creamy-white in appearance, but as it releases spores, it becomes green. Windows, baths, kitchens, and wood are among its favorite areas.
Penicillium
This type is fuzzy and comes in a variety of colors, including blue, green, and yellow. Basements, insulation, and carpets are all common places to find them. It is usually present anywhere a water-damaged structure is found. Penicillin, an antibiotic, is derived from it. You can learn more about penicillin by reading this article.
Key Materials for Mold Removal
Mold damage removal requires a variety of tools, depending on the size of the fungus and the type of surface to be cleaned. There are natural cleaning methods that may be utilized to get rid of it as well.
Plastic Sheet
A plastic sheet is used to separate the infected region from the rest of the room, preventing spores from spreading. It is used to block openings to air vents, doorways, and the rest of the building.
Biocide
It is critical to use a high-quality cleaning product for removing mold damage. The fungus will only be hidden if you use poor or regular household bleach or cleaning agent. Biocide is particularly effective at killing and inhibiting this bacterium's growth.
Vinegar
Despite its strength, it is quite effective against fungus. Baking soda, hydrogen peroxide, and lemon juice can all be added to it. Wear safety clothing such as goggles, gloves, and a breathing mask when using it. To remove the mixture, wipe the area with a clean moist cloth.
Sodium Bicarbonate
Baking soda, or sodium bicarbonate, has a wide range of applications, including the removal of fungus. It should be sprayed on the damaged surface after being combined with vinegar or water. After spraying, scrub the area with a brush, rinse, and then spray again.
Dehumidifier
This gets rid of the moisture and prevents future growth. It is best used after the cleaning procedure to air the place and remove any remaining moisture, but it can also be used as a preventative strategy. As a solution, a portable one can be stored in a room with an infestation.
If you need tips on how to use a dehumidifier, you can check here.
Lemon Juice
This natural cleanser is efficient, non-toxic, and has a pleasant scent. Before spraying it, clean the surface with soap and water. It can also be applied daily to keep fungus at bay. It is an excellent choice because it is both environmentally and pet-friendly.
How to Keep Mold Damage at Bay
Here are some methods to guide you:
Regular Checks
They can be found in open regions, but they can also grow in secret spots. This means that regular inspections of damp, dark areas like basements should be carried out to detect the infestation early before it worsens.
Repair any Leaks
If there is a leak from pipes or faucets, fix it immediately and dry the area. Also, inspect drains and pipelines on a regular basis. Liquid storage areas should also be checked because they can leak from their bottles.
Make Use of Cleaners
While it is necessary to deep clean your home on a regular basis, you should do so with a mold-prevention agent. Natural cleaners such as natural lemon, white vinegar, baking soda, as well as other citrus-based treatments are recommended. In addition to keeping fungi at bay, these solutions leave a fresh smell around the building.
Allow Sunshine In
Mold does not thrive in natural light and fresh air. This means that you have to open the windows and curtains to allow sunshine in. You can also turn on your ceiling fan to prevent the survival of mildew. Keep in mind that mold damage is detrimental to human health and this should guide you in taking the right steps to prevent its growth and survival. You can read articles explaining how mold affects human health for more information.
Wrap Up
Mold growth can pose a danger to human health; therefore, it should be nipped in the bud. Always inspect the bathroom, roof, pipes, and foundation for cracks, leaks, or damages. Delaying treatment as soon as the condition is discovered can worsen the condition and increase the cost of treatment, especially if toxic or black mold is present. This article outlined tips to help you prevent mold damage in a building. Feel free to check them out.
Read Also:
We Buy Houses Companies Saving Homeowners From Foreclosure
Cleaning Your Home with Pets – The Most Common Problems
Hosted Mail Service That Runs on the Cloud


 A crowded family must have children and teenagers who demand their own space. However, providing each one of them with their separate rooms may not be possible. To overcome this solution, the idea of the shared bedroom can be considered. The design of the bedroom should focus on the needs of children according to their age. To create more space, bunk beds are the most flexible options, leaving you with some empty spaces to play around.
Nowadays, study stable comes with multiples shelves fixed from the wall and can be closed when not in use while creating a good space-saving idea. These shelves are useful hacks for putting their stuff, toys, and books in a proper place. The sofa cum bed could also be turned on into a great option. The beds also come with lots of storage box options where new things, including sports or musical instruments, can be put on. Lastly, the wardrobe cabinet with multiple small shelves and space for hangers will store all their clothes methodically. If there are both boys and girls in a room, try keeping a neutral color of walls like calm grey, which would look pleasant without overly decorated.
A crowded family must have children and teenagers who demand their own space. However, providing each one of them with their separate rooms may not be possible. To overcome this solution, the idea of the shared bedroom can be considered. The design of the bedroom should focus on the needs of children according to their age. To create more space, bunk beds are the most flexible options, leaving you with some empty spaces to play around.
Nowadays, study stable comes with multiples shelves fixed from the wall and can be closed when not in use while creating a good space-saving idea. These shelves are useful hacks for putting their stuff, toys, and books in a proper place. The sofa cum bed could also be turned on into a great option. The beds also come with lots of storage box options where new things, including sports or musical instruments, can be put on. Lastly, the wardrobe cabinet with multiple small shelves and space for hangers will store all their clothes methodically. If there are both boys and girls in a room, try keeping a neutral color of walls like calm grey, which would look pleasant without overly decorated.
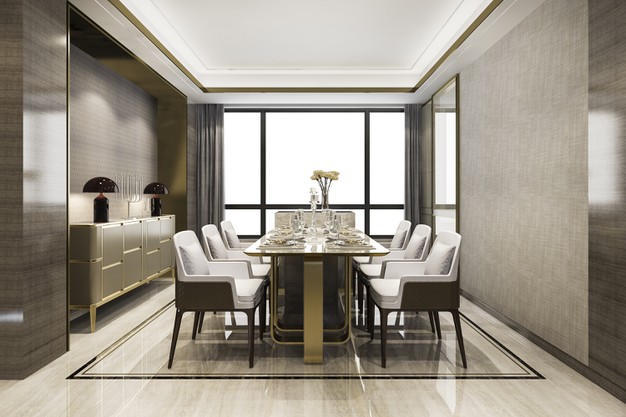 For a home with a large number of people, there is much need for multifunctional spaces. The dining spaces could be transformed into a games room or a corner used as a reading place. You can place an armchair with bookshelves placed on the walls. One needs to focus on the preferences of family members for doing so. A television set could also be placed on the other side of the wall there with a lounge for entertainment purposes. You can add some masterpiece painting, vases, or wallpapers to give a modern look in your room. Place a dining table where your family can fit in have a meal together. The buffet tables or smart dining tables with extendable chairs are a great way to save space.
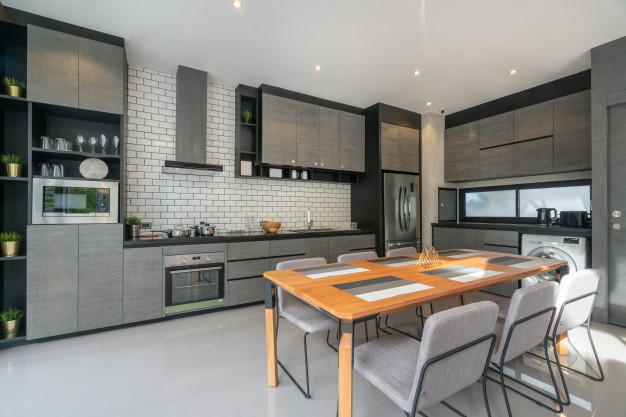 You can plan your dining room entrance just before the open kitchen as it will save a lot of space in the kitchen. The open kitchen doesn't make it look congested, and the dining room's access will recreate more space into it. It would be easy to serve food and won't create a mess around long pathways. You can place a covered shelves box or drawers in the wall and arrange all your cutleries there for storage options. Make sure to build cabinets below the kitchen slabs where you can store multiple ingredients along with a cylinder at the corner. Put your microwave in one corner and attach extended shelves or cabinets on the walls for keeping more utilities there. A larger counter place would eliminate high trafficking in a home where more than one person works. You can create a specific station in the kitchen for getting your work more organized.
 For having a good time, a lounging area can be considered an entertainment room option. The large family tries to do everything together, so the lawn or balcony could be placed with comfy diwan and sofa sets. One could turn it up as a garden by putting up many plants, and the place would be great for a mini picnic spot. You can also add bean bags or swings and decorate them with warm lighting to create a unique evening look. The place would be great for barbeques, or a small get-together. If you don't have much space, you can create a window seat and do partitions using some fabrics to create a visual barrier.