Published on: 28 April 2017
Last Updated on: 04 September 2024
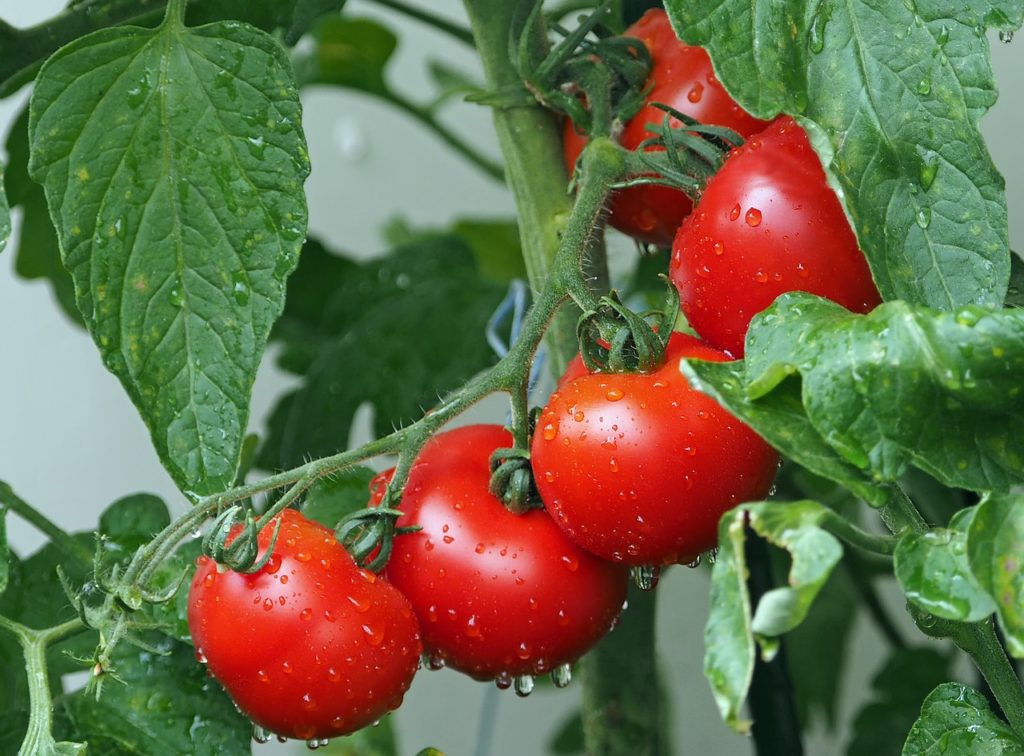
If you are an avid tomato grower you’re probably envious of all the different varieties that other growers talk about, but that you can’t find transplants for in your area. In many cases, those growers are growing tomatoes from seed.
Growing tomatoes from seed really isn’t that difficult, as long as you understand a few basic things. Well, I will walk you through this process below. Read on.
Why is it necessary to start tomato seeds early?
Tomato seeds planted in the garden won’t germinate until the ground is warm enough. What’s the ideal ground temperature? They germinate best at temperatures in the 70-80 degree range.
If you plant seeds directly into the ground, odds are the summer will be too short for tomatoes to become productive before the end of the growing season unless you live in one of the warmest climates in the US.
The days to harvest number that is on a packageof tomato seeds assumes that you are using transplants.
To decide if your area is warm enough to plant directly in the ground, add 30-50 days to that number. So if it says 90 days you would need 120-140 days of temperatures above 70 degrees to get your first ripe tomato if you plant the seeds in the ground!
When should I start my seeds?
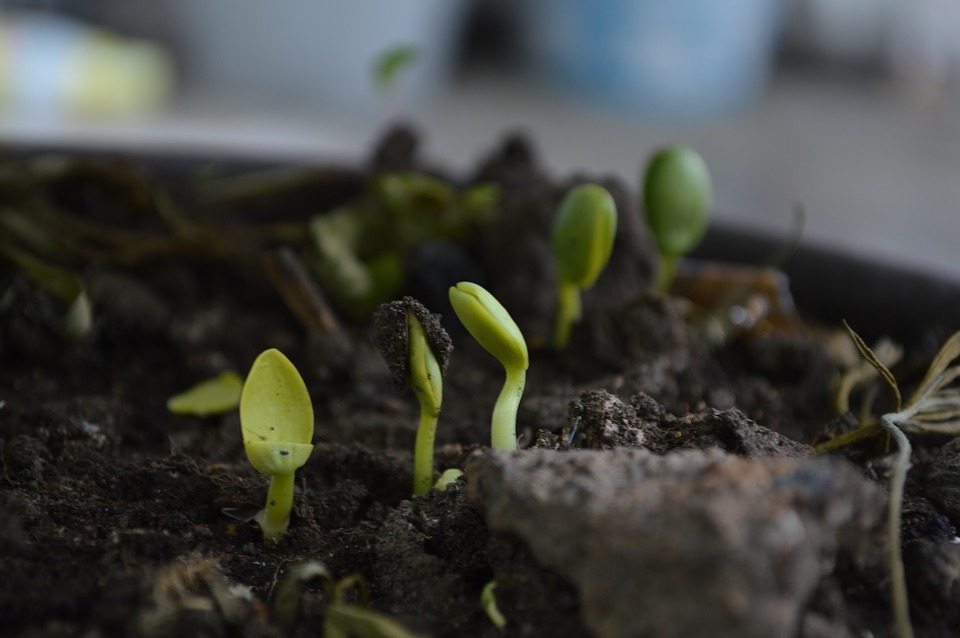
Most people who are growing tomatoes from seed start 4 6 weeks before the last expected spring frost date in their area. You need to wait to plant the seedlings outdoors about 2 weeks after that date when the soil has warmed up to at least 50 degrees.
The date you start growing tomatoes from seed can vary depending on the space you have available and the length of your growing season.
First, you need to gather some important items:
Containers: Start with clean, sterile containers to grow your tomato transplants in.
Your local garden center or big box store should have seed starting kits that consist of a black plastic tray with peat pots or plastic inserts and a clear plastic dome cover that fits over the top.
If you’re only starting a few seeds, you may want to just plant them in paper or foam cups with holes punched in the bottoms.
Many of us like to save money and reuse flats or recycle containers like plastic milk jugs for starting seeds. This is fine as long as you wash them thoroughlyand then sanitize in a 10% bleach solution (1 cup bleach in 10 cups of water).
Note: Be sure whatever container you use has drainage holes in the bottom so that excess water can drain out.
Lights: You cannot grow a healthy transplant without proper light. Even a sunny, south-facing window is not really adequate. Using a led grow light or fluorescent light on a timer that it is on for 12 hours and then off for 12 hours, will ensure that when you are growing tomatoes from seed your plants get all the light they need to grow properly.
You will need to plan a way to raise the lights so that the top leaves of the plants are 2- 3î below the lights. One method is to use a wire shelving unit. The chain that comes with a fluorescent shop light works perfectly to hang it from the shelf above your plants.
Growing Media: Use fresh, sterile germination mix labeled for seed starting. These mixes are usually peat-based and do not contain garden soil.
Tip: More than 50% of people who are growing tomatoes from seed for the first time lose their seedlings to damping-off disease. This fatal disease can literally wipe out your seedlings overnight. Starting with sterile containers and soil mix will greatly decrease the chance of your seedlings becoming infected.
Growing tomatoes from seed are the only way to have the very best tasting and old fashioned heirloom varieties which are not usually available as nursery started plants.
Abdul Aziz Mondol is a professional blogger who is having a colossal interest in writing blogs and other jones of calligraphies. In terms of his professional commitments, he loves to share content related to business, finance, technology, and the gaming niche.
The soil is a fundamental resource base for agricultural production systems. Besides being the main medium for crop growth, soil functions to sustain crop productivity and maintain environmental quality. Soil quality is determined by the soil's ability to perform these functions.
Organic gardening means avoiding the use of synthetic fertilizers or pesticides without necessarily implying that plants are left to fend for themselves. Therefore, it is Merely creating the best possible environment for plant growth using biological processes that create a supply of nutrients to the plants and maintain the structural and biological integrity of the soil.
Organic farming provides sites for nutrient retention by adding compost, animal and green manures in soil. In the process, soil nutrients such as potassium, calcium, and magnesium among others are added to the soil.
Leading gardening professionals such as Tree Service Deltona point out that organic farming can help promote sustainability and improve crop productivity. It can also allow helping create an ecosystem that is not dependent on artificial fertilizers, pesticides, and other harmful chemicals that ultimately end up getting into the composition of the vehicles.
Several natural soil enhancers used in organic gardening include:
Humus: This basically refers to completely decomposed, stable organic matter. Organic materials are decomposed over a long period of time. Humus has important functions in soil, particularly in enhancing soil structure and water-holding capacity
Growing of cover crops: A wide range of cover crops can be grown to enhance soil building properties. Mixtures of cover crops may be the best way to maximize soil building properties. When allowed to decompose, these cover crops have a large amount of biomass that when released into the soil have benefits. Examples of cover crops include leguminous grasses
Compost: Compost is one of the most stable forms of crop nutrients and is an effective means of building soil organic matter, it is also rich in carbon particularly when produced with carbon-rich materials.
Application of compost or manure is an effective means of building up soil organic matter, feeding a wide range of beneficial micro-organisms that aerate the soil and maintain soil PH levels.
A PH of 7 is neutral while values below 7 show increasing acidity and those above 7 show increasing alkalinity. When natural manures are used, the amount of soil PH is naturally maintained since artificial fertilizers add certain elements to the soil such as zinc and copper which when their levels are high become very toxic to the soil.
Through organic farming, soil organic matter is increased thus making the soil to be healthy and its quality also increased. The Use of natural manures aids in moisture retention within the soil, thus ensuring that the crops being grown in the farming process don't lose water to several biological processes such as evaporation. This is because the amount of water being retained by the soil is more than the lost amount by several factors. This is especially vital in sandy soils, which have low water retention capabilities due to their well-drained nature.
Building soil quality by the use of organic methods helps increase the soil's resilience. This is the ability to overcome stress or to bounce back after being disturbed. Crops grown in resilient soils have a better ability to withstand extreme conditions such as drought, flood, extremely high temperatures or pest infection.
Using a case study of a carrot sprout, which is mainly grown in home gardens and known for their sweet taste, we will notice that they are hard to grow and they thrive in areas of minimal artificial fertilizers and thus would do best in organic gardens that use natural means of soil improvement. They would also be best in chilly aquatic conditions considering the amount of moisture needed during their growth to full maturity.
You may have asked yourself this question - what do carrot sprouts look like. Well, carrot sprouts look like grass and can easily be mistaken for weeds in a garden.
Carrots are best grown in sandy soils since the sandy soil is well-drained in contrast to the high amounts of moisture needed to grow the carrots. The use of organic methods of enhancing the soil moisture retention will ensure that the conditions are similar to that of the best aquatic chiller thus favoring the growth of the carrots even in well-drained soils.
The growth of carrots is a good indication of how organic gardening is beneficial to the improvement of soil quality and also in ensuring that the conditions for the growth of several crops are successful, unlike when artificial enhancers such as fertilizers are used.
Advantages of organic gardening
Stabilizes the soil with time by repairing the soil composition and restoring the soil structure so as to ensure its properties are retained
Improve with time by using adequate and adaptive techniques to restore key soil functions
Increase productivity since a number of nutrients provided by the soil is adequate for crop growth
Provides healthy food supply since the crop produced is by natural means and artificial enhancers are not in the components of the crop which is being grown.
Organic gardening, therefore, does improve the quality of the soil.
Read also:
5 Essential Tips To Designing A Beautiful Front Yard Garde
3 Amazing Flower Street Garden – How To Design
When you are renovating your home or building a new one, it’s easy to visualize the big details, like the color of the roof and the walls. Something you may not necessarily be thinking of immediately is the color of your window frames, and yet this is such an important color to consider. It may help to think of them as something similar to the frame on a painting — it adds a finishing touch to the artwork, or in this case, the house. If you are not sure how to choose a color, here are some tips that may help you in your choice.
Choose a color palette: It helps to include the color of your window frames in the complete color palette you choose for your home. If the amount of color choices is overwhelming, keep it simple by choosing either a warm or a cool palette.
Pick a color that highlights or hides: If you are repainting your home, you can highlight your beautiful window frames by painting them a color that makes them stand out. Conversely, if they are ugly as sin, paint them a boring white, or any color that makes them blend in with the walls.
Select a color that complements your home’s exterior: Your walls should have a big say in what color you paint your window frames. If you have exposed brick walls, you should choose a bright contrasting color, and avoid warm browns and dark colors. For painted wood siding, it could work well to pick a darker accent color that complements the rest of the color palette of your home.
Read More : Essential Things To Consider Before Hiring A Window Tinting Expert
Consider neutral colors: Neutral colors are trendy again. The current variety is a far cry from boring beige, so you don’t have to fear to have a sterile hospital look. The new generation of beiges and grays are soulful and colorful, and they will prove to be timeless at the same time. No need to be embarrassed about bright lime or electric pink, or any such garish eyesores in a few years from now.
Choose a color that fits the style of your home: It is very important to choose a color that is appropriate to the style of your house. Certain colors go well with certain types of architecture. A red brick building already imposes a limit on the color palette due to the characteristic hue of the walls. A historic manor would benefit from modest colors that fit in with the time period in which the house was built. If the architecture is more modern, choose colors that enhance that particular style. But if it’s just your typical family home without any noteworthy architectural provenance, you are free to choose colors that match your personality and sense of style. It should be something that you like, and feel comfortable looking at every day.
Read More : Before You Forget : Things You Need To Consider Before Windows Replacement
Use bold colors wisely: For most people who doubt their stylishness, it would be best to stick to neutral colors. But if you are brave and daring, and you are sure you can pull it off, bold colors can add an unexpected twist to your decor.
Apex Window Werks is home and Commercial Window Repair Company with the headquarters in Chicago, IL. If you are looking for a reliable and experienced contractor to get the fog out of your windows, replace broken glass or repair rotten wood window frames, then AWW is your expedient choice. Feel free to give them a call to leave a message.
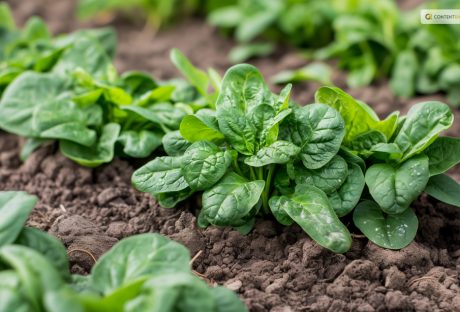
Being a gardener, I know Spinach is one of the most popular and versatile leafy greens you can grow in your garden. It's rich in vitamins, minerals, antioxidants, and fiber and can be used in salads, soups, smoothies, and more. But how do you harvest spinach the right way so that you can enjoy it fresh and crisp and make it last longer?
In this article, I will show you how to harvest spinach, so it keeps growing. I will also explain how to harvest spinach seeds, how to store and freeze spinach, and the health benefits of spinach. Additionally, I will also share some tips and tricks on how to grow spinach successfully and how to use it in delicious recipes.
Whether you're a beginner or an expert gardener, this guide will help you make the most of your spinach harvest. So, keep on reading till the end to learn more, and thank me later!
Driven by Benefits: Why are People Growing Spinach?
Spinach is not only tasty but also healthy. It's low in calories and high in fiber, vitamins, minerals, antioxidants, and phytochemicals. It can help improve various aspects of health, such as:
Eye Health
Spinach is rich in lutein and zeaxanthin. These are carotenoids that protect the eyes from age-related macular degeneration, cataracts, and glaucoma. Spinach also contains vitamin A, which is essential for vision and eye health.
Blood Pressure
Spinach is high in potassium, magnesium, and nitrates, which are compounds that help lower blood pressure and relax the blood vessels. Spinach also contains folate. This helps prevent homocysteine, an amino acid that can damage the blood vessels and increase the risk of cardiovascular diseases.
Bone Health
Spinach is a good source of calcium, magnesium, and vitamin K, which are important for bone health and density. Spinach also contains vitamin C, which helps the body absorb calcium and produce collagen, a protein that strengthens the bones and connective tissues.
Immune System
Spinach is loaded with vitamin C, which is a powerful antioxidant that boosts the immune system and fights off infections and inflammation. Spinach also contains vitamin E, which enhances the immune response and protects the cells from oxidative stress.
Digestion
Spinach is high in fiber, which helps regulate digestion and prevent constipation, diarrhea, and bloating. Fiber also feeds the beneficial bacteria in the gut. This improves the digestion and absorption of nutrients. It also supports the immune system.
Skin And Hair
Spinach is rich in vitamins A, C, E, and iron, which are essential for healthy skin and hair. Vitamin A helps maintain the moisture and elasticity of the skin and prevents acne and wrinkles. Vitamin C helps produce collagen, which keeps the skin firm and smooth.
On the other hand, vitamin E helps protect the skin from sun damage and aging. Iron helps deliver oxygen to the skin and hair cells and prevents anemia, which can cause hair loss and pale skin.
How To Harvest Spinach So It Keeps Growing
One of the best things about spinach is that it's a cut-and-come-again crop. This means you can harvest it multiple times throughout the season if you do it correctly. Here are the steps to follow to harvest spinach so it keeps growing:
Choose the right time to harvest
The best time to harvest spinach is when the leaves are young and tender. This is usually about 40 to 50 days after planting. You can also harvest baby spinach leaves earlier, about 25 to 30 days after planting.
You should harvest spinach before it starts to bolt. This is when it produces flowers and seeds and becomes bitter and tough. Spinach usually bolts when the days get longer and warmer. So, you should harvest it more frequently in the spring and summer.
Use a sharp knife or scissors to cut the leaves
You can either cut the whole plant at the base, leaving about an inch of stem, or cut individual leaves from the outer part of the plant, leaving the inner leaves to grow.
You should cut the leaves about an inch above the soil, to avoid damaging the crown and the roots. Moreover, you should also avoid cutting too many leaves from one plant, as this will weaken the plant and reduce the yield. A good rule of thumb is to leave at least half of the leaves on each plant.
Wash and dry the leaves
You should wash the spinach leaves as soon as possible after harvesting, to remove any dirt, bugs, or pesticides. You can use a colander or a salad spinner to rinse the leaves under cold water. After this, pat them dry with a paper towel or a cloth. Additionally, you should remove any damaged or yellow leaves, and trim any tough stems.
Enjoy or store the leaves
You can eat the spinach leaves fresh, or store them in the refrigerator or freezer for later use. We'll explain how to store and freeze spinach in the next sections.
How to Harvest Spinach Seeds?
If you want to save some spinach seeds for the next season or share them with your friends and family, you must let some spinach plants bolt and produce flowers and seeds. Here are the steps to follow to harvest spinach seeds:
Select the best plants to save seeds from
It would be best if you chose healthy, vigorous, and productive plants with the desired characteristics. Some of these are the flavor, size, color, and disease resistance.
Apart from these, you should also avoid saving seeds from hybrid varieties, as they will not produce true-to-type plants. You should look for open-pollinated or heirloom varieties, which will produce plants that are similar to the parent plants.
Isolate the plants to prevent cross-pollination
Spinach is a wind-pollinated crop, which means that it can cross-pollinate with other spinach plants or related plants, such as beets, chard, or quinoa, within a distance of up to a mile. This can result in seeds that have different traits than the parent plants. To prevent cross-pollination, you should isolate the plants you want to save seeds from, by either planting them far away from other spinach plants or related plants, or covering them with a mesh bag or a cage.
Let the plants flower and set seeds
You should let the plants bolt and produce flowers, which are small and yellow, and then wait for the seeds to form and mature. The seeds are round and black, and they are enclosed in a spiny husk. The seeds are ready to harvest when they are dry and hard, and the husks are brown and brittle, usually about four to six weeks after flowering.
Harvest and clean the seeds
You should cut the seed stalks and place them in a paper bag or a bucket, and then shake or rub them to release the seeds from the husks.
Furthermore, you should then winnow the seeds, which separates the seeds from the chaff or the husks and other debris. You can do this by blowing or fanning the seeds or using a screen or a sieve. You should end up with clean and shiny seeds.
Store the seeds
It would be best if you stored the spinach seeds in a cool, dry, and dark place, such as a jar, a tin, or a plastic bag. You should also label the seeds with the variety name and the date of harvest. Besides, you can store the spinach seeds for up to five years, but they will germinate better if you use them within two to three years.
How to Store and Freeze Spinach?
Spinach is best eaten fresh, as it loses its flavor and texture quickly. However, if you have a large harvest, or you want to preserve spinach for later use, you can store or freeze it. Here are the best ways to store and freeze spinach:
Store spinach in the refrigerator
You can store fresh spinach in the refrigerator for up to a week if you keep it in a perforated plastic bag or a container with a lid. However, you should avoid washing the spinach before storing it, as this will make it wilt faster. You should wash the spinach just before using it.
Freeze spinach raw
You can freeze raw spinach without blanching it, which is a process of briefly cooking and cooling the vegetables to stop the enzyme activity that causes them to spoil. However, freezing raw spinach will result in a mushy and watery texture and a loss of flavor and nutrients. To freeze raw spinach, you should wash and dry the leaves, and then pack them in freezer bags or containers, leaving some space for expansion. You can freeze raw spinach for up to six months, and use it in smoothies, soups, or casseroles.
Freeze spinach blanched
You can freeze blanched spinach, which will retain its color, texture, flavor, and nutrients better than raw spinach. To freeze blanched spinach, you should wash and trim the leaves, and then blanch them in boiling water for one to two minutes, depending on the size of the leaves.
You should then drain and cool the leaves, and squeeze out the excess water. You can then pack the leaves in freezer bags or containers, leaving some space for expansion. Furthermore, you can freeze blanched spinach for up to a year, and use it in salads, sandwiches, or quiches.
Things to Keep in Mind: How to Grow Spinach Successfully?
Spinach is a cool-season crop that grows best in the spring and fall, when the temperatures are between 40°F and 75°F. It can tolerate light frost but not heat or drought. Spinach also prefers moist, fertile, and well-drained soil with a pH of 6.0 to 7.0. Here are some tips and tricks on how to grow spinach successfully:
Choose the right variety
There are many types of spinach, but the most common varieties are savoy, semi-savoy, and flat-leafed. Savoy spinach has dark green, crinkly leaves that are great for salads and wraps. Semi-savoy spinach has slightly curled leaves that are more resistant to diseases and bolting. Flat-leafed spinach has smooth, broad leaves that are easy to clean and process. You can also choose spinach varieties based on their maturity time, bolt resistance, flavor, and color. Bloomsdale, Tyee, Space, Melody, and Red Kitten are popular spinach varieties.
Sow the seeds
You can sow spinach seeds directly in the garden, or start them indoors and transplant them later. The best time to sow spinach seeds is in early spring, as soon as the soil can be worked, or in late summer or early fall, for a winter harvest. You can also sow spinach seeds every two to three weeks, for a continuous harvest.
Besides this, you should sow the seeds about half an inch deep, and one to two inches apart, in rows that are 12 to 18 inches apart. You should water the seeds well, and keep the soil moist until they germinate, which usually takes seven to 14 days.
Thin the seedlings
When the spinach seedlings have two to four true leaves, you should thin them to avoid overcrowding and competition. You should leave about four to six inches of space between each plant, and eat or transplant the thinned seedlings. You should also weed the area around the spinach plants regularly, to prevent pests and diseases.
Harvest the leaves
Depending on the variety, you can start harvesting spinach leaves when they are big enough to eat, usually about 25 to 50 days after sowing. You can either harvest the whole plant or pick individual leaves from the outer part of the plant, leaving the inner leaves to grow.
Additionally, you should harvest spinach in the morning, when the leaves are crisp and fresh, and before the sun gets too hot. You should also harvest spinach before it starts to bolt, which is when it produces flowers and seeds, and becomes bitter and tough.
How to Use Spinach in Different Cuisines and Recipes?
Spinach is a versatile vegetable that can be used in many different cuisines and recipes. Whether you want to make a salad, a soup, a pasta, a pie, or a smoothie, spinach can add flavor, color, and nutrition to your dish. Here are some examples of how to use spinach in different cuisines and recipes:
Mediterranean cuisine
Spinach is a staple ingredient in many Mediterranean dishes, such as spanakopita, a Greek pie made with spinach and feta cheese wrapped in phyllo dough, or spinach and chickpea stew, a Moroccan dish flavored with cumin, paprika, and lemon juice. You can also make a simple spinach salad with tomatoes, olives, and feta cheese, dressed with olive oil and vinegar.
Asian cuisine
Spinach is widely used in Asian cuisine, especially in Chinese, Japanese, and Indian dishes. You can make a Chinese spinach and tofu stir-fry with garlic, ginger, soy sauce, and sesame oil, or a Japanese spinach and sesame salad with rice vinegar, sugar, and soy sauce. You can also make an Indian spinach and potato curry with onion, garlic, ginger, turmeric, and garam masala, or a spinach and paneer cheese dish with cream, tomato, and fenugreek.
Italian cuisine
Spinach is a common ingredient in Italian cuisine, especially in pasta, pizza, and lasagna. You can make a spinach and ricotta ravioli with butter and sage sauce, or a spinach and mushroom pizza with mozzarella and parmesan cheese. You can also make a spinach and cheese lasagna with béchamel sauce, or a spinach and artichoke dip with cream cheese and sour cream.
American cuisine
Spinach is also popular in American cuisine, especially salads, sandwiches, and casseroles. You can make a spinach and strawberry salad with almonds and poppy seed dressing or a spinach and bacon sandwich with mayonnaise and mustard. You can also make a spinach and cheese casserole with eggs, milk, and breadcrumbs, or a spinach and artichoke quiche with pie crust and cheddar cheese.
Wrapping It Up!
Spinach is a wonderful vegetable that you can harvest, store, and use in various ways. It's easy to grow, harvest, and store spinach, as long as you follow some simple steps and tips. It's also healthy, delicious, and versatile, as you can use it in many different cuisines and recipes. Spinach is a green treasure that you don't want to miss.
If you want to know about how to harvest spinach, I hope that this blog has been of help to you. If there are any other queries related to the same, please feel free to let me know. All that you need to do is scroll down till you reach the bottom of the page. Then, leave your comments and suggestions in the box below. And I will be ether to answer them all for you.
Read Also:
How to Harvest Lettuce: A Step-by-Step Guide for Fresh and Crispy Salads
Everything You Need To Know About Harvesting Basil!
Asparagus 101: When, How, And How Often To Harvest?