How To Grow Tomatoes From Seed

Published on: 28 April 2017 Last Updated on: 30 October 2024
planttomato

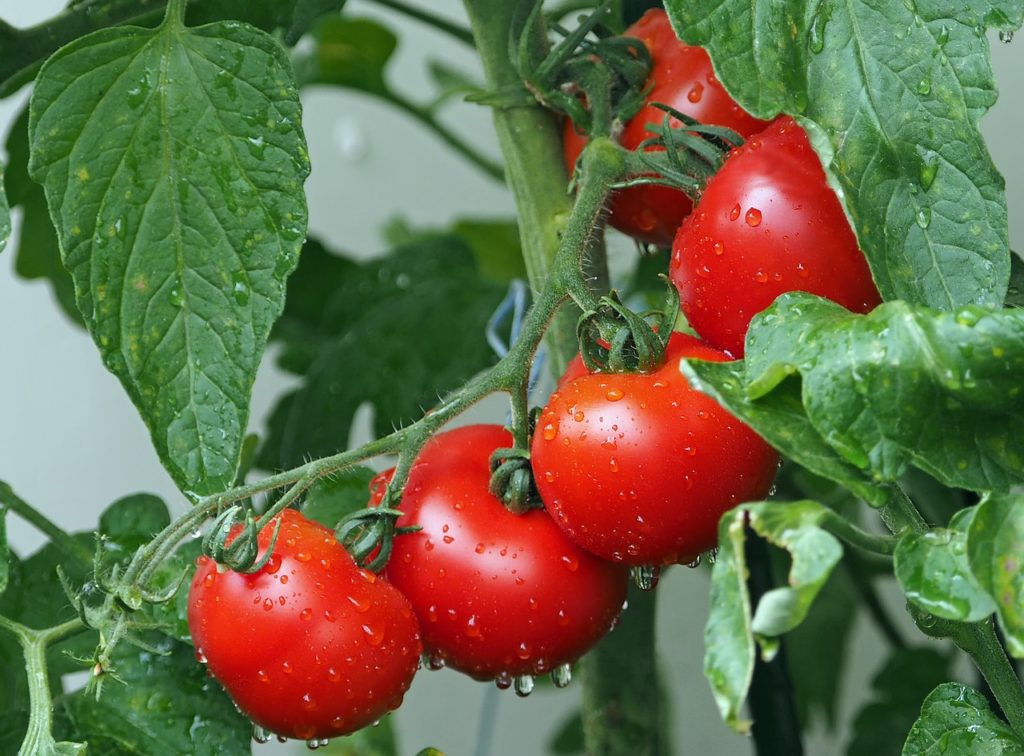
If you are an avid tomato grower you’re probably envious of all the different varieties that other growers talk about, but that you can’t find transplants for in your area. In many cases, those growers are growing tomatoes from seed.

Growing tomatoes from seed really isn’t that difficult, as long as you understand a few basic things. Well, I will walk you through this process below. Read on.

Why is it necessary to start tomato seeds early?

Tomato seeds planted in the garden won’t germinate until the ground is warm enough. What’s the ideal ground temperature? They germinate best at temperatures in the 70-80 degree range.

If you plant seeds directly into the ground, odds are the summer will be too short for tomatoes to become productive before the end of the growing season unless you live in one of the warmest climates in the US.

The days to harvest number that is on a packageof tomato seeds assumes that you are using transplants.

tomatoes

To decide if your area is warm enough to plant directly in the ground, add 30-50 days to that number. So if it says 90 days you would need 120-140 days of temperatures above 70 degrees to get your first ripe tomato if you plant the seeds in the ground!

When should I start my seeds?

Most people who are growing tomatoes from seed start 4 6 weeks before the last expected spring frost date in their area. You need to wait to plant the seedlings outdoors about 2 weeks after that date when the soil has warmed up to at least 50 degrees.

The date you start growing tomatoes from seed can vary depending on the space you have available and the length of your growing season.

tomato-flower

First, you need to gather some important items:

  1. Containers: Start with clean, sterile containers to grow your tomato transplants in.

    Your local garden center or big box store should have seed starting kits that consist of a black plastic tray with peat pots or plastic inserts and a clear plastic dome cover that fits over the top.

If you’re only starting a few seeds, you may want to just plant them in paper or foam cups with holes punched in the bottoms.

Many of us like to save money and reuse flats or recycle containers like plastic milk jugs for starting seeds. This is fine as long as you wash them thoroughly and then sanitize in a 10% bleach solution (1 cup bleach in 10 cups of water).

Note: Be sure whatever container you use has drainage holes in the bottom so that excess water can drain out.

  1. Lights: You cannot grow a healthy transplant without proper light. Even a sunny, south-facing window is not really adequate. Using a led grow light or fluorescent light on a timer that it is on for 12 hours and then off for 12 hours, will ensure that when you are growing tomatoes from seed your plants get all the light they need to grow properly.

You will need to plan a way to raise the lights so that the top leaves of the plants are 2- 3î below the lights. One method is to use a wire shelving unit. The chain that comes with a fluorescent shop light works perfectly to hang it from the shelf above your plants.

  1. Growing Media: Use fresh, sterile germination mix labeled for seed starting. These mixes are usually peat-based and do not contain garden soil.

Tip: More than 50% of people who are growing tomatoes from seed for the first time lose their seedlings to damping-off disease. This fatal disease can literally wipe out your seedlings overnight. Starting with sterile containers and soil mix will greatly decrease the chance of your seedlings becoming infected.

Read also: How To Choose The Right Containers For Your Container Garden

Growing tomatoes from seed are the only way to have the very best tasting and old fashioned heirloom varieties which are not usually available as nursery started plants.

Read also: Does Organic Gardening Improve Soil Quality?

Abdul Aziz Mondol is a professional blogger who is having a colossal interest in writing blogs and other jones of calligraphies. In terms of his professional commitments, he loves to share content related to business, finance, technology, and the gaming niche.

View all posts

Leave a Reply

Your email address will not be published. Required fields are marked *

Related

5 Tips to Keeping Animals Away From Your Garden

5 Tips to Keeping Animals Away From Your Garden

Animals might be cute, furry, and very pleasing to look at but they can seriously be destructive to your field, some of us may enjoy their company, others might want to kill them instantly! Either way, if you do not take care of who enters your garden, your plants may not thank you. Check out the rest of the article to understand what kind of animals can spoil your garden and how to restrict their movement. Who are these animals? Some of the most common garden animals include chipmunks, squirrels, skunks, mice, moles, rats, and opossums. To learn more about possums, click get rid of possum. These animals dig holes into the ground, eat your fruits and vegetables, multiply or lay eggs in your garden, and generally wreak havoc. Other larger animals include dogs, deer, birds, snakes, etc. Just having them run around the garden can cause large-scale destruction. Ways to get rid of animals in your garden There are several ways to control the entry of animals in your garden. Some are more effective than others. To learn more about these methods, read on. 1. Identify the creature : The best way to control animals is to identify them first. This way you would know exactly how to deal with them by understanding their behavior and ways of living or multiplying. You can then target the animal with exactly the right technique that is needed to get rid of them. It is necessary to identify the animal to learn about its habitat, control them, and devise an effective solution. 2. Make your garden animal proof : By making your garden attractive to animals, you will invite more pests into it. Therefore, certain methods need to be adopted to make sure that the animals stay away. One such method is to cut down on places that can house such animals, like tall grass, bushes, or a pile of leaves. Some animals can even crawl under your deck or porch. Minimize any food sources, like birdbaths and seed booths, where animals like squirrels may come to feed. Moreover, you should cover your compost pile that attracts raccoons and fruit and vegetable patches with nets to avoid dogs, cats, deer, etc. 3. Fences, nets, and traps : Fences are a great option to help minimize the entry of animals. For smaller animals, like rats, squirrels, rabbits, and more, small fences around your garden are enough. But for larger animals, like dogs and deer, larger and taller fences are required. Putting up taller fences can go a little heavy on your pocket, so securing plants is probably a better option. Nets are a great way to prevent animals from actually feeding on your produce, like fruits and vegetables. Just adding a mesh or net around your patches can make a huge difference. Traps can be placed throughout the garden to catch animals with the help of baits. Use some food, like cheese, crackers, or biscuits, to lure animals into the trap, which then slams shut. Animals are also not harmed this way. It’s easy to catch possums, rats, squirrels, etc. with the help of traps. 4. Repellents : Some animals can be repelled using auditory techniques, like certain sounds, and repellents that smell a certain way, thus driving or scaring away the animal out of your garden. Some examples of repellents are - predatory urine, garlic clips, and castor oil. But these repellants need to be applied and monitored on a regular basis to make sure they are effective. Some of these repellents, however, can be toxic to humans, so be careful, which repellents you choose. Auditory repellents include motion-sensitive water sprayers, ultrasonic repellers, and visual scare devices, such as reflective tape. The only problem with these repellents is that pests may become immune to these methods, and therefore they may decrease in effectiveness over time. Make sure you read all the directions given on any repellants or products before using them. 5. Do on the spot management : For example, when moles create boroughs in your garden, you can place mothballs in the holes to repel them. Moles don’t eat your garden produce but their tunnels can cause your plants to die since plants may not find space to grow underneath the ground with enough nutrients. If certain animals have entered your garden, immediately introduce the predator species into your gardens, such as cats and dogs, to scare away the pests. Cats and dogs prey on animals, like mice and rats. In some cases, you can hand aluminum foils with strings in your garden. The shiny material can scare away the animals. Again, the effectiveness of this method may die with time. Pests are destructive to your garden and should definitely be identified and eradicated. However, there’s no need to kill these animals in order to get rid of them. You can also use humane ways to get animals out of your garden. Use the methods given above in order to get rid of animals, including possums, from your garden. This will help you get a more secure and flourishing garden in no time! Read Also : 5 Summer Garden Maintenance Tips And Tactics You Have To Know Grow These Flowering Plants In Your Home Garden To Remove Vastu Related Problems

READ MOREDetails
Small Kitchen

Small Kitchen Storage Ideas

If you have a small kitchen, you could find it challenging to organize it and keep your space clutter-free. When you continue to struggle with small kitchen storage, then it’s time to assess how you organize everything. This will help you maximize every inch of kitchen space and ensure that no valuable space is wasted. Top-rated house cleaning in Tucson goes over step by step how to accomplish this task. How To Organize Small Kitchen If you are struggling with storage space, here are a few affordable small kitchen storage ideas to make life a little easier. 1. Tension rod No doubt, a small kitchen could mean having a tough time arranging essentials. But a tension rod can come in handy, especially to keep cleaning supplies safely. Hang your kitchen cleaning supplies from a short tension rod where they are easy to access. What’s more, you can hang rubber cleaning gloves on the tension rod. Your dish-drying towels too can be hidden from plain sight on a tension rod installed in the cabinet. 2. Use up the wall space Another small kitchen storage idea is to leverage the wall space to store kitchen accessories. Free up the drawer space and use the walls instead of clutter-free storage. You may stash knives on a magnetic rack to make access easy when food preparation is underway. 3. Stack on the rack One interesting small kitchen storage solution is to locate a bookshelf near the kitchen to store mist essential cooking supplies. You may leverage the space to stack spices, dishware, and even cookbooks. 4. Hang baskets When it comes to organizing a small kitchen, baskets can come in handy to stack kitchen utensils and cleaning supplies. Better still, you may hang a couple of baskets above a sink to leverage the vacant space. It’s one of the best ideas to stack wet dishes and sponges for quick drying. Another stylish kitchen storage solution is to hang a wire basket from the ceiling. It could be single or multi-tiered, depending on your storage needs. You can store potatoes, onions, garlic, and any other stuff that also adds visual interest to your kitchen. 5. Floating shelves Another kitchen storage idea is to add a pair of floating shelves for that extra storage space. This comes in handy if your kitchen lacks room for cabinetry. Easy to install, floating shelves can be hung just about anywhere – even under the bottom shelf. You can hang hand towels, utensils, or coffee mugs. 6. Corner drawer A small kitchen has little space. But with some creative ideas, you can create smart kitchen storage solutions. The corner drawer is one such space-saving storage idea in a small kitchen, especially for awkward corners. These drawers connect the corners diagonally. As a result, they can pack a lot of stuff that horizontal cabinets cannot. 7. Utensil drawer When your small kitchen lacks space for crockery and silverware, opt for a built-in utensil drawer. One similar DIY solution, which is affordable as well, is to place stainless steel pots in a deep drawer that has little space. Use these pots for holding small kitchen accessories. 8. Adopt a pantry Another way to make a small kitchen look bigger is to de-clutter the space by adding a pantry. It is a good storage solution that provides easy access while freeing up the burden on over-stuffed cabinets. 9. On-the-go space A portable kitchen trolley is a handy addition to a small kitchen. Take it anywhere while it safely stores bulky items. It works like an excellent solution to wheel food to the dining table. 10. Wall-mounted cabinets Get a little creative with the kitchen décor when you are looking for tips to organize a small kitchen. You may choose a mix of open shelves to show off your favorite cutlery and wall-mounted cabinets to keep stuff out of sight. Leave some gap between the two to create the impression of extra storage. Picture ledges and hooks can free up the work surface and spruce up the décor. 11. Velcro strips Velcro strips can come to your rescue in a small kitchen, where you are short on storage space. Attach these strips in two spots to hang towels and other similar stuff to save space. 12. File folders as racks While a file folder sits empty in your garage, why not put it to the right use in the kitchen? You may be surprised to see that it can be used smartly to organize your kitchen. They come in especially handy to store your kitchen cleaning supplies. Just place all the supplies into the file folders and you do not have to worry about a shortage of space. Read Also: The New Trend: Drawer Boxes 7 Expert Hacks for Downsizing to a Smaller Apartment Design your Kitchen According to Your Budget and Work in Organized Manner Top Secrets That Slash Your Kitchen Remodeling Bill in Half 10 Unique Kitchen Hacks to Save your Time in Kitchen and Cooking 7 Unique Kitchen Design Ideas That Your Family Will Enjoy

READ MOREDetails
Aerial Roof Inspections

Elevate Your Roof’s Health With Aerial Roof Inspections

In the realm of property ownership, maintaining the health of your roof is paramount. Aerial roof inspections emerge as a game-changer, providing a unique perspective that goes beyond traditional methods. In this comprehensive guide, we will be discussing what aerial roof inspection is all about and how it benefits. So, what are we waiting for?  Let's delve into the world of aerial inspections and discover how they can revolutionize your roof maintenance routine. What Is Aerial Roof Inspection? Automated aerial systems or vehicles that work remotely generally do not need human intervention. But, most often, the inspector has to take control of his devices to ensure safety. With the advancement of technology, aerial roof inspection came into being.  The drone is helpful in reducing risks because it provides a 360-degree view of the roofs. Moreover, it can trace even the smallest faults at the earliest. In the next section of the article, we will be discovering the advantages of inspecting roofs aerially. How Does A Typical Aerial Roof Inspection Process Look Like?  A general roof inspection is a bit different. Here, the contractors and building professionals make use of off-the-shelf drones accompanied by software applications. Other steps included in the roof inspection procedure are as follows: The pilot, operator, or estimator uses the application to make a flight plan. It is possible to do this either on-site or within the workplace. Furthermore, it includes building address specifications and defining the roof’s perimeter.  After the plan is ready, the pilot confirms the proper order of everything. They make use of the mobile app or controller to control and launch the drone.  Next, the drone follows the path automatically along with collecting images and other relevant information. This basically depends on the inspection’s cause and the sensors.  After 10 minutes, the drone automatically lands as per the program and transfers the data to other devices.  What Are The Benefits Of Aerial Roof Inspection? Roof inspection plays a critical role in ensuring the longevity and durability of your house. Conventionally, these inspections are a bit expensive. But even after the price factor, there are some advantages of aerial roof inspection. Check them out here: Unlocking Precision with Aerial Insights Aerial roof inspections leverage cutting-edge technology to scrutinize every inch of yourroof with unmatched precision. Drones equipped with high-resolution cameras soarabove, capturing detailed imagery that might be easily missed during groundinspections. This method ensures a thorough examination, leaving no room foroversight. Bolstering Structural Integrity One of the key advantages of aerial roof inspections is their ability to detect structural vulnerabilities early on. By identifying potential issues such as cracks, leaks, or weakened areas, proactive measures can be taken to address these concerns promptly. This not only safeguards your property but also prevents costly repairs down the line. Time and Cost-Efficiency at Its Finest Traditional roof inspections often involve time-consuming processes and extensivemanpower. Aerial inspections, on the other hand, streamline this operation. The swift deployment of drones reduces the time required for a comprehensive assessment, translating to cost savings for property owners. Embracing Sustainability in Maintenance Practices In an era where sustainability is paramount, aerial roof inspections align seamlesslywith eco-friendly practices. The minimized need for physical access to the roof reducesthe carbon footprint associated with maintenance activities. Property owners cancontribute to environmental conservation while ensuring the longevity of their roofs. Supporting Innovation and Progress As we navigate the realms of modern technology, embracing innovative solutionsbecomes imperative. Aerial roof inspections showcase a commitment to progress andefficiency in property maintenance. Property owners adopting this method not onlyenhance their roof health but also position themselves at the forefront oftechnological advancements in the real estate landscape. Transitioning to Aerial Excellence In conclusion, aerial roof inspections stand as a beacon of progress in the realm ofproperty maintenance. From precision to efficiency and sustainability, this method ticksall the boxes for an optimal roof care strategy. Elevate your roof asset management by embracing the power of aerial insights – your roof deserves nothing less. Remember, a well-maintained roof is not just an investment in your property; it's aninvestment in peace of mind. Read Also: How Often Do You Need A Roof Inspection? Choosing A Siding And Roofing Companies In Delaware Why You Must Use A Residential Roofing Company For Your Home

READ MOREDetails