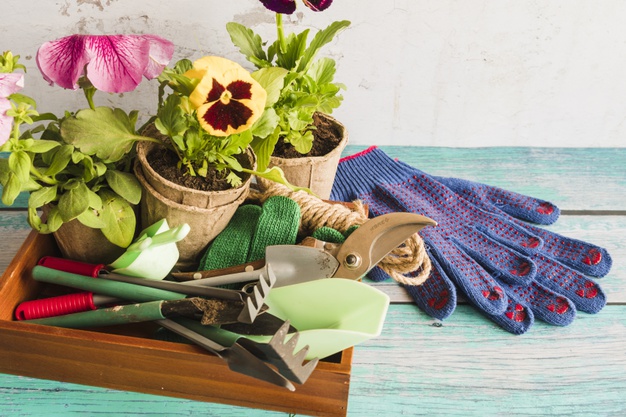
The beauty of gardening is to see your seedlings grow into healthy beautiful plants. Some of the plants we grow in our homes have natural meanings attached to them while others we grow them to remind us of something special. Money tree which is also known as Pachira aquatic is a tree grown to symbolize prosperity and good luck. The money tree can grow up to 60 feet tall when it naturally grows outdoor, but when we decide to domesticate it, we limit its growth to 6 or 7 feet tall. There natively grow in South, and Central American swamps and you can determine the age of the tree by its size.
In many customs of the world, the tree is linked to prosperity and positivity. It creates a positive aura that allows for economic benefits to flow into the family. However, caring and doing regular maintenance can become difficult for normal human beings and families. This is why a good idea is to opt for growing trees with Tree Service Stockton. They are professionals who can take care of everything from planting to regular pruning and fertilizers. This will ensure that your money tree will always be healthy.

How to grow a money plant can be easy, but how to take care of the five trunks braided tree can be a challenge. The braided trunk is a symbol of a lock that locks in your prosperity and good luck. Here are tips on how to take care of a money tree:
Where to Grow
A smaller pot is preferred for the growth of your money tree because it regulates the growth of your tree and also controls water and fertilizer. Big pots make it easy for you to overwater the plant. Your pot should have a proper drainage system and if you suspect that’s not the case then drill more holes at the bottom of your pot. DynaPOT 2 Gallon Garden Planting Aeration Fabric Container is a nice choice because it is eco-friendly and has a perfect drainage system.
Also, place your tree in a place with indirect light because direct sunlight makes the leaves vulnerable to scorching. However, if you notice that the leaves are turning yellow or withering then expose them to more light because that is an indication of light deficiency. Fluorescent light can do the magic if you are growing the tree inside your house or at the office.
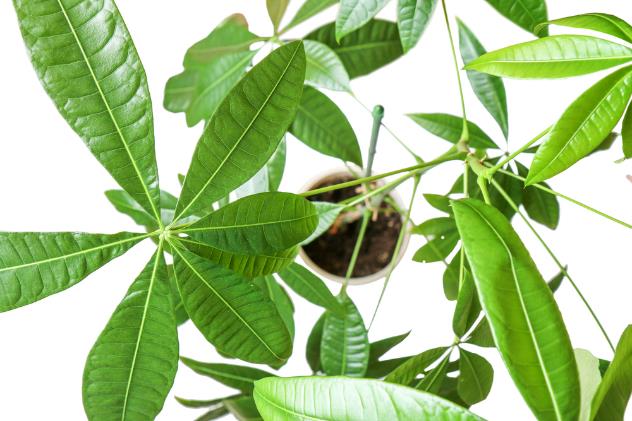
Glossy and healthy leaves of Pachira aquatic
Money tree grows well in moderate to high humid regions that why they mostly grow in South and Central America. When you domesticate the plant regulate the humidity at about 50% and above. Wet pebbles are a great way of maintaining humidity for your plant all you need to do is place the pot on a basin with wet pebbles. Also, you have to retain the room temperature around 16-25°C. When there is no enough humidity in the room the plant will respond by turning its leaves dry crispy.
Read also:
Fertilizer and Watering
When it comes to domesticating the money tree, you get a challenge of water and fertilizer ratio and how often you should add them to the plant. This tree needs moist soil but not wet to grow well. So you will need to water it after 7-10 days or when you notice that the top 3-4 inches of the soil are dry. Then thoroughly water your plant until water comes from the drainage system, but you have to avoid watering up to the trunk because the stem may start to rot. However, you have to cut down on water during winter because the growth is slow at this time of the year. When you see the leaves of your plants turning yellow, and you have put them in the right lighting condition then it may be an indicator or overwatering your plant.
How to grow and care for your money tree
During spring and summer, you can add water-soluble fertilizer that is diluted by half after every two weeks. Whether you want to use an organic or inorganic fertilizer that’s a personal choice that does not have a significant impact on the plant. The Grow More 5010 All Purpose Fertilizer 20-20-20 is a multi-purpose fertilizer that contains all the micro and macronutrients your tree will need for healthy growth.
Read also:
Pruning and Shaping
Pruning is one of the easiest steps when it comes to taking care of your money plant. You can use a clean pair of scissors or prune shears to remove yellow or damaged leaves and also side branches that could disrupt the braiding process. The pruning process is usually done during spring and summer to allow the plant to produce new leaves.
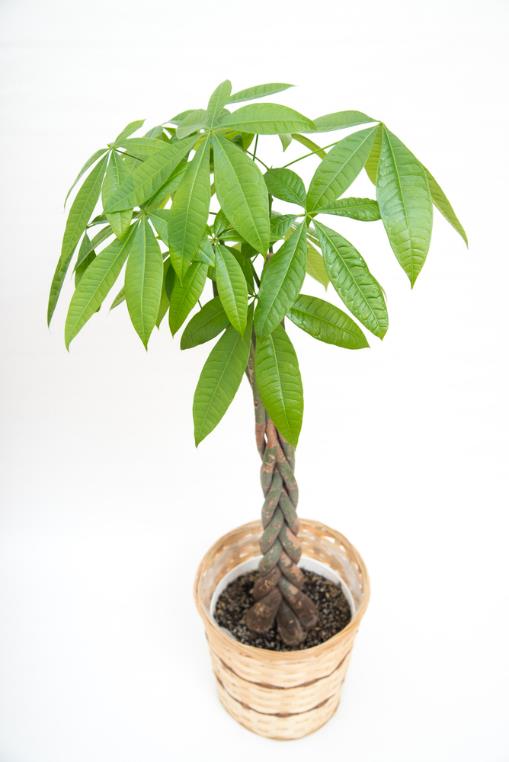
Image of a well braided Pachira aquatic
Do the braiding (shaping) of the money tree while the plant is still young and flexible. In the wild nature takes its course and braids the tree at a particular stage. Continue braiding the tree as it grows and ties a knot at the end of the braid to secure it.
Repotting
As the tree grows the roots also grow, and that’s why it is recommended that you report your plant after every two years. However, when the tree has reached your desired size, you can just report in the same sized pot with fresh soil. Mix your soil with peat moss to help in retaining moisture and sand to help in drainage. Avoid moving the plant too much because it gets shocked and responds by losing leaves or leaves turning yellow.
How to Propagate
Propagation should be done during spring because the growth rate is at its peak during this season. Chose a stem that contains not less than two leaf nodes. Sanitize a pair of scissors or pruning shears and chop off the stem then place it in a hormone rooting powder. When you the stem is well-soaked place it in a well moist pot mix. Give it time because it takes several weeks to start rooting.
https://www.youtube.com/watch?v=QlZVZkKy6IY
How to propagate money tree
It is easier to take care of your money tree if you know the favored conditions and how to troubleshoot any problems. The Pachira aquatic gives out various signs if they are not satisfied with the conditions that you place them. The soil that you plant your tree in is critical because it needs to have the ability to retain moisture throughout. Like most plants, the money plant is prone to aphids, mealybugs, and scale insects which will affect their growth. How to get rid of mealybugs can be a bit hectic if they infest your garden but you can use systemic insect control to treat your plant in case you notice the infestation.