Raising the value of your home can seem like an impossible task at first, particularly if you are working with a restrictive budget. However, it is not impossible. In this article, we will be looking into some of the simple ways that you can increase the value of your home with ease.
Replace The Doors And Windows
When looking to put your home on the market you want it to look its best. As a result, you may want to consider replacing the doors and windows, particularly if you are dealing with a draft of any kind. This will not only improve the curb appeal of your home, but it can also help to improve the energy usage of your home making it more appealing for those looking to purchase.
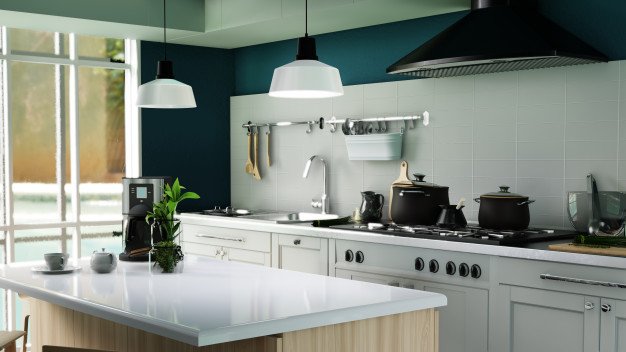
Makeover The Kitchen And Living Room
As the central hub of the home, the kitchen and the living room re the first two areas that you should consider modernizing. One of the easiest ways to do this is to paint the walls a neutral color. This will make the home more appealing to those hoping for a blank canvas, in addition to this, it is likely to brighten up the room as a whole. The living room can also be modernized and transformed by incorporating a custom-designed canvas using a next day canvas prints service for your home.
Improve The Look Of Your Garden
If you are lucky enough to have garden space, this needs to look the best that it can be at all times. By improving the front garden with flowers and taking care of the tress you are then making it seem more appealing to the buyer when they have a first impression. It is then time to consider the back garden. By mowing the lawn, tending to the flowerbeds, and removing any unwanted weeds in the patio, you can improve the curb appeal as well as the value of your home over time. Though this will take some man-hours, this will make it look more appealing to the listing.
Create A Driveway
The final way that you can boost the curb appeal for your home is to generate a driveway. If you have a vast amount of space outside the front of the house, sprucing up your driveway will make the home more appealing for those that have multiple cars or a family. Whether this is gated or just left open, this can help to limit on the road parking and raise the value of your home. IF you already have a driveway, it is recommended that you remove the weeds and clean the bricks or concrete to make it looks its best.
Whether you are in the process of selling, or you are considering it in the near future, some of these small little tips can help you to raise the property value of your home and sell it for the full amount that you would like.
Read Also:
Top Home Cleaning Tips
How To Pick The Perfect Flooring For Your New Home
Content Rally wrapped around an online publication where you can publish your own intellectuals. It is a publishing platform designed to make great stories by content creators. This is your era, your place to be online. So come forward share your views, thoughts and ideas via Content Rally.
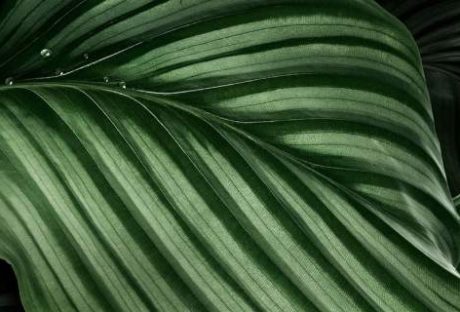
Big leaf plants can add an aesthetic touch to your home. If you are an admirer of home decoration, you cannot miss indoor plants as a part of your decoration.
Indoor plants require very minimum sunlight, and they are pretty easy to take care of. But, most important of all– they keep your indoor environment refreshed and fill it with fresh oxygen.
So, if you want to decorate your sweet home with beautiful big leaf aesthetic plants, you need to check out the few recommendations I have here in this article.
10 Best Big Leaf Plants For Indoors
If you are looking for recommendations for indoor plants with big leaves, please check out the ten recommendations I have here.
1. Swiss Cheese Plant
The botanical name of the Swiss Cheese Plant is Monstera deliciosa. This tropical beauty is enough to add a green touch to your indoors. It has big heart-shaped leaves to adorn your indoors. They do well if you keep them in indirect sunlight.
The heart-shaped leaves can grow up to 36 inches in length, and they are healthy for your indoor environment.
☀ Sun: They need bright but indirect sunlight.
🌡️Temperature: They are tropical plants, so you need to keep them in warm places. A temperature between 20°C - 30°C is ideal
💦Watering: You need to keep the soil wet most of the time. Watering them ⅔ times every week is enough.
🌷Type Of Soil: The soil needs to be moist and adequate fertilizers. A pH level of 5.5 to 7.5 works the best.
2. Dwarf Banana Plant
You can keep a large banana plant indoors. They are also big leaf plants. This is a tropical foliage plant that you can plant in a large plant. The leaves have quick growth, and the leaves are harmless to children and animals.
☀Sun: You can keep your Dwarf Banana Plant in full sunlight or in light shade.
🌡️ Temperature: They are big leaf tropical plants, so they enjoy a warm atmosphere. You can keep them at a temperature between 10°C to 33°C.
💦Watering: They need regular Watering– twice/ thrice every week in the warm season water them. Once every week is enough for the cold weather.
🌷Type Of Soil: The soil needs moisture. They need regular fertilizers.
3. Bird Of Paradise
If you want some flowers to highlight the big leaf plants you have indoors, then Bird Of Paradise is just the right plant to choose. These plants have long-lasting flowers and waxy leaves that add extra beauty to your indoors.
☀ Sun: Keep them in semi-shade or in full Sun.
🌡️ Temperature: Medium Temperature between 18°C to 22°C is just fine.
💦Watering: Keep the soil moist. The soil should not get completely dry.
🌷Type Of Soil: They need fertilizers in spring. Well-drained soil is better.
4. Elephant Ear Plant
These are the cheapest big leaf house plants. You can pull them from anywhere and plant them indoors. You can find these plants growing outdoors. These plants are toxic for small children and animals, so if you want to keep them, you need to be very careful.
☀Sun: They don't need full sunlight. Indirect bright sunlight is the best.
🌡️ Temperature: A temperature between 20°C to 30°C is best.
💦 Watering: The soil needs consistent moisture.
🌷Type Of Soil: Acidic, moist soil is the best.
5. Pinstripe Houseplant
Not many tabletop plants look as pretty as the Pinstripe Houseplant. These big leaf plants have gorgeous jungle green color with pink stripes to compliment the big leaves. They aren't too fond of direct bright sunlight. These plants are not harmful to animals and children.
☀ Sun: Keep them in indirect sunlight.
🌡️Temperature: 18°C to 30°C temperature is good enough.
💦Watering: You need to maintain the soil moisture.
🌷Type Of Soil: You peat and pebbles to balance the moisture.
You May Like To Read This: 10 Best Trailing Indoor Plants To Buy In
6. African Mask Plant
These big leaf plants are native plants of the Philippines. They get their name from their resemblance to an African mask. The large dark leaves can grow up to 18 inches. The silvery-white veins of the leaves make them even more attractive.
☀ Sun: Avoid direct sunlight. They love diffused sunlight.
🌡️Temperature: 15°C to 30°C is ideal for them.
💦Watering: They need regular watering during growth. Keep the pot moist and well-drained.
🌷Type Of Soil: Keep the soil well-drained using pebbles. Fertilize frequently after ⅔ months.
7. Majesty Palm
If you are looking for long leaf plants or big leaf indoor plants, the Majesty Palm is the one. They grow ten feet tall indoors. The leaves are toxic for animals and children, so you need to be careful if you are planting them indoors.
☀ Sun: Bright indirect sunlight is best.
🌡️Temperature: 18°C to 30°C is best.
💦 Watering: Water once after 1 or 2 weeks. Let the soil get dry before watering again.
🌷Type Of Soil: The soil is best if it is acidic.
8. Calathea Orbifolia
Are you looking for low-maintenance plants that keep the indoor air purified? Then there is no better option than Calathea Orbifolia. They can remove toxins from the air while also looking pretty with big textured leaves. There are silvery-white forks in the leaves that make them appear outwardly beautiful.
☀ Sun: They love bright sunlight but not direct sunlight.
🌡️Temperature: 18°C to 30°C is enough.
💦Watering: You can water them once or twice every two weeks.
🌷Type Of Soil: Well-drained soils rich in fertilizers are the best.
9. Philodendron Gloriosum
A native plant of Colombia, the Philodendron Gloriosum is a big leaf foliage plant. These plants love to crawl and climb. In humid weather, you can keep them indoors. These big leaf plants have gorgeous pink, light green, and white running across the leaves. The leaves, stems, and roots are toxic for humans and animals.
☀ Sun: Indirect and right sunlight is best.
🌡️Temperature: 7°C to 35°C is good enough.
💦Watering: The soil needs to be damp. You can water two to three times every week.
🌷Type Of Soil: Organic soil rich in fertilizers works the best.
10. Fiddle Leaf Fig
The fiddle-shaped leaves of the Fiddle Leaf Fig are large and waxy. They inhabit their pots quite well. These big leaf plants are poisonous to humans and animals. But they are aesthetic-looking bedroom plants, and they are gorgeous.
☀ Sun: These plants need bright sunlight. Do not keep them in the shade.
🌡️Temperature: 15°C to 30°C is good enough for them.
💦 Watering: Regular Watering is necessary.
🌷Type Of Soil: You need well-fertilized moist soil.
Frequently Asked Questions (FAQs):
Here are some frequently asked questions that you may find interesting.
Q1. How To Care For Big Leaf Plants? Taking care of big leaf aesthetic plants is easy. You need to keep them in medium indirect sunlight and keep the potting soil moist. They don't need frequent fertilizing; once or twice every year is enough. Q2. How Do You Encourage A Big Leaf To Grow? The water, light, fertilizer, soil, and care are all crucial to growing your big leaf plants. Q3. Why Is My Big Leaf Plant Dying? There can be several reasons for this; excessive Watering or little Watering can cause your plant to die. Varying sunlight and bad incompatible soil can also be the reason behind your indoor plant's death. Q4. What Affects Leaf Size? The amount of Sun, water, air, and fertilizer your plant gets has an effect on the leaf size.
Bottom Line
If you want to grow big leaf plants indoors, then you can choose from these ten plants I have recommended here. All of these plants are low maintenance, and they are pretty in look. Aside from that, some of these plants purify your indoor environment.
Did you like this list? Please let us know in the comment; also, if you purchased any of them, let us know which once was your favorite.
Read Also:
10 Best Tall House Plants To Buy
10 Best Spiky Plants To Decorate Outside Your House
What Are Trailing Plants? – What Are The Types Of Trailing Plants?
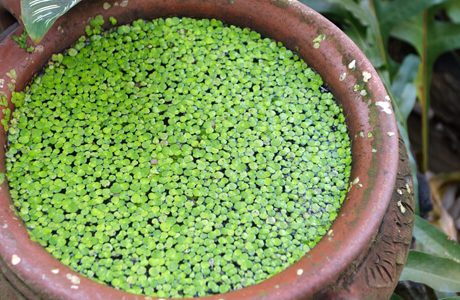
What is the fastest growing plant on earth? The answer to this question is Duckweed which is known as the fastest-growing plant in the world in 2021.
The Duckweed family consists of 37 species and can be found pretty all over the globe. Besides, this plant is also known as Wolffia, a plant that is easy to harvest and float on water. It grows very fast that you have never imagined of.
Wolffia is found everywhere in freshwater and has become a subject of fascination for scientists. This plant acts much like a weed, although it is eaten by humans, animals, and ducks.
What Is The Fastest Growing Plant On Earth?
As already discussed above, the fastest growing plant on earth is Duckweed, also known as Wolffia. This plant is a tiny type of duckweed that grows faster.
On the other hand, you are probably familiar with this plant (duckweed) that is found on ponds where several green beads seem to form a lid on water sources. The genetics underlying this strange little plant’s success has long been a mystery to scientists.
The Genome Research of February 2021 will help scientists to know how plants grow up so fast and what are the functions that allow them.
What Makes Wolffia (Duckweed) The Fastest Growing Plant In the World?
There are various reasons why Wolffia is known as the fastest-growing plant in the world. Many individuals are taking the benefit of this unusual crop as it is extremely high in protein and is a part of some Southeast Asian cuisines.
This plant reproduces very quickly. According to many types of research, Wolffia is regarded as the fastest growing plant in the globe. About forty percent of the plant’s genes are influenced by this time of day factor. Wolffia, clocks in with only 13 percent of its genes restricted by time.
Can You Speed Up Growing Rate Of Plants?
Smaller plants and trees grow faster than bigger versions of the same tree and plant because of the root ratio. These variants grow fast as they highlight a great balance of roots to top growth.
On the other hand, the plant and trees can place all their strength into top growth enables it to grow taller. And fast-growing plants only grow as fast as their roots support.
Besides, if you are growing plants, they must be planted right. In order to encourage deep root growth, you can also give continuous watering to the same.
The Final Thoughts
Duckweed is the fastest growing plant on earth and this is the correct answer to your question. The characteristics of the same are described above and if you have any queries about the same, you can specify them below in the comment section.
More Resources:
Garden Edging for Beginners
How to Maintain a Bright and Beautiful Garden During Winter
Smart Fun Gardening: How to Take Care of a Money Tree
We all know, at least by intuition, that having our living spaces clean is important – and not just because of the visual appeal of it. Then, what are the main reasons why it’s so crucial for our lives? Sure, the look of a clean home, the convenience of finding things in their place, habits it helps us foster, and the sense of obligation – especially if you live with other people, all of them play their part. But, there’s something that really makes house cleaning vital: the link between it and our physical and mental well-being.
So, what aspects of health are we talking about here, and how exactly does keeping your home in shape make a difference? According to Hire A Maid and their team of seasoned experts in house cleaning, there are a few main health-related considerations that connect to the state of our living spaces. We’ll discuss them below, and then explain how to approach home maintenance with a focus on well-being.
What Are The Approaches Of Home Maintenance With A Focus On Well-Being
There are a lot of approaches to home maintenance with a focus on well-being. In this case these approaches are quite suitable and feasible in terms of keeping your health nice and up to the mark. Below I am going to discuss the approaches of home maintenance with a focus on well-being.
1) Germs & Contaminants
This one is pretty straightforward: cleaner space means fewer germs and other contaminants. Your goal shouldn’t be to live in a completely sterile bubble, it’s more the means to lower the chance of illness by keeping those pesky germs at bay, especially during flu season.
To that end, you should regularly wipe and disinfect surfaces throughout your home and give extra attention to the high-touch ones. It’s a tried and tested way to keep yourself and your family safe.
And don’t forget the kitchen and bathroom, where a combination of moisture and food particles creates ideal conditions for pathogens to thrive. To make sure all of these areas are regularly addressed, it’s best to craft a realistic cleaning routine – one that’s easy to stick to but still addresses all microbe-prone surfaces regularly.
2) Allergens & Air Quality
Allergies are a common issue, one that many people unfortunately have to deal with even in the safety of their own homes. Allergy symptoms may be somewhat unpredictable, but luckily, it’s possible to lessen their grip on your day-to-day life. It’s quite simple really: regular cleaning reduces the amount of allergens the same way it reduces the number of germs.
Dust is a common culprit for triggering reactions, along with dust mites. And even if you and your family members don’t suffer from allergies, dust and dust mites can irritate almost anyone.
To reduce the amount of irritant particles and improve the quality of air in your home, focus on dusting regularly and efficiently, use a high-quality vacuum, and tackle upholstery, carpets, and bedding whenever possible.
3) Order & Stress Levels
Aside from being an eyesore, clutter can crowd your mind as much as your space. The hassle of moving around through the mess, a decrease in productivity – these are just some of the ways in which clutter and neglected cleaning tasks can add to your stress levels.
Before you know it, it becomes a loop where the sight of the mess and the dread of having to address it feed into each other, making you feel increasingly overwhelmed.
Tackling clutter is about reclaiming peace as much as it’s about reclaiming your space. Start small – a drawer, a shelf, a corner, and work your way through the home. If possible, rely on others for help, whether it’s family members or hiring a cleaning professional. Once everything is in order, brainstorm ways to keep clutter from creeping back in.
The ripple effects of a clean home on our well-being are extensive. Improved sleep, heightened concentration, and a general sense of wellbeing are all byproducts of a space that breathes cleanliness and order. Furthermore, the discipline and habits cultivated through regular home maintenance can translate into other areas of life, promoting a lifestyle that values mindfulness, health, and balance.
What Are The Monthly Home Maintenance Checklists?
While this is about a monthly home maintenance checklist, preserving the property’s condition is essential. Below, I am going to discuss the monthly home maintenance checklists.
1) Cleaning HVAC Filters
While this is about adequately installed HVAC filters, this will help you breathe easily in your home. This further ensures that your cooling and heating systems will also work efficiently.
2) Test Smoke Alarms
Always ensure that smoke detectors are functional in the home. This is a key feature for early detection in handling several other safety hazards. On the other hand, you must replace such batteries every six months to keep consistent and reliable operations.
3) Clearing Drains and Sinks
Always ensure that you are regularly clearing sinks and drains. These will prevent the inconvenience and chaos of several other clogs.
4) Examining Electrical Cords
Always examine several electrical cords. In this case, you must inspect the cables for frayed wires, or else you will lose the connections, which would prevent the electrical hazard.
5) Lubricating Door Locks and Hinges
Always lubricate the door hinges and locks to prevent doors from further squeaking. This ensures the smoother operations of several other locks.
6) Cleaning Gutters And Downspouts
After regularly purging the blockages and water damage, you might get a flawless water service across the entire washroom.
7) Checking Plumbing For Leaks
Always ask the plumber to detect leaks as early as possible. This will save and prevent money along with extensive damage. Ensure you check the shower heads, plumbing, and faucets for such leaking to avoid headaches. It takes work to handle this kind of service, especially every season.
What Are The Four Types Of Maintenance Strategies That You Must Know?
Did you know that predictive maintenance is about rapidly gaining and sparked by several other advancements across the IIoT? Below, I will discuss four types of maintenance strategies you must know.
1) Reactive Maintenance
After all, reactive maintenance is quite simple as it can fix several other things they usually break. Since repairs still need to be planned. Ultimately, this is a suitable method in which you can employ equipment that is optional for operations. Or else this has a low cost.
2) Preventive Maintenance
Another one of the most suitable approaches, which entails periodically pausing the operation of assets, is preventive maintenance. One of the main objectives of this maintenance is to enhance the lifespan of assets.
3) Reliability Centered Maintenance
After all, reliability-centered reliability-centered maintenance acknowledges equipment failure, which is not always unpredictable. This delves deep in terms of analyzing each equipment’s potential failure patterns. This is also applicable to craft a tailored maintenance plan.
4) Predictive Maintenance
Did you know that predictive maintenance is a vibration of analyzing a sensor that might warn of an impending malfunction? This prompts inspection, and this would also be feasible for timely repair.
In Conclusion
It’s clear that the benefits of regular home maintenance go beyond the surface. Fighting off germs, clearing the air from allergens, reducing stress levels – the impact on well-being is undeniable. It’s all about including mindful cleaning habits into your life, for the sake of your and your family’s well-being. So, embrace these tasks, rely on a routine, don’t hesitate to ask for help tackling them, and enjoy a living space in which you can thrive.
I hope you liked this article!
Read Also:
Home Maintenance Tips To Keep Your Home In Good Condition
Home Maintenance Plans And Cleaning Tips During Covid-19