3 Ways to Care for Cattle at Home

Cattle

Economic crises, such as the 2008 recession, or the current COVID-19 pandemic, tend to make people think about job security and finance for the future.

It’s one of the main reasons why people turn their attention to self-sufficiency, home farming, and even raising livestock. The good news is there is plenty of support, ranging from high-quality livestock loans to expert advice.

But, before you can start buying cattle you need to be sure that you know how to care for them. Fortunately, you’re about to discover the three ways to care for cattle at home.

1. Shelters & Paddocks

Grazing animals need to have approximately 2 acres per animal for all year round grazing. This may seem excessive but grass growth slows in the winter, you have to allow for this. Anything less than this means you need to calculate the cost of animal feed and include this in your budget.

Don’t forget, this is a minimum. Having more space will allow you to deal with bad grass growth, whether a result of drought or something else.

You also need to make paddocks, these are simple fenced areas that allow you to rotate your cattle and ease the burden on the grass. You’ll need big enough paddocks to accommodate your cattle, keeping cows and bulls separate.

The larger your paddocks the better as small paddocks mean frequent cattle rotations. Of course, no matter how big the paddock you should move your cattle regularly to avoid the grass becoming ruined.

You may be surprised to learn that cattle don’t actually need shelter. But, they do need the high ground to wait out storms and other bad weather. That said, you can build a barn that provides the cattle with a roof, but this will cost more.

2. Basic Needs

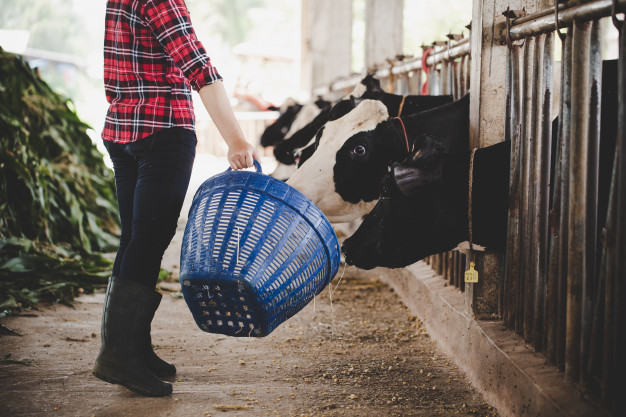
Cattle need grass of animal food in order to stay healthy. This is important whether you want milk or meat from them. But, they also need a plentiful supply of water.

Freshwater springs and rivers are good but you’ll need to monitor and clean them often to ensure diseases aren’t spread. Alternatively, you can use an animal operated pasture pump. It’s a tank with a pump that is activated by the cow pressing against the lever, giving them access to the water.

Your cattle need approximately 2 gallons of water per 100 pounds of body weight per day.

3. Cattle Training

Your cattle need to respond when you want them to. This may be to herd them or for some other purpose. You’ll have to decide the noise you wish to make, such as a bell or car horn, then sound it when you feed the cattle. Repeat it every time you feed them and the cows will quickly learn to come whenever you make the specific sound.

Moving cattle around requires little effort. Alongside the recognizable sound, simply use a plastic paddle to put gentle pressure on the sides, it will steer them where you want them to go.

With a little patience, you’ll have the cattle doing exactly what you want without any stress.

Read also:

Content Rally wrapped around an online publication where you can publish your own intellectuals. It is a publishing platform designed to make great stories by content creators. This is your era, your place to be online. So come forward share your views, thoughts and ideas via Content Rally.

View all posts

Leave a Reply

Your email address will not be published. Required fields are marked *

Related

planttomato

How To Grow Tomatoes From Seed

If you are an avid tomato grower you're probably envious of all the different varieties that other growers talk about, but that you can't find transplants for in your area. In many cases, those growers are growing tomatoes from seed. Growing tomatoes from seed really isn't that difficult, as long as you understand a few basic things. Well, I will walk you through this process below. Read on. Why is it necessary to start tomato seeds early? Tomato seeds planted in the garden won't germinate until the ground is warm enough. What's the ideal ground temperature? They germinate best at temperatures in the 70-80 degree range. If you plant seeds directly into the ground, odds are the summer will be too short for tomatoes to become productive before the end of the growing season unless you live in one of the warmest climates in the US. The days to harvest number that is on a packageof tomato seeds assumes that you are using transplants. To decide if your area is warm enough to plant directly in the ground, add 30-50 days to that number. So if it says 90 days you would need 120-140 days of temperatures above 70 degrees to get your first ripe tomato if you plant the seeds in the ground! When should I start my seeds? Most people who are growing tomatoes from seed start 4 6 weeks before the last expected spring frost date in their area. You need to wait to plant the seedlings outdoors about 2 weeks after that date when the soil has warmed up to at least 50 degrees. The date you start growing tomatoes from seed can vary depending on the space you have available and the length of your growing season. First, you need to gather some important items: Containers: Start with clean, sterile containers to grow your tomato transplants in.Your local garden center or big box store should have seed starting kits that consist of a black plastic tray with peat pots or plastic inserts and a clear plastic dome cover that fits over the top. If you're only starting a few seeds, you may want to just plant them in paper or foam cups with holes punched in the bottoms. Many of us like to save money and reuse flats or recycle containers like plastic milk jugs for starting seeds. This is fine as long as you wash them thoroughly and then sanitize in a 10% bleach solution (1 cup bleach in 10 cups of water). Note: Be sure whatever container you use has drainage holes in the bottom so that excess water can drain out. Lights: You cannot grow a healthy transplant without proper light. Even a sunny, south-facing window is not really adequate. Using a led grow light or fluorescent light on a timer that it is on for 12 hours and then off for 12 hours, will ensure that when you are growing tomatoes from seed your plants get all the light they need to grow properly. You will need to plan a way to raise the lights so that the top leaves of the plants are 2- 3î below the lights. One method is to use a wire shelving unit. The chain that comes with a fluorescent shop light works perfectly to hang it from the shelf above your plants. Growing Media: Use fresh, sterile germination mix labeled for seed starting. These mixes are usually peat-based and do not contain garden soil. Tip: More than 50% of people who are growing tomatoes from seed for the first time lose their seedlings to damping-off disease. This fatal disease can literally wipe out your seedlings overnight. Starting with sterile containers and soil mix will greatly decrease the chance of your seedlings becoming infected. Read also: How To Choose The Right Containers For Your Container Garden Growing tomatoes from seed are the only way to have the very best tasting and old fashioned heirloom varieties which are not usually available as nursery started plants. Read also: Does Organic Gardening Improve Soil Quality?

READ MOREDetails
Natural ways to get rid of flea in your lawn

Natural ways to get rid of flea in your lawn

It may be a challenging task to remove fleas from your lawn. This can drive somebody crazy, sick and tired of spending a huge sum of money to buy chemicals with a view to expelling fleas for good. All efforts go up in smoke due to wrong methods. Is there any right, natural way to make their dream come true? Yes, here is the answer that is proven for green pest control in Minnetonka. Natural ways to kill fleas in your lawn : source Spray thoroughly your whole lawn with natural ingredients: Nowadays, many industrial products are available for your choice, yet they can be harmful to your health. Why don’t you make use of fewer but multifunctional things right in your kitchen? Vinegar or lemon is accepted. As for vinegar, mix ½ vinegar with ½ fresh water. As for lemon, slice them and boil in at least 20 minutes. Either vinegar or lemon, you also end up pouring the combined water into a spray bottle in order to sprinkle your lawn. This handmade flea killer is friendly to the environment, hence you can utilize it day in and day out. Flood your lawn: After spraying, don’t rush to flood right away. Take some time, about at least 2 hours, to kill the adults. So, what about larvae and eggs? Just flood your lawn slightly to soak up and eradicate them. Maintain the flood in a couple of minutes, and drain your lawn as fast as possible. Natural ways to prevent fleas re-infesting : Source  Rake your lawn to get rid of all shrubs, littered pots, trash and leaves: In fact, this step is indispensable in the whole process of getting rid of tenacious pests. Many people are wondering why they treat flea inside their home and in their pets already, but flea infestation does not decrease or boom just after a short period. Simply it is because of your uncompleted treatment, and you have skipped one of the most potential areas, your lawn. Fleas can live outdoors until they find a good chance to jump into your house or your pets, and their favorite environment is a moist, dark place. They can find it easier to escape from your “checking-radar” if hiding under a bottle or rotten leaves. After raking all useless items, don’t pile them up. Instead, clear up and throw away as soon as possible. The cleaner your lawn is, the lower the percentage of being infestation is. Mow your lawn: Mowing is one of the most useful methods to remove flea in the lawn. It can be understandable because to let your lawn long also means to create “an ideal shield” for fleas’ larvae and eggs. In addition, short lawn also allows sunlight to deeply penetrate into while fleas really hate daylight. Nonetheless, don’t try to cut your lawn as short as possible as the too-short, on the contrary, can make your lawn weaker and more attractive to fleas and even other animals like ants. Don’t overwater: As aforementioned, fleas prefer moist, as a result, you should prepare for an appropriate watering schedule and leave your lawn to dry. Moreover, a good drainage system is enormously useful. Minimize other animals’ contact to your lawn: Outside your fence may be a huge potential to be infested by fleas, coming from wildlife animals. Build up a fence around your lawn to protect your lawn and your house as well. Sound simple, right? In fact, it really is. All the mentioned methods are so cost-effective and practical. They are really worth a try. Read More : Grow These Flowering Plants In Your Home Garden To Remove Vastu Related Problems How To Choose The Right Containers For Your Container Garden Does Organic Gardening Improve Soil Quality? featured image Source: https://pxhere.com/en/photo/994438

READ MOREDetails
Make Most Out Of Your Outdoor Space

Ten Tips to Make Most Out Of Your Outdoor Space

Bored of seeing the old patio and cringe every time your friends come home for a barbecue backyard? Not anymore! Give your boring living space a beautiful makeover. Whether you have small outdoor or a big yard, you don’t need to juggle a lot to make a big statement to your outdoors. Just some tips and bang on! From the most beautiful designs to the personalized touch, get the most out of your outdoors with these ten practical tips: Seating: A perfect seating as per the ambiance is the one everybody wants to relax on. While the right seating can enhance the look, inappropriate arrangements can ruin the whole look. For big spaces, add farmhouse table or a custom-built bench, or perhaps an artistic sofa. However, for small spaces, try bold colors or make use of wicker chairs. Lighting: One of the essential elements in outdoors is the lighting. Perfect lighting can uplift the mood as well as can change the ambiance of the place to dress up your place, use chandeliers or small lamps. String lights can also work for small patios to make a significant impact. Read More: Create A Stunning Outdoor Space With These Residential Landscape Lighting Tips Bar/ Kitchen: A bar at the outdoors is a must! Turn your patio into an outdoor kitchen space or a customized bar with all the liquor to make your weekend party a bang! Rug area: Dress-up your outdoors with the beautiful rugs of different patterns and shapes. Try primary colors, or a plane stencil pattern would work in that green lushes. Storage seats: Storage is another essential thing for outdoors. Use a multifunctional box or perhaps a functional couch to place drinks, cushions or eatables in it. Adorn the storage box by painting on it or make them look like extra seating for your guest or friends. DIY planters: Plants at outdoor are no exception, but plants in quirky things can be. Don’t settle for pots or hanging pots, instead make use of every other waste thing lying around to bring greenery to your outdoors. Grab a tin or maybe an old bottle or perhaps tire, spray paint on it and done! Flower boxes: Flower boxes are also a beautiful way to enhance the look of outdoors. Use shutters or wall hangings of a different color to get the most out of your living space. Give it a curb appeal by planting colorful flowers in it. Fire Pits: If your outdoors has a fireplace, you know it’s the place to cuddle on beautiful nights. The source of fire at outdoor draw people, so if you have one makes the seating around it and get set party! But if you don’t have any fireplace, DIY one by making small pits. Fire pit cover: Put your fire pit to double duty by popping a lid on it making it a unique tabletop. For daylight gathering or day parties, coving a fire pit will add more space to the outdoor to place things. Add a sporty look: Fashion and sport can go hand-in-hand. And with greenery, it looks the best. Use some of your favorite outdoor games to decorate the space. Make use of walls, install shelves on the railings or look for the places where you can hang on things. So those were some of the most favorite home builder tips that you can use to remodel your outdoors.  Want to go a step ahead? Build a swimming pool in the space and enjoy outdoor bathing or how about a pool party! Insert these ideas and make outdoor living beautiful. Read More: 3 Amazing Flower Street Garden – How To Design Does Organic Gardening Improve Soil Quality? How To Choose The Right Containers For Your Container Garden Grow These Flowering Plants In Your Home Garden To Remove Vastu Related Problems

READ MOREDetails