How TO Harvest Lemongrass: Tips AND Tricks FOR Growing AND Using This Versatile Herb 

Published on: 11 March 2024 Last Updated on: 12 September 2024
how to harvest lemongrass

Lemongrass is a tropical herb that has a fresh and citrusy flavor and aroma. It is one of the most essential herb that is people widely use in Asian cuisines. They especially use it in Vietnamese, Thai, and Indonesian dishes. It is also a popular ingredient in teas, soups, curries, salads, and marinades. Lemongrass has many health benefits, such as improving digestion, boosting immunity, reducing inflammation, and relieving stress.

But did you know that you can grow and harvest your own lemongrass at home? Yes, you can! Lemongrass is easy to grow and maintain, and can thrive in pots, containers, or gardens. You can enjoy fresh and organic lemongrass all year round, and save money and time from buying it at the store.

In this article, I will show you how to harvest lemongrass, and share some tips and tricks for growing and using this versatile herb. By the end of this article, you will have a better understanding of how to harvest lemongrass, and how to make the most of this wonderful herb.

So, if that is something that you want to know, I have you covered! Keep on reading this blog till the end to learn more…

How to Grow Lemongrass?

How to Grow Lemongrass?

Lemongrass is a wonderful herb that can add a refreshing and citrusy flavor to your dishes, drinks, and teas.

It is also a beautiful ornamental plant that can brighten up your garden with its tall, graceful stalks and fragrant leaves. Lemongrass is native to tropical regions, but you can grow it in cooler climates as well with some care and preparation.

Here are the steps and conditions for growing lemongrass successfully at home:

1. Choose a healthy lemongrass plant or stalk

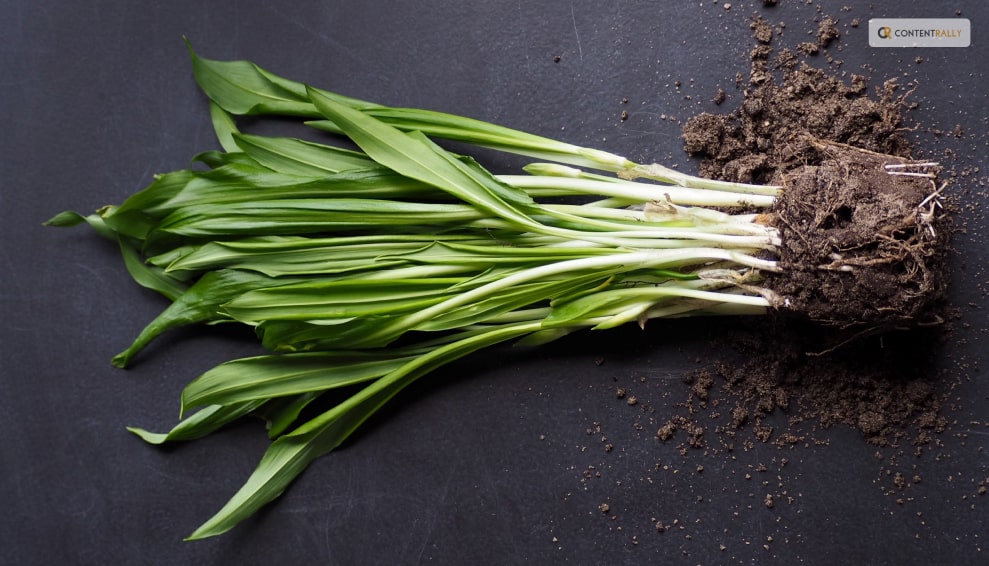
You can buy a potted lemongrass plant from a nursery or garden center, or you can start your own from a fresh lemongrass stalk that you can find in most grocery stores or Asian markets. Look for a stalk that is firm, green, and has some roots at the base. Avoid any that are dry, brown, or moldy.

2. Prepare a sunny and warm spot for your lemongrass

Lemongrass loves full sun and heat, so choose a location that gets at least six hours of direct sunlight per day. If you live in a colder region, you can grow lemongrass in a container that you can move indoors during the winter.

Use a large pot with drainage holes and fill it with rich, loamy soil that is high in organic matter. You can also add some compost, manure, or leaf mold to improve the soil quality and fertility.

3. Plant your lemongrass in the soil

If you bought a potted plant, simply transplant it to the ground or a larger container, making sure to bury the roots well and leave some space between the stalks.

If you are starting from a stalk, peel off any dead or yellow leaves and trim the top part to about six inches.

Place the stalk in a glass of water and keep it in a sunny windowsill until roots start to grow, which can take a few weeks.

Then, plant the rooted stalk in the soil, leaving about two inches of the stem above the ground. Space the plants about two feet apart to allow them to spread

4. Water and fertilize your lemongrass regularly

Lemongrass needs moist soil to thrive, so water it frequently and deeply, especially during hot and dry periods.

A good rule of thumb is to water it once a week or whenever the top inch of the soil feels dry. You can also apply a layer of mulch around the plants to conserve moisture and prevent weeds.

Lemongrass also benefits from a monthly dose of liquid organic fertilizer during the growing season, such as fish emulsion or seaweed extract. This will help it grow faster and produce more leaves and stalks.

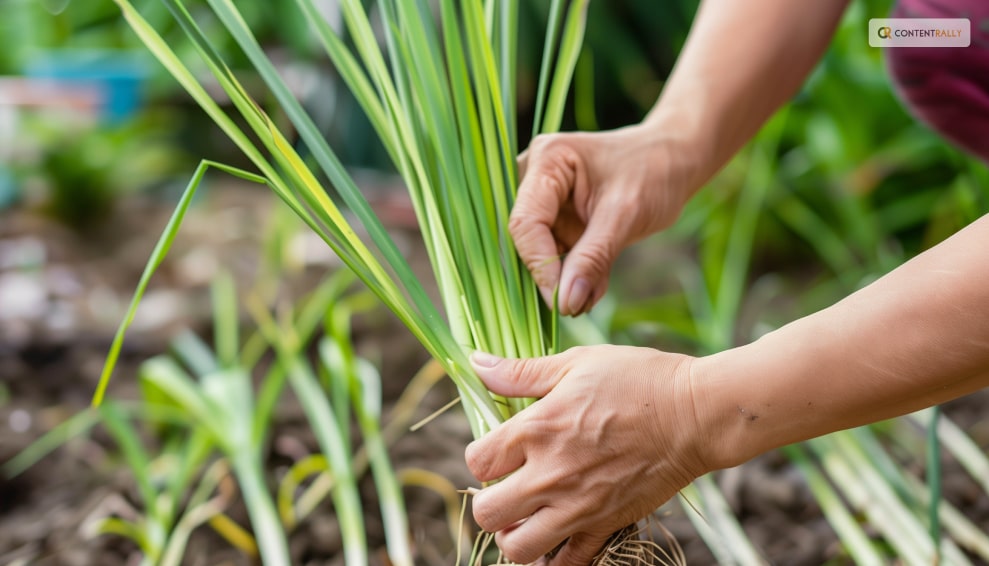
5. Harvest and enjoy your lemongrass

You can start harvesting your lemongrass when the stalks are about a foot tall and half an inch thick. Cut the stalks at the base with a sharp knife or scissors, leaving about two inches of the stem in the ground.

Additionally, you can use the whole stalk, or peel off the outer layers and use only the tender inner part. You can also harvest the leaves and use them fresh or dried for teas and infusions.

Lemongrass can be stored in the refrigerator for up to two weeks, or in the freezer for up to six months. You can also dry it and store it in an airtight container for later use.

How to Harvest Lemongrass?

How to Harvest Lemongrass?

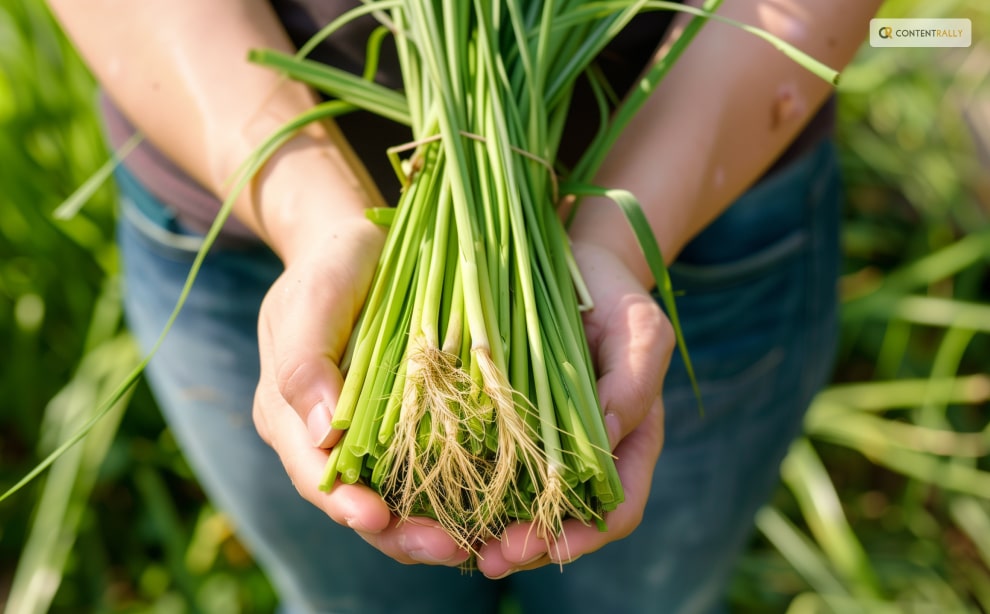
Harvesting lemongrass is a simple and satisfying process that can be done in a few steps. Here are the basics of how to harvest lemongrass:

Choose the right time 

The best time to harvest lemongrass is when the stalks are about 12 inches tall and 0.5 inches thick. This usually happens after 3 to 4 months of planting. You can harvest lemongrass throughout the year, as long as the temperature is above 40°F. You can also harvest lemongrass in batches, leaving some stalks to grow and regenerate.

Cut the stalks

To harvest lemongrass, you need a sharp knife or scissors, and a clean cutting board. Cut the stalks at the base, as close to the soil as possible. You can cut as many stalks as you need, or as many as you can use within a week. You can also trim off the leaves, as they are not edible and can be used for other purposes.

Wash and store the stalks

After cutting the stalks, wash them under running water, and pat them dry with a paper towel. You can store the stalks in the refrigerator, wrapped in a damp paper towel, and placed in a plastic bag. They can last for up to a week. You can also freeze the stalks, chopped or whole, in a freezer bag. They can last for up to 6 months.

Dividing Lemongrass: What is It and How to Do It?

Dividing Lemongrass: What Is It And How To Do It?

Dividing lemongrass is a great way to propagate and maintain this aromatic and flavorful herb. Lemongrass is a perennial plant that grows in clumps of stalks and leaves.

Over time, these clumps can become crowded, woody, and less productive. By dividing lemongrass, you can rejuvenate the plant, increase its yield, and share it with others.

Here are the steps and reasons for dividing lemongrass:

1. When to divide lemongrass?

The best time to divide lemongrass is in the spring, after the last frost date when the plant is actively growing and has new shoots.

You can also divide lemongrass in the fall if you live in a warm winter climate or if you plan to overwinter the divisions indoors.

Avoid dividing lemongrass in the summer, when the heat and drought can stress the plant and reduce its survival rate.

2. How to divide lemongrass?

To divide lemongrass, you must dig up the entire plant and separate it into smaller sections. You can use a shovel, a sharp knife, or your hands to do this.

Each section should have at least one inch of root and several healthy stalks and leaves attached.

You can trim the leaves to about six inches to reduce water loss and make the divisions easier to handle. Discard any old, brown, or damaged parts of the plant.

3. Where to plant lemongrass divisions?

You can plant lemongrass divisions in the same spot where you dug up the parent plant or in a new location with full sun, moist and well-drained soil, and plenty of organic matter.

You can also plant lemongrass divisions in containers at least 10 inches deep with drainage holes. Space the divisions about two feet apart to allow room for growth.

Plant the divisions at the same depth as they were before, with the crown just below the soil surface. 

4. How to care for lemongrass divisions?

Lemongrass divisions need regular water and fertilizer to establish and thrive. Water them deeply and frequently, especially during the first few weeks and during hot and dry periods.

You can also apply a layer of mulch around the plants to conserve moisture and prevent weeds. Fertilize the plants once a month with a liquid organic fertilizer, such as fish emulsion or seaweed extract, during the growing season.

Protect the plants from frost in the winter by moving them indoors or covering them with a frost cloth.

5. How to harvest and use lemongrass divisions?

You can start harvesting lemongrass divisions when they are about a foot tall and half an inch thick. Cut the stalks at the base with a sharp knife or scissors, leaving about two inches of the stem in the ground. You can use the whole stalk, peel off the outer layers, and use only the tender inner part.

Additionally, you can also harvest the leaves and use them fresh or dried for teas and infusions. Lemongrass can be stored in the refrigerator for up to two weeks or in the freezer for up to six months. You can also dry it and store it in an airtight container for later use.

How to Use Lemongrass in Food?

How to Use Lemongrass in Food?

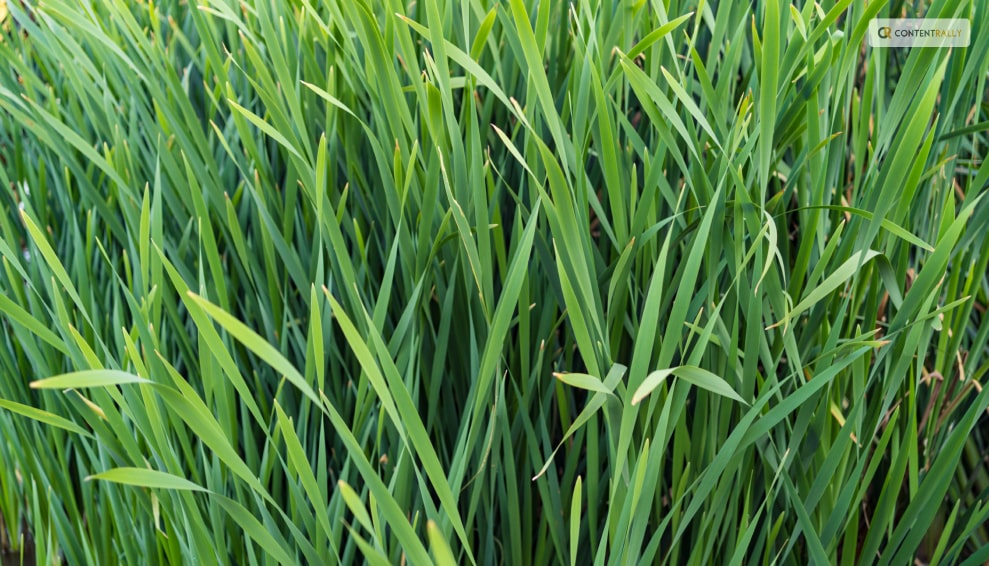
Lemongrass has a long, green stalk with a bulbous base and grassy leaves. It has a lemony taste with a hint of mint and ginger. Lemongrass can be used fresh, dried, or powdered, depending on the recipe and preference. Here are some ways related to how to use lemongrass in different ways:

Fresh lemongrass

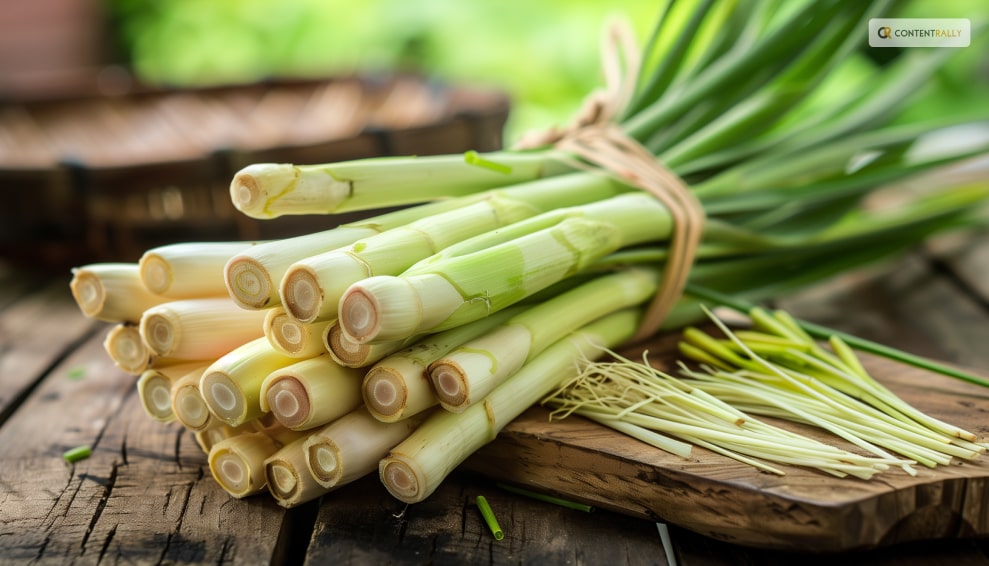
Firstly, fresh lemongrass is the most aromatic and versatile form of lemongrass. You can find it in the produce section of most supermarkets, Asian markets, or online.

To prepare fresh lemongrass, you need to peel off the tough outer layers and trim off the root end and the top third of the stalk. You can use a sharp knife or scissors to do this. The part that you want to use is the pale and tender lower part of the stalk.

After that, you can slice it thinly, chop it finely, or bruise it with a pestle or the back of a knife. Slicing or chopping is good for salads, stir-fries, curries, and marinades, while bruising is good for soups, stews, and broths.

You can also make a paste by pounding or blending lemongrass with other ingredients, such as garlic, ginger, chilies, and cilantro.

A paste is great for adding flavor to meats, seafood, tofu, and rice. You can store fresh lemongrass in the refrigerator for up to two weeks or in the freezer for up to six months.

Dried lemongrass

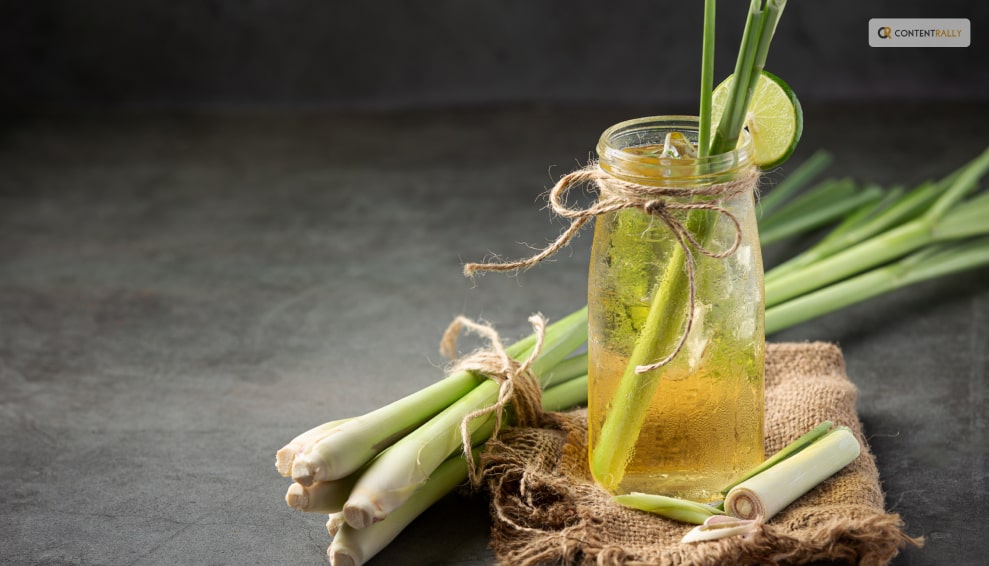
Secondly, dried lemongrass is less potent than fresh lemongrass but still has a nice, lemony flavor. You can buy it in whole or sliced form or dry your lemongrass by hanging the stalks in a warm and airy place until they are brittle.

Dried lemongrass is good for making teas, infusions, and herbal blends. You can also use it to flavor soups, stews, and broths, but you must soak it in hot water for about 20 minutes before adding it to the pot.

Additionally, you can store dried lemongrass in an airtight container in a cool, dark place for up to a year.

Powdered lemongrass

Lastly, powdered lemongrass is the most convenient form of lemongrass, as it does not require any preparation. You can buy it in spice shops, Asian markets, or online.

Powdered lemongrass has a mild and sweet flavor and can be used in baking, desserts, sauces, and dressings. You can also sprinkle it over salads, soups, and stir-fries for a touch of freshness.

The shelf life of powdered lemongrass is also great. For up to six months, you can store powdered lemongrass in an airtight container in a cool and dark place.

How to Use Lemongrass in Other Things?

How to Use Lemongrass in Other Things?

Apart from cooking, you can use lemongrass in many other ways. Some of the best and most popular uses of this herb are as follows:

Beautifying

You can use lemongrass to make your own beauty products, such as soap, lotion, or shampoo. You can infuse the stalks or the leaves with oil, such as coconut, olive, or almond oil.

Moreover, you can also add other ingredients, such as honey, aloe vera, or essential oils. You can use the products to cleanse, moisturize, or scent your skin and hair.

Healing

You can use lemongrass to treat various ailments, such as headaches, colds, or infections. You can inhale the steam from boiling the stalks or the leaves, or apply the oil to your temples, chest, or throat.

Additionally, you can also drink the tea, or gargle with the syrup. You can use the products to relieve pain, inflammation, or congestion.

Wrapping It Up!

If you want to know how to harvest lemongrass, I hope that this blog has been of help to you. If there are any other queries about the same, please feel free to let me know. All that you need to do is scroll down till you reach the bottom of the bottom of the page. Then leave your suggestions and comments in the box below. And I will be there to answer them all for you!

Learn More About:

Ankita Tripathy loves to write about food and the Hallyu Wave in particular. During her free time, she enjoys looking at the sky or reading books while sipping a cup of hot coffee. Her favourite niches are food, music, lifestyle, travel, and Korean Pop music and drama.

View all posts

Leave a Reply

Your email address will not be published. Required fields are marked *

Related

Repairing Your Roof

Repairing Your Roof – How Should You Get Started?

Your house's roof is its ultimate defense against harsh weather, pesky creatures, and infestations.  If your roof is not in top condition, your entire house is at risk. It's crucial to schedule roof repair as soon as you notice a leak, even if it's small, as it can cause significant damage.  Repairing your roof is more cost-effective than replacing it entirely and is vital to maintain its integrity.  Left unaddressed, roof leaks can cost you tens of thousands of dollars.  This article will discuss the basics of roof repair, what you need, and how to do it. Ensuring your roof is in top condition is essential to protect your home from the elements and ensure its longevity. Steps For Repairing Your Roof Given below are the steps that will guide you in the process of roof repairing at your home— 1. Examine The Damage Following a systematic approach is vital when searching for a leak in your roof. Begin by surveying the visible damage to your roof, including shingles, gutters, and roof edges.  It's essential to start with the most obvious issues and progress to less apparent ones. Once you've assessed the exterior, examine the interior for signs of water damage.  Look for indications of water stains, dripping water, sagging, pooled water, and dampness. Inspect during rainy weather, as some leaks are intermittent and only occur when there is enough rain.  Access the attic using a flashlight to locate the water source through the roof deck. Check around all rafters for indications of water.  Water can travel through the roof decking and rafters due to the force of gravity, which may result in dripping in different areas. If you observe water dripping, trace it back to its origin. 2. Find A Reliable Contractor After a thorough inspection of your roofing system by a professional roofing consultant, you will receive an accurate and detailed bid or estimate.  The estimate will be based on the materials you choose for your roofing projects. Moreover, you must consider the unique measurements of your roof.  The roofing consultant will also consider any special conditions that may affect the cost. This can include the complexity of the roof design or any existing damage that needs repairing. Once you receive the bid or estimate, your roofing contractor should provide a written contract outlining the details.  This contract should include a comprehensive breakdown of the costs, the expected timeline for completion, and any warranties or guarantees included.  Therefore, you must carefully review and understand the contract before agreeing to any work to ensure everything is clear and fair for both parties. 3. Select The Suitable Material  It's crucial to have a complete set of roofing tools when undertaking any repair project. These hand tools have various uses throughout the house. They include the following: Roofing hammer. Pry bar. Nail puller. Utility knife. Shears. Tin snips. Handbrake. Tape measure. Chalk box. Roofing nails (also known as roofers). Speed squares. A pencil for notes or markings. A 10 oz clay gun. Choosing the right roofing sealant depends on the roofer's needs, but any kind will suffice.  While shingles are optional, matching them is optional. For flashing work, it's recommended to use aluminum coil stock, which is available in various colors at most box stores. A tape measure is recommended for all measurements and layout work, and a chalk box is ideal for snapping reference lines and general layout work.  Roofing nails, or "roofers," are recommended for their durability. The materials used for the roofing sealant, shingles, and aluminum coil stock are also essential. 4. Ensure That All Cracks Are Sealed Using an uncomplicated roofing sealant is important to seal any cracks on your roof.  To apply a sealant, you must pierce a thin aluminum membrane with the tube, allowing the sealant to flow.  Next, load the sealant into a caulk gun and aim it at the crack or hole to seal it.  The sealant will dry in a few hours and be set entirely in 24 hours without intervention.  Finally, you can cover the hole with shingles or flashing and move on to other projects. Ensuring that the roof sealant is compatible with your caulk gun is crucial. This is because some construction materials come in 28-ounce tubes that won't fit a standard 10-ounce gun. 5. Ensure The roof Is Insulated When planning to replace your roof, it's also a good opportunity to consider upgrading your insulation.  However, if you opt for new blown-in insulation, your roofing contractor will install it while they remove the decking.  This insulation process requires running a hose through the exposed roof and into your attic. It allows the insulation to be installed quickly and easily without causing any damage to your walls or ceilings.  Therefore, with the new insulation, you can enjoy improved energy efficiency and a more comfortable indoor environment. 6. Leave It Clean After the roofing crew installs your new roof, they should clean up any debris around your home. This includes loose shingles and nails and leaves them in their original condition.  They should also haul away old roofing materials for proper disposal. Additionally, you must ensure not to dispose of in landfills, which can contribute to pollution. The roofing expert must inspect the final product to ensure it meets all industry standards and building codes.  They should also check for potential leaks or damage and address any concerns. It is important to address any concerns and take steps to correct any issues. Therefore, ensure you’re completely satisfied with the new roof and its reliable protection for years. Can You Repair Your Roof Yourself? Understandably, as a homeowner, you may want to save money. Therefore, taking care of some home maintenance tasks can help you save a lot.  However, it is important to know your limits when it comes to your roof.  You may be capable of handling minor tasks such as replacing caulking or cleaning gutters. On the other hand, leaving any roofing projects to the professionals is highly recommended.  Moreover, roofing maintenance requires specific skills, knowledge, and equipment that only experienced and trained professionals possess.  Even a seeming DIY project can quickly spiral into a much bigger roof repair if something goes wrong.  Therefore, it's always wise to prioritize the safety of your home and family. Look for an efficient roofing service provider and explain the damage. You can get your roof cost-effectively repaired under expert supervision! Read Also: How Often Do You Need A Roof Inspection? Elevate Your Roof’s Health With Aerial Roof Inspections Choosing A Siding And Roofing Companies In Delaware

READ MOREDetails
Apartment

6 Types Of Signs Every Apartment Resident Should Know About

Signage plays a crucial role in communicating important information and guiding residents and visitors at apartment complexes. From practical wayfinding signs to eye-catching banners advertising available units, the right signs can make all the difference.  This blog explores the array of sign options that apartment managers have at their disposal to effectively convey messages, improve accessibility, and enhance curb appeal. We’ll look at everything from illuminated “Vacancy” signs to inform potential renters of availability to parking designation signs that help maintain order in lots. Metal laser cut signage like building and unit number markers also make it easier for emergency responders, delivery drivers, and visitors to navigate complexes. Plus, promotional banners can attract interest from passersby. With a thoughtful signage strategy, managers can ensure their apartment community puts its best face forward while helping residents and guests seamlessly get where they need to go. Effective Safety Signage for Apartment Complexes Strategic safety signs are a must for any apartment community, helping to mitigate risk and give residents peace of mind. Required by law in many cases, these symbols and warnings serve an important function by alerting residents and visitors to potential hazards, emergency resources, and proper protocols.  Exit signs with directional arrows provide critical guidance in the event of a fire or other emergency evacuation. Highly visible hazard signs denoting slippery floors or wet paint caution people to avoid dangerous conditions. Signs indicating the locations of safety equipment like fire extinguishers and defibrillators can save critical seconds in an emergency. Parking and traffic signs help maintain order in complex lots and garages. Warning symbols for loud noises, falling objects, or other construction hazards around work zones keep passersby safe. When properly placed around an apartment community, these simple but essential signs convey a message of preparedness and attention to safety that gives residents confidence in their building management. Contemporary Signage for an Inviting Apartment Atmosphere An apartment community's signage makes a strong first impression on prospective residents. To keep pace in a competitive market, modern, stylish signs are a must in showcasing an up-to-date, inviting atmosphere.  Sleek, backlit LED signs at a complex's entrance identify the property while seamlessly blending contemporary aesthetics. Likewise, stylish building IDs with minimalist lettering and colors that pop evoke modern tastes. Parking signs with clean lines and high-visibility reflective vinyl or thermoplastic lettering also exude a contemporary vibe.  Inside leasing offices, wayfinding signage with intuitive pictograms, sans-serif fonts, and bright accent colors speaks to today's sensibilities. Outdoor banners sporting vibrant images, short impactful phrases, and a distinctive modern style attract the gaze of passersby. Signs with polished, contemporary finishes appeal aesthetically and communicate professionalism and quality. By partnering with an innovative sign company, apartments can keep their image fresh, memorable, and inviting for new generations of renters. Promotional Signage for Apartment Events Special events help apartment communities build a sense of togetherness and camaraderie among residents. To generate buzz and boost participation, targeted signage is an invaluable promotional tool. Eye-catching vinyl banners prominently displayed at a complex's entrance build anticipation and awareness of upcoming holiday parties, poolside barbecues, and other resident events. Sandwich boards stationed in high-traffic common areas like mailrooms spread the word on everything from movie nights to fitness classes. For events like trick-or-treating or a pet parade that will draw outside visitors, roadside signs posted nearby grab attention from passersby.  Temporary signage like corrugated yard signs, A-frame sidewalk signs, and posters hung in common spaces ensure residents receive frequent reminders leading up to each event. The vibrant, festive designs set a fun tone. After an event concludes, a thoughtful "Thank You" sign shows appreciation for those who participated. With the right signage strategy, apartment managers can generate buzz and bring their community together around special activities and gatherings year-round. Clear Identification Signs for Apartment Buildings A clear signage strategy is essential in any apartment community to help residents and guests easily identify buildings, units, and common spaces. Proper identification guides traffic, minimizes confusion, and improves the overall living experience.   Illuminated building numbers and address signs ensure emergency responders can quickly locate the correct structures. Unit number signs on floors and doors give each residence a sense of identity. Room ID signs labeled with easy-to-read text and icons help differentiate laundries, fitness centers, lobbies, and other shared amenities. Custom room name signs add personality to spaces like game rooms or theaters.  Well-designed identification signage also reinforces security. Authorized access signs for private lobbies or gated garages deter unwanted visitors. And placards labeling restricted areas like electrical rooms or roof access help keep people safe.  Finally, a clear wayfinding signage strategy with directionals pointing to different building exits or parking areas simplifies navigation. With thoughtful placement and durable materials, identification signage provides clarity, security, and convenience for years of daily use. Accessible Signage for ADA Apartment Compliance In apartment complexes, proper ADA-compliant signage is a legal requirement to accommodate residents and guests with disabilities. Following ADA guidelines help ensure equal access and inclusion for all. Signs must have high visual contrast between lettering and background without glare or shadows. Grade 2 braille placed below the text provides accessibility for the blind and visually impaired. Raised characters and pictograms allow signs to be interpreted non-visually by touch.  Accessible signs use simple, intuitive icons that transcend language barriers. Directional signs assist with wayfinding. Room signs identify amenities. Informational signs indicate accessible routes, entrances, exits, and areas of rescue assistance. Stairway signs guide users towards ramps.  By law, permanent spaces like unit entrances and common rooms require ADA signs. Temporary signs like parking warnings should also follow recommendations. With a thoughtful sign plan incorporating contrast, braille-raised characters, and icons, apartment complexes demonstrate their commitment to creating a welcoming, navigable environment for all residents and visitors. Intuitive Wayfinding Signage for Apartment Complexes A clear wayfinding signage strategy is essential for any apartment community, allowing residents and guests to seamlessly navigate between buildings, amenities, and parking areas. Intuitive signs reduce frustration and reflect thoughtful management. Directional signs posted at complex entrances and key intersections point visitors toward leasing offices, guest parking, and specific buildings. Trailblazer signs on main walkways provide ongoing orientation. Arrows, international symbols, and maps further aid navigation at junctions.  Building directories found in main lobbies centralize location information for amenities like fitness centers, pools, and business centers. Illuminated unit number signs outside stairwells and elevators confirm users are on the correct floor. Parking signs with color coding and space numbers help distinguish lots and spaces.  With thoughtful placement and highly visible reflective materials, wayfinding signage ensures visitors quickly find their destination. This cuts down on circling, enhances first impressions, and communicates a resident-focused environment. Simply put, good wayfinding equals good management. Conclusion An effective signage plan is invaluable for any apartment community, serving practical and aesthetic purposes. From illuminating building numbers that assist emergency response to wayfinding signage guiding foot traffic, signage provides orientation, security, accessibility, and visual appeal. Managers must consider permanent signage needs like room IDs and ADA compliance and options for changeable messaging to promote leasing availability or resident events. The finishes and design details of all signs should align with the complex's contemporary style and branding. Utilizing sign types from digital displays to sidewalk A-frames provides flexibility. With the help of an experienced sign company, managers can develop a comprehensive signage strategy tailored to their complex's specific spaces, needs, and aspirations. From influencing first impressions to sustaining long-term functionality, signage positively impacts apartments in countless ways. When thoughtfully designed, fabricated, and placed, signage cements an apartment community's identity as an inviting, navigable place residents are proud to call home. Read Also: How to Make Your Student Apartment Feel Like Your Own House? Things You Can Do to Your Apartment to Raise Its Value 5 Interior House Painting Tips

READ MOREDetails
low maintenance plants

Best Low Maintenance Plants To Buy In 2024

I have always enjoyed gardening, spending time in nature, and a general affliction towards plants. However, once professional commitments started taking up too much time, I was left with 'no time to stand and stare'. Whatever time I had left, most of it went behind work, and my plants started shriveling up. Do you relate? If this sounds relatable, then keep reading to find out what I did to change things and give my plants the time they need. Well, for starters, I started investing more in low-maintenance plants. These plants can easily thrive well under low lights and can quickly bounce back in case of one or more missed watering. So soon, I was able to spot the change! 10 Best Low Maintenance Plants To Buy In 2024: It was a discovery that I thankfully stumbled upon. It made things so much easier for the anthophilous inside me that I was motivated to write about it. If you are also planning to purchase a few low-maintenance plants, then scroll down to find out more on the same! 1. Cacti If you have long and irregular work schedules, then Cacti is probably the best low-maintenance indoor plant. Cacti plants can thrive well in light that’s natural and requires water only once every week during summer and spring. During winter and fall, you just need to water your cacti once in three weeks. Price: 18 dollars (for four) Why Do We Love It? Can be grown easily Can be cared for easily Great option as a gift 2. Air Plants Air plants are great alternatives for low maintenance plants - they do not even need soil for survival. All that you have to do in this case is dunk these plants in the water for 2 to 3 hours, once every ten days. Now is that not perfect? This is entirely doable every 10 days while you spend your afternoon sunk knee-deep in work. Price: 14 dollars (for five) Why Do We Love It? Easy to maintain Very affordable Saves time 3. Pothos Pothos is also referred to as Devil’s Ivy and is one of the best types of low-maintenance house plants. The best part? These plants can thrive well in both light and darkness. So if you keep it in your low-light cubicle, the plant will survive, and the same goes for brightly lit areas. Also, it can survive when you forget to water the plant. Price: 18 dollars (for five) Why Do We Love It? Air-purifying properties Value for money It comes in a grower’s pot 4. ZZ Plant The ZZ Plants thrive the best in brightly lit rooms, but that does not mean they cannot survive in moderate or low lights. Just like cacti, you don’t need to water them every day. Moreover, it’s a pretty sturdy plant. When you notice that the leaves are falling off, simply water it properly, and you will soon notice the plant from bouncing right back. Price: 26 dollars Why Do We Love It? Can thrive in both natural and artificial light Sturdy and durable Great option as a gift 5. Spider Plants Spider plants are pretty great options if you are looking for low-maintenance plants. These spidery plants tend to dry out in between two watering sessions. In addition, spider plants thrive pretty well under indirect light, and as a result, these plants can flourish well even inside windowless, dark offices. Price: 12 dollars Why Do We Love It? Can thrive well in both natural and artificial light. Air-purifying properties. Great option as a gift for apartments, office cubicles, dorm rooms, and the like. 6. Snake Plants There are low-maintenance plants, and then there are Snake plants. These are not just great as low-maintenance outdoor potted plants but also as plants for low-lit indoor cubicles. Simply put, snake plants are great alternatives for those offices where you get just thirty minutes for grabbing your lunch - let alone watering your plants. Price: 38 dollars Why Do We Love It? Has higher carbon dioxide absorbing efficiency and releases oxygen at night. Has premium air-purifying properties.  Versatile - can be planted in a pot or directly into the ground. 7. Succulents Succulents are amazing not because they can be easily maintained but mostly because it has thick leaves that store water. As a result, these plants needed to be watered once a week. Also, these thrive well in dry air and sunlight. No wonder succulents are the best low-maintenance outdoor potted plants. Price: 19 dollars (for five) Why Do We Love It?  Easy to grow and maintain Very affordable Perfect for DIY or doing your home decor 8. Bamboo Considered to be a lucky plant, Bamboo needs some light for thriving. This technically means Bamboo plants are great for those cube desks at work. If anyone is starting a new job, it’s best to gift them a bamboo plant wishing them good luck. Also, these plants give any workspace a Feng Shui boost. Price: 28 dollars Why Do We Love It? Easy to grow and maintain Value for money Ideal gift for everyone You May Also Like This: 9. Peace Lily Peace lilies look beautiful, and they also happen to be very easy to grow and maintain. All you need to do is keep misting the leaves and moisturize the soil regularly. However, make sure you are not overwatering the plant, and you should keep the plant away from direct sunlight. Price: 24 dollars Why Do We Love It? Thrives in indoor light Has health benefits Easy to maintain and care for 10. Red Aglaonema Did you know that the Red Aglaonema is new and happening presently? The leaves are all reddish-pink, while the stems are pink. This low-maintenance plant simply amps your cubicle’s personality a few notches higher. Naturally, these will appear brighter in well-lit rooms, buts they can also thrive well under low light. Price: 21 dollars Why Do We Love It? Sturdy and durable Adds texture and color to different spaces Ideal for dorm or room decor 11. Dusty Miller Often called silver ragwort, this icy-looking plant can withstand shade but prefers bright light. The distinctive, silvery leaves become more green-gray in shaded areas, which is also a visually pleasing effect. Its foliage is the main attraction, though it produces small, bright yellow blooms in midsummer. 12. Ribbon Grass Because they spread easily, these variegated blades make an excellent ground cover option. They do not mind shade or sun, but they do love moisture. When planted as a border in your garden, they create a charming link between the grass and the garden. Just make sure to use your shovel to create a sharp trench to keep it from getting into your flowers. 13. Cosmos The name "cosmos" comes from the Greek word for "harmony" or "ordered universe," and Mexican priests gave these happy little flowers this name due to their perfectly arranged, uniform petals. You'll have blooms from spring into autumn because these annual flowers reseed and grow well in full sun. 14. Butterfly Bush Some of the longest-blooming shrubs are these sun-loving plants. They are drought- and insect-resistant and have a vibrant range of colors that are perfect for summer. The plants will naturally draw a large number of hummingbirds and butterflies throughout the fall season. Frequently Asked Questions (FAQs):- Q1. What Is The Most Low Maintenance Plant? Ans: The most low maintenance plants are,⦿ Aloe vera⦿ ZZ plant⦿ Snake plant⦿ Spider plant, and⦿ Cast-iron plant  Q2. What Are The Easiest Plants To Take Care Of? Ans: The easiest plants to take care of are,⦿ Cast-iron plant⦿ Snake plant⦿ ZZ plant⦿ Spider plant⦿ Aloe Vera. Q3. What Is The Most Durable House Plant? Ans: The most durable house plants are,⦿ ZZ plant⦿ Snake plant ⦿ Chinese money plant⦿ Bromeliads⦿ Chinese Evergreen Plant. Wrapping Up:  Remember that it is always a good idea to check the resources available through your local extension service, even if the plants you choose are designated for your USDA Plant Hardiness Zone and the light and soil conditions of your site. By taking into account factors like wind, humidity, rainfall, and more, you can determine what grows best in your area. It's worth noting that not all plants labeled as "deer-resistant" will withstand deer damage. Are you looking for additional strategies to work in the garden more efficiently rather than more laboriously? Invest in a base of well-established evergreen shrubs; you'll be grateful for it come winter. Fast-growing vines can make a big difference for an ugly fence or garden wall without requiring a lot of work. Additionally, check out container plants and outdoor hanging plants if your garden is limited to a patio or balcony Low-maintenance plants are pretty popular presently. Mostly because they are easy to grow and maintain. So what are you waiting for? Invest in some low-maintenance plants today, and let us know which one are you buying first. Read Also: Planting & Harvesting Mint List of White Flowers in the world All You Need To Know About Resurrection Plant and its Facts

READ MOREDetails