Interesting Facts about Celery and Deadheading Petunias

Published on: 21 June 2017 Last Updated on: 24 February 2020
Deadheading Petunias

How long does celery last? Do you know about Deadheading Petunias? Celery lasts for as long as any other quick expiring ingredient in the recipe. Many individuals consume celery stalks, but the leaves are also beneficial and edible. They make an excellent addition to soups and stir-fries.

You can find celery seeds either in extract form, whole seed form, or ground up, with its impressive health benefits. In many parts of the universe, people grow this plant because of its beneficial seeds. When you crash them, you can use the seeds as a spice because it contains a unique oily compound called apiol. The spice is good for providing flavor and also has medicinal benefits.

Celery facts:

Celery

Celery has a cholesterol-lowering power that makes it useful for maintaining heart health. The seeds contain a unique compound called BuPh that has lipid-lowering properties. However, researchers believe that this plant contains many other beneficial compounds that are still under research.

In a recent study, rats feeding on celery continuously for eight weeks recorded lower lipid levels in their blood compared to those that did not feed on celery. This group of rats also experienced reduced serum cholesterol, triglyceride concentrations, and low-density lipoprotein cholesterol.

Celery also contains polysaccharides and antioxidants that act as anti-inflammatories, especially polyphenol and flavonoid antioxidants. They support the overall health of individuals as they age by fighting free radical damage that causes inflammation. Inflammation causes chronic diseases like heart disease, arthritis, cancer, and much more.

Researchers have come up with several antioxidant types from celery which is beneficial like ferulic acid, caffeic acid, and phenolic acid, as well as flavors like quercetin. These acids make celery the right solution for treating inflammatory conditions like joint pain, liver and kidney infection, gout, irritable bowel syndrome, skin disorders, and urinary tract infection.

When you consume celery, and you have high blood pressure, the risk of high blood pressure reduces. These seeds help in controlling the chronic levels of blood pressure. The seeds contain aqueous ethanolic, methanolic, and hexane extracts that lower inflammation improves blood circulation, and help in controlling blood pressure.

These seeds also help in reducing bloating and boosting digestion with the aid of the NBP oily compound that contributes to detoxifying the body. The digestive benefits result from its diuretic effect. If you want to lose weight, consuming celery is vital because it has vital nutrients that help in regulating lipid metabolism.

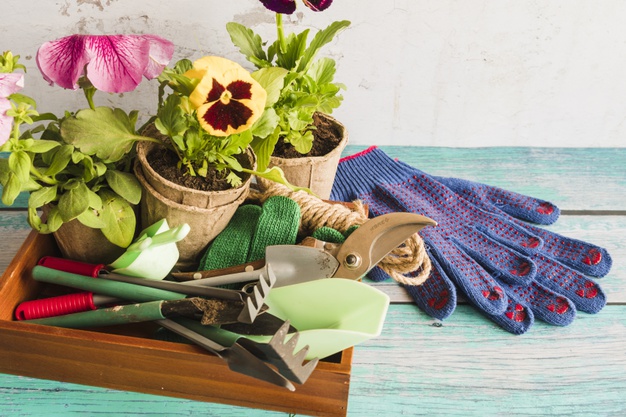
How do you prune Deadheading petunias blooms?

Deadheading Petunias

Many garden tips will guide you on how to deadhead petunia. You need to allow your flowers to start blooming. You need to wait until the plant spends about six hours in the sun and are full of blooms. Once the flower starts dying, it is the right time to deadhead. You will also have to get a sharp pair of scissors and pruning shears. Give the plant a sharp cut when you use scissors. You will then have to pick the petunia stem gently with many blooms. You need to aim at the area that contains the most spent blooms and cut with your shears. Even though you need to cut back healthy sections of the plant to encourage new growth of Deadheading Petunias, pruning your plant extends your season of growth and helps produce more blooms.

It is recommended that you prune one stem per week on a small plant and eight stems for the large hanging basket. Regular pruning will help you avoid pruning the whole plant at once. On some occasions, you will have to prune a healthy-looking bloom so that the plant looks healthy for an extended period. If you cannot do it on a weekly basis, it is advisable to wait for the mid-summer season to make it bloom for long. You need to keep fertilizing Deadheading Petunias every two weeks.

Read also:

Content Rally wrapped around an online publication where you can publish your own intellectuals. It is a publishing platform designed to make great stories by content creators. This is your era, your place to be online. So come forward share your views, thoughts and ideas via Content Rally.

View all posts

Leave a Reply

Your email address will not be published. Required fields are marked *

Related

Mint

Planting & Harvesting Mint

Mint is a wonderful plant that practically cultivates itself. So fast is its growth that it can threaten to spread across and take over your entire yard or garden. One way to battle this is to confine its growth by planting it in a pot or a separate bed. However, once you have this plant, you will be glad, because it has properties that make it fruity and a great addition to tea and foods. As can be seen here, it is also quite useful in health remedies that can aid digestion and relieve headaches. We know you already feel enthralled by this herb and would like to know more. So, why don’t you read on and discover more amazing things about mint… What Mint is All About Mint is an herb that is perennial and has a very wonderful fragrance. Its leaves are toothed and may have tiny pink, white, or purple flowers. Mint has so many variants from crinkled or smooth, to fuzzy or shiny. However, one thing is constant despite what kind of variant it is; all mints have that wonderful fragrance. Hence, whenever you pick up any variant of this great herb and roll it in your fingers, you would get the same smell that will make you either think of sweet teas, candy, or mint juleps. Aside from being a wonderful kitchen companion, this herb is also used as ground covers, garden accents, herbal medicines, and air fresheners. Mints are functional as well as beautiful and can grow either in shades or under the sun.  However, as we already said, this plant is a vigorous spreader; therefore, unless you want to have too much than you need, you have to be very deliberate about planting it. Uses We have already stated several things that mints can be used for, but there are still so many more benefits of this wonderful herb. Below are some of these benefits: Can be used to make mint tea. To do this, simply put the leaves in a cup of hot water and then leave it to sit for some minutes. Make tasty ice cubes with it by freezing the leaves with raspberries and cranberries. Add it to a salad dressing, marinades, or fruit salad.  Use it to relieve headaches by applying It's oil to the temples.  It can also be used to relieve anxiety and stress. Yes, mints have many other health benefits, but though not a practical use, it is also used as a virtue symbol. Planting Mints If you decide to plant mints in your garden or yard, then below are some important things that you have to know: They flourish in light earth which has good drainage. Their original habitats are stream banks, so, the site you plant them should imitate stream bank soils. That is to say, ensure the soil you plant your mints is moist but also well-drained. Variegated mints should not be planted in direct sun as they require a bit of shade. Mints typically grow to become one to two feet tall. If you plant them in a container or pot, then you would need to topdress them with organic or compost fertilizer once in a few months. If you plant mints in your garden, ensure to plant them next to tomatoes or cabbages, this will help contain their spread and prevent them from stealing your crops’ nutrients. Care Mints do not require that much care; however, you should consider the following points when caring for them: If planted outdoor, use light mulch. You can visit https://www.thespruce.com/what-is-mulch-1402413 to read up more on mulch. The light mulch will ensure the soil remains moist and also help the leaves to stay clean. If planted indoors, then ensure you water them often to help the soil stay evenly moist. Mints should be picked and pruned regularly. Like we have stated many times already, these guys are fast spreaders, therefore, you would need a lot of pruning to stop them from taking over everything. This should not worry you since their roots are shallow making it quite easy to drag them out of the soil. The Propagating You do not need to do a lot to propagate mint. The perfect way to go about this is to find the plant which you like and then cut out of it. Ensure the cutting is at least 6 inches and has ample roots attached. Then plant them in the soil horizontally. You can always get a cutting from a gardening friend, so this is nothing to worry about. Harvesting and Storing To learn how to harvest mint is quite easy, it typically does not involve any special skill. You may either pick the leaves individually, or you may use shears to prune the plant and then take off the leaves from the stem you had cut off. Despite the harvesting process being relatively easy, you need to remember a few things when you harvest your mints: Frequent harvesting will keep the plant at its best. The younger leaves have a better flavor than the old ones. You can pluck the leaves whenever you need mints. If you need dry mints, then pluck the leaves before flowering and then save them in an airtight container. You can also store fresh mints that you do not immediately have use for. To do this, put water in a glass and then put the stems inside the water. The mint will stay fresh for 3 to 7 days this way. You may equally put the mints inside a rubber bag and then store them in your refrigerator. This should keep it fresh for at least a week. Conclusion Mint is an herb that would make a very great addition to your garden or yard. But, without proper knowledge about the plant, everything may spiral out of control. Therefore, you must have basic knowledge about planting, caring for, and harvesting this plant before you farm it.  Read Also: How to Maintain a Bright and Beautiful Garden During Winter How to Choose the Right Containers for Your Container Garden Grow these flowering plants in your home garden How To Grow Tomatoes From Seed  

READ MOREDetails
Wall Tiles

Quick Tips For Selecting The Ideal Wall Tiles

Your choice of wall tiles can greatly affect the entire look and feel of your living area. Whether you're remodeling your kitchen, bathroom, or any other room, the appropriate wall tiles can improve the room's aesthetic appeal and practicality.  This article offers brief advice to help you select the ideal wall tiles that complement your taste, style, and functional requirements. 1. Establish Your Look Determine your interior design style before exploring tile possibilities. The tiles you choose will depend on your preferred style, whether modern, traditional, minimalist, or eclectic. Consider the room's current decor and color scheme to guarantee that the wall tiles blend in seamlessly with the overall design concept. 2. Examine the Room's Objective Every room has a different purpose; thus, the wall tiles you select should also fit that objective. For instance, choose tiles that are water-resistant and simple to clean for bathrooms and kitchens, where moisture is common. Give priority to tiles that contribute to the desired environment in spaces such as living rooms or bedrooms, where aesthetics are more important. 3. Examine the Tile Materials There are many types of wall tiles, each with unique qualities. Ceramic tiles are a well-liked option because of their adaptability and durability. Similar advantages can be found with porcelain tiles. They are better suited for high-moisture locations due to their density and increased water resistance.  Glass tiles are simple to maintain and give a sophisticated touch. While they can seem more opulent, natural stone tiles like marble or travertine may need more upkeep. To know more about tile materials, you can check this website: https://tiento.com.au/  4. Examine Various Finishes The finish of your wall tiles can greatly affect the room's ambiance. Matte surfaces provide a more muted and subtle appearance. In contrast, glossy finishes reflect light and give a bright and polished appearance.  Think about how much upkeep each finish demands and how well it fits into your lifestyle. For instance, fingerprints and smudges may be more noticeable on glossy tiles than on matte ones. 5. Experiment with patterns and colors The visual impact of your wall tiles is greatly influenced by the colors and patterns you choose. Darker tiles provide coziness and warmth, while lighter tiles can enlarge and open up a room. Select tiles that contrast or complement the room's color scheme to create a dynamic impact.  Try experimenting with patterns to create character and eye-catching visuals, like subway tiles, geometric patterns, or elaborate mosaics. 6. Take Tile Size Into Account The size of your wall tiles may affect how big you think the space is. While smaller tiles might produce a traditional and complex appearance, larger tiles can give a place a more expansive and modern aspect. When choosing tile sizes, consider the room's dimensions and the size of your furnishings and fixtures to create a harmonious and balanced aesthetic. 7. Examine Samples in Your Area Tile samples should always be tested in the actual area where they will be put. The way the tiles look can be affected by both artificial and natural lighting and the surrounding design. By seeing the samples in your own setting, you'll have a better idea of how the finishes, colors, and patterns will work with the room's existing pieces. 8. Give Maintenance and Durability the First Priority It's important to consider your wall tiles' longevity and upkeep needs. Sturdy and scratch-resistant tiles may benefit high-traffic areas like entryways or corridors. Choose stain- and spill-resistant tiles for areas like kitchens and bathrooms where spills and splashes are common. To ensure long-term pleasure with your tile choice, balance looks and utility. 9. Get Expert Counsel Consult with tile or design specialists if you're confused about what will look best in your area or if options overtake you. They can guide you through the options available and offer suggestions based on their experience. Experts can direct you toward tiles that fulfill your area's functional needs and your own taste. 10. Examine Long-Term Patterns While the tiles you select represent your style, keeping long-term design trends in mind must help you make lasting judgments. Classic patterns and neutral hues are timeless and can accommodate changing tastes in design throughout time. But don't be afraid to add some individuality with more fashionable components in areas like backsplashes that are simpler to alter. Select the Ideal Wall Tiles Selecting the ideal wall tiles requires carefully balancing practicality, style, and individual tastes. You may make well-informed decisions that improve the aesthetics and usability of your house by defining your style, considering the function of the area, investigating various materials and finishes, and testing samples in your space.  With the correct wall tiles, you can create an aesthetically pleasing and welcoming atmosphere in your home, allowing each area to represent your taste and style. Read Also: Keeping Your Pool Pristine: Expert Pool Cleaning In Knoxville, TN What You Need To Know About Ceiling Textures And Drywall Options The Impact Of Vanity Size On Bathroom Design And Functionality

READ MOREDetails
how to clean evaporator coil without removing

How To Clean Evaporator Coil Without Removing?

If you want your air conditioner to perform well at all times, you will need to ensure that you maintain and clean the parts of the air conditioner on a regular basis. If you schedule your maintenance as per the requirement of the AC, then it is great. However, in some cases, people like to clean their AC themselves. If you are one of them, you might be interested to know how to clean evaporator coil without removing it when you have a dirty evaporator coil. In this article, we will basically talk about why you need to clean your AC's evaporator coil and how to clean evaporator coil without removing the coil from the AC. Before that, you will also know about what happens to the air conditioner when the evaporator gets dirty. What Happens When Your AC Coil Gets Dirty? Image Source: lirp.cdn-website.com If the evaporator coil of your AC is unclean, it puts your AC at risk. It compromises the safety and working efficiency of the AC in general. In the first, an unclean evaporator coil slows down the speed at which the air blows through the AC, as it blocks the flow of the air. If the evaporator coil contains other materials and particles like pollen and dust, it limits the efficiency of the flow of air. The following things happen when there is an unclean evaporator coil inside the air conditioner: 1. If the evaporator coil is dirty or clogged with particles, then it reduces the flow of air into your home. If there is a reduced flow of air inside your home, it will lead to a lowering of the efficiency of the cooling system of the AC. Your room takes a lot of time to cool than it normally takes, probably your evaporator coil needs cleaning. 2. There might be some cases where your room is not achieving a good level of cooling, despite running the AC for hours at a stretch. In such cases, the problem is probably more than a delay in the cooling performance of the AC. Basically, it is a negative effect on the AC's cooling capacity. 3. Another great issue that happens when the evaporator coil of your AC gets dirty is that the operating pressure increases. This increases the temperature level of the AC, as the unit is working at hotter levels. This is not good for the AC as it damages the components of the AC. 4. An unclean evaporator coil creates wear on the AC system. If one important part of the AC fails to work properly, the other parts follow suit. This is because there is more pressure on the other components of the AC. Hence, the other parts are more likely to get damaged due to the failure of one part. Therefore, you will end up with a damaged AC altogether, and repairing it will be quite expensive for you. 5. If your AC’s evaporator coil gets compromised and does not work properly, then it affects the performance of the other parts of the AC. Hence, your AC unit will have a shorter life. If you want your AC unit to perform well and serve your home for a long time, you will need to ensure that every part of your AC is clean, especially the evaporator coil. Why Do You Need Your Air Conditioner Coil Clean? Image Source: www.cleanairprotx.com You will not need to spend a lot on the repairs of the AC. Regular maintenance will keep out the issues from the AC that need repair. Before any problem turns into a bigger one, you can fix it with regular maintenance. Apart from that, if you keep your evaporator coil clean always, it will not accumulate dust and hence will perform better as a result. How To Clean AC Coils? – Things You Need? Image Source: phyxter.ai The first thing you will obviously need for your AC cleaning is an air conditioner coil cleaner. Apart from that, you will need a cotton cloth for cleaning the coil. For your own protection, wear protective goggles, and wear gloves on your hand for better protection. Furthermore, ensure that you are following the instructions properly while you are cleaning your AC’s evaporator coil. How To Clean Evaporator Coil Without Removing? Image Source: snyderac.com The evaporator coil basically captures all the heat present in your home to condition the air inside. Apart from the evaporator coil, there is a condenser coil in the AC, which removes the air from the AC to the outside of the house. This is the way in which the AC works in colling the house. Since an evaporator is an important part of your air conditioner, hence keeping it clean will enable you to keep your air conditioner always efficient. However, if your question is, “How to clean AC evaporator coils inside house?” then you need to read the next subsection of this article. Read More: Here’s What Makes Package Units Better than the Other ACs AC Coil Cleaners - How To Clean Evaporator Coil Without Removing? Image Source: img.fruugo.com The following are the ways in which you can clean the evaporator coil of your AC without removing it from the AC: Step 1: Turn down the power of the AC, and unplug the machine from the electric port. You will not need an electricity risk for yourself while cleaning. Step 2: Remove the access panel from the AC to see the evaporator coil clearly. Go over the manual of the AC, if required. The manual has instructions on where you can find the access panel. Step 3: Take the access panel off, and remove the screws from the AC. Keep the screws in a safe place. Step 4: To blow the unclean particles off, try using a compressed air canister. This will help you to easily loosen the dirt on the evaporator coil. Step 5: Put back the screws, as well as the access panel. Your evaporator coil is clean. Summing Up Hope the article helped you in knowing how to clean evaporator coil without removing it from the AC. Cleaning your AC is a part of the maintenance operation of the AC. If you maintain your AC on a regular basis, it will offer you a lot of benefits. There will be less hassle and issues on your AC as a result of regular maintenance and cleaning. If you clean the parts of your AC, your AC will look and perform as if it is fully new. Read Also: Best Paying Jobs In Electric Utilities Central How to Brew the Best Beer with an Electric Brew System 13 Ways to Maintain the Coolness of Your Air Condition Unit

READ MOREDetails