Published on: 23 June 2017
Last Updated on: 11 September 2024
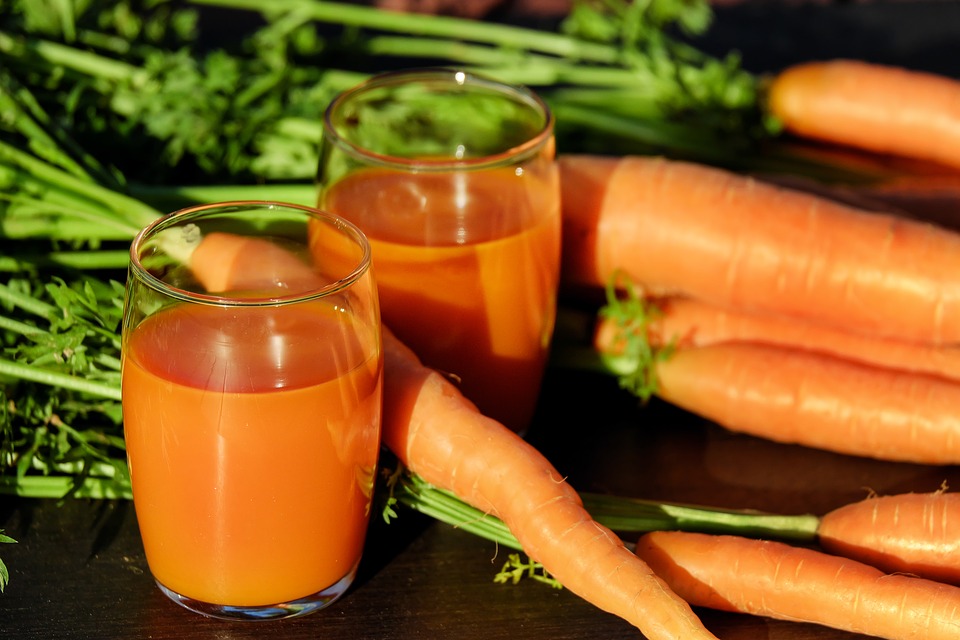
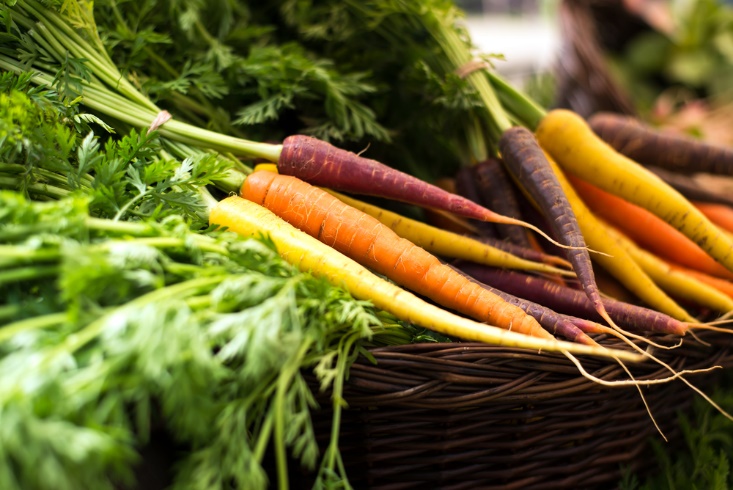
Carrots are root vegetables. They vary from purple to red in color but most commonly found are bright orange ones. The orange color of carrot is due to its high content of beta-carotene. This helps suffice our body with necessary levels of vitamin A, which is required for proper functioning of our immune system.
Yes, we can grow carrots all year round! Also, you may grow it anywhere, even in our small kitchen garden or as a potted plant.
You must know how to grow and harvest carrot before you start the procedure of producing carrots yourself. I conducted various kinds of research including reading online resources and talking to farmers in my town before going ahead with carrots plantation. This is so because carrots are a low-acid plant and can catch contamination easily, which may make it inappropriate for human consumption.
When can we Grow Carrots?
Carrots are biennial plants that are they grow twice in a season. However, the seeds and flowers grow only in cold season. They take ten to twelve weeks to reach their full growth. They can be sowed in spring just before two weeks of the last frost date.
In cold climate, we can continue to plant them every three weeks till mid-summer. Then again they can be sowed in summer for winter products that are due in next ten to twelve weeks.
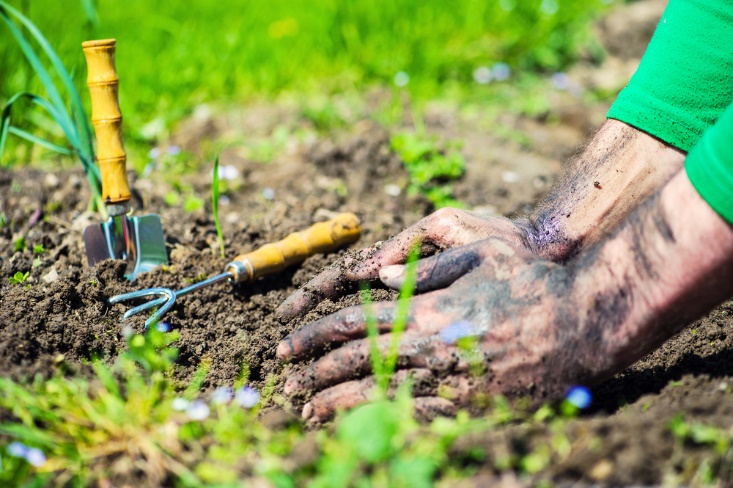
Preparing the soil
First, you need to judge the solid where you want to plant your carrots. If the soil is sandy or clay soil, then it is not appropriate for growing carrots. Sandy soil and clay soil cannot retain nutrients and lacks good soil structure, which makes them inappropriate for growing carrots. Salty and loam soil is the best kind of soil for growing any vegetables. There is another variety of soil that is chalky soil. This is also not appropriate for growing carrots due to its alkaline nature.
Before sowing carrots, you need to dig in the soil well to about twelve to fifteen inches. Once done, you can introduce some earthworms and crawling critters who make the soil appropriate for growing carrots.
Earthworms consume the organics from the soil and then scatter it throughout the soil to make the soil more fertile. Similarly, crawling critters would keep the bugs and insects away from the soil from harming the crop. You should be cautious about using chemicals to kill insects as they also take away the good part of the soil. Always organic gardening is recommended for the growth of any crop as organic gardening improves soil, its overall structure and gets it ready for next cycle as well.
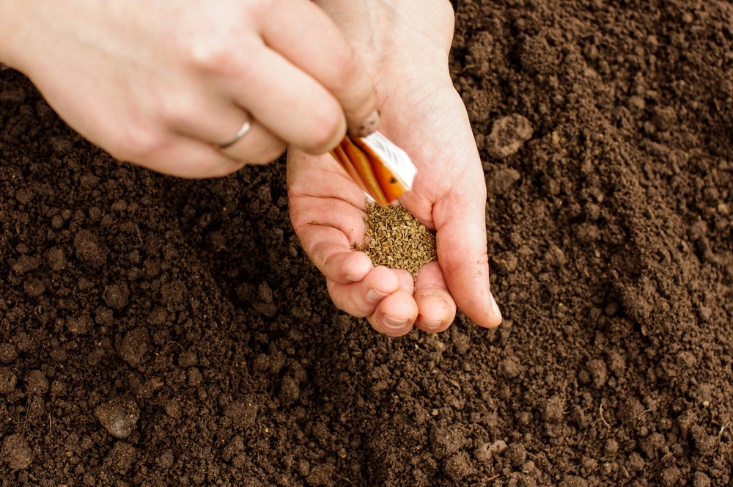
You can sow your carrot seeds into the sowing beds created three inches apart.
The carrot seeds are very small so to distribute them evenly; you can mix them up with the sand and then sprinkle them into the sowing
Cover the field with some warm blanket or a shield to avoid the tiny creatures from ruining your crop.
This should be kept covered for at least three weeks to let the healthy growth of the crop.
Carrot Sprouts
While you decide to plant carrots, you should also be aware of how a carrot sprout looks like to differentiate it from other sprouts or just weed. The sprout is breaking out of the soil may be of cabbage or potato or some grass. Well, then how does carrot sprouts look like? You can very easily identify them. From the perspective of their appearance, they look like ferns or palm leaves.
Well if that’s not all for you, then you can take the leave in your palm and crush it with your nails. Now smell the crush, and it will be like one of carrot. That’s how you can very easily identify the carrot sprouts from other growing vegetables and weeds in your kitchen garden.
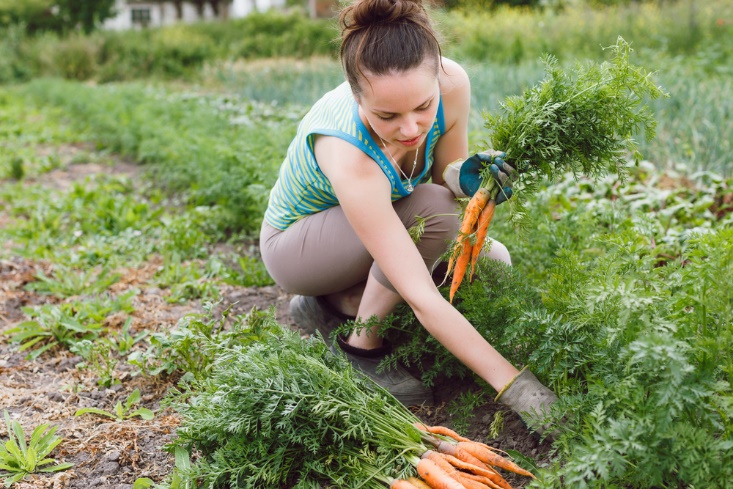
Harvesting Carrots
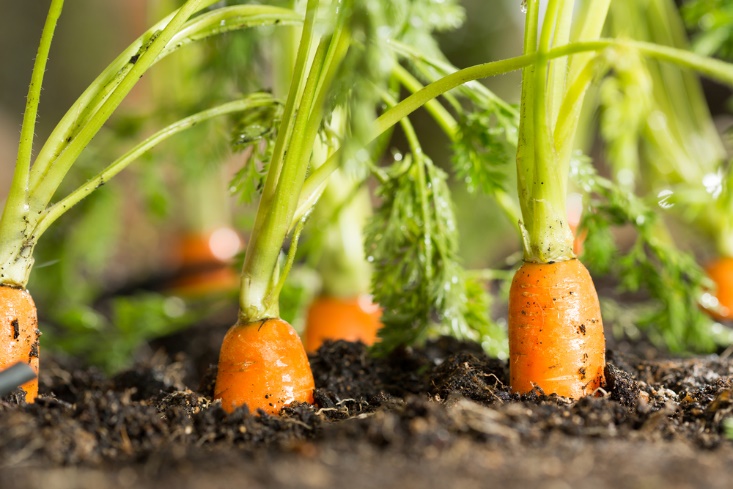
You can judge the growth of the carrots by looking at their roots. The size of the roots is a good indicator of the growth of your carrots. You can pull them out in three weeks to enjoy baby carrots of wait for next ten to twelve weeks for fully grown carrots.
Storing Carrots
Now is the question of how to store carrots for prolonged use. You can seal the carrots in a polythene bag and store them in the coolest part of your refrigerator. One should never wash carrots until they need to be used as added moisture ruins carrot structure earlier. You can also store carrot in a box and cover it with a layer of sand. This will also help you preserve carrots for long.
You can very well enjoy your garden-fresh carrots all year round once you know how to sow and harvest them. You can use them in a variety of ways in your kitchen like caramelize then with sugar syrup or bake a carrot cheesecake or eat them raw as part your daily salads.
We have a lot of questions making rounds by our readers; therefore, in case, you have any further questions on how to grow carrots, or anything related to sowing or harvesting or storing them, then please comment below.
Content Rally wrapped around an online publication where you can publish your own intellectuals. It is a publishing platform designed to make great stories by content creators. This is your era, your place to be online. So come forward share your views, thoughts and ideas via Content Rally.
Sunflowers are not only beautiful and cheerful, but they also produce delicious and nutritious seeds that you can enjoy as a snack or use in various recipes. Harvesting sunflower seeds is a fun and easy activity that you can do with your whole family. It is also a great way to teach your kids about nature, gardening, and healthy eating.
In this article, I will show you how to harvest sunflower seeds in a few simple steps, as well as some tips and tricks to make the most of your sunflower harvest. If you enjoyed reading my blog on harvesting lettuce, you will enjoy reading this one!
So, if that is what you are interested in knowing, I have you covered! Keep reading this blog till the end to learn more…
How to Grow Sunflower Seeds: A Simple and Rewarding Gardening Project?
Sunflowers are one of the most iconic and cheerful flowers in the world. They are also one of the easiest and most rewarding plants to grow from seeds.
Sunflowers can brighten up your garden, attract pollinators, provide shade, and produce edible seeds that you can harvest and enjoy.
In this part of the article, I will show you how to grow sunflower seeds in a few simple steps, as well as some tips and tricks to make the most of your sunflower growing experience.
How to Choose Sunflower Seeds?
The first step to growing sunflower seeds is to choose the right seeds for your garden. Sunflowers come in a wide range of sizes, colors, shapes, and types. Some of the most common types of sunflowers are:
Giant sunflowers
These are the tallest and largest sunflowers, reaching up to 15 feet in height and 12 inches in diameter. They produce huge and heavy flower heads that are filled with large and plump seeds. They are ideal for creating a dramatic and impressive display in your garden, as well as for harvesting large quantities of seeds. Some examples of giant sunflowers are Mammoth, Titan, and Kong.
Dwarf sunflowers
These are the smallest and shortest sunflowers, growing up to 3 feet in height and 6 inches in diameter. They produce smaller and lighter flower heads that are easier to manage and maintain. They are ideal for growing in containers, pots, or small spaces, as well as for adding a splash of color and charm to your garden. Some examples of dwarf sunflowers are Teddy Bear, Sunny Smile, and Little Becka.
Colored sunflowers
These are the most diverse and colorful sunflowers, ranging from yellow, orange, red, pink, purple, brown, and even green. They produce medium-sized flower heads that are attractive and eye-catching. They are ideal for creating a vibrant and varied display in your garden, as well as for cutting and arranging in bouquets or vases. Some examples of colored sunflowers are Autumn Beauty, Moulin Rouge, and Lemon Queen.
Things to Consider While Choosing Sunflower Seed
When choosing sunflower seeds, there are several things that you need to keep in mind. For instance, you should also consider the following factors:
Climate and season of your area
Sunflowers are warm-season plants that need full sun and warm temperatures to grow and bloom. They are best planted in late spring or early summer, after the last frost, when the soil is warm and moist. If you live in a cold or frost-prone area, you can start your seeds indoors and transplant them outdoors when the weather is favorable.
Soil and water conditions of your garden
Sunflowers are adaptable and tolerant plants that can grow in most types of soil, as long as they are well-drained and fertile. They prefer slightly acidic to neutral soil with a pH of 6.0 to 7.5. They also need regular watering, especially during the germination and flowering stages. However, they can withstand some drought and dryness once they are established.
Space and support available in your garden
Sunflowers are large and sturdy plants that need ample space and support to grow and thrive. They should be planted at least 2 to 3 feet apart from each other and from other plants, to avoid overcrowding and competition. They should also be staked or tied to a fence, a trellis, or a pole, to prevent them from bending or breaking under their own weight.
How to Plant Sunflower Seeds?
Once you have chosen your sunflower seeds, you can proceed to the next step. Planting sunflower seeds is a simple process that involves preparing, sowing, and caring for the seeds. Here is how to do it:
Prepare the Soil
Prepare the soil by loosening it with a fork or a spade. Ensure that you remove debris, weeds, or rocks. You can also enrich your soil by adding some compost, manure, or fertilizer, to boost its fertility and drainage. Make sure the soil is moist but not soggy, and has a temperature of at least 50°F.
Sow the Seeds
Sow the seeds by making holes or furrows in the soil, about 1 to 2 inches deep and 2 to 3 feet apart. You can use a ruler, a stick, or your finger to make the holes or furrows. Drop one or two seeds in each hole or furrow, and cover them lightly with soil. You can also sprinkle some water over the seeds to help them settle in the soil.
Nurture
Care for the seeds by watering them regularly, but not excessively, to keep the soil moist but not wet. You can also mulch the soil with straw, grass clippings, or leaves, to retain moisture and prevent weeds. You should also protect the seeds from birds, squirrels, or other animals, by covering them with a net, a cage, or a cloche. You should also thin the seedlings when they are about 4 to 6 inches tall, by removing the weaker or smaller ones, and leaving only the strongest and healthiest ones.
How to Grow Sunflower Seeds?
After planting your sunflower seeds, you can watch them grow and enjoy their beauty and bounty. Growing sunflower seeds is a rewarding and satisfying experience that requires minimal maintenance and care. Here are some tips and tricks to grow sunflower seeds successfully:
Water
Water your sunflowers regularly, but not excessively, to keep the soil moist but not wet. Sunflowers need about 1 to 2 inches of water per week, depending on the weather and the soil conditions. You can use a hose, a sprinkler, or a drip irrigation system to water your sunflowers. You should water them in the morning or evening, and avoid wetting the leaves or the flower heads, to prevent fungal diseases.
Fertilizer
Fertilize your sunflowers occasionally, but not excessively, to boost their growth and flowering. Sunflowers need a balanced fertilizer that contains nitrogen, phosphorus, and potassium, such as a 10-10-10 or a 20-20-20 formula. You can apply the fertilizer once or twice during the growing season, following the instructions on the label. You should avoid over-fertilizing your sunflowers, as this can cause them to grow too tall and weak, and make them prone to pests and diseases.
Pruning
Prune your sunflowers occasionally, but not excessively, to improve their shape and health. Sunflowers do not need much pruning, as they are naturally self-pruning and self-cleaning. However, you can prune them to remove any dead, damaged, or diseased leaves, stems, or flowers, to prevent infection and improve air circulation. You can also prune them to control their height and spread, by pinching or cutting off the tips of the main stem or the side branches.
You should use clean and sharp scissors or pruners to prune your sunflowers and do it in the morning or evening when the plants are less stressed.
When to Harvest Sunflower Seeds?
The first step to harvesting sunflower seeds is to know when they are ready. Sunflowers typically bloom in the summer and their seeds mature in late summer or early fall. You can tell when your sunflowers are ready to harvest by looking at their appearance and feel. Here are some signs that your sunflowers are ready to harvest:
Petals have fallen off or turned brown.
The back of the flower head has turned yellow or brown.
Seeds have developed black and white stripes.
The seeds are plump and firm to the touch.
If you are not sure if your sunflowers are ready to harvest, you can do a simple test by rubbing your thumb over the seeds. If they come off easily, they are ready to harvest. If they are still attached to the flower head, they need more time to ripen.
How to Harvest Sunflower Seeds?
Once you have determined that your sunflowers are ready to harvest, you can proceed to the next step. Harvesting sunflower seeds is a simple process that involves cutting, drying, and storing the seeds. Here is how to do it:
Cut the flower heads from the stems using a sharp knife or scissors. Leave about 12 inches of stem attached to the flower head for easier handling.
Place the flower heads in a dry and well-ventilated area, such as a garage, shed, or porch. You can hang them upside down or lay them flat on a screen or rack. Make sure they are not touching each other to prevent mold and rot.
Let the flower heads dry for about two weeks or until the seeds are completely dry and hard. You can check the dryness by biting or cracking a seed. If it is crunchy and not moist, it is dry enough.
Remove the seeds from the flower heads by rubbing them gently with your hands or a soft brush. You can also use a fork or a spoon to scrape them off. Discard any debris, such as petals, leaves, or insects.
Store the seeds in an airtight container, such as a glass jar, a plastic bag, or a metal tin. Label the container with the date and the variety of sunflower. Keep the container in a cool and dark place, such as a pantry, a cupboard, or a basement.
How to Enjoy Sunflower Seeds?
Now that you have harvested your sunflower seeds, you can enjoy them in various ways. You can eat them raw or roasted, salted or unsalted, shelled or unshelled. You can also use them in salads, soups, breads, muffins, granola, trail mix, pesto, butter, and more.
Sunflower seeds are rich in protein, fiber, healthy fats, vitamins, minerals, and antioxidants. They can help manage high cholesterol, blood pressure, and inflammation and boost your immune system, brain function, and mood. Here are some tips and tricks to enjoy your sunflower seeds:
Roast
To roast your sunflower seeds, spread them in a single layer on a baking sheet and bake them in a preheated oven at 300°F for about 15 to 20 minutes, stirring occasionally, until golden and crisp. You can season them with salt, pepper, garlic, onion, paprika, cumin, or any other spices you like.
Shell
To shell your sunflower seeds, you can use your teeth, your fingers, or a nutcracker. You can also soak them in water for a few hours to make them easier to shell. To remove the shells, you can blow them away with a fan, a hair dryer, or your mouth, or you can shake them in a colander or a sieve.
Sunflower Seed Butter
To make sunflower seed butter, you need to blend the shelled and roasted sunflower seeds in a blender until it turns smooth and creamy. You can add a little oil, honey, salt, or vanilla to enhance the flavor and texture. You can use sunflower seed butter as a spread for toast, crackers, or fruit, or as a dip for pretzels, celery, or carrots.
Pesto
To make sunflower seed pesto, blend roasted and shelled sunflower seeds with fresh basil, garlic, olive oil, lemon juice, salt, and pepper in a food processor or a blender until smooth and thick. You can use sunflower seed pesto as a sauce for pasta, pizza, or sandwiches, or as a dressing for salads or roasted vegetables.
Wrapping It Up!
Harvesting sunflower seeds is a fun and easy activity that you can do with your whole family. It is also a great way to enjoy the beauty and bounty of nature, as well as the health benefits of sunflower seeds. By following the steps and tips in this article, you know how to harvest sunflower seeds in a few simple steps, as well as enjoy them in various ways. I hope you found this article helpful and informative.
If there are any other queries related to the same, please feel free to let me know. All that yo need to do is scroll down till you reach the bottom of the page. Then leave your comments and suggestions in the box below. And I will be ether to answer them all for you!
Learn More About:
Best Material for Garden Sheds: A Guide for Everyone
Asparagus 101: When, How, And How Often To Harvest?
Best Gardening Tips For Beginners: Adopting A Relaxing Hobby
One of the most used herbs in the world, cilantro, is also referred to as Chinese parsley or Coriandrum sativum. Fresh and zesty, cilantro gives your recipes a flavor boost. Mexican, Middle Eastern, Indian, Mediterranean, Chinese, African, and even Scandinavian cuisines use it extensively. Even cilantro microgreens are grown from it!
Since cilantro itself doesn't keep well and loses aroma and flavor once dried, most people prefer to use it fresh. To have cilantro on hand, you should also have a few plants in the garden.
You can harvest the plant for its flavorful cilantro seeds, also known as coriander, even if you don't use the leaves in your recipes. The leaves of the cilantro plants come throughout the spring and summer. Allow them to go to seed at that time since they grow easily in the garden!
You must know how to harvest cilantro properly if you want to have a steady supply. Keep reading to find out all you need to know about harvesting cilantro.
Harvesting Cilantro: Overview
Most people either love or hate the flavor of cilantro leaves. However, you should still think about cultivating a few coriander plants in your garden and saving the seeds for a range of culinary uses.
Most people in the US grow this delicious herb for its leaves. But the tasty coriander seeds are also worth harvesting. They have a distinct flavor from cilantro leaves. This fragrant herb of the cool season, cilantro, quickly goes to seed in the long, sweltering summer months.
As the plant reaches higher in the sky, its rounded, lobed leaves become feathery. Pretty clusters of tiny white blossoms quickly emerge. Many pollinators are drawn to these nectar- and pollen-rich blossoms, particularly syrphid flies and honeybees. Little round coriander seeds with a kelly green color emerge as the blossoms start to fade.
What To Expect from Cilantro?
The distinctive flavor of coriander is citrusy and slightly nutty. It goes incredibly well with rice, beans, lentils, and roasted or grilled veggies. You can pick the seeds while they are still young and vibrant green. Or you can wait until they start to turn brown.
Since green coriander seed is only found in gardens, it is better to harvest them when they are still green because of their stronger, more distinct flavor. You will not find them in the farmers’ market or the grocery store.
If the seeds are kept in a glass container with a lid, then they can be refrigerated for several weeks and frozen effectively as well. Wait until most of the seed turns brown if you want to harvest the mature brown seed for winter grinding or planting next year.
Next, trim off a few inches of stalk and the seed heads, then hang them upside down in a brown paper bag. The seeds will drop out of the heads and land in the bag's bottom once they are completely dry. The dry seed should be kept in a dry, cool place in a glass jar with a lid.
For optimal flavor, grind it just before using. The flavor difference between freshly ground coriander seed and the pre-ground variety typically found in stores will astound you. Try adding green coriander seeds to dressings and marinades. Frequently adding an equal amount of ground coriander to recipes that call for cumin makes the flavors of the two go particularly well together.
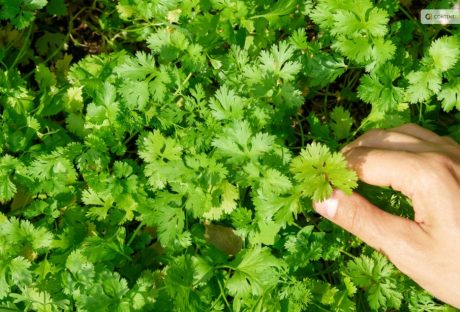
How to Harvest Cilantro?
The most exciting aspect of growing plants is undoubtedly harvesting. Pick individual cilantro leaves if you plan to use a small amount. It is best to leave at least 1-2 inches of stem above the soil's surface when harvesting larger quantities of cilantro.
It is preferable to leave a few lower leaves on the plant to support the herbs until they grow back. To cut the stems cleanly, use harvesting snips, long reach harvesting snips, or sharp, sterilized garden shears. To guarantee that your herbs regrow, it is best to remove only a small portion of the plant at a time.
Furthermore, when the cilantro plant blooms and sets seed, the herb may start to taste bitter. So, when wondering how to harvest cilantro, it is preferable to harvest before the plant bolts because the leaves will be less appetizing at that point.
When is The Best Time to Harvest Cilantro?
When the morning dew has cleared and the sun hasn't set, it's the ideal time of day to harvest a variety of fruits, vegetables, and herbs, including cilantro. This way you can lessen the stress on your cilantro plant and give the fresh stock cuts enough time to dry before dusk, which lowers the risk of illness.
Before it bolts, harvest cilantro when it is 6 to 8 inches tall. The flavor of cilantro leaves significantly decreases after they have bolted. The lifespan of the cilantro plants can be increased by careful and routine harvesting. It is crucial, though, to wait for your plant to become established before beginning to harvest.
The plant develops numerous long, thin stems as it grows. They are ready to be harvested when the stems are long, and the leaves have a lacy appearance. The cilantro herbs are about ten to twelve inches tall at this point. Gather your cilantro in the spring and into the first part of the summer.
Your plants may bolt to seed if summertime full sun conditions prove to be too hot for them. The best time to harvest cilantro is early morning. You can either choose to harvest it once a week or source just individual leaves whenever you need them.
Most of the time, it takes about 2-3 weeks for regrowth, so you must harvest accordingly. You must remember that regular cut-and-come-again harvesting is the most ideal while the plant keeps producing foliage.
How To Store Fresh Cilantro?
Part of knowing how to harvest cilantro is also knowing how to store them. It's best to know how much you should take from the garden before you harvest. You will need to learn how to store cilantro if you do not intend to use the leaves right away to extend its shelf life. There are several approaches to try.
Storing Cilantro in Water
To keep the cilantro leaves dry, wait to wash them after harvesting. For storage purposes, store the stem ends in a glass or jar with 1 to 1.5 inches of water and refrigerate for a few days. At a minimum, change the water once a day. Use a plastic bag to cover the top loosely to preserve the humidity surrounding the herbs.
Storing Cilantro in The Freezer
Freezing cilantro is another low-maintenance way to store it. Shake off any extra moisture and rinse the leaves to get rid of any garden soil. Tear the leaves into small pieces and stuff them into ice cube trays, covering the herb with just enough water to barely cover.
You can pre-measure if you'd like to ensure that you know precisely how much is in each cube for recipes in the future. After the cubes are completely frozen, place them in a freezer bag. Add as needed to marinade, smoothies, soups, and sauces. You can freeze cilantro for up to six or eight months.
Read More: Everything You Need To Know About Harvesting Basil
How To Dry Cilantro?
There are two methods for drying cilantro. You can use the oven to dry cilantro. Since hot air can greatly affect the flavor of the finished and dried herb, you might want to avoid using heat if you want to enjoy flavorful dried cilantro.
Air drying or hanging drying is a better way to dry cilantro. Gather the stems of the herbs into a small bunch and secure them with a string. Place the bunch in a dark, well-ventilated area and hang it upside down. Alternatively, you can wrap the bunch in a brown paper bag to keep the cilantro from getting dusty.
After the bunch has been hanging for about a week, begin to check its level of dryness every day or two. It's ready to be crushed or powdered and stored for later use when it crumbles when touched.
Cure the cilantro ahead of time to reduce the possibility of mold growth. Put the dried cilantro in a glass mason jar to cure. Open the jar and give it a good shake every day to let fresh air into it and mix the contents. This will assist in achieving moisture content parity. If you'd like, you can also include a moisture-absorbing packet.
How To Harvest Cilantro Seeds?
You can harvest the coriander seeds even if you don't like cilantro leaves. The plant can grow to 20 inches when it flowers. This requires temperatures above 75 degrees. Pods will form once they have flowered, and the flowers will fade.
Before being harvested, these should be green to brown in color. These pods release the mature seed when it's ready. Tie the stems with the seed pods still attached into a bunch. Next, hang them upside down in a paper bag in a cool, dry place to harvest the seeds.
With time, the seeds will sprout and drop into the bag. Store your seeds in a dry, cool place in an airtight jar. Unground dried seeds can be kept for three to four years in storage. Before using dried seeds in your recipes, grind them for the best flavor.
How To Harvest Cilantro So It Keeps Growing?
If you sow cilantro seeds every two weeks from spring until late summer, you can be sure to always have fresh leaves available. We advise chopping them up and firmly packing them into an ice cube tray filled with water. Then, just place the tray in the freezer. These can then be added directly to hot pans when preparing soups or sauces. Or they can be dropped into hot or cold water for cooking or drinking.
What To Do If Cilantro Bolts?
It's time to collect and preserve your own coriander seeds once your plant produces seeds. Picture each of those tiny white blossoms turning into a flavorful spice for your cooking or seeds for the following year! In addition to being aesthetically pleasing and tasty, cilantro flowers are also excellent pollinators.
There is a short window of time when the growing seasons of cilantro and tomatoes coincide. This proves they go well together. It usually happens that my tomato and pepper plants are just starting to take off when my cilantro plants bolt, sending forth gorgeous white flowers.
To maximize the amount of fruit your plants produce for you, beneficial insects that are feeding on your cilantro flowers will collide with your fruiting plants, vibrate their leaves, and assist in pollination. Ladybugs, butterflies, and bees all love cilantro flowers. It truly is a win-win!
Choose Slow Bolt Seeds
Seek out seed packets labeled "long-standing" or "slow bolt cilantro," as these varieties have been cultivated to endure longer in the garden. You can find your go-to slow bolt seeds that are 100% certified organic from Seeds of Change.
Finding a local seed producer is another smart move. Buying local seeds means you'll be growing a climate-adapted variety of cilantro, which increases the likelihood that you'll keep it longer.
Harvest Cilantro Regularly
Regularly chop your cilantro leaves. This preserves the health of the plant and guarantees that the leaves of this herb are fresh when you use them. Your cilantro will continue to produce new leaves from the center of the plant if you regularly harvest it by chopping off the older outer leaves.
Additionally, your chances of cutting off those immature flower stalks increase with the amount of cilantro you harvest. This will aid in postponing any bolting.
Since cilantro is incredibly obstinate, you can delay as long as you can. Cut that thick center stalk as soon as possible. After that, the plant will start to send outside shoots, giving you a little extra cilantro before it eventually bolts completely. For sun protection, surround your cilantro with tall plants.
Plant Taller Plants Around Cilantro for Sun Protection
Encircle your cilantro with large warm-season plants (like tomato or pepper plants) so that the taller plants can shade your herbs slightly and help keep the soil cooler as the temperatures rise. After all, four to six hours of sun is sufficient for cilantro to grow. To increase the lifespan of your cilantro in the garden, interplant it with larger plants.
Wrapping Up
You will need to have patience if you want to collect the seeds for your cilantro. Before seeds can be harvested, cilantro needs to blossom. Before harvesting, the resulting seed heads need to be allowed to dry on the plant for a while.
Harvesting the seeds is then as simple as shaking them into a paper bag or chopping off the entire seedhead and placing it inside the bag. If you have thoughts to share or questions to ask about how to harvest cilantro, please leave a comment below. We would love to hear from you!
Read Also:
Asparagus 101: When, How, And How Often To Harvest?
Some Facts You Need to Know About Rainwater Harvesting
How to Harvest Lettuce: A Step-by-Step Guide for Fresh and Crispy Salads
Traditionally, the garage is used for parking your cars. However, even though it can definitely be great for shielding your vehicles from the elements, there are plenty of other things that you can do with this part of your home as well. These are a few ideas that you can try.
Read also: Will Self-Driving Cars Replace Human Error?
1. Use it as a Workshop
One great use for your garage is to use it as a workshop. If you like woodworking, for example, your garage can provide you with the perfect space to keep your tools tidy and organized and to work on your projects. This makes it easy for you to work indoors without having to drag the mess into your actual house.
2. Create a Game Room
Has your family always wanted a game room? You don't have to build an addition to your home to make this happen; instead, you can use your garage for this purpose instead. Your garage probably has ample space for a pool table or for other types of game tables, such as for air hockey or Foosball. You can also hang up a dartboard, install a stereo system and otherwise turn the area into a comfortable place for hanging out with family and friends.
3. Make a Play Area for Your Kids
If your kids have a lack of space for playing, you can turn your garage into a safe place for them to do so. You will probably need to take some steps first, however, to ensure that it isn't dangerous. For example, you'll probably want to disable the garage door so that it cannot be opened, remove any dangerous tools, and put down rubber mats to help cushion any falls. If you take these steps, however, the garage can actually make for a nice, spacious play area for your children, and it can allow you to store books and toys outdoors so that they aren't cluttering up your home. Plus, your little ones can play to their hearts' content, and you won't have to worry about their messes being on display inside your home for everyone to see.
4. Store Out-of-Season and Rarely-Used Items
If you are like a lot of people, your home might be cluttered with out-of-season and rarely-used items. You might not want to get rid of these items, since you might need them later, but you probably don't want them in the way inside your home. Luckily, your garage can be perfect for storing stuff.
For example, you can store your suitcases and other items that you only use when you travel, or you can pack up seasonal clothing like coats and sweaters and only bring them into the house when it's seasonally appropriate to do so. Additionally, you can store holiday decorations, outdoor items and other things that you only need to use every now and then. Then, these items will be out of the way but will be easy to access when you need them.
5. Create a Craft Room
If you're really into crafting, you might wish that you had a dedicated space for your crafts. Luckily, your garage can function perfectly for this purpose. You can set up a nice craft table that you can use for making things, and you'll have more than enough space to stash fabric, ribbons, glue guns and anything else that you might need for crafting purposes.
As you can see, there are tons of uses that you can use your garage for rather than just using it to park your vehicles. If you'd like to maximize the space that is available for you and your family and would like to customize your home so that it properly suits your family's needs, following these tips can help.