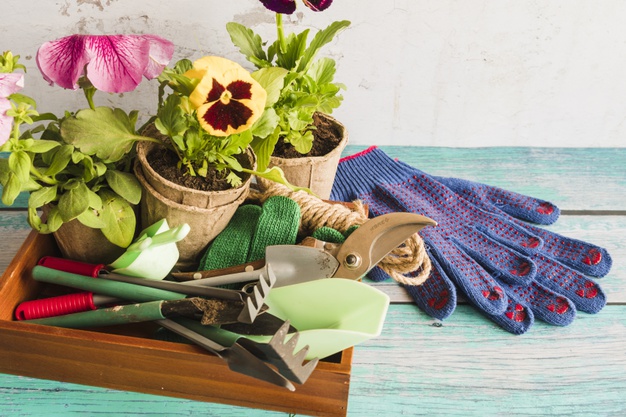
Plants and humans have a long mutual understanding relationship since the beginning of this civilization. Mother Nature has provided us a diverse range of flora that caters to our various requirements of nourishment, clothing, commercially important products, oilseeds and other such things for the growth of mankind.
Not just that, there are other plants that are known to bring good luck, positive vibes, improved health and a host of other such benefits. These good luck plants need to be a part of every home due to their significance and importance. You need to grow these auspicious plants and also send good luck plant to other people. Check out these five best good luck plants that can help in transforming your home environment completely.
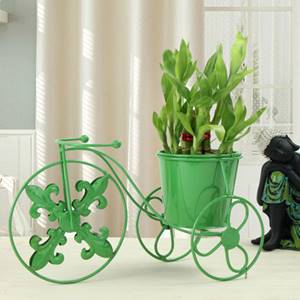
The Lucky bamboo plant:
It is one of the most importantly good luck plants that has a great significance in Chinese tradition. This lucky bamboo plant is a part of Feng Shui and is quickly adopted by the people in modern times. This good luck plant helps in keeping the family together and is an effective home décor item. If you are unable to find this lucky bamboo plant in your local nursery, you can easily buy good luck plants online through various stores.
The Four Leaf Clover plant:
This good luck plant is a native of the USA and consists of four miraculous leaves. The plant is a mutant variety of the normal clover plant that is found at rare places. The four-leaf clover is said to bring good luck or fortune and this sentiment is based on a 17th-century belief. According to the ancient belief, finding a four-leaf clover is said to bring a good thing for the person.
Read More: How To Grow Tomatoes From Seed

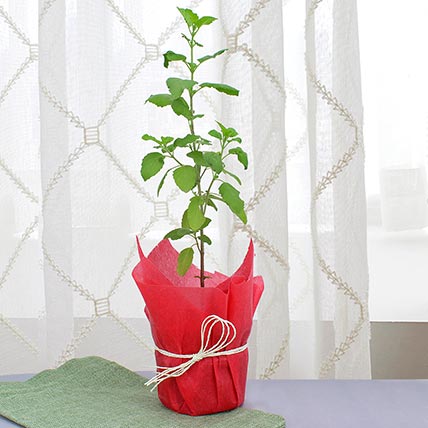
The Tulsi or The Holy Basil plant:
Tulsi is one of the good luck plants that can be widely seen in numerous homes of Hindu families. It is considered as the wife of “Lord Krishna” and is meant as very sacred or pure. This good luck plant is said to possess magical medicinal properties and removes the negative energy from the homes. The significance of the basil plant is also mentioned in the religions like Islam and Christianity which considers it as a “divine plant”. You can even send good luck plant of basil to your close friends and relatives as an ideal gift.
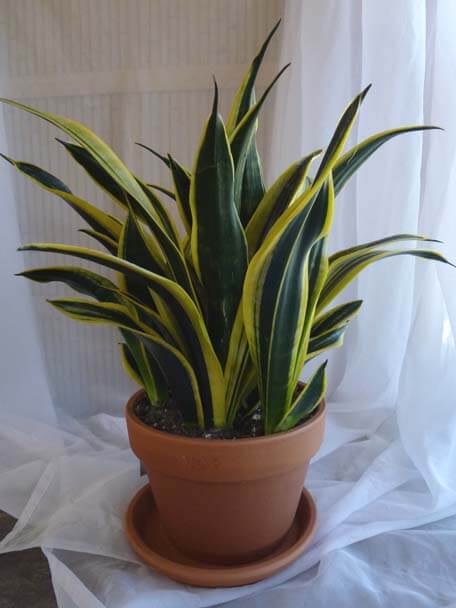
The Snake plant:
This good luck plant is believed to absorb certain poisonous gases from the internal air of our home. Snake plant releases a large amount of water vapor and helps in maintaining the humidity in our surroundings. If you are thinking about how to get this plant, here is the solution for you. You can easily buy this plant from an online good luck plants store without any need to step outside.
The Money plant:
Money plant is an important member of the good luck plant family. It can be easily grown in a jug of water and are seen as creepers in various homes. You need to point the shoot of this money plant in the upward direction in order to bring wealth and good luck to your home.

So, visit your nearest plant nursery or buy good luck plants online from a store to enhance the internal appeal and aura of your homes. Involve these good luck plants as a home décor item and experience their multiple benefits yourself.
Read More:
- 3 Amazing Flower Street Garden – How To Design
- Gardening Tips To Improve Outdoor Space
- Does Organic Gardening Improve Soil Quality?
- How To Choose The Right Containers For Your Container Garden