5 Tips for Creating a Modern Dining Room

Published on: 09 February 2021 Last Updated on: 26 December 2024
modern dining room

The dining room is more than just a space where meals are taken. It is the heart of the home and the one place that brings people together. As a space where families get to spend time and enjoy delicious meals, it is only right that homeowners would want it to be stylish and luxurious. The modern dining room comes in two types; the formal dining room is a separate area from the kitchen. On the other hand, open-plan dining where the kitchen connects to the living space.

For the past years, the open plan dining has gained traction among homeowners, and the formal dining room is becoming more uncommon. Why? Because the large open plan is more practical and allows them to save space.

Thus, the modern dining room concept has typically become the kitchen area that transitions into the living area. So how do you proceed with creating a modern dining room? Whether you are doing an extreme dining makeover or making a few tweaks to make your dining room, there are so many options to explore to give your space a modern tone. These tips will help you give your dining space a refreshing modern vibe.
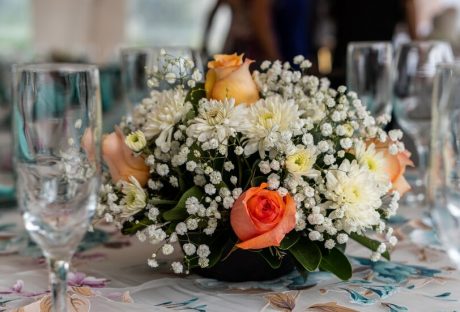
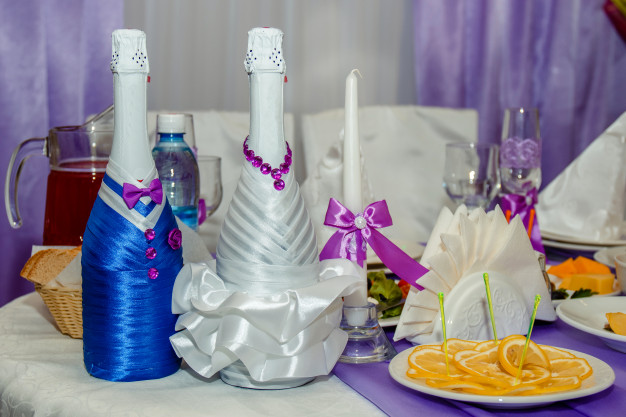
1.Add a centerpiece

Add a centerpiece

When creating a modern dining room, it is essential also to decorate the dining table. A contemporary table centerpiece could spice up your dining room, giving it that modern look you are going for. Depending on your style, centerpieces go from a simple vase of flowers and candles to a decorative bowl with fruits.

You can even customize one by DIYing decorations. Greenery centerpieces like succulents or snake plants would also do an excellent job bringing life into space. A bonus is they are low maintenance, and you won’t have to deal with withered plants frequently. Mixing different statement-making materials with bold and neutral colors to decorate the room will give it a sophisticated look. Apart from elevating the dining room’s overall appearance, a fantastic centerpiece will transform your dining into a classy space.

2.Integrate wooden furniture

Integrate wooden furniture

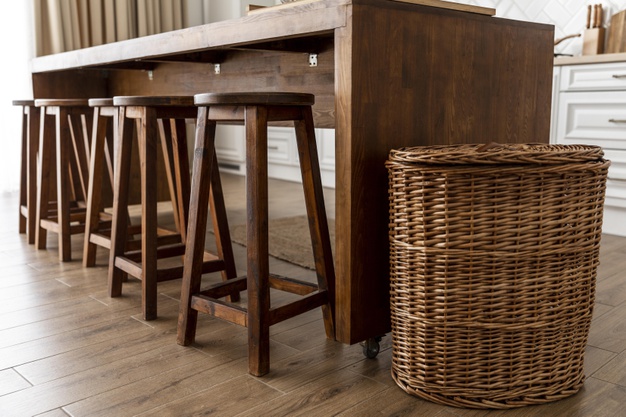
Wooden furniture has a lot to offer in the dining room. It’s simple, and its natural attribute can bring style to the room. However, before you go in over your head with displaying cabinets and sideboards, start with the basics; dining table and chairs. However, you should consider adding a wooden dining table handcrafted to meet your preferred style and needs.

There is a vast choice of wooden dining tables you can add to update your dining area. A large dining design would do a great job adding comfort. Team your dining table with classic chairs to give your dining space a whole new look. Anne Quin furniture offers to handcraft modern style dining tables at affordable rates. If you crave a luxurious dining set, you can learn more about Anne Quin furniture on their site.
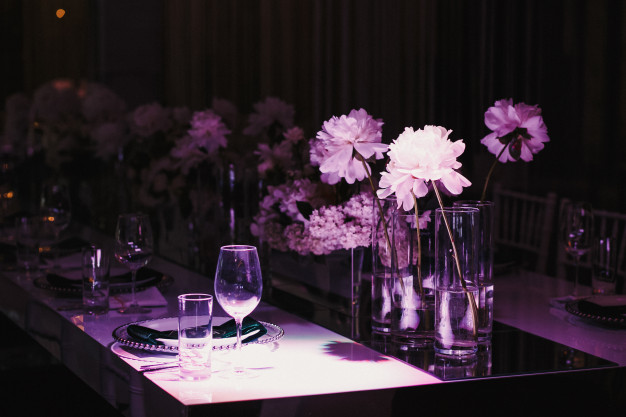
3.Light it up

Light it up

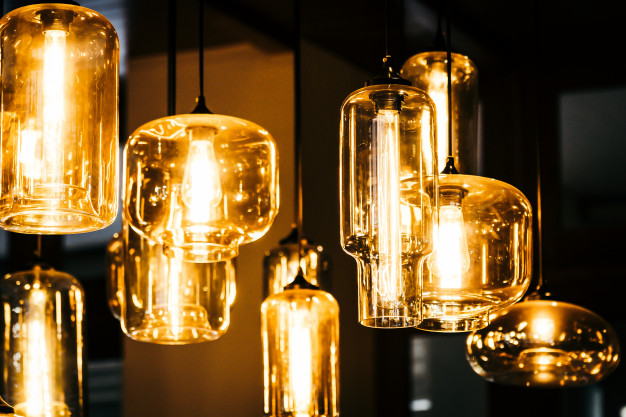
One way to make a statement in your dining space is by adding a modern lighting fixture. Pendant lightings are on-trend, and most importantly, they work perfectly in the dining room. Always remember to choose a soothing light because you want people to be comfortable. The pro tip is the bigger you go, the better it is for the room’s appeal.

You can choose a single large hanging pendant or install a group to make a bolder statement in the room. There are many shops filled with affordable lighting fixtures, so you have free reign, one that marries well with the existing décor and finishes in the area. A beautiful lighting fixture will bring the room together and boost its visual appeal.

4.Add a banquette

Add a banquette

A modern dining space is about mixing different aspects: classic, elegant, and contemporary. Create a relaxed vibe in the room by adding a banquette near the dining table. A banquette is an ultimate steal when modernizing your dining space; homeowners get to enjoy a modern vibe while adding more storage space. It also offers a flexible seating option which is a bonus. You can top the banquette with colorful plush pillows to cheer up the area and add comfort.
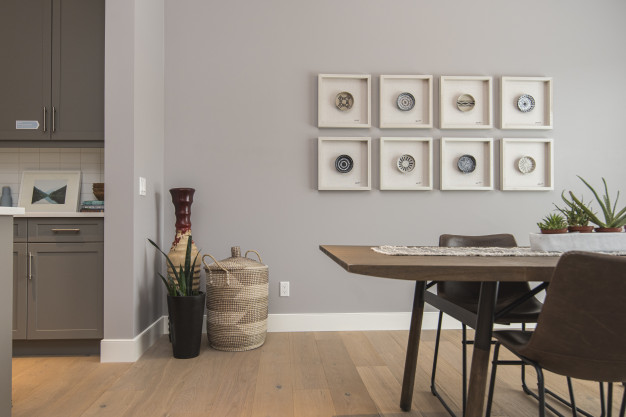
A gallery wall

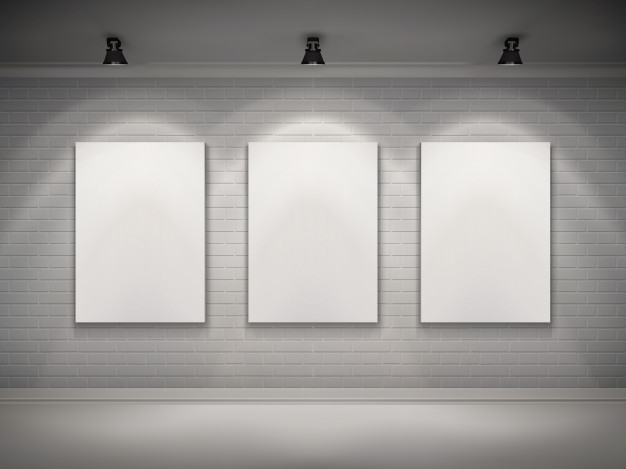
Modern dining styles are about breaking the norm, and many homeowners are embracing going bold in their dining areas. To give the room a purposeful look, you can choose to add modern art or a couple of picture frames.  

Since most modern furniture tends to be sleek and cold, a wall of art would create a warm look and maintain a contemporary tone at the same time.  

A beautiful piece of contemporary art will bring in some color to finish the dining room. Family photos or botanical-inspired prints could add personality to your dining space. However, ensure you use matching frames to give the room a cohesive look.  

Trust us; displaying them in your dining room would look twice as good as it would on your social media.

How to Create a Cozy Dining for A Rented Apartment 

Moved from your hometown for work? 

Want to know how to create a cozy environment? Especially in the dining space? Here is how you can. 

Moving to a new city for work is exciting. But first, you need an apartment.  

Then, you’ll want to make that space feel like home — especially the dining area where you’ll gather for meals and memories. Here’s how to create great dining in a rented space. 

Purchase a Compact Dining Set 

In a rented apartment, the space is often limited! Yes, it is a nuisance, but we have to do the most  

A small round-dining table with two comfortable chairs can make the space feel intimate, and it doesn’t take up that much space. You can choose it to your liking if you prefer modern, rustic or in between. 

Think About your Lighting Options 

Lighting is so important to help create a warm and inviting space. A great floor lamp or a simple set of string lights can add a nice glow to your dining area.  

If you’re able to, I would love the idea of installing a pendant light above the table as well. 

Use Rug To Define Space 

Add some seasonal greenery or flowers. A geometric rug in neutral tones will ground a black dining room and contrast the heavy pattern of your living room. 

Try to keep the rug color the same as your kitchen floor for a seamless blending. This also creates a focal point, which is where all the cooking and cleaning will go on. 

Sometimes, less is more when it comes to a beautiful black dining room. 

Add Personal Touches 

Stop searching for the perfect inspiration from the latest AD. Just do what feels right to keep it cozy! 

Make the space your own with personal decorations. A small gallery wall with your favorite photos, a vase of fresh flowers, or a few candles can add a homey feel to your dining area. These touches make the space uniquely yours, even in a rental. 

Keep it Functional 

Lastly, make sure your dining space works for you. When space is tight, use furniture that can serve double duty. For example, a bench with built-in storage or a table that you can fold & move out of the way when not needed. 

There you have it – an inviting and cozy eating space in your apartment.  

A place where you can enjoy meals, put your feet up, and recharge as you immerse yourself in your home sweet home. 

Final Notes! 

Even though the kitchen wins many people’s hearts, the dining area will always be a special place in the home. As seen above, the simplicity and minimalism that a modern dining design calls for taking.  

Different forms. These are a slew of tips you can incorporate to give your dining area a modern feel. 

Remember to go for designs that complement one another to give your room a seamless pattern. If you remember these things and find the right design combo, you should be good to go.  

Have fun and happy redesigning!  

Read Also:

Content Rally wrapped around an online publication where you can publish your own intellectuals. It is a publishing platform designed to make great stories by content creators. This is your era, your place to be online. So come forward share your views, thoughts and ideas via Content Rally.

View all posts

Leave a Reply

Your email address will not be published. Required fields are marked *

Related

how to harvest cilantro

The Best Time and Method to Harvest Cilantro for Maximum Flavor and Aroma

One of the most used herbs in the world, cilantro, is also referred to as Chinese parsley or Coriandrum sativum. Fresh and zesty, cilantro gives your recipes a flavor boost. Mexican, Middle Eastern, Indian, Mediterranean, Chinese, African, and even Scandinavian cuisines use it extensively. Even cilantro microgreens are grown from it! Since cilantro itself doesn't keep well and loses aroma and flavor once dried, most people prefer to use it fresh. To have cilantro on hand, you should also have a few plants in the garden. You can harvest the plant for its flavorful cilantro seeds, also known as coriander, even if you don't use the leaves in your recipes. The leaves of the cilantro plants come throughout the spring and summer. Allow them to go to seed at that time since they grow easily in the garden! You must know how to harvest cilantro properly if you want to have a steady supply. Keep reading to find out all you need to know about harvesting cilantro. Harvesting Cilantro: Overview Most people either love or hate the flavor of cilantro leaves. However, you should still think about cultivating a few coriander plants in your garden and saving the seeds for a range of culinary uses. Most people in the US grow this delicious herb for its leaves. But the tasty coriander seeds are also worth harvesting. They have a distinct flavor from cilantro leaves. This fragrant herb of the cool season, cilantro, quickly goes to seed in the long, sweltering summer months. As the plant reaches higher in the sky, its rounded, lobed leaves become feathery. Pretty clusters of tiny white blossoms quickly emerge. Many pollinators are drawn to these nectar- and pollen-rich blossoms, particularly syrphid flies and honeybees. Little round coriander seeds with a kelly green color emerge as the blossoms start to fade. What To Expect from Cilantro? The distinctive flavor of coriander is citrusy and slightly nutty. It goes incredibly well with rice, beans, lentils, and roasted or grilled veggies. You can pick the seeds while they are still young and vibrant green. Or you can wait until they start to turn brown. Since green coriander seed is only found in gardens, it is better to harvest them when they are still green because of their stronger, more distinct flavor. You will not find them in the farmers’ market or the grocery store. If the seeds are kept in a glass container with a lid, then they can be refrigerated for several weeks and frozen effectively as well. Wait until most of the seed turns brown if you want to harvest the mature brown seed for winter grinding or planting next year. Next, trim off a few inches of stalk and the seed heads, then hang them upside down in a brown paper bag. The seeds will drop out of the heads and land in the bag's bottom once they are completely dry. The dry seed should be kept in a dry, cool place in a glass jar with a lid. For optimal flavor, grind it just before using. The flavor difference between freshly ground coriander seed and the pre-ground variety typically found in stores will astound you. Try adding green coriander seeds to dressings and marinades. Frequently adding an equal amount of ground coriander to recipes that call for cumin makes the flavors of the two go particularly well together. How to Harvest Cilantro? The most exciting aspect of growing plants is undoubtedly harvesting. Pick individual cilantro leaves if you plan to use a small amount. It is best to leave at least 1-2 inches of stem above the soil's surface when harvesting larger quantities of cilantro. It is preferable to leave a few lower leaves on the plant to support the herbs until they grow back. To cut the stems cleanly, use harvesting snips, long reach harvesting snips, or sharp, sterilized garden shears. To guarantee that your herbs regrow, it is best to remove only a small portion of the plant at a time. Furthermore, when the cilantro plant blooms and sets seed, the herb may start to taste bitter. So, when wondering how to harvest cilantro, it is preferable to harvest before the plant bolts because the leaves will be less appetizing at that point. When is The Best Time to Harvest Cilantro? When the morning dew has cleared and the sun hasn't set, it's the ideal time of day to harvest a variety of fruits, vegetables, and herbs, including cilantro. This way you can lessen the stress on your cilantro plant and give the fresh stock cuts enough time to dry before dusk, which lowers the risk of illness. Before it bolts, harvest cilantro when it is 6 to 8 inches tall. The flavor of cilantro leaves significantly decreases after they have bolted. The lifespan of the cilantro plants can be increased by careful and routine harvesting. It is crucial, though, to wait for your plant to become established before beginning to harvest. The plant develops numerous long, thin stems as it grows. They are ready to be harvested when the stems are long, and the leaves have a lacy appearance. The cilantro herbs are about ten to twelve inches tall at this point. Gather your cilantro in the spring and into the first part of the summer. Your plants may bolt to seed if summertime full sun conditions prove to be too hot for them. The best time to harvest cilantro is early morning. You can either choose to harvest it once a week or source just individual leaves whenever you need them. Most of the time, it takes about 2-3 weeks for regrowth, so you must harvest accordingly. You must remember that regular cut-and-come-again harvesting is the most ideal while the plant keeps producing foliage. How To Store Fresh Cilantro? Part of knowing how to harvest cilantro is also knowing how to store them. It's best to know how much you should take from the garden before you harvest. You will need to learn how to store cilantro if you do not intend to use the leaves right away to extend its shelf life. There are several approaches to try. Storing Cilantro in Water To keep the cilantro leaves dry, wait to wash them after harvesting. For storage purposes, store the stem ends in a glass or jar with 1 to 1.5 inches of water and refrigerate for a few days. At a minimum, change the water once a day. Use a plastic bag to cover the top loosely to preserve the humidity surrounding the herbs. Storing Cilantro in The Freezer Freezing cilantro is another low-maintenance way to store it. Shake off any extra moisture and rinse the leaves to get rid of any garden soil. Tear the leaves into small pieces and stuff them into ice cube trays, covering the herb with just enough water to barely cover. You can pre-measure if you'd like to ensure that you know precisely how much is in each cube for recipes in the future. After the cubes are completely frozen, place them in a freezer bag. Add as needed to marinade, smoothies, soups, and sauces. You can freeze cilantro for up to six or eight months. Read More: Everything You Need To Know About Harvesting Basil How To Dry Cilantro? There are two methods for drying cilantro. You can use the oven to dry cilantro. Since hot air can greatly affect the flavor of the finished and dried herb, you might want to avoid using heat if you want to enjoy flavorful dried cilantro. Air drying or hanging drying is a better way to dry cilantro. Gather the stems of the herbs into a small bunch and secure them with a string. Place the bunch in a dark, well-ventilated area and hang it upside down. Alternatively, you can wrap the bunch in a brown paper bag to keep the cilantro from getting dusty. After the bunch has been hanging for about a week, begin to check its level of dryness every day or two. It's ready to be crushed or powdered and stored for later use when it crumbles when touched. Cure the cilantro ahead of time to reduce the possibility of mold growth. Put the dried cilantro in a glass mason jar to cure. Open the jar and give it a good shake every day to let fresh air into it and mix the contents. This will assist in achieving moisture content parity. If you'd like, you can also include a moisture-absorbing packet. How To Harvest Cilantro Seeds? You can harvest the coriander seeds even if you don't like cilantro leaves. The plant can grow to 20 inches when it flowers. This requires temperatures above 75 degrees. Pods will form once they have flowered, and the flowers will fade. Before being harvested, these should be green to brown in color. These pods release the mature seed when it's ready. Tie the stems with the seed pods still attached into a bunch. Next, hang them upside down in a paper bag in a cool, dry place to harvest the seeds. With time, the seeds will sprout and drop into the bag. Store your seeds in a dry, cool place in an airtight jar. Unground dried seeds can be kept for three to four years in storage. Before using dried seeds in your recipes, grind them for the best flavor. How To Harvest Cilantro So It Keeps Growing? If you sow cilantro seeds every two weeks from spring until late summer, you can be sure to always have fresh leaves available. We advise chopping them up and firmly packing them into an ice cube tray filled with water. Then, just place the tray in the freezer. These can then be added directly to hot pans when preparing soups or sauces. Or they can be dropped into hot or cold water for cooking or drinking. What To Do If Cilantro Bolts? It's time to collect and preserve your own coriander seeds once your plant produces seeds. Picture each of those tiny white blossoms turning into a flavorful spice for your cooking or seeds for the following year! In addition to being aesthetically pleasing and tasty, cilantro flowers are also excellent pollinators.  There is a short window of time when the growing seasons of cilantro and tomatoes coincide. This proves they go well together. It usually happens that my tomato and pepper plants are just starting to take off when my cilantro plants bolt, sending forth gorgeous white flowers. To maximize the amount of fruit your plants produce for you, beneficial insects that are feeding on your cilantro flowers will collide with your fruiting plants, vibrate their leaves, and assist in pollination. Ladybugs, butterflies, and bees all love cilantro flowers. It truly is a win-win! Choose Slow Bolt Seeds Seek out seed packets labeled "long-standing" or "slow bolt cilantro," as these varieties have been cultivated to endure longer in the garden. You can find your go-to slow bolt seeds that are 100% certified organic from Seeds of Change. Finding a local seed producer is another smart move. Buying local seeds means you'll be growing a climate-adapted variety of cilantro, which increases the likelihood that you'll keep it longer. Harvest Cilantro Regularly Regularly chop your cilantro leaves. This preserves the health of the plant and guarantees that the leaves of this herb are fresh when you use them. Your cilantro will continue to produce new leaves from the center of the plant if you regularly harvest it by chopping off the older outer leaves. Additionally, your chances of cutting off those immature flower stalks increase with the amount of cilantro you harvest. This will aid in postponing any bolting.  Since cilantro is incredibly obstinate, you can delay as long as you can. Cut that thick center stalk as soon as possible. After that, the plant will start to send outside shoots, giving you a little extra cilantro before it eventually bolts completely. For sun protection, surround your cilantro with tall plants. Plant Taller Plants Around Cilantro for Sun Protection Encircle your cilantro with large warm-season plants (like tomato or pepper plants) so that the taller plants can shade your herbs slightly and help keep the soil cooler as the temperatures rise. After all, four to six hours of sun is sufficient for cilantro to grow. To increase the lifespan of your cilantro in the garden, interplant it with larger plants. Wrapping Up You will need to have patience if you want to collect the seeds for your cilantro. Before seeds can be harvested, cilantro needs to blossom. Before harvesting, the resulting seed heads need to be allowed to dry on the plant for a while. Harvesting the seeds is then as simple as shaking them into a paper bag or chopping off the entire seedhead and placing it inside the bag. If you have thoughts to share or questions to ask about how to harvest cilantro, please leave a comment below. We would love to hear from you! Read Also: Asparagus 101: When, How, And How Often To Harvest? Some Facts You Need to Know About Rainwater Harvesting How to Harvest Lettuce: A Step-by-Step Guide for Fresh and Crispy Salads

READ MOREDetails
Aerial Roof Inspections

Elevate Your Roof’s Health With Aerial Roof Inspections

In the realm of property ownership, maintaining the health of your roof is paramount. Aerial roof inspections emerge as a game-changer, providing a unique perspective that goes beyond traditional methods. In this comprehensive guide, we will be discussing what aerial roof inspection is all about and how it benefits. So, what are we waiting for?  Let's delve into the world of aerial inspections and discover how they can revolutionize your roof maintenance routine. What Is Aerial Roof Inspection? Automated aerial systems or vehicles that work remotely generally do not need human intervention. But, most often, the inspector has to take control of his devices to ensure safety. With the advancement of technology, aerial roof inspection came into being.  The drone is helpful in reducing risks because it provides a 360-degree view of the roofs. Moreover, it can trace even the smallest faults at the earliest. In the next section of the article, we will be discovering the advantages of inspecting roofs aerially. How Does A Typical Aerial Roof Inspection Process Look Like?  A general roof inspection is a bit different. Here, the contractors and building professionals make use of off-the-shelf drones accompanied by software applications. Other steps included in the roof inspection procedure are as follows: The pilot, operator, or estimator uses the application to make a flight plan. It is possible to do this either on-site or within the workplace. Furthermore, it includes building address specifications and defining the roof’s perimeter.  After the plan is ready, the pilot confirms the proper order of everything. They make use of the mobile app or controller to control and launch the drone.  Next, the drone follows the path automatically along with collecting images and other relevant information. This basically depends on the inspection’s cause and the sensors.  After 10 minutes, the drone automatically lands as per the program and transfers the data to other devices.  What Are The Benefits Of Aerial Roof Inspection? Roof inspection plays a critical role in ensuring the longevity and durability of your house. Conventionally, these inspections are a bit expensive. But even after the price factor, there are some advantages of aerial roof inspection. Check them out here: Unlocking Precision with Aerial Insights Aerial roof inspections leverage cutting-edge technology to scrutinize every inch of yourroof with unmatched precision. Drones equipped with high-resolution cameras soarabove, capturing detailed imagery that might be easily missed during groundinspections. This method ensures a thorough examination, leaving no room foroversight. Bolstering Structural Integrity One of the key advantages of aerial roof inspections is their ability to detect structural vulnerabilities early on. By identifying potential issues such as cracks, leaks, or weakened areas, proactive measures can be taken to address these concerns promptly. This not only safeguards your property but also prevents costly repairs down the line. Time and Cost-Efficiency at Its Finest Traditional roof inspections often involve time-consuming processes and extensivemanpower. Aerial inspections, on the other hand, streamline this operation. The swift deployment of drones reduces the time required for a comprehensive assessment, translating to cost savings for property owners. Embracing Sustainability in Maintenance Practices In an era where sustainability is paramount, aerial roof inspections align seamlesslywith eco-friendly practices. The minimized need for physical access to the roof reducesthe carbon footprint associated with maintenance activities. Property owners cancontribute to environmental conservation while ensuring the longevity of their roofs. Supporting Innovation and Progress As we navigate the realms of modern technology, embracing innovative solutionsbecomes imperative. Aerial roof inspections showcase a commitment to progress andefficiency in property maintenance. Property owners adopting this method not onlyenhance their roof health but also position themselves at the forefront oftechnological advancements in the real estate landscape. Transitioning to Aerial Excellence In conclusion, aerial roof inspections stand as a beacon of progress in the realm ofproperty maintenance. From precision to efficiency and sustainability, this method ticksall the boxes for an optimal roof care strategy. Elevate your roof asset management by embracing the power of aerial insights – your roof deserves nothing less. Remember, a well-maintained roof is not just an investment in your property; it's aninvestment in peace of mind. Read Also: How Often Do You Need A Roof Inspection? Choosing A Siding And Roofing Companies In Delaware Why You Must Use A Residential Roofing Company For Your Home

READ MOREDetails
Maintain Garden

4 Essential Tools Needed to Maintain Your Garden in the Winter

You may not expect that it is necessary to do yard work in the winter, but it is more important than you think. Properly preparing your lawn in the beginning months of cold weather and even though snowy conditions will ensure you have the best-looking lawn come springtime. These four tools are essential in maintaining a healthy yard during the winter. 4 Essential Tools For Maintaining Your Winter Garden When you love to spend your leisure time in front of your lawn. The maintains of your garden is quite an important task to preserve the beauty of your favorite garden. Every time seeking professional help is costly so better look at how you can maintain a garden in winter using some simple tools. However, you need to understand that maintaining your garden during winter can be a tough affair. Not only will freezing temperatures deter you from engaging in outdoor work, but the tools and machines can become non-operational. This is why a good idea would be to engage an expert to do the needful. Tree Service Round Rock can maintain your garden during the winters and ensure that you stay safely and cozily within the warm confines of your home. Here are the names of four tools to maintain a garden in the winter season. 1. Aerator: Cool-season grass, which is the most common type, should be aerated in the early spring and late fall. For those of you that may not be familiar with this machine, it digs small plug-like holes out of the ground. This helps the grassroots have access to more water, nutrients, and air. The point of this is to make the roots deeper and healthier so the grass has a stronger foundation to grow. Use this equipment on a day that the ground is slightly moist, maybe the day after rain, for the best results. It will relieve the soil from compaction that causes the roots to be starved and suffocated. Making sure your grass gets all the nutrients it needs before it is covered in snow will help it grow back better when the weather warms up. 2. Chainsaw: Pruning your trees and bushes during the wintertime is an essential part of a healthy yard. Plants will waste too much energy trying to send nourishment to dead limbs which affect the living ones. Investing in a chainsaw would be beneficial so that you can cut down the dead branches. If you are a seasoned expert, you will know to not only trim dead branches but also cut any that are rubbing together. Damage to the tree from the rubbing can create an entry for bugs to get inside. When it comes to finding a good quality chainsaw, get this it works! The better the quality of equipment, the less risk when it comes to the safety and wellbeing of your yard. 3. Drop Spreader: Fertilizer is the basis for giving your lawn what it needs to look its best for next year. There are winterizing products that slowly release nitrogen during the offseason. Using a spreader makes this task time-efficient and well done. It allows you to evenly distribute the fertilizer throughout the lawn, maximizing the benefits of this product. Putting grass seed down at the beginning of the winter can help maintain your yard as well. You will use the same drop spreader to put this down, but you’ll want to make sure you set the amount it is releasing slightly less than recommended. In doing this, you can overlap your passes, so nothing is missed, and you still have enough to do the whole yard. As a pro tip, it is encouraged to spread a thin layer of compost before laying the seed. Combining the seed and the compost keeps your grass moist and germinated during dry and cold weather. 4. Rake: Before a snowfall, it is crucial to clear your yard of any leaves, branches, or debris. When this waste sits on your grass all winter it will cause these patches to brown or die. Simply raking every once in a while will prevent dead spots and inconsistency in height and color. Raking will also help mix in any seed or fertilizer you have laid down in the soil previously. Something to keep in mind is to make sure you are not raking when the ground is frozen. The protective layer in the frozen blades of grass gets destroyed from the pressure of footsteps. While this will not kill the grass, it may cause it to be brown when it grows back in. Get a leg up on those who do not know to still maintain during the winter months. Investing in these tools will ensure you have the lushest green grass on the block come spring and summertime. Wrapping It Up: Maintain Garden is simple when you are already having the essential tools to do the job. But the professional touch every time required. When you already have these tools your hard work related to garden maintains in the winter is becoming a much easier process. So what is your opinion? Are you going to maintain your garden on your own? Or do you seek professional help? Do not forget to share your opinion with us. Read Also: 5 Summer Garden Maintenance Tips And Tactics You Have To Know 5 Essential Tips To Designing A Beautiful Front Yard Garden

READ MOREDetails