Repairing Your Roof – How Should You Get Started?

by

23 December 2023

Home & Garden

Repairing Your Roof

Your house’s roof is its ultimate defense against harsh weather, pesky creatures, and infestations. 

If your roof is not in top condition, your entire house is at risk. It’s crucial to schedule roof repair as soon as you notice a leak, even if it’s small, as it can cause significant damage. 

Repairing your roof is more cost-effective than replacing it entirely and is vital to maintain its integrity. 

Left unaddressed, roof leaks can cost you tens of thousands of dollars. 

This article will discuss the basics of roof repair, what you need, and how to do it. Ensuring your roof is in top condition is essential to protect your home from the elements and ensure its longevity.

Steps For Repairing Your Roof

Given below are the steps that will guide you in the process of roof repairing at your home—

1. Examine The Damage

Following a systematic approach is vital when searching for a leak in your roof. Begin by surveying the visible damage to your roof, including shingles, gutters, and roof edges. 

It’s essential to start with the most obvious issues and progress to less apparent ones. Once you’ve assessed the exterior, examine the interior for signs of water damage. 

Look for indications of water stains, dripping water, sagging, pooled water, and dampness. Inspect during rainy weather, as some leaks are intermittent and only occur when there is enough rain. 

Access the attic using a flashlight to locate the water source through the roof deck. Check around all rafters for indications of water. 

Water can travel through the roof decking and rafters due to the force of gravity, which may result in dripping in different areas. If you observe water dripping, trace it back to its origin.

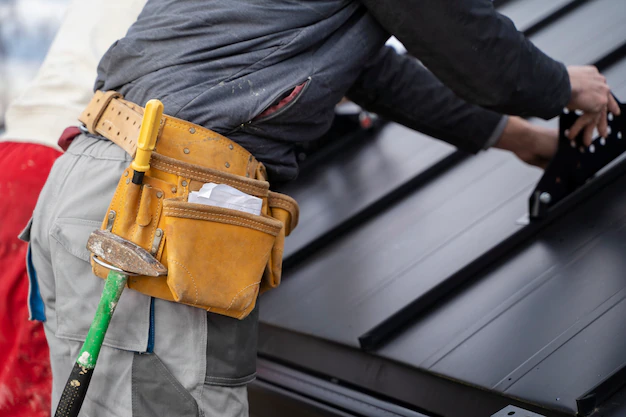
2. Find A Reliable Contractor

After a thorough inspection of your roofing system by a professional roofing consultant, you will receive an accurate and detailed bid or estimate. 

The estimate will be based on the materials you choose for your roofing projects. Moreover, you must consider the unique measurements of your roof. 

The roofing consultant will also consider any special conditions that may affect the cost. This can include the complexity of the roof design or any existing damage that needs repairing.

Once you receive the bid or estimate, your roofing contractor should provide a written contract outlining the details. 

This contract should include a comprehensive breakdown of the costs, the expected timeline for completion, and any warranties or guarantees included. 

Therefore, you must carefully review and understand the contract before agreeing to any work to ensure everything is clear and fair for both parties.

3. Select The Suitable Material 

It’s crucial to have a complete set of roofing tools when undertaking any repair project. These hand tools have various uses throughout the house.

They include the following:

  • Roofing hammer.
  • Pry bar.
  • Nail puller.
  • Utility knife.
  • Shears.
  • Tin snips.
  • Handbrake.
  • Tape measure.
  • Chalk box.
  • Roofing nails (also known as roofers).
  • Speed squares.
  • A pencil for notes or markings.
  • A 10 oz clay gun.

Choosing the right roofing sealant depends on the roofer’s needs, but any kind will suffice. 

While shingles are optional, matching them is optional. For flashing work, it’s recommended to use aluminum coil stock, which is available in various colors at most box stores.

A tape measure is recommended for all measurements and layout work, and a chalk box is ideal for snapping reference lines and general layout work. 

Roofing nails, or “roofers,” are recommended for their durability. The materials used for the roofing sealant, shingles, and aluminum coil stock are also essential.

4. Ensure That All Cracks Are Sealed

Using an uncomplicated roofing sealant is important to seal any cracks on your roof. 

To apply a sealant, you must pierce a thin aluminum membrane with the tube, allowing the sealant to flow. 

Next, load the sealant into a caulk gun and aim it at the crack or hole to seal it. 

The sealant will dry in a few hours and be set entirely in 24 hours without intervention. 

Finally, you can cover the hole with shingles or flashing and move on to other projects. Ensuring that the roof sealant is compatible with your caulk gun is crucial. This is because some construction materials come in 28-ounce tubes that won’t fit a standard 10-ounce gun.

5. Ensure The roof Is Insulated

When planning to replace your roof, it’s also a good opportunity to consider upgrading your insulation. 

However, if you opt for new blown-in insulation, your roofing contractor will install it while they remove the decking. 

This insulation process requires running a hose through the exposed roof and into your attic. It allows the insulation to be installed quickly and easily without causing any damage to your walls or ceilings. 

Therefore, with the new insulation, you can enjoy improved energy efficiency and a more comfortable indoor environment.

6. Leave It Clean

After the roofing crew installs your new roof, they should clean up any debris around your home. This includes loose shingles and nails and leaves them in their original condition. 

They should also haul away old roofing materials for proper disposal. Additionally, you must ensure not to dispose of in landfills, which can contribute to pollution.

The roofing expert must inspect the final product to ensure it meets all industry standards and building codes. 

They should also check for potential leaks or damage and address any concerns.

It is important to address any concerns and take steps to correct any issues. Therefore, ensure you’re completely satisfied with the new roof and its reliable protection for years.

Can You Repair Your Roof Yourself?

Understandably, as a homeowner, you may want to save money. Therefore, taking care of some home maintenance tasks can help you save a lot. 

However, it is important to know your limits when it comes to your roof. 

You may be capable of handling minor tasks such as replacing caulking or cleaning gutters. On the other hand, leaving any roofing projects to the professionals is highly recommended. 

Moreover, roofing maintenance requires specific skills, knowledge, and equipment that only experienced and trained professionals possess. 

Even a seeming DIY project can quickly spiral into a much bigger roof repair if something goes wrong. 

Therefore, it’s always wise to prioritize the safety of your home and family. Look for an efficient roofing service provider and explain the damage.

You can get your roof cost-effectively repaired under expert supervision!

Read Also:

Ankita Tripathy loves to write about food and the Hallyu Wave in particular. During her free time, she enjoys looking at the sky or reading books while sipping a cup of hot coffee. Her favourite niches are food, music, lifestyle, travel, and Korean Pop music and drama.

View all posts

Leave a Reply

Your email address will not be published. Required fields are marked *

All Comments

I appreciate you sharing this blog post. Thanks Again. Cool.

Related

Cooking

6 Tips To Improve Your Cooking Overnight

Cooking is a form of art and like any other art, it needs your devotion. While many love the idea of cooking and spending hours in the kitchen, to some it is an excruciatingly scary idea as they just cannot find that confidence to cook something. But worry no more as we have come up with some spectacular tips and tricks that will help you improve your cooking hand and make you an expert at it. The best part about cooking is that you don’t have to be an absolute professional at it. There are several ways in which you can practice and enhance your cooking techniques for attaining better results. Therefore we have designed 10 unique tips to help you become better at cooking and you can definitely see the change overnight. 1. Invest In a Quality Knife This is the most important part of the cooking process. Handling a knife properly is significant when it comes to cooking and for that, it is ideal to invest in a good quality knife. Not only will it improve your ability to handle the knife but will improve the quality of the cuts in your food as well. 2. Always Choose Fresh Ingredients Ingredients make a huge impact in your dish. It is the core of the dish that makes or breaks it and whenever you are attempting to cook something always make sure that you have picked out the freshest ingredient possible. This will escalate and improve the quality and taste of your food. 3. Learn to Use Hands For Better Estimation Your hands are the ideal tool to use in the kitchen when it comes to cooking. Using your hands and fingers to check whether the meat is properly cooked is traditional and best techniques as your hands are the most sophisticated and very sensitive tools and hence can make the ideal estimations. 4. Learn to Saute professionally Often we do the mistake of overcrowding the pan with ingredients while sauteing which is absolutely wrong can make the food soggy and ruin the taste.  It is crucial that the bottom of the pan is still visible while you are frying or sauteing your ingredients. And always remember to put in the ingredient when the pan is heated. This will enhance the quality of your cooking to a whole new level and make a huge difference in the food quality as well. 5. Reduce The Gravy To Get a Richer Flavour Did you know that the flavors in your gravy or any liquid item enhance when you reduce the liquid to a more thicker consistency? This is a great tip to brighten the flavors in your food and gravy items. People often tend to struggle to bring out the flavors in the gravies and soups. To avoid that, make sure to simmer the liquid for some time and you can observe a huge difference in the meal you cook. 6. Rest Your Roasted Meats This is a mistake that many make that they forget to allow the roasted meat to rest before carving them. When you immediately carve meat before it gets time to rest, the meat will release all the juices out and dry out faster. To avoid that, make sure you let the meat rest which will help it soak in all the flavors and keep them intact within. Conclusion Cooking is easy and not as challenging as you might think it to be. Only with a few tricks and by avoiding some silly mistakes while doing so you can improve your cooking overnight and that is guaranteed. Hence go ahead and make your meal by applying these few basic tips and you will surely see a change in the quality of the food you serve. Read also: 10 Unique Kitchen Hacks To Save Your Time In Kitchen And Cooking

READ MOREDetails
getting rid of clutter

7 Tips for Getting Rid of Clutter in Your Home

Are you guilty of hanging on to items you don't need anymore? Is your home starting to look more like the dwellings of a pig than a person? It can be easy to let clutter creep up on you. One minute all of your rooms seem spacious and empty, but the next you realize your entire floor is covered with items. Getting rid of clutter is an important step in having peace of mind. This article will give you seven tips on eliminating clutter so you can start to think more clearly. 1. Begin With the Bedroom: Your bedroom should be a sanctuary for you. It should be the place you can go to relax and get away from the world. If your bedroom is full of junk, it's not likely to be relaxing. Start by putting all of your items in a pile. This will enable you to take inventory of what you have. Get two giant trash bags, one for trash and one for donations. Put all the items you want to throw away in one bag and put the items you want to donate in the other. Once you get rid of all the useless junk you don't use anymore, you'll be able to find places to store the items you really value. Getting your bedroom tidied first will motivate you to fix the entire house. 2. Kill the Clutter in Your Kitchen: Your kitchen is where you prepare your food, so you want to make sure it's a clean environment. Begin by throwing away any food that is expired. Look through your pantry and toss and spices or soups that may have been sitting there for decades. Make room in your cabinets by throwing out extra Tupperware. Only keep the Tupperware that has a lid. Make sure every base has a matching lid. Discard any old pots and pans that go unused. Cleaning out your kitchen will ensure you don't develop a pest problem. Rodents, roaches, and other insects won't want to make a home in a clean kitchen. 3. Get the Family Involved: Decluttering doesn't have to be a one-man job. Send in some recruits, aka your children and spouse, to help you. Turn banishing clutter into a game for your kids. Set up trashcans like basketball hoops and see who can get the most useless items inside. Give them incentives for donating old clothes and toys they don't use anymore. Tell them they can't have any new toys until they donate some. Your children need to learn the art of letting go as much as you do. You can't keep accumulating items into your home unless you take some out of it. Otherwise, you might end up a hoarder and need serious hoarding help. 4. Put on Some Music: Any task can be made easier with the right music. Put on music that motivates you and watches as your body kicks into overdrive. Before you know it, your entire house will be clean. Dance around as you clean to burn some extra calories and have a blast doing it. 5. Use the KonMarie Method: Marie Kondo has become famous for her method of getting rid of clutter. She says you must think carefully about each and every item in your home. Hold it up to your chest and ask yourself if it "sparks joy." If it does spark joy, you keep it. If it doesn't make you feel happy, you should thank it for its time in your life and then discard it. This method causes you to be more mindful of your belongings. It makes you think about what items you care about. 6. Don't Get Overwhelmed: The easiest way to give up on your de-cluttering journey is to try to do too much at once. You can't possibly tackle your entire house in one day and do a good job. Instead, focus on one room at a time. Schedule in time to clean in your day so it doesn't take away from other responsibilities. If you schedule in 20 minutes a day for a week, you'll notice big progress at the end of the week. You're less likely to give up that way then if you tried to do several hours in one day. Slow and steady wins the race and the clean house. 7. Keep it Clean: If you don't want to have to go through the stress of cleaning everything all over again, take steps to keep your home under control. As soon as you're done using an item, put it away in it's designated storage place. When you're done eating, do the dishes. When your laundry is done, fold it. When the trash is full, take it out. When you do these small chores every day, they won't pile up on you. You must commit to the habit of tidying up after yourself. It will make you feel better and make your home look better for guests. Start Getting Rid of Clutter Today: The key to getting rid of clutter is commitment. You have to want to eliminate clutter and set realistic goals to get there. Picture how great your house will look once you've cleaned out all the excess. Close your eyes and envision how easy it will be to find something when everything has its own place. You'll be able to save so much extra time in your day because you won't be sifting through things for hours trying to find what you need. Enjoy this article? Want to tell us some of your best tips for eliminating clutter? Please contact us here. Read Also: 5 Tips To Add More Zen To Your Home 5 Ways That Ensure That Your Home Is Safe For Living

READ MOREDetails
Screened Porch

How to Make Your Screened Porch as Comfortable as Possible?

Outdoor living is in, especially during the sweltering summer months. Turn a staid, screened-in porch into a tranquil oasis with some comfortable furnishings and ambient decor. These are our favorite tips for creating a screened space you'll want to live in all year long. Treat It as Your Home: Don't be tempted to skimp on furniture for your screened-in porch. Many homeowners rely on basic patio furniture rather than adding comfortable cushioned couches and chairs that create an inviting space. Outdoor poufs are a versatile choice that does triple duty as extra seating, a footrest, or a convenient side table. Choose options with weatherproof fabric that provides easy maintenance and care. The cozier you are on the screened-in porch, the more likely that you (and your guests) will want to spend time there. Think of this area as a natural extension of your home. When choosing furniture, picture how you want to use the space. If you plan to entertain, are you envisioning cocktail parties or boisterous family dinners? Pick your pieces accordingly. Add Accessories: Those little details are a major part of making the patio feel like an extension of your indoor space. Think colorful throw pillows, durable rugs, side tables for snacks and beverages, and accent lighting. Choose colors that coordinate with your indoor palette for a seamless transition from inside to out. Pillows and throws in various textures will add visual and tactile interest. Potted plants add more life to space while emphasizing its natural elements. Keep It Cool: For a three-season porch, you can use from spring to fall, consider screened-in, porch-cooling options to see you through the hottest days of August. Ceiling fans are more effective than a window AC unit, and they create a cooling breeze that will provide relief. Evaporative coolers lower the temperature by using humidity. With these units, cold air is blown over water droplets that chill the air as they evaporate. You can also install shades that can be pulled down to keep the cool air in during the summer and to block the cold air out on chillier nights. Look for transparent versions that will preserve the outdoor feel of the porch. Promote Relaxation: Both real and battery-powered candles create a romantic light that enhances the porch's appeal. String lights provide a similar function. If your home is in a suburban or an urban area that tends to get noisy, consider outdoor speakers through which you can play relaxing ambient noise, such as ocean sounds or birds chirping. You can also plant a row of trees or shrubs to dampen the noise, provided it doesn't block your view. Consider adding a fireplace to your screened-in porch, which has the added benefit of allowing you to enjoy the space when the weather cools. By incorporating these design ideas to add life to your screened-in porch, you're expanding the usable square footage of your home and increasing its value. Best of all, you'll have a space your entire family can enjoy together for years to come. Read Also: 7 Ways To Add Character And Style To Your Home 7 Unexpected Ways To Use Glass And Wood For Your Home 5 Things You Should Know About Heating And Cooling Tiny Homes  

READ MOREDetails