Published on: 24 November 2017
Last Updated on: 29 July 2024
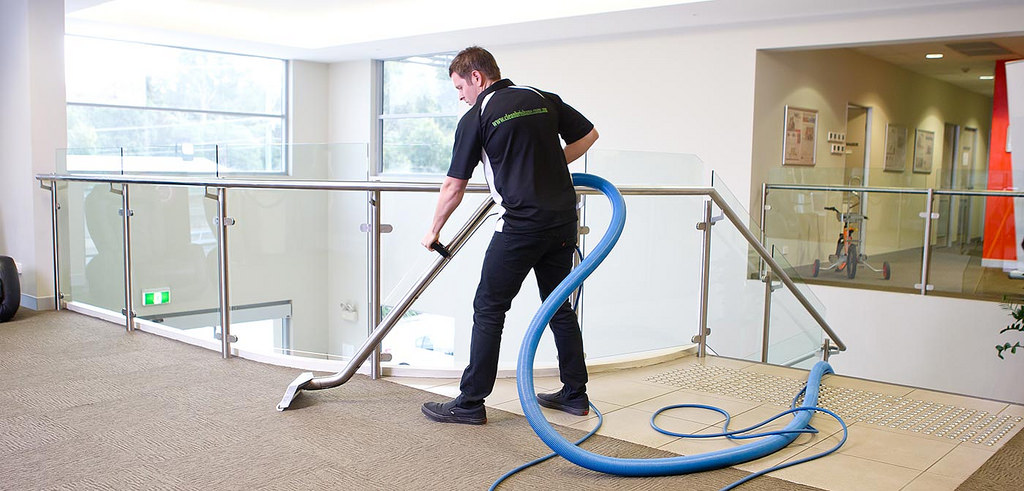
When push comes to a shove and you have guests arriving in an hour, you better believe that you will turn into a superhuman and manage to clean your apartment in less than sixty minutes. Even if you won’t have the time to do a proper thorough cleanup, you can do a lot in an hour to make your home presentable, but you have to be efficient and light on your feet. Let’s get to it.
Spotless Living Room
You will need 10-15 minutes to get this area tidy and you should be as meticulous as possible without getting stuck on details. The first thing to do is to de-clutter quickly – clothing, trash, cosmetics, books, get it out of the way and into their rightful place. You don’t have to go back and forth, but organize stuff into different piles and then get them to their designated places as you move through the house. After that, straighten everything as much as possible, fluff the pillows, do a super quick round of dusting and use wet wipes to wipe your coffee table clean. Finally, get your vacuum cleaner out and run through the room, but do it for five minutes tops, you’ve still got other matters to attend to.
Next up – The Dining Room
If you plan on making dinner for your guest or just serving snacks, don’t neglect the dining room in your cleaning spree. If you’ve got a mountain of stuff on your dining table, the first priority is to remove it stat (this is also the time to throw away all the trash from the living room). Whip out a new tablecloth and make sure that chairs are straightened and free from any bags and clothes hanging from them (nobody is impressed by chairdrobes). Scan for dust and get it out of the way, vacuum the area super quickly and if you’ve got windows, wipe them clean with a coffee filter (just give it a try, it works). Get the glasses and plates, snacks, and drinks on the table and the dining room is prepped and guest-ready.
Now to the Kitchen
Chances are you’ve moved all the dirty dishes from the dining room and living room into the kitchen and now it’s time to pop them in the dishwasher. You don’t have to get them clean and arranged right away, though it might be a good idea to let the dishwasher do its magic while you’re cleaning around, that way, you’ll have more clean dishes at the ready. Stovetop and countertops should be in your focus – clean them as efficiently as possible without losing too much time. Then move to the sink, wipe it clean and you can also put a few slices of lemon into the garbage disposal, it will make the entire kitchen smell fresh and clean. Sweep the floors and if your trash can is full, take it outside, so that it doesn’t stink up your work.
Then We Have the Bathroom
This is one step you shouldn’t overlook since your guests will definitely need to use your bathroom eventually. Get to the toilet, spray it with a cleaner and let it sit while you’re busy with other things. Make your mirror spotless and do the same with any shelves you’ve got around it – wet wipes will do the trick here nicely. Tidy the shower curtain, wash the bathtub with hot water and rearrange the toiletries to look neat. If you’ve got a shower, wipe it clean with a rag or microfiber cloth. After that, get back to your toilet, scrub it quickly, flush, and voila, you’re done. Take the trash out too, get out clean hand towels and for a final touch, light an incense stick to make everything smell better.
Yes, you can clean your home in under an hour, and now you’ve got a system to work by. Honestly, sometimes it’s easier to hire a part-time cleaning lady than to scramble and clean when you’ve got someone coming over. There’s nothing wrong with getting some help when you’ve got a packed schedule and if you’re thinking about it, you can browse through your options at helpling.com.sg/maids to see if you find a suitable match. If not, we suggest finding time to clean a bit every day, it will be much easier to tackle chores one day at a time.
Content Rally wrapped around an online publication where you can publish your own intellectuals. It is a publishing platform designed to make great stories by content creators. This is your era, your place to be online. So come forward share your views, thoughts and ideas via Content Rally.
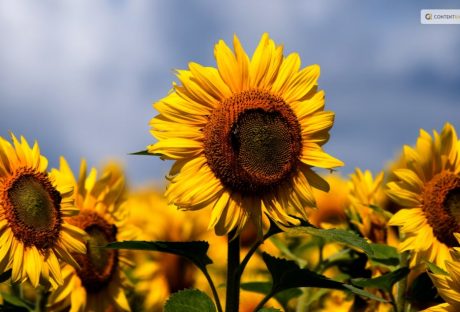
Sunflowers are not only beautiful and cheerful, but they also produce delicious and nutritious seeds that you can enjoy as a snack or use in various recipes. Harvesting sunflower seeds is a fun and easy activity that you can do with your whole family. It is also a great way to teach your kids about nature, gardening, and healthy eating.
In this article, I will show you how to harvest sunflower seeds in a few simple steps, as well as some tips and tricks to make the most of your sunflower harvest. If you enjoyed reading my blog on harvesting lettuce, you will enjoy reading this one!
So, if that is what you are interested in knowing, I have you covered! Keep reading this blog till the end to learn more…
How to Grow Sunflower Seeds: A Simple and Rewarding Gardening Project?
Sunflowers are one of the most iconic and cheerful flowers in the world. They are also one of the easiest and most rewarding plants to grow from seeds.
Sunflowers can brighten up your garden, attract pollinators, provide shade, and produce edible seeds that you can harvest and enjoy.
In this part of the article, I will show you how to grow sunflower seeds in a few simple steps, as well as some tips and tricks to make the most of your sunflower growing experience.
How to Choose Sunflower Seeds?
The first step to growing sunflower seeds is to choose the right seeds for your garden. Sunflowers come in a wide range of sizes, colors, shapes, and types. Some of the most common types of sunflowers are:
Giant sunflowers
These are the tallest and largest sunflowers, reaching up to 15 feet in height and 12 inches in diameter. They produce huge and heavy flower heads that are filled with large and plump seeds. They are ideal for creating a dramatic and impressive display in your garden, as well as for harvesting large quantities of seeds. Some examples of giant sunflowers are Mammoth, Titan, and Kong.
Dwarf sunflowers
These are the smallest and shortest sunflowers, growing up to 3 feet in height and 6 inches in diameter. They produce smaller and lighter flower heads that are easier to manage and maintain. They are ideal for growing in containers, pots, or small spaces, as well as for adding a splash of color and charm to your garden. Some examples of dwarf sunflowers are Teddy Bear, Sunny Smile, and Little Becka.
Colored sunflowers
These are the most diverse and colorful sunflowers, ranging from yellow, orange, red, pink, purple, brown, and even green. They produce medium-sized flower heads that are attractive and eye-catching. They are ideal for creating a vibrant and varied display in your garden, as well as for cutting and arranging in bouquets or vases. Some examples of colored sunflowers are Autumn Beauty, Moulin Rouge, and Lemon Queen.
Things to Consider While Choosing Sunflower Seed
When choosing sunflower seeds, there are several things that you need to keep in mind. For instance, you should also consider the following factors:
Climate and season of your area
Sunflowers are warm-season plants that need full sun and warm temperatures to grow and bloom. They are best planted in late spring or early summer, after the last frost, when the soil is warm and moist. If you live in a cold or frost-prone area, you can start your seeds indoors and transplant them outdoors when the weather is favorable.
Soil and water conditions of your garden
Sunflowers are adaptable and tolerant plants that can grow in most types of soil, as long as they are well-drained and fertile. They prefer slightly acidic to neutral soil with a pH of 6.0 to 7.5. They also need regular watering, especially during the germination and flowering stages. However, they can withstand some drought and dryness once they are established.
Space and support available in your garden
Sunflowers are large and sturdy plants that need ample space and support to grow and thrive. They should be planted at least 2 to 3 feet apart from each other and from other plants, to avoid overcrowding and competition. They should also be staked or tied to a fence, a trellis, or a pole, to prevent them from bending or breaking under their own weight.
How to Plant Sunflower Seeds?
Once you have chosen your sunflower seeds, you can proceed to the next step. Planting sunflower seeds is a simple process that involves preparing, sowing, and caring for the seeds. Here is how to do it:
Prepare the Soil
Prepare the soil by loosening it with a fork or a spade. Ensure that you remove debris, weeds, or rocks. You can also enrich your soil by adding some compost, manure, or fertilizer, to boost its fertility and drainage. Make sure the soil is moist but not soggy, and has a temperature of at least 50°F.
Sow the Seeds
Sow the seeds by making holes or furrows in the soil, about 1 to 2 inches deep and 2 to 3 feet apart. You can use a ruler, a stick, or your finger to make the holes or furrows. Drop one or two seeds in each hole or furrow, and cover them lightly with soil. You can also sprinkle some water over the seeds to help them settle in the soil.
Nurture
Care for the seeds by watering them regularly, but not excessively, to keep the soil moist but not wet. You can also mulch the soil with straw, grass clippings, or leaves, to retain moisture and prevent weeds. You should also protect the seeds from birds, squirrels, or other animals, by covering them with a net, a cage, or a cloche. You should also thin the seedlings when they are about 4 to 6 inches tall, by removing the weaker or smaller ones, and leaving only the strongest and healthiest ones.
How to Grow Sunflower Seeds?
After planting your sunflower seeds, you can watch them grow and enjoy their beauty and bounty. Growing sunflower seeds is a rewarding and satisfying experience that requires minimal maintenance and care. Here are some tips and tricks to grow sunflower seeds successfully:
Water
Water your sunflowers regularly, but not excessively, to keep the soil moist but not wet. Sunflowers need about 1 to 2 inches of water per week, depending on the weather and the soil conditions. You can use a hose, a sprinkler, or a drip irrigation system to water your sunflowers. You should water them in the morning or evening, and avoid wetting the leaves or the flower heads, to prevent fungal diseases.
Fertilizer
Fertilize your sunflowers occasionally, but not excessively, to boost their growth and flowering. Sunflowers need a balanced fertilizer that contains nitrogen, phosphorus, and potassium, such as a 10-10-10 or a 20-20-20 formula. You can apply the fertilizer once or twice during the growing season, following the instructions on the label. You should avoid over-fertilizing your sunflowers, as this can cause them to grow too tall and weak, and make them prone to pests and diseases.
Pruning
Prune your sunflowers occasionally, but not excessively, to improve their shape and health. Sunflowers do not need much pruning, as they are naturally self-pruning and self-cleaning. However, you can prune them to remove any dead, damaged, or diseased leaves, stems, or flowers, to prevent infection and improve air circulation. You can also prune them to control their height and spread, by pinching or cutting off the tips of the main stem or the side branches.
You should use clean and sharp scissors or pruners to prune your sunflowers and do it in the morning or evening when the plants are less stressed.
When to Harvest Sunflower Seeds?
The first step to harvesting sunflower seeds is to know when they are ready. Sunflowers typically bloom in the summer and their seeds mature in late summer or early fall. You can tell when your sunflowers are ready to harvest by looking at their appearance and feel. Here are some signs that your sunflowers are ready to harvest:
Petals have fallen off or turned brown.
The back of the flower head has turned yellow or brown.
Seeds have developed black and white stripes.
The seeds are plump and firm to the touch.
If you are not sure if your sunflowers are ready to harvest, you can do a simple test by rubbing your thumb over the seeds. If they come off easily, they are ready to harvest. If they are still attached to the flower head, they need more time to ripen.
How to Harvest Sunflower Seeds?
Once you have determined that your sunflowers are ready to harvest, you can proceed to the next step. Harvesting sunflower seeds is a simple process that involves cutting, drying, and storing the seeds. Here is how to do it:
Cut the flower heads from the stems using a sharp knife or scissors. Leave about 12 inches of stem attached to the flower head for easier handling.
Place the flower heads in a dry and well-ventilated area, such as a garage, shed, or porch. You can hang them upside down or lay them flat on a screen or rack. Make sure they are not touching each other to prevent mold and rot.
Let the flower heads dry for about two weeks or until the seeds are completely dry and hard. You can check the dryness by biting or cracking a seed. If it is crunchy and not moist, it is dry enough.
Remove the seeds from the flower heads by rubbing them gently with your hands or a soft brush. You can also use a fork or a spoon to scrape them off. Discard any debris, such as petals, leaves, or insects.
Store the seeds in an airtight container, such as a glass jar, a plastic bag, or a metal tin. Label the container with the date and the variety of sunflower. Keep the container in a cool and dark place, such as a pantry, a cupboard, or a basement.
How to Enjoy Sunflower Seeds?
Now that you have harvested your sunflower seeds, you can enjoy them in various ways. You can eat them raw or roasted, salted or unsalted, shelled or unshelled. You can also use them in salads, soups, breads, muffins, granola, trail mix, pesto, butter, and more.
Sunflower seeds are rich in protein, fiber, healthy fats, vitamins, minerals, and antioxidants. They can help manage high cholesterol, blood pressure, and inflammation and boost your immune system, brain function, and mood. Here are some tips and tricks to enjoy your sunflower seeds:
Roast
To roast your sunflower seeds, spread them in a single layer on a baking sheet and bake them in a preheated oven at 300°F for about 15 to 20 minutes, stirring occasionally, until golden and crisp. You can season them with salt, pepper, garlic, onion, paprika, cumin, or any other spices you like.
Shell
To shell your sunflower seeds, you can use your teeth, your fingers, or a nutcracker. You can also soak them in water for a few hours to make them easier to shell. To remove the shells, you can blow them away with a fan, a hair dryer, or your mouth, or you can shake them in a colander or a sieve.
Sunflower Seed Butter
To make sunflower seed butter, you need to blend the shelled and roasted sunflower seeds in a blender until it turns smooth and creamy. You can add a little oil, honey, salt, or vanilla to enhance the flavor and texture. You can use sunflower seed butter as a spread for toast, crackers, or fruit, or as a dip for pretzels, celery, or carrots.
Pesto
To make sunflower seed pesto, blend roasted and shelled sunflower seeds with fresh basil, garlic, olive oil, lemon juice, salt, and pepper in a food processor or a blender until smooth and thick. You can use sunflower seed pesto as a sauce for pasta, pizza, or sandwiches, or as a dressing for salads or roasted vegetables.
Wrapping It Up!
Harvesting sunflower seeds is a fun and easy activity that you can do with your whole family. It is also a great way to enjoy the beauty and bounty of nature, as well as the health benefits of sunflower seeds. By following the steps and tips in this article, you know how to harvest sunflower seeds in a few simple steps, as well as enjoy them in various ways. I hope you found this article helpful and informative.
If there are any other queries related to the same, please feel free to let me know. All that yo need to do is scroll down till you reach the bottom of the page. Then leave your comments and suggestions in the box below. And I will be ether to answer them all for you!
Learn More About:
Best Material for Garden Sheds: A Guide for Everyone
Asparagus 101: When, How, And How Often To Harvest?
Best Gardening Tips For Beginners: Adopting A Relaxing Hobby
Maintenance of home devices is one way to keep them for a long period of time and make them energy-efficient devices to decrease electrical bills. There are various ways to maintain the air condition unit and this, we are going to discuss today.
Things you should do to maintain properly the AC condition unit:
The evaporator
The foil insulation in front of air duct junction should be removed first. If it is worn, replace it immediately. Then, the access plate should be cleaned as well. It is located behind the insulation and anchored with a few screws. Remove the screws and plates
Professional contractors who offer AC repair will recommend you to use a utility brush when cleaning the underside of the evaporator. Now, if the back area is unreachable, you just slide the evaporator a little bit.
Clean the tray now from the growth of fungus by pouring a tablespoon of chlorine bleach inside the tray. You can determine if there's a clog on your tray, there's water in it. Use the heavy wire in removing the clog.
Now, attach again the plate and tape the insulation back to the original place.
Switch on the AC unit and check for any air leakage. If there's any, tape them with duct tape.
Maintain the Condenser
According to the professional technicians of HVAC companies, the condenser is always collecting dirt, dust and other debris from the outside environment. The fan inside the unit helps to circulate the air over the coil.
Any dirt, dust, debris like grass or vines should be removed from the condenser. This debris can affect the airflow.
Use a coil cleaner when cleaning the condenser. There is an instruction on the manual on how are you going to clean it. Flush some water on coil cleaner and let it dry.
Clean the fins using a brush. Remove the outer grill so you can reach the fins. Some of the professional contractors said that using the water hose to clean the fins may cause the dirt to clump then turning into mud. A fin comb can be used to get into the spaces of fins to clean it.
Inspecting the concrete pad is essential too. Make sure that the concrete pad is settled properly.
Use condenser cover for your unit to prevent ice damage or leaf blockage during winter months. A heavy plastic sheet with the sturdy cord can also secure your unit.
The maintenance of thermostat unit
Remove the grill and the control panel. Then, you must remove the thermostat carefully.
Test the thermostat using the VOM set into RX1 scale. You should attach the probes to the terminals then switch on the temperature controls to the coolest setting. Licensed HVAC technicians said that if the result is zero, it is functional then. But if the result is above zero, replace it right away.
Filter
The air conditioning filter must be changed once a month according to professional air condition technicians. But if the weather is extreme, change the filter twice a month.
Now, you don't need to worry about your AC unit, these steps and tips shared by Wincrest will totally help you to do-it-yourself the AC cleaning and maintenance.
Read More:
Basic Idea On Power Tools For Home Improvement
Additional Ways To Keep Your Home Warm
Installing A Kitchen Tile Splashback – The Basics
Using Feng Shui In Your Bathroom Design
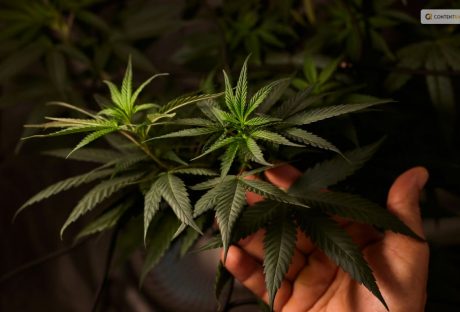
If there is one thing that most people try to know after searching for the legalities of growing weed, it is about “how to harvest weed?”
If this is something that you are searching for, I have you covered!
You see, weed, or marijuana, is a controversial plant to talk about. You might want to grow it for medicinal and recreational purposes. But the “What if people...” thoughts might put you off! This is because harvesting or growing weed is not like harvesting potatoes. There are several other things associated with the same. So, having someone like Stoned Genie can always come in handy!
But don’t you worry, my friend! If you are trying to search for the best ways to harvest weed, both indoors and outdoors, you need to look no further! Keep on reading this blog till the end to learn more...
Is Growing Marijuana Legal?
Marijuana, also known as cannabis, weed, pot, or ganja, is a plant that contains several psychoactive compounds. It can alter one's mood, cognition, and perception. Marijuana has been used for several reasons and purposes for thousands of years, ranging from medicinal to spiritual.
But its legal status has been a matter of debate and controversy in many countries. So, is growing marijuana legal?
The answer depends on where you live, how much you grow, and what you use it for. In some countries, such as Canada, Uruguay, and South Africa, growing marijuana for personal use is legal or decriminalized as long as you follow certain rules and regulations.
In other countries, such as the United States, Australia, and the Netherlands, growing marijuana is legal or tolerated in some states or regions but illegal or restricted in others. In many countries, such as China, India, and Saudi Arabia, growing marijuana is illegal and punishable by harsh penalties, regardless of the amount or purpose.
Various factors, such as the potential benefits and harms of marijuana use, the social and cultural attitudes towards marijuana, the economic and political interests of different groups, and the international treaties and agreements on drug control influence the legal status of marijuana.
The legal status of growing marijuana is also subject to change as new laws and policies are enacted or revised and further research and evidence are presented.
Growing marijuana is a complex and controversial issue that has no simple or universal answer. The best way to find out if growing marijuana is legal in your area is to consult the relevant authorities and sources, and to be aware of the risks and consequences of your actions. Remember, just because something is legal, does not mean it is safe, ethical, or advisable.
When Should You Plant Weed?
Spring is here, and you know what that means: it's time to get your marijuana seeds ready for planting outdoors.
This is the most important crop of the year because you can get the biggest harvest of all.
Some old-timers like to plant their seeds on the first full moon of March. They say this way, the seeds get some light at night and don't grow too tall too fast.
But sometimes, it's still too chilly in March, and not everywhere has the same weather. If you live in a colder place, your plants will grow slower and suffer from the cold and the wind. They will be weaker and more likely to get bugs and diseases
So, what should you do in this case?
Well, you can wait a month or two longer. A seed that sprouts in a nice climate from April onwards will grow bigger and better than one that sprouts in March in the same place
But growing plants for so long is not easy.
You must watch out for all kinds of things: bugs, diseases, nutrients, transplanting, pruning, training... It's a six-month-long job requiring constant attention
Things to Keep in Mind
If you want a good quality and quantity of weed there are several things that you need to keep in mind. Want to know what they might be? I have you covered! Here are some of the things that you'll need:
Fertilizers for growth and flowering: You can choose whatever fertilizers you like, organic or chemical. Organic ones, like humus, guano, and flower boosters, will give you a tasty and aromatic weed, but less of it. Chemical ones, like those from specific brands, will give you more buds, but less flavor.
Insecticides for insects like whiteflies, mites, or thrips: It's better to use them as a prevention, so you don't get any nasty surprises.
An anti-fungal product that works well against powdery mildew: Propolix or other chemical products are good, but you have to use them from the beginning.
Bacillus Thuringiensis: This is for caterpillars and other worms. Use it as soon as the flowers start to show, which is when these critters start to show up. Around May/June.
Stakes or wires to support the branches during the flowering stage.
Soil and Other Conditions to Grow Weed or Marijuana
It's obvious that this is the most common grow medium, probably because it's easy to find and has some nutrients already in it. Weed grown in soil is also more delicious and fragrant. And, no, it's not hard to grow in soil – just plant your (favorite) strain in the soil, and you're good to go.
That's it. Of course, there are different kinds of soil, and some are better than others. High-quality potting soil will make your life easier and faster. You might also want to add some extra nutrients to make your weed grow better.
Or you can make your own super soil. If you decide to buy soil, we suggest you go for the best brands, or at least those with a good soil mix. They should have things like earthworm castings, alfalfa meal, humic acid, etc.
Can You Grow Weed Without Soil?
Want to try something different? Go soilless. You'll see some quicker growth (and bigger harvests). And, conveniently, growing weed in soilless mediums is pretty similar to growing it in soil. The only difference is that you'll have to give the nutrients yourself because soilless mediums don't have any. Some examples of soilless mediums are coco coir, vermiculite, perlite, etc.
What About Hydroponic Grows? Is it Complicated?
No, hydroponic growth is not complicated. It's as easy as picking your setup (hydroponic system), getting your nutrients, and sprouting your seeds. And you'll get some amazing benefits: super-fast growth, huge yields, and super-strong weed.
Sounds good, right? Don't believe everything you hear because some information can mess up your growth. But with the right setup and care, you can be sure of a plentiful harvest.
What It Needs to Survive and Thrive: How to Grow Weed Plant?
If you want to grow the best weed possible, you need to know your plant well. Here are some of the main things that a weed plant needs to thrive, and how it works.
Light
Light is the fuel that drives photosynthesis and growth in a weed plant. The fan leaves are like solar panels that absorb light. The more light you give your plants, the more buds they will produce.
But be careful not to give them too much light. If you grow indoors, keep your lights at a safe distance from your plants, or you might burn them and ruin your nugs. And if your plants get too hot, they will dry out faster and need more water and attention.
Weed plants usually need at least six hours of sunlight a day when they grow outdoors. This is called “full sun”. When they grow indoors, they usually get between 12 and 18 hours of artificial light a day, depending on their stage of growth.
Weed is a photoperiod plant, which means that the amount of light it gets every day affects when it flowers and makes buds. Outdoors, this happens when the days get shorter in the fall. Indoors, you can make this happen by changing the light cycle from 18 to 12 hours a day.
Water
Water is essential for all plants, including weed. Water provides hydrogen for photosynthesis, and also carries nutrients from the soil to the plant through the roots, and throughout the whole plant.
Water also helps the plant stay firm and flexible, by creating pressure on the cell walls. This allows the plant to bend with the wind or reach for more light.
Plants also lose water through their leaves, like humans sweat, to cool down. This is called transpiration, and you can see it as droplets on the leaf tips.
This may sound obvious, but you only need to water the soil or the medium where your weed plant grows, not the leaves or the plant itself. We suggest that you water a lot, but not too often, rather than a little, but more frequently. This way, the roots can dry out a bit and get more oxygen from the soil.
Nutrients
A marijuana plant needs several nutrients to grow and flower. The main nutrients it needs are:
Nitrogen: Nitrogen helps a weed plant grow during the vegetative phase, when it makes more mass, stems, branches, and leaves. It is part of chlorophyll, the green pigment that helps the plant use light for photosynthesis.
Phosphorus: Phosphorus is important for storing and using energy, as well as for root growth and bud development. It helps the plant take up nutrients and build its structure.
Potassium: Potassium helps with many of the plant’s metabolic activities, such as respiration, transpiration, and enzyme activation. It also helps the plant fight off diseases and pests.
Calcium: Calcium is a minor nutrient, but it still plays a role in keeping the plant’s cell walls intact, and helping the plant absorb other nutrients.
Magnesium: Magnesium is part of chlorophyll, and helps the plant make glucose from photosynthesis. Without it, the plant can’t turn light into energy.
CO2
Plants breathe in CO2 through tiny holes in their leaves called stomata. During photosynthesis, plants turn CO2 into glucose, which they use to grow and flower.
Some indoor growers use a “CO2 burner”, which is a device that adds a little bit of CO2 to the air, to make the plants grow faster and bigger. But this is usually too much for home growers.
Wind/airflow
Wind or airflow is good for your plants, because it brings fresh air and CO2, which they need to grow.
Airflow also prevents mold and diseases, by removing moisture from the inside of the plant, so it doesn’t get too wet. You can also use a technique called scragging, which spreads out the branches and lets more air in.
Wind or airflow also makes your plant stronger and healthier, by making its stalks and branches thicker and sturdier. When a plant bends with the wind, it produces a hormone called auxin, which stimulates growth.
What to Keep in Mind While Harvesting Weed?
You probably know that different strains of weed need different amounts of time and sun to grow well. Sativas, which come from places near the equator, like a long and sunny summer to get fully ripe.
Indicas, which come from colder and harsher places, are usually faster to finish. But there are exceptions, of course. Some indicas are slow and some sativas are quick.
The best time of day to cut down your outdoor plants is in the morning, before the sun gets too strong. You don't want them to be wet from dew, but you also don't want them to be exposed to too much sunlight, which can ruin their flavor.
You can also harvest at night when it's cooler, but the morning is better because the plants are fresher and haven't been under the sun all day.
1. Watch the weather
As your buds get bigger and heavier and the season changes from summer to fall, the weather can change too. Depending on where you live, you might get some cold snaps or rainstorms.
These are not the end of the world, but you do need to pay attention to the weather and maybe decide on the spot when to harvest your plants, balancing their ripeness with the risk of losing them.
2. Harvesting in Lower Temperatures
According to sources, most weed plants can handle a light freeze—28-32°F for up to three hours—without any problem. But a hard freeze, anything lower or longer, can be a disaster.
Frost can make ice crystals form in the plant cells, hurting them. The leaves will look droopy and then turn dark and crunchy. The worse the frost, the more damage to the plant.
Remember that plants in pots are more sensitive to temperature changes than plants in the ground, so they are more likely to get frost damage.
3. Rainy Harvests
Rain is not a big deal by itself, but it depends on how long and how hard it rains. If it's going to stop soon and dry up fast, you can leave your almost ready plants outside. But if the rain is going to stay, mold is waiting—better to harvest sooner than later.
Covering your plants can help, but the air will still be humid. You can use some tall stakes and a tarp to cover them, but make sure to take them off when the rain or cold is over. In this way, the plants can warm up and breathe.
When to Harvest Weed Plant?
The type of plant growing determines when to harvest cannabis. Sativa, hybrid, and indica are the three primary kinds of cannabis seeds. Are you curious about the best time to harvest marijuana?
Let me break it down for you!
Sativa strain plants typically take longer to mature and give off a stronger cerebral height. However, Indica plants yield larger blooms and a more sedative, paralyzing high.
When an Indica and a Sativa are crossed, hybrids that enable flowers to have both traits are created. While Sativa cultivars blossom in 10 to 16 weeks (about three and a half months), Indica varieties flower in 8 to 10 weeks (about two and a half months) on average.
The cannabis plant can be found in hybrid form halfway between the two main species. It is important to understand that flowering times might vary based on environmental factors like temperature and duration of day.
Thus, the questions of when and how to harvest cannabis remain unanswered. Knowing what you want to achieve with your cannabis plants can help you decide when to harvest them.
Let's say you are growing cannabis for therapeutic purposes. Is there a unique method for harvesting cannabis in this case? If so, it is imperative to harvest the plant at the height of its cannabinoid content.
But if you are cultivating cannabis seeds for fun purposes, then it is best to harvest marijuana at its peak maturity.
How to Harvest Weed?
Once you've decided when to harvest your cannabis, it's critical to understand how to harvest cannabis plants correctly. It's simple to harvest cannabis; you just need to cut the stem off at the root. But it's best not to pull the branch out of the ground since this could damage it and reduce its yield.
It is crucial to properly dry the cannabis after harvesting it before stocking it. Hanging it upside down in a room with lots of ventilation and little light exposure is the best method to accomplish this, like a wardrobe. In order to efficiently dry cannabis, proper ventilation is necessary because it inhibits the growth of mold.
Before you proceed to store it, ensure that you let your cannabis rest for some time. This can range anywhere from three to seven days. This is a great way to ensure that the leaves are dried and ready for you to store.
Wrapping It Up!
In case you were searching for the best ways on how to harvest weed, I hope that this blog has been of help to you. If there are any other queries related to the same, please feel free to let me know. All that you need to do is scroll down till you reach the bottom of the page. Then leave your suggestions in the box below. And I will be there to answer them all for you!
More Resources:
Choosing a Medical Marijuana Dispensary
Marijuana Addiction Treatment: 5 Steps to Avoid Relapse
What Are Tarpenes? How Do They Work? – Cannabis Guide
Medical Marijuana Can Take New Dimensions in the Treatment of Pets