Installation of Kitchen Cabinets: Best Way to Give Your Home

inner-img

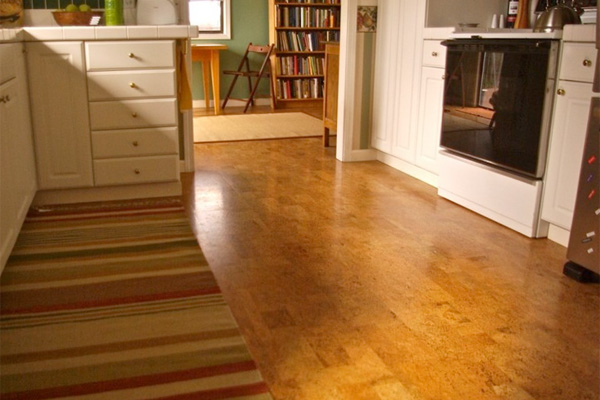
Are you contemplating on redesigning your old kitchen? Your kitchen is the heart of your home. You should be paying it the proper attention it deserves. Redoing your kitchen will make your life really easy and comfortable. While proceeding towards the project, make a proper plan beforehand. You can find numerous blueprints of designs on the internet. If you are a resident of Minneapolis, USA, certain leading furniture manufacturer offer you free computerized technical drawing even. For an efficient as well as elegant kitchenette, installation of a modern range of cabinets would be a great option for you.

home-1

Your Elegant Kitchen:

The ground incentive you have, to install cabinets in your kitchen is their incomparable agility. These cupboards are available in various style and material to realize your need. Before choosing a company for picking your outfits from, make sure it’s trustworthy enough and the products they provide are high in standard. In modern times, the cookhousehas advanced its position from being merely a place of cooking to being the heart of a household, a place where all the family members gather and have important discussions. And your kitchen cabinets aren’t only storage, but to the elegance of your kitchen, they contribute the most. So, make sure to choose them wisely. Transform the look of your kitchenette; paint a new color, install a set of matching curtains and give it the final touch of perfection by placing an exquisite array of cabinets.

Home-2

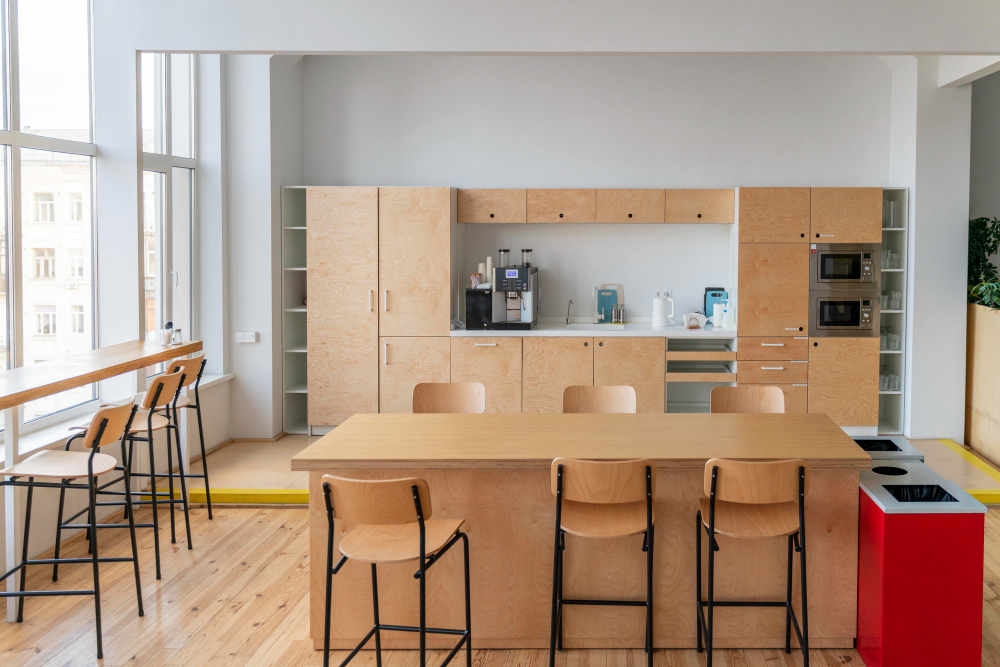
 The Exotic Wooden Outfits:

When it comes to furnishing, no other material on earth ever can succeed in competing with wood. Wood is always the smartest and most prestigious outfit to choose for the glory of your house. They are available in both traditional and modern designs. You can make a choice among Café Vienna, Cherry Shaker, Gazed Maple, Northern Maple, Toffee or Walnut. They come in soft close drawers and doors and all with warranty. These products are crafted out of selected hardwood and varnishes that enable them to withstand the assay of time. The door of the cabinets makes a lot of difference in the beauty of the room so you need to be extremely sagacious while choosing a door design for your cupboards. Wooden cabinetry gives you the most elegant natural look. They are strong and have great resistance capacity. They are easy to clean, eco-friendly, and flexible. They provide you the most extraordinary décor ever. Hence, doesn’t it occur to you that purchasing a range of wooden cabinetry for your kitchen would be the worthiest investment you can ever make?

Home-3

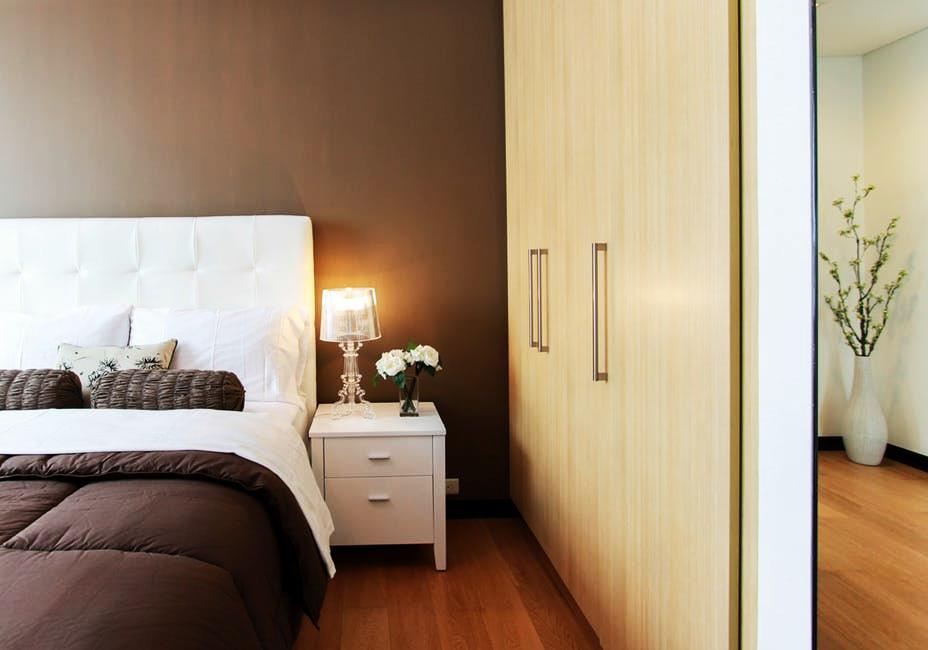
White is Always the Perfect Choice:

White is one of the most adaptable colors to be chosen for decoration. Itis a color that never gets obsolete. It stands for purity and calmness. Consider collecting a range of white kitchen cabinets for giving your kitchenette a perfect air. You can choose an attractive range of Mystic white cabinets for the purpose. These gorgeous wooden outfits are a flawless blend of purity and composure, promising durability. They have been crafted out of standard features and under the minute inspection of every detail. White helps you keeping your home ultraclean, for even if a single speck of dust is there, you tend to wipe it off immediately. Besides, the modern laminate white veneer itself has the feature of resisting dirt and smears. So, you won’t need to worry about their appearing grubby. White cabinetry illuminates light making your cookery appear brighter and more spacious than it really is. This color matches with almost any color you use for your walls, or any style or material of the cabinet.

Everybody needs and likes to change. So does your cookhouse, for change is the only thing constant. Bringing some changes to the ambiance of our homes makes lives more enjoyable, more comfortable. So, undertaking a kitchen renovation project is sure to bring flavors and colors to your family.

Read More:

  1. Mirror Decorating Ideas To Style Your Bathroom
  2. 3 Tips On How To Plan The Best Cheap And Fabulous DIY Bedroom Makeover
  3. Interior Designing: A Great Art To Make Your Home Look Beautiful
  4. Experts Recommend: Top Interior Design Trends For 2017

Lucia Patterson is the woman behind TheLegalGuides, a blog solely focused on legal guides, tips, and advice. Lucia loves essay writing and blogs at EssayWritingGuides from her college days.

View all posts

Leave a Reply

Your email address will not be published. Required fields are marked *

Related

Mint

Planting & Harvesting Mint

Mint is a wonderful plant that practically cultivates itself. So fast is its growth that it can threaten to spread across and take over your entire yard or garden. One way to battle this is to confine its growth by planting it in a pot or a separate bed. However, once you have this plant, you will be glad, because it has properties that make it fruity and a great addition to tea and foods. As can be seen here, it is also quite useful in health remedies that can aid digestion and relieve headaches. We know you already feel enthralled by this herb and would like to know more. So, why don’t you read on and discover more amazing things about mint…What Mint is All AboutMint is an herb that is perennial and has a very wonderful fragrance. Its leaves are toothed and may have tiny pink, white, or purple flowers. Mint has so many variants from crinkled or smooth, to fuzzy or shiny. However, one thing is constant despite what kind of variant it is; all mints have that wonderful fragrance. Hence, whenever you pick up any variant of this great herb and roll it in your fingers, you would get the same smell that will make you either think of sweet teas, candy, or mint juleps. Aside from being a wonderful kitchen companion, this herb is also used as ground covers, garden accents, herbal medicines, and air fresheners. Mints are functional as well as beautiful and can grow either in shades or under the sun.  However, as we already said, this plant is a vigorous spreader; therefore, unless you want to have too much than you need, you have to be very deliberate about planting it.UsesWe have already stated several things that mints can be used for, but there are still so many more benefits of this wonderful herb. Below are some of these benefits:Can be used to make mint tea. To do this, simply put the leaves in a cup of hot water and then leave it to sit for some minutes. Make tasty ice cubes with it by freezing the leaves with raspberries and cranberries. Add it to a salad dressing, marinades, or fruit salad.  Use it to relieve headaches by applying It's oil to the temples.  It can also be used to relieve anxiety and stress.Yes, mints have many other health benefits, but though not a practical use, it is also used as a virtue symbol.Planting MintsIf you decide to plant mints in your garden or yard, then below are some important things that you have to know:They flourish in light earth which has good drainage. Their original habitats are stream banks, so, the site you plant them should imitate stream bank soils. That is to say, ensure the soil you plant your mints is moist but also well-drained. Variegated mints should not be planted in direct sun as they require a bit of shade. Mints typically grow to become one to two feet tall. If you plant them in a container or pot, then you would need to topdress them with organic or compost fertilizer once in a few months. If you plant mints in your garden, ensure to plant them next to tomatoes or cabbages, this will help contain their spread and prevent them from stealing your crops’ nutrients.Care Mints do not require that much care; however, you should consider the following points when caring for them:If planted outdoor, use light mulch. You can visit https://www.thespruce.com/what-is-mulch-1402413 to read up more on mulch. The light mulch will ensure the soil remains moist and also help the leaves to stay clean. If planted indoors, then ensure you water them often to help the soil stay evenly moist. Mints should be picked and pruned regularly. Like we have stated many times already, these guys are fast spreaders, therefore, you would need a lot of pruning to stop them from taking over everything. This should not worry you since their roots are shallow making it quite easy to drag them out of the soil.The Propagating You do not need to do a lot to propagate mint. The perfect way to go about this is to find the plant which you like and then cut out of it. Ensure the cutting is at least 6 inches and has ample roots attached. Then plant them in the soil horizontally. You can always get a cutting from a gardening friend, so this is nothing to worry about.Harvesting and Storing To learn how to harvest mint is quite easy, it typically does not involve any special skill. You may either pick the leaves individually, or you may use shears to prune the plant and then take off the leaves from the stem you had cut off. Despite the harvesting process being relatively easy, you need to remember a few things when you harvest your mints:Frequent harvesting will keep the plant at its best. The younger leaves have a better flavor than the old ones. You can pluck the leaves whenever you need mints. If you need dry mints, then pluck the leaves before flowering and then save them in an airtight container.You can also store fresh mints that you do not immediately have use for. To do this, put water in a glass and then put the stems inside the water. The mint will stay fresh for 3 to 7 days this way. You may equally put the mints inside a rubber bag and then store them in your refrigerator. This should keep it fresh for at least a week.Conclusion Mint is an herb that would make a very great addition to your garden or yard. But, without proper knowledge about the plant, everything may spiral out of control. Therefore, you must have basic knowledge about planting, caring for, and harvesting this plant before you farm it.  Read Also:How to Maintain a Bright and Beautiful Garden During Winter How to Choose the Right Containers for Your Container Garden Grow these flowering plants in your home garden How To Grow Tomatoes From Seed 

READ MOREDetails
your lawn

How To Prepare Your Lawn For Fall

With fall's arrival, you might think your yard work just shifts over to raking leaves. The sun isn't shining as hard, and your lawn isn't getting dry as quickly or growing as fast as it was in the summer.But if you want a healthy lawn to greet you when the snow melts and the ice thaws, there are plenty of things you can do now to give your yard the care it needs to survive cooler weather ahead. 5 Tips To Prepare Your Lawn For Fall Season You are investing your whole year to maintain the look of your lawn. But after the fall, you start to face more challenges to bringing that look again. Hence proper care and the right strategies are making your work simple.Here are the five tips for preparing your lawn for the fall season. 1. Reseed Late In The Growing Season If your lawn looks thin and brown or has dead patches, the time to reseed is in the late summer/early fall. It always is better to cover all the empty patchy areas of your lawn. Hence after the fall, you will not get enough time to clever up these patchy areas.Whether you're seeding a small patch or a whole yard, the cooler, damper weather of this time of year will promote successful growth, eliminate bare patches, and deter the growth of weeds.Consider Reading: 5 Essential Tips to Designing a Beautiful Front Yard Garden 2. Water And FertilizeDespite less sun and breezier, cooler days, your lawn still needs to be watered. Watering in the fall helps your lawn recover from summer and gain strength for the winter ahead, and while you can reduce your lawn watering, you shouldn't stop watering completely until the ground freezes.To make it easier, many Toronto homeowners install sprinkler systems that automatically water whenever they choose. Having lawn sprinklers in Toronto set according to your specific needs is an easy way to keep your grass watered and ensure your lawn is never too wet or dry. 3. Provide More Nutritions Fertilizing in the fall can also help provide energy and nutrients for the roots of your lawn grass. Fertilizing should be done about three weeks before the last mowing of the season. Roots are the most important part of the plant. After mowing, you can see the roots and provide more nutrition to boost plant growth.If you do fertilize, keep in mind that watering is a must for the fertilizer to work. The water helps the fertilizer dissolve and soak into the ground where it's needed. 4. Rake Your Leaves Make sure you're raking and removing all of those dead leaves that fall before the snow flies. If you don't, those pretty leaves will turn into a thick layer of wet leaves that can smother your grass and deprive it of sunlight, which will get in the way of the healthy growth you want.Plus, it's much easier to deal with dry leaves of your lawn during fall than wet, soggy leaves in the spring. Not only before the fall but every time raking, your garden’s dry leaves also look cleaner. 5. Cut The Grass ShortWith the cooler temperatures setting in, growth will begin to slow down, and your lawn will be preparing for dormancy throughout the winter. It's essential to continue the mowing process of your lawn during this time.You will want to cut your grassv shorter than usual during this time of year. Gradually lower the length of the mower until you reach the size of 1-1/2 or 2-inches. This will reduce the chances of snow mold forming in colder climates, and tall grass blades fall flat and smother the new grass next spring. Conclusion: Taking time to prepare your lawn for the harsh elements of winter can reduce the amount of time and effort you have to put into nurturing your lawn back to health come springtime. After strictly following these five tips, you can quickly minimize the challenges for the fall session and enjoy the green view again after fall. And in addition, these five tips are also boosting up the fertility rate of your lawn. Read Also:The Top Four Reasons Why You Could Certainly Benefit from a Garden Shed How to Maintain Your Garden Railings? The Best Riding Lawnmowers: These Lawnmowers are for You

READ MOREDetails
Portable Generators

Portable Generators: 5 Ways To Keep Them Clean and Running

Before purchasing your portable generator, there are two essential things you should always consider; it’s versatility and handiness. This will significantly help in cases of breakdown. How? Once you’re sure of your portable generator power and versatility, then it becomes more comfortable for you to identify it’s spare parts availability.If you want your portable generator to last longer, then you’ll have to follow the number one rule of owning a portable generator strictly. Bonus: Maintenance. Proper maintenance will ensure your portable generator works efficiently.Outlined below are five tips for maintaining your portable generator for efficiency. 1. Fresh Oil Helps Changing the oil of your machine regularly replacing it with a fresh one will maintain your engine for efficacy. If your generator is new, then it needs to be synchronised exactly after 30 hours of use. This sounds demanding and tiresome but, you’re never going to regret it.Don’t worry because as time goes by, changing the oil of your small engine will only be done after every 100 hours of use, or even after every season.It is always important to have a stock of oil or gas set aside in case you run out of power. The fact is that you’ll never know when you’re going to have extended power outages. This is to prevent your engine from corrosion. 2. Plugs & Filters Ensure that your generator has a way of igniting gas into the engine cylinders otherwise, your generator will have no use.However, maintaining your generator will have you change your plug and air filter occasionally. You can do this after using it for 200 hours or maybe once at the start of each season.Having done that successfully, your generator will have a proper fuel-air mixture that will help your generator work efficiently thus, an extension of lifespan. 3. Store Your Generator on an Empty Tank This implies that if you ’re planning to store your generator for longer, maybe a month or so. But, before you do that, ensure that you drain the fuel from the tank.However, there are necessary steps you’ll need to follow before emptying your generator’s fuel tank. First, you’ll have to add a quality gas stabilizer to the fuel tank and allow it to run for about 15 minutes. Once you’ve done that, allow your engine to cool down, then start your engine and run it until it runs out of gas and automatically shuts down.On the other hand, you may use a siphon that’s non-conductive to remove excess gas in the tank. Remember, the siphon should be non-conductive to prevent the fuel tank from static electricity. 4. Charge the Battery You can charge your generator only if it has a battery because not all of the generators use a battery. Some of the generators are electric starts feature so; they will need to charge before storing them. You can as well plug your generator’s battery in a trickle charger for freshness and availability. 5. Train in the Off-Season As you continue to store your generator, you are advised to always start it after every month allowing it to run for some few minutes.This will help keep your generator’s features lubricated because oil will be circulating through the engine.Wrap UpHad problems before maintaining your portable generator? Worry not because the above tips have provided solutions to your questions.Read More:7 Specifications You Should Look for When Buying a Home Generator Generator Secrets that manufacturer won’t tell you Advantages of Using a Portable Solar Generator

READ MOREDetails