7 Expert Hacks for Downsizing to a Smaller Apartment

Published on: 21 August 2019 Last Updated on: 10 August 2020
Downsizing

So you want to downsize to a smaller apartment? 

If you’re banging your head against the wall trying to figure out how to make a move go smoothly, you’re not alone. We’ve all been guilty of having too much stuff!

Give yourself a break and start thinking of solutions. Stay inspired by focusing on the many benefits of downsizing! 

Moving into a smaller apartment gives you the chance to start over and get rid of things you no longer need. It can also help you to get organized and keep only the essentials. 

Even better, you won’t have to clean nearly as much space and can live as a minimalist! That in itself has some serious perks. Your stuff won’t own you and you’ll have more time to enjoy life.

Do you see where we’re going with this? 

Get ready, because, in this article, we offer seven expert hacks to help make the process of moving into a smaller apartment easier. 

Here are 7 Expert Hacks for Downsizing to a Smaller Apartment:

1. Analyze the space you’ll have

It’s essential to know the total space of your new apartment before you start the downsizing process. 

Take a look at your new floor plan and figure out how much room in feet and inches are on each wall. That way you’ll know what will fit in your apartment.

If the measurements aren’t on the floor plan, ask the leasing office to provide you with the details. 

But, the floor plan or provided measurements won’t tell you everything. You need to measure the extra spaces as well: 

  • Closets
  • Space under the bed (more on this later)
  • Bathroom storage and cabinets
  • Garage storage (if your apartment includes a separate garage)
  • Kitchen storage and cabinets
  • Other spaces where you might add shelving (like the top of the fridge or in a window)

When you’re done with that, measure your current furniture and decide which pieces will fit into your place and which ones you won’t need. 

2. Determine your actual needs 

An excellent way to figure out what your needs are is by asking yourself if everything was gone, what would you replace? 

Jot down some necessary items you can’t live without such as a bed, sofa, coffeemaker, dog bed — whatever is important to you. 

You should also ask yourself the following questions: 

  • What sentimental items will I miss the most? 
  • Does this item serve a purpose? 
  • Do I already have something that serves the same purpose? 
  • Can I use this item to accomplish more than one task? 
  • Is this object in good shape, and will it last for a while longer?

This is the point where you’ll be making some headway on knowing what you’re keeping and what you can live without. 

If ever in doubt of whether you should keep or donate something, go back to asking yourself these questions. 

3. Set some tangible goals 

When it’s getting closer to moving time, you need to come up with a game plan. 

Best get started with setting some goals before time escapes you! 

We’re assuming you want to declutter and possibly redecorate your new place, and if that’s the case, it’s time to set some tangible goals. 

Ask yourself these questions:

(Yes, we realize we’re telling you to do this yet again.)

  • What do I hope to gain by adopting a minimalist lifestyle? 
  • Do I want to keep the furniture I have or get new furniture (#1 and #4 will help with this)
  • How do I plan to declutter? 
  • How will I maximize my space? (Keep reading because we cover this in #4.)
  • What will I do if I can’t decide to part with some items? 
  • Should I pay for storage elsewhere to store extra belongings? 

Need some help answering those kinds of questions? 

Here are some goals you could have:

  • I want a clutter-free apartment that will give me peace. 
  • Not fixating on my possessions will help me feel free. 
  • I’d like to have a clean slate and keep my belongings organized moving forward. 
  • Being minimalistic will help me put emphasis on the most important emotional and physical items in my life. 

Write down a few goals that inspire you so that when you feel like giving up, you’ll be able to remind yourself of your intentions.

4. Be a master organizer by maximizing space 

Since you know how much space is in your apartment, as we recommended in #2, you should already have a plan in place as to where everything should go.

With the limited storage space in your new digs, it’ll help to store things vertically.

Vertically aligning hooks and shelves helps you take advantage of every square inch of space. 

You might want to use adhesive hooks at first because most are easy to adjust.

We’ll be getting into how to simplify your wardrobe next, but for now, keep in mind that multi-use furniture can solve a lot of storage problems. 

Keep reading because we’re about to reveal some killer ideas. 

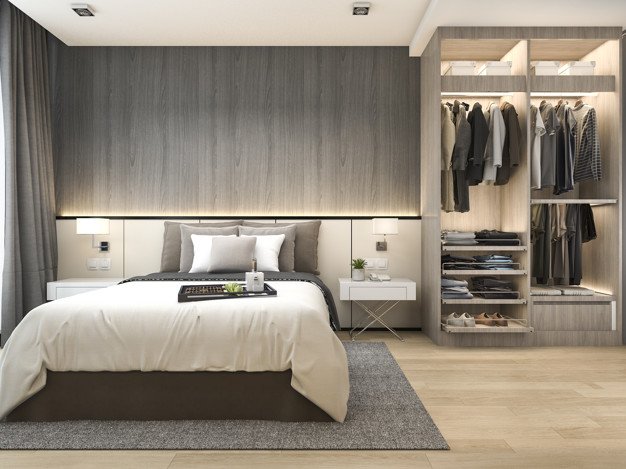
One idea is to maximize space by incorporating storage headboards. These are pieces of furniture such as bookshelves and a hutch that’ll fit over your bed. 

Incorporating these types of units will make it easier to store a variety of items from family treasures to books and jewelry. 

For example, incorporating a fitted unit in your closet can make it easier to organize. 

Beyond that, think of other ways you can make use of storage. Is there any room underneath the bed you’ll be moving into your fancy new apartment? 

If there isn’t and you need an upgrade, buy a bed that has drawers underneath. Trust us — those drawers will be your best friend when you need to store extra items of clothing such as blankets or sweatshirts. 

Keep your bed if you like it, and it just so happens that you may be able to squeeze in some bins underneath to use as storage. For example, milk crates work well when you want to store books, tee shirts, and keepsakes.

5. Simplify your wardrobe

wardrobe 

Seriously, how do you go about simplifying your wardrobe with you have a gazillion t-shirts? 

If you think your new closet is small, just think about the people who live in tiny homes. Now those are super tiny! 

Don’t worry; you can do this if they can! 

Here are some steps to follow that’ll make your wardrobe functional in no time at all. 

Step 1:  Get all of your clothing out (ALL of it!) and put it somewhere you can sort through it. Whether that’s on the floor or on your bed is entirely up to you. 

Step 2:  Next, divide those clothes into three different piles and decide to donate, keep, or store them. 

Step 3:  Ask yourself if the clothing fits you or if it’s still in wearable condition. If you haven’t worn jeans, for example, due to a weight gain or loss, donate or store those items. 

Don’t keep clothing that’s falling apart. That’s just a waste of precious closet space!

Step 4:  Are you done going through your clothing and separating them into three different piles? 

Okay good, you’re going to do it again. This time ask yourself if this clothing fits your personality and your current lifestyle. 

Step 5:  Mission complete! Well, almost. Organize the clothes you’re keeping, store what you plan to wear later (such as seasonal clothing), and drop off clothes you’re donating.

6. Sell or donate what you don’t want 

Now that you know how much space you have, and how to simplify your wardrobe, let’s dive into why it’s so essential to sell or donate belongings. It’s time to stop and figure out which items you can and can’t part with. 

As you know, whether you’re moving to a different city or relocating to a separate apartment at the same complex, moving takes a lot of work.

You should do everything in your power to simplify the moving process. 

Eager to make some money to help with moving expenses?

One way to do that is by selling belongings and furniture you no longer want.

Try Craigslist, eBay, garage sales, Facebook, consignment stores, and more.

Before you even start packing, you should sell, donate, or recycle stuff you can live without. This will eliminate packing everything up only to decide later that you didn’t need that item of clothing or five extra plates. 

If you have problems deciding whether you want to keep, sell, or donate an item, take a hard look at everything you own. 

Think about whether another person would find use out of that item.

If the item is useful, you can either donate it or sell it, depending on its value. 

Who knows, your trash may turn into someone else’s treasure. 

7. Digitize nonessential media

Next let’s dive into how you can digitize and save documents, pictures, videos, cassettes, videos, DVDs, and CDs. 

While it’s important to keep hard copies of documents such as your social security card and birth certificate, try to save and scan everything else. 

Transfer CDs and DVDs to digital files by using free computer programs such as Freemake Video Converter, Movavi, and WinX.

Scan documents to your computer or save them as PDF files. After you’re done scanning everything, use services like Google Drive, Dropbox, and Microsoft One Drive. 

Online storage sites are lifesavers when your goal is to digitize media. 

Think of all of the space you’ll free up in your new apartment by getting rid of boxes of videos, paper, and more by going paperless! 

It’ll take some time, but it’ll totally be worth it. And boom! Suddenly you’ll realize you’re there. 

So, do you think it’s time to move? Even though downsizing may seem daunting, it doesn’t have to be. Moving to a smaller apartment has its perks, such as decluttering your life and organizing your new place with fewer belongings. 

Simply put, downsizing to a smaller apartment means: 

  • Enjoying lower monthly expenses and living costs
  • Not having to clean nearly as much since your place is smaller
  • Living a minimalist lifestyle without meaningless belongings getting in your way 

Instead of sweating the small stuff, take the moving process step by step. Before you know it, you’ll be enjoying your new digs, relieved that you took the time to eliminate the clutter.

Carolina Creek is a great townhouse-style community located about a mile from Eastern Carolina University’s campus. The community consists of 2×3 and 3×3 apartments and contains a full amenity suite including a fitness center, pool, business center, and game room. The community is the best value in the Greenville NC student housing market.

Read Also:

Content Rally wrapped around an online publication where you can publish your own intellectuals. It is a publishing platform designed to make great stories by content creators. This is your era, your place to be online. So come forward share your views, thoughts and ideas via Content Rally.

View all posts

Leave a Reply

Your email address will not be published. Required fields are marked *

Related

Drywall

Elevate Your Home With Unique Ceiling Textures

Drywalls are those construction materials that are used to create walls and ceilings in your home. Not all that, but drywalls also come in handy if you want to create design features like eaves, arches, or any mind-blowing architectural requirements!!! Do you know the best part about drywalls? These are super easy to install, highly durable, and only require simple repairs when damaged. So, drywall is a flat component composed of calcium sulfate dihydrate, typically between thick sheets of backer paper, and facer, used to construct interior ceilings. Let’s talk about the ceiling textures and the drywall options you can choose for your home!!! The Ceiling Textures And Your Drywall Options Decorating your home can be a real challenge for many !!! Therefore, choosing the right drywall finish or texture can prove to be a hard nut to crack. And it’s very natural to get in a state of indecision if you are handpicking it for your new home or renovation project. There are so many options that it feels like you are “searching for a pearl in an ocean.” Making up your mind about whether or not to go texturing your ceiling can be a tough job. And even if you choose to texture your ceilings, there are chances you’ll be confused about which one to go for!!!! And remember, getting the drywall right is the first step of tiling projects?”. But No Need to Worry!! This article will guide you in choosing the perfect texture and drywall option for your ceilings to look more elegant than ever!! 1. Sheetrock Texture: Old Is Gold Sheetrock ceiling texture is a drywall ceiling texture that has been famous since 1917. The reason this drywall texture is so awesomely renowned is because of the artistic look that it gives to your ceiling And the best part is you don’t need to use any sort of spray paint in this case. You can achieve this texture by using your artistic hand technique and without using any special brushes. This texture is perfect for any room. There are no restrictions on the use of this ceiling texture. 2. Stipple Brush Texture: A Test Of Your Skill This texture is not as easy as it seems. You need skills to create this texture. To create this texture, you need a roller and slap brush. The fascinating fact about this texture is it can cover the bumps and holes on your ceiling. And if you have the skills, then this texture can surely make your ceiling look gorgeous than ever!! 3. Swirl Texture: Creativity Taken To A New Level To achieve this texture, you need either a roller or sprayer. You can also do this by using a technique called “the basic swirl” method. But one thing that you need to keep in mind is while creating this texture, you’ll need a lot of patience to get the best result. And the difficult part is you need to create the pattern before the mud dries. So, make sure to have a helping hand by your side. Overall, the texture can really give that awesome look on your ceilings if you do it in the right way!!! 4. Orange Peel Texture: A Color Of Choice The name suggests all the colors of orange skin, but sometimes it’s also called “an eggshell” ceiling texture. If you really love this color, then this can be on the top of your favorite lists. To create this texture, you need to apply thin mud to the ceiling using a spray gun set at very high pressure. The more artistic mind you have, the more artistic look it has got!!!! 5. Smooth Textures: Choice Of Many If you are someone who wants the best at a cheap cost, then this texture is just the right choice for you. Moreover, you don’t need to have many skills to create this texture design. The look of this texture is just mind-blowing, and if you are someone who likes things to be consistently gorgeous, then this is the texture you can have for your ceiling. This texture is effortless to remove and is also perfectly suited for any room. 6. Tree Bark Texture: Beauty Of Nature If you are someone who loves nature and wants to bring the reflection of nature inside your home, then this textured style is just the option you can have. This ceiling has the look of a tree. You can create this texture just by using a heavy roller. The texture might look simply, but it’s very artistic and can surely catch the eyes of many. If you have a farmhouse, then this texture will double the beauty!!!!! 7. Slap Brush Texture: Slap The Beauty Out Artistic, gorgeous, beautiful, and elegant are the nicknames you can give to this texture. A complete package of beauty!!!! To get this texture, you’ll need a brush with very stiff bristles and thin mud. Firstly, you have to cover your ceiling with mud using a roller, then take the brush and slap the ceiling from the edge. This can be a hard nut to crack because if you don’t get it right on the first shot, the whole ceiling might end up looking messy. 8. Popcorn Texture: Cottage Cheese This texture, also known as the “cottage cheese” or “acoustic” ceiling texture, is probably one of the most famous ceiling textures ever!!! If you look closely, you’ll see it’s kind of a look-alike of “popcorn.” That’s why it’s called “popcorn texture.” To achieve the correct texture, you need to use a sprayer to apply to your ceiling. This contains Styrofoam with mud which gives that puffy effect. But it will require you to have a lot of skill to achieve this effect. That’s because the “popcorn texture” is both challenging to apply and remove. I hope this article will help you to know about the needs of ceiling textures and drywall options. And now I believe you’ll be able to get yourself the perfect texture for your ceilings. How Can I Remove Old Ceiling Textures Safely? Removing old ceiling textures can be a big job, but it doesn’t have to be intimidating! If you want to update your ceiling and get rid of that outdated texture, I’m here to help. No matter if you have popcorn, stipple, or another type of texture, this process takes a little bit of care, but don’t worry! Here’s a step-by-step guide on how to remove an old ceiling texture without breaking your back or the bank. Step 1: Test For Asbestos Before you get out any tools…safety first!  Remember, many older ceilings (especially those with popcorn texture installed prior to 1980) contain asbestos. Before doing anything else, have your ceiling tested for asbestos. You can hire a pro to test the ceiling or buy a self-test kit. If asbestos is present, halt all work and consult pros immediately. Asbestos removal is not a do-it-yourself job because it poses serious health risks if mishandled. Step 2: Clear The Room If there’s no asbestos present, it’s time to get the room ready. Cover all the furniture. You’d be amazed at how far a fine mist of water, compound, and paint can travel! Also, plastic should be removed from the floors, and tape should be around any ceiling fans or lights that are not being removed. I can personally tell you we didn’t do this. We found dried white dust on our bedspread when we were stripping the wallpaper in our bedroom, and we had to clean up all the residual dust a little too late. It was wild! Step 3: Soften The Texture For Better Finish Here’s where the fun starts! To make that texture easier to remove, you’ll need to soften it. Fill a spray bottle with warm water and mist the ceiling. You don’t want to drench it. If you put too much water on the ceiling, it could end up damaging the drywall underneath. Allow the water to sit for about 15–20 minutes or so, giving it time to penetrate and loosen up that texture material. Don’t rush this step. It’ll only cause more work for you in the long run. Step 4: Clean Your Work Grab a wide putty knife or scraper and start scraping off the texture. Do small sections at a time, and scrape at a shallow angle so that you don’t gouge the drywall underneath. If it’s not coming off well, spray some more with the water bottle and let it sit for a little longer. This step can be kind of messy and time-consuming, but have patience because, in the end, you will have a nice smooth ceiling. Step 5: Patch & Sand Once the texture is gone, you may notice a few dings or dents in the ceiling. Don’t worry! Just fill them with some joint compound, sand it smooth, wipe away any dust and you’re ready for a new ceiling. And that’s it! A fresh, smooth ceiling in no time! Read Also: Here’s How to Turn Your Garage into a Bedroom on a Budget! Turn your attic into a living space

READ MOREDetails

7 Unique Kitchen Design Ideas That Your Family Will Enjoy

The kitchen is usually the hub of many homes. It's the room where you gather to prepare meals for your family. It's also a room where you can gather to talk about everyone's day and celebrate special events. Aside from being a functional kitchen, it should also be a room that is comfortable to look at and spend time in so that your family will enjoy this room of your home. These are only a few of the unique design ideas that you can try in your kitchen to give it an updated look that can be enjoyed throughout the year. Beach Waves: Whether you live on the coast or hours away from the beach, you can enjoy the beautiful scenery of the coast any time you enter your kitchen. The best place to start is with a white background with blue trim. From there, add hardware that is a dark color, such as dark blue or black. Light fixtures that hang from the ceiling can be blue as well to blend with the nautical theme. Hang pictures of lighthouses, the coastline, or other images that you would see at the beach to complete the design. Windows can be designed to look like portholes along with doorways that have an arched design if you want to take the nautical theme a step farther. Subtle Elegance: If your kitchen is small and only has one or two functional areas with cabinets and counters, then consider a design that features a subtle elegant appearance. Wooden cabinets can be transformed with a fresh coat of off-white paint and faux legs that will give a raised appearance. This will make it seem as though there is additional space under the cabinets even though there isn't. Open shelves are an option as well that is trending in many homes. These shelves give you the additional space needed to display the beautiful dishes and decorations that your family and guests might not always see when they are in your kitchen. A chandelier in the kitchen adds to the elegance that you're trying to achieve. Lounging While Eating: No one ever said that you have to sit at a table when you're eating a meal with your family. Create a modern design in your home that features a table surrounded by comfortable bench seating. You'll have a place to sit at the end of a long day while enjoying time with your family and a delicious meal. When you're designing the lighting in the kitchen, consider fixtures that are under the cabinets to add a soft glow to the counter spaces. Colorful Oasis: Give your kitchen a facelift with bright colors and appliances that match. Find a color that suits the entire family, using the shade when you paint the cabinets and the lower half of a kitchen island. Find chairs that are in the same color family or wooden chairs that you can paint in a dipped design to match the theme of the room. Colorful dishes on open shelves and appliances that are the same colors of the kitchen complete the look and add a touch of vibrancy to a room that can be somewhat boring. Companies like Brisbane Alfresco Kitchen Unique Design have various colorful decorations that can complete your kitchen in a way that showcases the personality of your family. Designing With Wallpaper: You probably thought that wallpaper went down the drain with the dishwater, but if you know how to apply it to the walls in your kitchen, it can be a nice feature to consider. Apply wallpaper to the walls that don't have a lot of details on them and that aren't home to appliances or counters. If you put wallpaper behind the stove or near the sink, consider covering it with glass or a clear film so that it doesn't get destroyed in a short time. A benefit of wallpaper in your kitchen is that it can easily be changed when you want a new look. Get Cozy: When you spend time with your family in the kitchen, it should be a warm experience. This is usually where you'll gather for holidays and special occasions as well. Lower the ceiling, and change the floor so that it looks like hardwood. An island with barstools provides an intimate setting where it's easier to talk to each other. Add a few details to the cabinets and the walls to bring a feeling of warmth to them, such as decorations that you might see in a cozy lodge. Mugs on the shelves or hanging on hooks on the walls are an option to consider to deliver the warm appearance that you desire. When you're trying to determine the best type of lighting, consider pendants that hang over the island or kitchen table. Two Tones: Instead of using one color throughout your kitchen, add a little balance by using one color for the top half of the room and one color for the lower half. White is a good color to start with on the upper half of your kitchen. This will allow you to focus more of your efforts on the cabinets and drawers in a color that you enjoy. It's also easier to play around with the hardware that's included on the cabinets and drawers when you have a solid color on the lower half of your kitchen. Counters that are a dark color tend to easily divide the two colors and make each shade stand out as soon as you enter the room. Read Also: 9 Feng Shui Tips For A Calmer Kitchen The Best Countertops To Help Revamp Your Kitchen Five Bedroom Rug Ideas – Area Rugs And Decorating Ideas A Guide To Finding The Perfect Sofa For Your Living Room

READ MOREDetails
Live Edge Wood

Tips To Care For Your Live Edge Wood Table

Live edge wood furniture is where the carpenter or the craftsman leaves the natural edges or incorporates them into the design. Live edge wood design is the new rave in town. This is because of its unique and stylish properties. Live edge wood can be used to make both furniture and decorations for your home. However, the thing about live edge wood furniture is that it can be hard to clean and maintain. Live edge wood is often left with visible knots and pits in addition to an uneven surface. These qualities are what make live wood furniture attractive. Below are some tips to help you keep those edges in shape. 1. Dry dusting: Use a microfiber cloth to dust off the edges of the live edge dining tables or any other furniture you have in your home. A microfiber cloth is best because it is soft and highly absorbent. You can be sure to get the dust off every corner or rut on the furniture with a microfiber cloth. You should always dry dust your live wood furniture regularly. 2. Do not use harsh cleaning products: Natural cleaning products are the best to use when cleaning your live edge dining tables. Most people are advised to use vinegar and warm water. Both elements should be mixed in equal parts and then use a microfiber cloth to clean the furniture. Just dampen the fabric with the mixture and then go ahead and start cleaning. Use your finger to reach the grooves of the wood. 3. Polish: Polishing wood always makes it look new. However, when it comes to living edge wood, it is typical for the wood polish to gather in the pits of the rugged edges of the timber. This can make your live wood look old and outdated. When using wood polish on live edge wood it is advisable to avoid the cracks and stick to the flat surfaces. Polishing your live edge wood furniture also helps to cover small stains and scratches. 4. Avoid moisture damage: When you have wood furniture in your house you will understand just how essential coasters are. Live wood furniture has a glass-like finish. It is common for homeowners to assume that the furniture can resist damage from water or moisture. This is not so, and you should use coasters or table mats on your live wood furniture to protect it from any moisture damage. A lot of live wood furniture pieces are got from waste wood. These are usually pieces of wood that were to be thrown away. Artisans have found creative ways to turn live edge wood into beautiful art pieces. Any live edge wood piece that you buy is enough to make a statement in your home or office. Furniture design companies today are also making custom live edge wood furniture for their customers. You can look at Dumond’s Furniture website to view their catalog and get ideas of tables, cabinets, made with live wood. They also have ready-made designs that you can order. Read Also: Why You Need A Solid Wood Office Desk Furniture In Utica: Benefits Of Buying Locally-Made Products What Species Of Wood Is Right For Your Wine Cellar Furniture?

READ MOREDetails