Making Your Home Strong From Within: Tips To Build A Sturdy House

Build A Sturdy House

The holiday season is coming, so is the time to build a sturdy house that can withstand the harsh winters. Furthermore, with holidays around, you would look to have a house where kids can play and have some fun. 

Also, with family and friends coming over, it is the best time to invest some time and money to enter the new year in a new house. The house will keep your whole family safe and cozy in winter and cool in summer. 

Therefore, in this section, we will discuss how to build a strong home with a strong foundation. Mainly, the focus will be laid on houses absorbing minor earthquakes and storms. So, you need to shift your attention to the next part. 

Tips To Build A Sturdy Home 

With the holiday season coming faster than ever, you need to make some plans to build a beautiful house. Therefore, it is the best time to invest your money to build the best house for you and your family. Consequently, you need to make proper planning and prepare a future understanding of the house. 

Tips To Build A Sturdy Home 

That’s why we will give you some tips to build a sturdy home for yourself – 

1. Getting Proper Permits 

One of the things that you need to do is go to the local housing departments, where you can get a housing permit to build a proper house. You need to know how to build a house in a legal way so that government people won’t knock on your door unnecessarily. Therefore, you need to get all the permits that will get you going in the process of building a good house – 

  • Pouring Foundation 
  • Construction Permit 
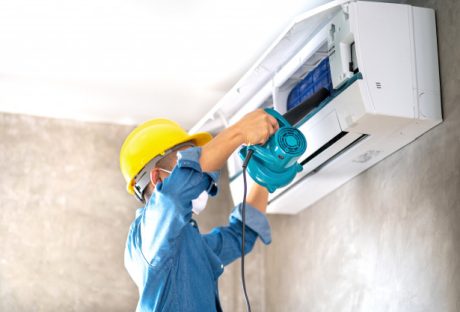
  • Installing home systems like heating and cooling 
  • Installation of wires and plumbing materials 
  • Adding other utilities to the house

Once you get all the permits done, you can then start building your house properly. For this, you might need a contractor builder who will get all the permits for you. Consequently, they all bring all the necessary things to build the house. 

2. Getting The Right Builder 

Another thing that you need to do is get the right builder. 

This will ensure that you get to build a sturdy house. Consequently, they will ensure that they can give you the right foundation for you to build a great structure. Moreover, you should discuss it with them, where you can sit and discuss the project. 

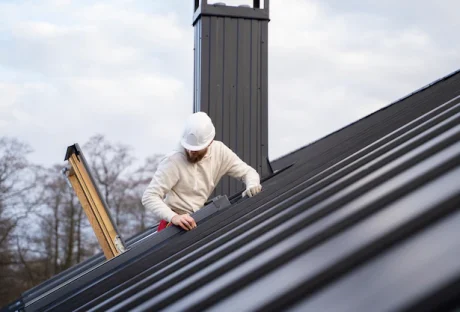
Hence, you can discuss the type of house you want yourself, especially everything from the roof to the ground, and you can showcase proper planning. 

Then, they can put the blueprint into action and build a big house for you. For this, you need to do some internet research. It will help you to hire the best house to enter the new house. 

And if you are looking for a roofing contractor, you can visit Gj Keller’s website. You can gain access to the service from the site. 

3. Building A Budget 

One of the important things that you need to do is decide on a budget. It is the thing that will showcase what type of house you want for yourself. It will ensure that you are able to earn a valuable house for you and your family. 

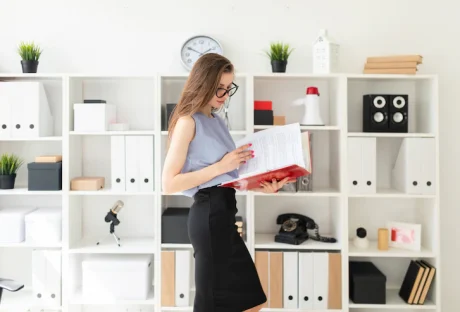
Therefore, you need to sit with your partner and discuss some of the aspects of budgets. There, you can decide where you need to invest the money carefully. Mainly, it refers to the building materials, wires, plumbing equipment, and paint. 

Consequently, you must fixate your mind on the process of what type of house you want to live in. That will clear your head and then create a proper budget for your dream sturdy house. 

4. Always Look Into The Future 

Another thing that you need to decide on is always looking into the future while building a house. It’s important that you see how you’ll accommodate every member of your house. Thus, it would help if you stepped into the future to create the best sturdy home. 

Here are a few things you need to look into – 

  • Always have three or more rooms in the house: It will ensure that your house can accommodate every member of the house. Also, keep a spare room for guests. 
  • Have two or more bathrooms: To stay safer, you should always have two bathrooms to make your house more functional   
  • Add some greeneries to your house: You should look to include some house plants and trees in the garden to make your house look beautiful. 
  • Look to install security: From security cameras to space to charge your electric cars.
  • Keep some extra space in the house in case you choose to expand your house in the future.

After you set all the things regarding the points mentioned, then you can build a better house for yourself and your family.  

5. Choosing The Right Construction Site 

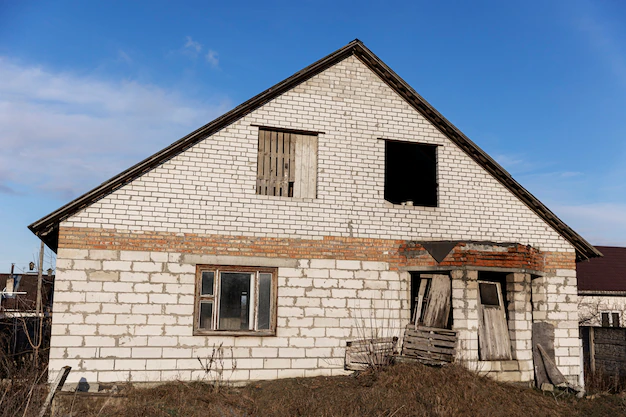
Lastly, one of the things you need to do is choose the right construction site. This is because if you want to build over soft soil, the chances of crashing down will increase. Therefore, you need to buy the right plot, especially ensure that the house is not beside any pond or lake. 

The soil is soft in that area. So, you need to look into a few things that will help you build the best house, especially for the foundation part – 

  • Basement 
  • Concrete slab 
  • Pier and beam 
  • Crawl space 

These things will ensure that you give the proper foundations for your house to grow and welcome all your family members. 

The Bottom Line 

In the end, we can say that there are many aspects of the house that you need to look into to build a proper house. Therefore, if you follow the tips, you will surely have a sturdy house where you can welcome everyone in the house. 

Also, with the holiday season around the corner, the sturdy house will allow your kids and their friends to have fun on Christmas. 

Read Also:

Shahnawaz is a passionate and professional Content writer. He loves to read, write, draw and share his knowledge in different niches like Technology, Cryptocurrency, Travel,Social Media, Social Media Marketing, and Healthcare.

View all posts

Leave a Reply

Your email address will not be published. Required fields are marked *

Related

Drywall

Elevate Your Home With Unique Ceiling Textures

Drywalls are those construction materials that are used to create walls and ceilings in your home. Not all that, but drywalls also come in handy if you want to create design features like eaves, arches, or any mind-blowing architectural requirements!!! Do you know the best part about drywalls? These are super easy to install, highly durable, and only require simple repairs when damaged. So, drywall is a flat component composed of calcium sulfate dihydrate, typically between thick sheets of backer paper, and facer, used to construct interior ceilings. Let’s talk about the ceiling textures and the drywall options you can choose for your home!!! The Ceiling Textures And Your Drywall Options Decorating your home can be a real challenge for many !!! Therefore, choosing the right drywall finish or texture can prove to be a hard nut to crack. And it’s very natural to get in a state of indecision if you are handpicking it for your new home or renovation project. There are so many options that it feels like you are “searching for a pearl in an ocean.” Making up your mind about whether or not to go texturing your ceiling can be a tough job. And even if you choose to texture your ceilings, there are chances you’ll be confused about which one to go for!!!! And remember, getting the drywall right is the first step of tiling projects?”. But No Need to Worry!! This article will guide you in choosing the perfect texture and drywall option for your ceilings to look more elegant than ever!! 1. Sheetrock Texture: Old Is Gold Sheetrock ceiling texture is a drywall ceiling texture that has been famous since 1917. The reason this drywall texture is so awesomely renowned is because of the artistic look that it gives to your ceiling And the best part is you don’t need to use any sort of spray paint in this case. You can achieve this texture by using your artistic hand technique and without using any special brushes. This texture is perfect for any room. There are no restrictions on the use of this ceiling texture. 2. Stipple Brush Texture: A Test Of Your Skill This texture is not as easy as it seems. You need skills to create this texture. To create this texture, you need a roller and slap brush. The fascinating fact about this texture is it can cover the bumps and holes on your ceiling. And if you have the skills, then this texture can surely make your ceiling look gorgeous than ever!! 3. Swirl Texture: Creativity Taken To A New Level To achieve this texture, you need either a roller or sprayer. You can also do this by using a technique called “the basic swirl” method. But one thing that you need to keep in mind is while creating this texture, you’ll need a lot of patience to get the best result. And the difficult part is you need to create the pattern before the mud dries. So, make sure to have a helping hand by your side. Overall, the texture can really give that awesome look on your ceilings if you do it in the right way!!! 4. Orange Peel Texture: A Color Of Choice The name suggests all the colors of orange skin, but sometimes it’s also called “an eggshell” ceiling texture. If you really love this color, then this can be on the top of your favorite lists. To create this texture, you need to apply thin mud to the ceiling using a spray gun set at very high pressure. The more artistic mind you have, the more artistic look it has got!!!! 5. Smooth Textures: Choice Of Many If you are someone who wants the best at a cheap cost, then this texture is just the right choice for you. Moreover, you don’t need to have many skills to create this texture design. The look of this texture is just mind-blowing, and if you are someone who likes things to be consistently gorgeous, then this is the texture you can have for your ceiling. This texture is effortless to remove and is also perfectly suited for any room. 6. Tree Bark Texture: Beauty Of Nature If you are someone who loves nature and wants to bring the reflection of nature inside your home, then this textured style is just the option you can have. This ceiling has the look of a tree. You can create this texture just by using a heavy roller. The texture might look simply, but it’s very artistic and can surely catch the eyes of many. If you have a farmhouse, then this texture will double the beauty!!!!! 7. Slap Brush Texture: Slap The Beauty Out Artistic, gorgeous, beautiful, and elegant are the nicknames you can give to this texture. A complete package of beauty!!!! To get this texture, you’ll need a brush with very stiff bristles and thin mud. Firstly, you have to cover your ceiling with mud using a roller, then take the brush and slap the ceiling from the edge. This can be a hard nut to crack because if you don’t get it right on the first shot, the whole ceiling might end up looking messy. 8. Popcorn Texture: Cottage Cheese This texture, also known as the “cottage cheese” or “acoustic” ceiling texture, is probably one of the most famous ceiling textures ever!!! If you look closely, you’ll see it’s kind of a look-alike of “popcorn.” That’s why it’s called “popcorn texture.” To achieve the correct texture, you need to use a sprayer to apply to your ceiling. This contains Styrofoam with mud which gives that puffy effect. But it will require you to have a lot of skill to achieve this effect. That’s because the “popcorn texture” is both challenging to apply and remove. I hope this article will help you to know about the needs of ceiling textures and drywall options. And now I believe you’ll be able to get yourself the perfect texture for your ceilings. How Can I Remove Old Ceiling Textures Safely? Removing old ceiling textures can be a big job, but it doesn’t have to be intimidating! If you want to update your ceiling and get rid of that outdated texture, I’m here to help. No matter if you have popcorn, stipple, or another type of texture, this process takes a little bit of care, but don’t worry! Here’s a step-by-step guide on how to remove an old ceiling texture without breaking your back or the bank. Step 1: Test For Asbestos Before you get out any tools…safety first!  Remember, many older ceilings (especially those with popcorn texture installed prior to 1980) contain asbestos. Before doing anything else, have your ceiling tested for asbestos. You can hire a pro to test the ceiling or buy a self-test kit. If asbestos is present, halt all work and consult pros immediately. Asbestos removal is not a do-it-yourself job because it poses serious health risks if mishandled. Step 2: Clear The Room If there’s no asbestos present, it’s time to get the room ready. Cover all the furniture. You’d be amazed at how far a fine mist of water, compound, and paint can travel! Also, plastic should be removed from the floors, and tape should be around any ceiling fans or lights that are not being removed. I can personally tell you we didn’t do this. We found dried white dust on our bedspread when we were stripping the wallpaper in our bedroom, and we had to clean up all the residual dust a little too late. It was wild! Step 3: Soften The Texture For Better Finish Here’s where the fun starts! To make that texture easier to remove, you’ll need to soften it. Fill a spray bottle with warm water and mist the ceiling. You don’t want to drench it. If you put too much water on the ceiling, it could end up damaging the drywall underneath. Allow the water to sit for about 15–20 minutes or so, giving it time to penetrate and loosen up that texture material. Don’t rush this step. It’ll only cause more work for you in the long run. Step 4: Clean Your Work Grab a wide putty knife or scraper and start scraping off the texture. Do small sections at a time, and scrape at a shallow angle so that you don’t gouge the drywall underneath. If it’s not coming off well, spray some more with the water bottle and let it sit for a little longer. This step can be kind of messy and time-consuming, but have patience because, in the end, you will have a nice smooth ceiling. Step 5: Patch & Sand Once the texture is gone, you may notice a few dings or dents in the ceiling. Don’t worry! Just fill them with some joint compound, sand it smooth, wipe away any dust and you’re ready for a new ceiling. And that’s it! A fresh, smooth ceiling in no time! Read Also: Here’s How to Turn Your Garage into a Bedroom on a Budget! Turn your attic into a living space

READ MOREDetails
Commercial Cleaning

The Ultimate Commercial Cleaning Checklist: Everything You For A Spotless Workspace

Maintaining a clean and organized workplace is a must for your well-being and productivity. However, it is no secret that office cleaning is a daunting task. There are so many things you need to consider, not to mention different areas and surfaces require different cleaning methods. Often, different methods require different cleaning equipment and cleaning supplies. In this entry, we will share with you the best practices and processes that the best commercial cleaning services use in their office cleaning service. Here's a commercial cleaning checklist to keep your workplace spotlessly clean. The basics of office cleaning services Before diving into the checklist, it is important that you understand the basic processes of commercial cleaning and how commercial cleaning companies deliver these practices. Most of these things are pretty self-explanatory. However, there is a reason why professional cleaners from commercial cleaning companies are efficient in their job – they know how to do things right. Knowing these practices will help you understand how to do them right too. Dusting Dirt, dust, and allergen particles accumulate quickly. If not removed from the business premises, these particles can get mixed into the indoor air and cause various health problems such as allergies, respiratory problems, headaches, etc. Commercial cleaning plans for office cleaning often include exhaustive dusting of all surfaces. This includes desks, shelves, electronics, windowsills, etc. A good commercial cleaning company uses microfiber cloth and a feather duster to remove dust effectively and safely. Vacuuming Vacuuming is the most efficient way to keep workplaces clean. It removes dirt, dust, and various outdoor debris from carpets, mats, rugs, etc. The advantage of hiring cleaning services is that a commercial cleaning company has access to industrial-grade and powerful vacuum cleaning machines that can truly and efficiently remove dirt, dust, and various debris. Nevertheless, when vacuuming your workplace, include cleaning the hard-to-reach areas, such as under the desks, tables, and chairs. Since they are hard to reach, these spots often trap foreign debris. Mopping Mopping is the best way to keep hard floors clean and shiny. It removes dirt, dust, and grime buildup from the floor. However, there is more to mopping than simply sliding the mop head back and forth on the surface of the floor. When mopping the floor, use a cleaning solution that is recommended for the type of floor you have. To ensure that all areas are covered, you need to mop in a back-and-forth motion. Trash removal and disposal No building maintenance will ever be complete without taking the trash out. When removing trash from your commercial premises, make sure to replace the bin liners as well. And when replacing the liner, make sure you clean the interior of the trash bin. Commercial cleaning services often include weekly disinfection of the trash bin. This is incredibly important in preventing bacteria buildup and odour in your trash bin. Disinfecting surfaces Another crucial aspect of commercial cleaning is surface disinfection. Disinfecting surfaces helps prevent the spread of disease-causing germs and bacteria in the workplace. When disinfecting your workplace, make sure you use a disinfectant spray or antibacterial wipes to clean surfaces. This includes desks, chairs, tables, countertops, light switches, office appliances buttons, and doorknobs. Commercial cleaning services often include disinfection and sanitation of surfaces in their cleaning service. Also, commercial cleaners, in particular, pay close attention to high-touch areas and surfaces, which are often breeding grounds for bacteria. These surfaces include hand railings, elevator buttons, light switches, and more. Bathroom cleaning Bathrooms are often the dirties and smelliest areas for commercial spaces. With that said, it is not surprising that they have become breeding grounds for bacteria and germs. When cleaning bathrooms, make sure you clean and disinfect high-touch spots and items such as faucets, sinks, toilets, and even mirrors. Commercial cleaners often include towel replacement, hand soap refill, and bathroom supplies restocking to ensure your office bathrooms are clean and convenient to use. Breakroom cleaning The breakroom is where employees often gather to chit-chat, eat their food, drink their beverages, and rest. For this reason, breakrooms can become breeding grounds for bacteria and germs. Thus, when taking care of your breakrooms, make sure you include the appliances, countertops, sink, tables, and chairs. Glass window cleaning Often, business owners neglect their windows, thinking they cannot clean surfaces they can’t reach. This is particularly true for tall building establishments. Professional commercial cleaners, however, have access to the right cleaning equipment and materials you need for a thorough and efficient window cleaning. They have tall ladders, power washers, longer hoses, and the right safety equipment and gears for a thorough clean. Floor care Floors, whatever type of flooring material it uses, must be swept daily to remove dirt and debris. Moreover, make sure you use the right floor cleaner that is recommended for the type of flooring material your business premises has. Carpet and upholstery cleaning Carpets and rugs are basically dirt traps. Aside from completing the look of a certain room, carpets function as dirt traps to minimize and even stop dirt and dust from entering the premises. While regular vacuuming can help, most office vacuums are not strong enough to rid carpets of deep-seated stains and bacteria. This is why commercial cleaning services invest in high-quality equipment so they can tackle difficult cleaning jobs like deep carpet cleaning. And like carpets and rugs, upholstered furniture is dirt, dust, and allergen traps too. Regular vacuuming of upholstery removes foreign debris. However, to ensure your carpets are actually clean, fresh, and disinfected, you can ask professional cleaners to take care of them. Most commercial cleaning service companies would suggest deep cleaning for carpets and furniture upholstery once or twice a year. Air vent cleaning Another incredibly important process for comprehensive commercial cleaning services includes air vent cleaning. Air vents accumulate allergens, dust, and foreign debris over time. When there is too much buildup of these particles in your air vent system, your indoor air quality will drop, leading to health issues such as respiratory problems such as asthma attacks. The Ultimate Commercial Cleaning Checklist for Your Workplace Daily Tasks: Desk and Surfaces Wipe down your desk and other surfaces daily with a disinfectant spray or wipe to remove any dirt, dust, or germs. Trash Empty your trash can daily, and ensure all rubbish is disposed of correctly. Floors Sweep or vacuum your floors daily to remove any dirt or debris. Kitchen/Breakroom Clean and sanitize all surfaces, including countertops, sinks, and appliances, daily. Weekly Tasks: Dusting Dust all surfaces, including shelves, pictures, and light fixtures. Glass and Mirrors Clean all glass surfaces, including windows and mirrors, to remove any fingerprints or smudges. Upholstery Vacuum all upholstery, including chairs and couches, to remove any dirt or debris. Disinfecting Disinfect all high-touch areas, including doorknobs, light switches, and handles. Floors Mop or steam-clean your floors weekly to remove any stains or buildup. Monthly Tasks: Windows Clean your windows inside and out to let in more natural light and improve the appearance of your workspace. Carpets Have your carpets cleaned by professionals to remove any deep-seated stains and odours. Deep Cleaning Perform a deep clean and complete disinfection of your entire workspace, including hard-to-reach areas and appliances. Office Equipment Clean and sanitize all office equipment, including computers, printers, and phones. Restrooms Thoroughly clean and sanitize your restroom, including the toilet, sink, and floors. Seasonal Tasks: Outdoor Maintenance If you have an outdoor space, clean and maintain it seasonally to keep it looking its best. HVAC Maintenance Have your HVAC system inspected and cleaned seasonally to ensure proper airflow and reduce allergens. Furniture Maintenance Have any upholstered furniture professionally cleaned seasonally to extend its lifespan? The Takeaway As you can see, office cleaning is not a one-time thing. It is a continuous never-ending process. You can save yourself from all these troubles and opt for professional office cleaning instead. Cleanworks cleaning services is one of the few professional commercial cleaning companies that actually deliver the highest quality professional service. They have been in the industry of professional commercial cleaning for more than two decades, thus they have the track record to say they have “been there, done that”. Cleanworks cleaning services have a fully trained, extensively experienced, and completely equipped cleaning team to handle all sorts of cleaning. Their office cleaners are fully insured and up-to-date with the latest local cleaning requirements and COVID cleaning guidelines. Call Cleanworks commercial cleaning services now and get free quotes for your commercial cleaning needs. Their professional staff will be more than willing to help you. Read Also: Why Is A Janitorial Service For Commercial Establishments? 10 Pro Tips To Minimize Commercial Door Repair & Maintenance Cost The Hidden Damages In Workspaces: 5 Steps To Reduce The Risk Of Workplace Injuries!

READ MOREDetails
Oil Heater vs. Fan Heater: Which Is Better

Oil Heater vs. Fan Heater: Which Is Better

A dependable heater may make all the difference in keeping your home warm and inviting during the bitterly cold winter months when the frigid air bites your nose. However, it might not be easy to select the best heater for your needs, given the variety of products on the market. Oil heaters and fan heaters are two standard options, each having pros and cons of their own. This article will examine the differences between oil and fan heaters to see which is better. Oil Heaters: The Basics Oil heaters also referred to as oil-filled heaters, work by heating a particular kind of oil inside the metal fins of the device. Because of the effective heat retention of this oil, the heater can continue to provide warmth long after it has been switched off. Oil heaters give a steady, soft warmth that many people find comfortable, although they usually take longer to heat up than fan heaters. Fan Heaters: The Basics In contrast, fan heaters operate by drawing air over a heating element and then using a fan to distribute it around the space. Fan heaters are renowned for their ability to heat a space quickly, increasing the ambient temperature. They can, however, occasionally produce a dry heat, which some people may find less comfortable. Here are the various considerations before you buy oil heaters online: Energy Efficiency And Cost-Effectiveness The energy efficiency of oil heaters is highly praised. The heater's oil holds heat efficiently after it reaches the proper temperature, reducing the frequency of on and off cycles. As a result, there may be a decrease in energy use and, eventually, heating costs. Furthermore, oil heaters can contribute to energy conservation by maintaining a comfortable temperature without continuously using power because they generate heat even when shut off. Meanwhile, fan heaters use more energy even though they are good at warming a space rapidly because they run continuously. Using a fan to disperse heat is another way that using more electricity might increase. But thanks to developments in fan heater technology, more energy-efficient models with eco modes and thermostat controls have been created to help reduce energy use. Cost Comparison Fan heaters are typically less expensive upfront than oil heaters, which makes them the more logical option for consumers on a tight budget. The long-term operating costs, however, must be taken into account. Oil heaters are typically more energy-efficient because they use a heating element soaked in oil, which maintains heat well and permits less frequent cycling. As a result, this may lead to decreased energy use and cheaper heating costs over time. Improvements in fan heater technology have created more energy-efficient versions with features like eco modes and thermostat settings, which help partially offset their higher energy usage. Consequently, even though fan heaters could be less expensive initially, the overall cost-effectiveness of the two differ based on several variables, including usage habits, energy costs, and the particular model. Heating Performance And Comfort Known for its capacity to deliver even, delicate warmth, oil heaters are highly recommended for use in living rooms, bedrooms, and other spaces where keeping a comfortable temperature is crucial. Many people describe the warm, comforting, radiant heat that oil heaters create as ideal for resting and relaxing. Meanwhile, fan heaters are excellent at quickly heating a space, making them ideal for short bursts of heat in areas like bathrooms or home offices that need to be warmed up immediately. However, some people might feel that the dry heat of fan heaters is less comfortable, mainly if they use them for an extended period. Safety Considerations Because of how they are made, oil heaters are typically considered safer than fan heaters. The oil-filled fins encase the heating element, reducing the possibility of fire or burns from direct contact with the hot surface. Oil heaters usually have automatic shut-off systems and overheating prevention to prevent further mishaps. Unfortunately, burn risks are increased by fan heaters, mainly when they come in contact with skin or explosive objects. Fan heaters can also be dangerous due to their exposed heating element and moving parts, so they must be positioned steadily, away from potential threats. Read Also: What To Do When Your AC Unit Stops Working Impact On The Environment Due to its higher energy consumption and shorter lifespan, fan heaters typically have a more significant environmental impact. Carbon emissions are increased when electricity is used to run the fan and heating element, mainly when that electricity is produced from non-renewable resources. Nonetheless, the environmental impact of fan heaters can be reduced by selecting and operating them wisely. Oil heaters are often seen as being more environmentally friendly. They are quieter to operate and have less emissions since they use radiant heat instead of forced air. Fan Heaters vs Oil Heaters: In Summary It's critical to consider your unique heating requirements and preferences when choosing between oil and fan heaters. An oil heater can be a better option if you need constant, soft warmth in larger areas, including living rooms or bedrooms. Oil heaters are excellent at producing radiant heat that heats the surrounding space gradually, making it seem friendly and suitable for rest or sleep. However, a fan heater can be a better option if you're searching for a rapid and effective heating solution for smaller spaces or regions that need instant warmth, such as home offices or restrooms. Fan heaters are renowned for their speedy heating qualities, allowing them to relieve chilly air and raise the room's temperature instantly. Make The Right Choice There must always be a clear winner in the age-old comparison between oil and fan heaters. The ideal option ultimately relies on your preferences, budget, and particular heating demands. Each type of heater has a mix of benefits and drawbacks. Whichever kind of heater you use, you must always take safety precautions. By researching and using your heater sensibly, you may have a warm and comfortable house all winter while consuming the least energy and having the least damaging effect on the environment. Read Also: What You Should Know about Solar Energy for Schools Benefits The Benefits of Solar Lighting in a Nutshell Everything You Need to Know About Portable Solar Power

READ MOREDetails