How to Make Your Student Apartment Feel Like Your Own House?

Published on: 23 December 2023 Last Updated on: 16 February 2026
Student Apartment

Feeling a bit homesick while away at college is pretty common and almost everyone goes through it at some point. And, if you are a student living abroad in student housing, it might be even more difficult for you. 

Feeling a bit homesick while away at college is pretty common, and almost everyone goes through it at some point. And, if you are a student living abroad in student housing, it might be even more difficult for you. 

After all, being in a different environment, like student apartments, can sometimes make you feel disconnected from home. First things first, you might need to find apartments near campus so that you can at least save some commute time. 

The good news is — there are several other strategies that’ll help you make your new place feel just like your own house.  Let’s keep reading to know more about it.

Let’s keep reading to know more about it.

1: Add a Little Bit More Light

Improving the brightness of your living space is essential for comfort and health. Dim or insufficient lighting can create a dreary atmosphere, making your student accommodation feel cramped and less inviting. Enhancing the illumination may also create a curious illusion of spaciousness, akin to the roominess of your bedroom back home. 

If your current light fixtures aren't effective, consider investing in stylish lamps to brighten up your place. Not only will this boost the ambiance, but it'll also revive the space, making it feel more lively and homely. Choosing lamps that align with your personal style will not only add a touch of flair but also bring back the cozy feelings of home that you're missing.

2: Instill Life in Those Lifeless Walls 

If your new apartment has plain white walls and feels a bit empty, bringing in cherished photos or posters can liven up the space. 

Whether it's capturing your family moments or displaying images of beloved sports icons, incorporating these elements, can personalize your living area. 

Consider engaging a professional house painter in CT or a painting company in Prospect, CT, to introduce more depth and texture to your walls with a fresh coat of paint.

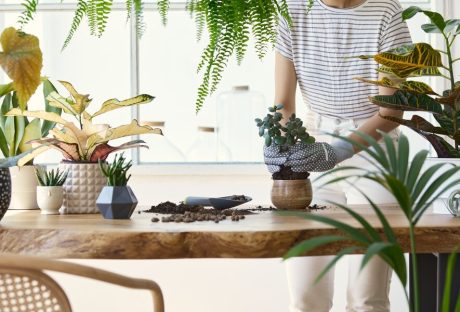
3: The Plants… Don’t Forget Them

If you enjoy plants but lack the time or skill for care, consider placing a few low-maintenance plants in your student apartment. 

They can bring color, improve air quality, and enliven your living area effortlessly. 

However, if you don't have the time or inclination for plant care, there are a lot of attractive artificial plants available that can still lend a sense of style and coziness to your new home.

4: Blankets, Rugs, and Pillows Can Be Your Best Friend

Simple tile, carpets, or hardwood floors might lack excitement. 

To spruce things up, consider adding stylish throw rugs to your apartment—they not only enhance decor and color but also bring comfort and a personal touch. 

Additionally, throwing blankets and vibrant pillows on sofas and chairs might further elevate your space with a touch of flair.

5: Gather Your Favorite Food and Stuff

Food serves as a strong cultural link and a way to bring people together, although it can also spark heated debates like the pineapple pizza controversy. It holds significant value in our lives, often tied to cherished family recipes. 

Exploring those recipes with loved ones can be a wonderful experience. Yet, not all favorite dishes originate from family recipes; some hail from local restaurants. 

Recreating these meals can be achieved through copycat recipes found online or by purchasing specialty sauces or dishes from these establishments. If all else fails, discovering new eateries can lead to new culinary favorites and create fresh memories.

6: Make Your Space Smell Better

Is there a particular aroma that evokes the feeling of being home? It could be the comforting scent of your mom's Sunday morning cinnamon buns or the nostalgic fragrance of garden flowers from your childhood bedroom. 

Whatever brings you that sense of security, consider finding ways to incorporate that smell into your space. If burning candles isn't an option in your apartment, there are alternatives like oil diffusers, wax melts, and candle warmers that can help recreate that familiar scent.

7: Have a Motivating Study Space

In college, studying is inevitable. While some apartments offer study rooms, you might opt to carve out your own study nook within your place. 

Thankfully, the additional room in an apartment lets you craft a cozy workspace to ease the studying grind. Locate a peaceful corner with minimal interruptions. Then, deck it out with a comfy chair, a quality reading lamp, and enjoyable stationery to amp up your study vibes.

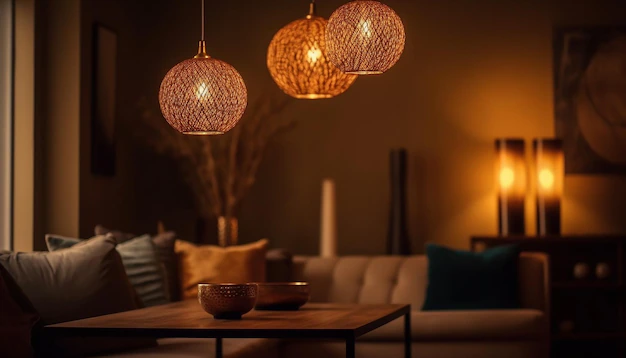
8: Cozy and Ambient Lighting

Fluorescent lights commonly found in dorm rooms might not be appealing. Instead, opt for a stylish desk lamp for your study area or a larger floor lamp to illuminate the entire space. 

You could also think about getting a budget-friendly light timer to automatically switch on your lamps in the evening. 

Walking into a softly lit room late at night creates a much more inviting atmosphere than entering a completely dark space.

Cozy and Ambient Lighting

FAQs - Frequently Asked Questions

Q: How can I personalize my student apartment on a budget?

Personalizing on a budget is possible! Consider using affordable decor items like posters, string lights, and inexpensive furniture. DIY projects and second-hand stores are also great options.

Q: What are some easy ways to add a personal touch to my living space?

Incorporate items that reflect your personality, such as photos, artwork, or memorabilia. Adding throw pillows, rugs, and curtains in your favorite colors can also make a significant difference.

Q: How can I maximize storage in a small apartment without making it feel cluttered?

Optimize vertical space with shelves and organizers. Use under-bed storage bins, wall-mounted hooks, and multi-functional furniture like ottomans with hidden storage to keep things organized.

Q: Can I paint the walls of my student apartment, or are there alternative options for adding color?

Check with your landlord first regarding painting. If not allowed, use removable wallpaper, wall decals, or large fabric panels to add color and personality without causing damage.

Q: How can I create a productive study space within my apartment?

Choose a quiet area with good lighting and invest in a comfortable chair and desk. 

Personalize the space with motivating quotes, plants, and organizational tools to make it conducive to studying.

Q: Are there any low-maintenance plants that are suitable for a student apartment?

Yes, consider plants like snake plants, pothos, or succulents that require minimal care. These can add a touch of nature to your space without demanding too much attention.

Q: Any advice for maintaining a clean and organized apartment?

Develop good habits, such as cleaning up after yourself daily and having a designated place for everything. Regular decluttering sessions and a cleaning schedule can help maintain a tidy and organized living space.

Read Also:

Nabamita Sinha loves to write about lifestyle and pop-culture. In her free time she loves to watch movies and TV series and experiment with food. Her favourite niche topics are fashion, lifestyle, travel and gossip content. Her style of writing is creative and quirky.

View all posts

Leave a Reply

Your email address will not be published. Required fields are marked *

Related

Mold Damage

How to Prevent Mold Damage In a Building

Healthy living requires a clean and safe environment, but with the prevalence of many microorganisms such as mold damage, this can be challenging. This is because they are invisible to the naked eye and release spores into the air, which cause major health problems when inhaled. Mold is a fungus that grows in the form of hyphae, which are multicellular threads. It is composed of microorganisms that can be found almost anywhere. They are useful outside for breaking down garbage and composite materials, but when found indoors, they are extremely detrimental to human health. Mold damage produces allergic reactions or irritation and must be removed as soon as possible. To stop it from spreading, early detection and removal are essential. Mold remediation or removal is not something just anyone can do. To achieve a proper sanitization of the entire building to avoid the existence of mold, you will need to contact professionals or follow the complete guide about damp wall treatment procedures. This way, you will be sure that your home or office will be properly treated. Finding a good remediation service is not always a stroll in the park, especially if you have not worked with one before. However, with the right guide handy, you can easily find a professional company that will properly clean and sanitize your building. If you do not know how to find a good company, and you need recommendations on reputable companies to work with, you can visit the Long Beach mold removal company for help. Types of Molds Damage: Here are some common types: Aspergillus This type does not need much ventilation and can be found in attics, textiles, walls, dry food, and basements. It has a powdery appearance and may be white, green, or gray in color, with dark dots. It has several carcinogenic forms, but when detected within the home, it causes serious respiratory problems. Cladosporium This can be found in both warm and cold places. It can also be found on carpets, clothes, wood, and heating and cooling ducts, among other things. The color is usually black, or green. Alternaria This fungus has a white background with black dots and can be found near windows, in fabrics, bathrooms, kitchens, air conditioning units, and wallpapers. However, it is commonly found outdoors. Trichoderma This fungus is commonly creamy-white in appearance, but as it releases spores, it becomes green. Windows, baths, kitchens, and wood are among its favorite areas. Penicillium This type is fuzzy and comes in a variety of colors, including blue, green, and yellow. Basements, insulation, and carpets are all common places to find them. It is usually present anywhere a water-damaged structure is found. Penicillin, an antibiotic, is derived from it. You can learn more about penicillin by reading this article. Key Materials for Mold Removal Mold damage removal requires a variety of tools, depending on the size of the fungus and the type of surface to be cleaned. There are natural cleaning methods that may be utilized to get rid of it as well. Plastic Sheet A plastic sheet is used to separate the infected region from the rest of the room, preventing spores from spreading. It is used to block openings to air vents, doorways, and the rest of the building. Biocide It is critical to use a high-quality cleaning product for removing mold damage. The fungus will only be hidden if you use poor or regular household bleach or cleaning agent. Biocide is particularly effective at killing and inhibiting this bacterium's growth. Vinegar  Despite its strength, it is quite effective against fungus. Baking soda, hydrogen peroxide, and lemon juice can all be added to it. Wear safety clothing such as goggles, gloves, and a breathing mask when using it. To remove the mixture, wipe the area with a clean moist cloth. Sodium Bicarbonate  Baking soda, or sodium bicarbonate, has a wide range of applications, including the removal of fungus. It should be sprayed on the damaged surface after being combined with vinegar or water. After spraying, scrub the area with a brush, rinse, and then spray again. Dehumidifier This gets rid of the moisture and prevents future growth. It is best used after the cleaning procedure to air the place and remove any remaining moisture, but it can also be used as a preventative strategy. As a solution, a portable one can be stored in a room with an infestation. If you need tips on how to use a dehumidifier, you can check here. Lemon Juice This natural cleanser is efficient, non-toxic, and has a pleasant scent. Before spraying it, clean the surface with soap and water. It can also be applied daily to keep fungus at bay. It is an excellent choice because it is both environmentally and pet-friendly. How to Keep Mold Damage at Bay Here are some methods to guide you: Regular Checks They can be found in open regions, but they can also grow in secret spots. This means that regular inspections of damp, dark areas like basements should be carried out to detect the infestation early before it worsens. Repair any Leaks If there is a leak from pipes or faucets, fix it immediately and dry the area. Also, inspect drains and pipelines on a regular basis. Liquid storage areas should also be checked because they can leak from their bottles. Make Use of Cleaners While it is necessary to deep clean your home on a regular basis, you should do so with a mold-prevention agent. Natural cleaners such as natural lemon, white vinegar, baking soda, as well as other citrus-based treatments are recommended. In addition to keeping fungi at bay, these solutions leave a fresh smell around the building. Allow Sunshine In Mold does not thrive in natural light and fresh air. This means that you have to open the windows and curtains to allow sunshine in. You can also turn on your ceiling fan to prevent the survival of mildew. Keep in mind that mold damage is detrimental to human health and this should guide you in taking the right steps to prevent its growth and survival. You can read articles explaining how mold affects human health for more information. Wrap Up Mold growth can pose a danger to human health; therefore, it should be nipped in the bud. Always inspect the bathroom, roof, pipes, and foundation for cracks, leaks, or damages. Delaying treatment as soon as the condition is discovered can worsen the condition and increase the cost of treatment, especially if toxic or black mold is present. This article outlined tips to help you prevent mold damage in a building. Feel free to check them out. Read Also: We Buy Houses Companies Saving Homeowners From Foreclosure Cleaning Your Home with Pets – The Most Common Problems Hosted Mail Service That Runs on the Cloud

READ MOREDetails
Your House

How To Keep Your House Clean – A Beginner’s Guide

Starting the process of tidying up and arranging your home might feel overwhelming, but it's incredibly rewarding. A clean, organized space not only brings a sense of calmness but also sets the stage for enjoyable moments with loved ones.  This beginner's manual on cleaning and organizing equips you with the essentials to kickstart your journey towards a serene living environment. So, let's get started with it. Step - 1: Begin Your Journey with Something Small Beginning with a small area can help alleviate the overwhelming feeling of cleaning and organizing your home. For example, starting in just one room or a tiny section within a room can reduce the stress associated with the task.  Once you've tidied up and organized that small space, it tends to inspire further progress.  It's like a chain reaction— as soon as you initiate the process, you'll often find the motivation to continue. The sense of accomplishment from cleaning that initial space acts as a catalyst, propelling you to tackle more cleaning and organizing tasks. Step - 2: Declutter Your Rooms. All of Them! Before diving into organizing, it's crucial to declutter thoroughly.  Start with a smaller space like your fridge. Empty its content, discarding expired or inedible items. Clean all of the surfaces using a damp cloth and your preferred all-purpose cleaner.  When clearing out various areas in your home, prioritize keeping only the things you truly need or cherish. If it's challenging to part with certain items, remember they might serve someone else while giving you more room at home.  Consider donating or selling belongings you no longer adore. Discard broken, incomplete, or heavily worn-out items. Items that are no longer in use—like old toys, baby gear, clothes, or furniture—can find new homes through donation or sale.  This decluttering not only creates space for other purposes but also makes it easier to access and appreciate the things you genuinely value and use. Step 3: Get a Cleaning Caddy for Yourself Before starting your home cleaning routine, it's helpful to prepare a portable cleaning kit that you can easily carry around.  You don't need a multitude of cleaners or tools—just include what you'll actually use. Your cleaning kit can be as simple as a bucket, plastic bin, canvas bag with handles, or any larger container that suits your convenience.  Whether store-bought or homemade, the key is to have a portable solution that suits your needs as you move from room to room. Step 4: Keep the Surfaces Clean After completing the decluttering process, it's crucial to tidy up the space before organizing. Quickly cleaning the area will impart a fresh feel, enhancing the likelihood of maintaining its cleanliness for an extended period. Here are some cleaning tips that you might need… Create a cleaning caddy for easy access to supplies.  Then clean from higher surfaces downward to catch falling debris as you progress.  Utilize a vacuum attachment to clear drawers, shelves, cabinets, or closets of any remaining debris.  Use a damp microfiber cloth to wipe surfaces, ensuring thorough cleaning. Remove any items that don't belong in the cleaned area. Step - 5: Organize Everything The crucial element in home organization is to gather similar items together.  Whether it's your refrigerator, pantry, kitchen cabinets, bathroom, living room, kids' rooms, closets, or garage, arranging items of the same kind is essential for easy access and visibility. Scattered items make it difficult to locate what you need and can lead to clutter.  By grouping similar items, you create a clear system that helps in both finding items and guiding your family when it comes to tidying up. I: How to Organize Your Kitchen? It's beneficial to begin organizing your kitchen by focusing on a small area first, as this can inspire you to tackle other spaces. The kitchen often serves as the hub of a home and sees frequent use, making it a great starting point.  Once you've sorted out your kitchen, the task of taking care of the rest of your house becomes more manageable. A smart step in this process is to begin with your refrigerator. Streamlining your fridge organization can serve as a catalyst for organizing other areas. II: Organizing Your Fridge Arranging your refrigerator involves categorizing similar food items–together for better organization. With adjustable shelves and doors, along with additional bins, you can optimize the space quite easily. Clear plastic bins are particularly helpful as they allow easy visibility of their contents. They're convenient for accessing snacks, packing lunches, and planning meals.  Here are examples of foods that should be grouped together either in bins, on shelves, or in drawers for a more organized fridge... Bagged fruits and vegetables  Cheeses and lunch meals  Fresh vegetables and fruits Sauces and condiments  Salad dressings III: Organizing the Other Parts of Your House After you've sorted one area, take the same approach to the rest of your house.  Use the refrigerator organization tips as a template for each room: clear out unnecessary items, tidy up, and then arrange everything neatly.  Remember, the key is to tackle each room gradually to avoid feeling swamped, following the same method each time. If there are any similar types of items available in your house, group them together. Clean the area once you are done with the former step. Get rid of anything and everything that you don't want to use. Step 6: Disinfect the Surface Areas and Countertops Clean the hard surfaces around your home thoroughly, including countertops, appliances, cabinets, doorknobs, light switches, TV remotes, and phones.  Disinfect surfaces that are commonly touched to reduce the spread of germs.  Create a natural disinfectant by combining one-fourth to half a cup of white or apple cider vinegar with one cup of water. They'll work like magic for you. Make It a Group Activity Collaborating as a team is a top-notch method for swiftly tidying up a house. Plan ahead with your family for a designated time and distribute specific chores among everyone.  Joining forces not only injects some enjoyment into the cleaning process but also ensures a sparkling home in no time. You can also opt for a reputable cleaning service that can help you with the process. It can seem a little more expensive than usual, but it's much more sustainable per see. Read Also: Vancouver House Cleaning Services with Local Home Cleaners Near You What You Need to Look for When Hiring House Cleaning Service 5 Hotel Housekeeping Tricks You Need To Clean Your Bathroom

READ MOREDetails
how to harvest sunflower seeds

How To Harvest Sunflower Seeds: A Fun And Easy Activity For The Whole Family

Sunflowers are not only beautiful and cheerful, but they also produce delicious and nutritious seeds that you can enjoy as a snack or use in various recipes. Harvesting sunflower seeds is a fun and easy activity that you can do with your whole family. It is also a great way to teach your kids about nature, gardening, and healthy eating. In this article, I will show you how to harvest sunflower seeds in a few simple steps, as well as some tips and tricks to make the most of your sunflower harvest. If you enjoyed reading my blog on harvesting lettuce, you will enjoy reading this one! So, if that is what you are interested in knowing, I have you covered! Keep reading this blog till the end to learn more… How to Grow Sunflower Seeds: A Simple and Rewarding Gardening Project? Sunflowers are one of the most iconic and cheerful flowers in the world. They are also one of the easiest and most rewarding plants to grow from seeds. Sunflowers can brighten up your garden, attract pollinators, provide shade, and produce edible seeds that you can harvest and enjoy.  In this part of the article, I will show you how to grow sunflower seeds in a few simple steps, as well as some tips and tricks to make the most of your sunflower growing experience. How to Choose Sunflower Seeds? The first step to growing sunflower seeds is to choose the right seeds for your garden. Sunflowers come in a wide range of sizes, colors, shapes, and types. Some of the most common types of sunflowers are:  Giant sunflowers These are the tallest and largest sunflowers, reaching up to 15 feet in height and 12 inches in diameter. They produce huge and heavy flower heads that are filled with large and plump seeds. They are ideal for creating a dramatic and impressive display in your garden, as well as for harvesting large quantities of seeds. Some examples of giant sunflowers are Mammoth, Titan, and Kong. Dwarf sunflowers These are the smallest and shortest sunflowers, growing up to 3 feet in height and 6 inches in diameter. They produce smaller and lighter flower heads that are easier to manage and maintain. They are ideal for growing in containers, pots, or small spaces, as well as for adding a splash of color and charm to your garden. Some examples of dwarf sunflowers are Teddy Bear, Sunny Smile, and Little Becka. Colored sunflowers These are the most diverse and colorful sunflowers, ranging from yellow, orange, red, pink, purple, brown, and even green. They produce medium-sized flower heads that are attractive and eye-catching. They are ideal for creating a vibrant and varied display in your garden, as well as for cutting and arranging in bouquets or vases. Some examples of colored sunflowers are Autumn Beauty, Moulin Rouge, and Lemon Queen.  Things to Consider While Choosing Sunflower Seed When choosing sunflower seeds, there are several things that you need to keep in mind. For instance, you should also consider the following factors: Climate and season of your area Sunflowers are warm-season plants that need full sun and warm temperatures to grow and bloom. They are best planted in late spring or early summer, after the last frost, when the soil is warm and moist. If you live in a cold or frost-prone area, you can start your seeds indoors and transplant them outdoors when the weather is favorable. Soil and water conditions of your garden Sunflowers are adaptable and tolerant plants that can grow in most types of soil, as long as they are well-drained and fertile. They prefer slightly acidic to neutral soil with a pH of 6.0 to 7.5. They also need regular watering, especially during the germination and flowering stages. However, they can withstand some drought and dryness once they are established. Space and support available in your garden Sunflowers are large and sturdy plants that need ample space and support to grow and thrive. They should be planted at least 2 to 3 feet apart from each other and from other plants, to avoid overcrowding and competition. They should also be staked or tied to a fence, a trellis, or a pole, to prevent them from bending or breaking under their own weight.  How to Plant Sunflower Seeds? Once you have chosen your sunflower seeds, you can proceed to the next step. Planting sunflower seeds is a simple process that involves preparing, sowing, and caring for the seeds. Here is how to do it: Prepare the Soil Prepare the soil by loosening it with a fork or a spade. Ensure that you remove debris, weeds, or rocks. You can also enrich your soil by adding some compost, manure, or fertilizer, to boost its fertility and drainage. Make sure the soil is moist but not soggy, and has a temperature of at least 50°F. Sow the Seeds Sow the seeds by making holes or furrows in the soil, about 1 to 2 inches deep and 2 to 3 feet apart. You can use a ruler, a stick, or your finger to make the holes or furrows. Drop one or two seeds in each hole or furrow, and cover them lightly with soil. You can also sprinkle some water over the seeds to help them settle in the soil. Nurture Care for the seeds by watering them regularly, but not excessively, to keep the soil moist but not wet. You can also mulch the soil with straw, grass clippings, or leaves, to retain moisture and prevent weeds. You should also protect the seeds from birds, squirrels, or other animals, by covering them with a net, a cage, or a cloche. You should also thin the seedlings when they are about 4 to 6 inches tall, by removing the weaker or smaller ones, and leaving only the strongest and healthiest ones.  How to Grow Sunflower Seeds?  After planting your sunflower seeds, you can watch them grow and enjoy their beauty and bounty. Growing sunflower seeds is a rewarding and satisfying experience that requires minimal maintenance and care. Here are some tips and tricks to grow sunflower seeds successfully: Water Water your sunflowers regularly, but not excessively, to keep the soil moist but not wet. Sunflowers need about 1 to 2 inches of water per week, depending on the weather and the soil conditions. You can use a hose, a sprinkler, or a drip irrigation system to water your sunflowers. You should water them in the morning or evening, and avoid wetting the leaves or the flower heads, to prevent fungal diseases. Fertilizer Fertilize your sunflowers occasionally, but not excessively, to boost their growth and flowering. Sunflowers need a balanced fertilizer that contains nitrogen, phosphorus, and potassium, such as a 10-10-10 or a 20-20-20 formula. You can apply the fertilizer once or twice during the growing season, following the instructions on the label. You should avoid over-fertilizing your sunflowers, as this can cause them to grow too tall and weak, and make them prone to pests and diseases. Pruning Prune your sunflowers occasionally, but not excessively, to improve their shape and health. Sunflowers do not need much pruning, as they are naturally self-pruning and self-cleaning. However, you can prune them to remove any dead, damaged, or diseased leaves, stems, or flowers, to prevent infection and improve air circulation. You can also prune them to control their height and spread, by pinching or cutting off the tips of the main stem or the side branches. You should use clean and sharp scissors or pruners to prune your sunflowers and do it in the morning or evening when the plants are less stressed. When to Harvest Sunflower Seeds? The first step to harvesting sunflower seeds is to know when they are ready. Sunflowers typically bloom in the summer and their seeds mature in late summer or early fall. You can tell when your sunflowers are ready to harvest by looking at their appearance and feel. Here are some signs that your sunflowers are ready to harvest: Petals have fallen off or turned brown. The back of the flower head has turned yellow or brown. Seeds have developed black and white stripes. The seeds are plump and firm to the touch. If you are not sure if your sunflowers are ready to harvest, you can do a simple test by rubbing your thumb over the seeds. If they come off easily, they are ready to harvest. If they are still attached to the flower head, they need more time to ripen. How to Harvest Sunflower Seeds? Once you have determined that your sunflowers are ready to harvest, you can proceed to the next step. Harvesting sunflower seeds is a simple process that involves cutting, drying, and storing the seeds. Here is how to do it: Cut the flower heads from the stems using a sharp knife or scissors. Leave about 12 inches of stem attached to the flower head for easier handling. Place the flower heads in a dry and well-ventilated area, such as a garage, shed, or porch. You can hang them upside down or lay them flat on a screen or rack. Make sure they are not touching each other to prevent mold and rot. Let the flower heads dry for about two weeks or until the seeds are completely dry and hard. You can check the dryness by biting or cracking a seed. If it is crunchy and not moist, it is dry enough. Remove the seeds from the flower heads by rubbing them gently with your hands or a soft brush. You can also use a fork or a spoon to scrape them off. Discard any debris, such as petals, leaves, or insects. Store the seeds in an airtight container, such as a glass jar, a plastic bag, or a metal tin. Label the container with the date and the variety of sunflower. Keep the container in a cool and dark place, such as a pantry, a cupboard, or a basement. How to Enjoy Sunflower Seeds? Now that you have harvested your sunflower seeds, you can enjoy them in various ways. You can eat them raw or roasted, salted or unsalted, shelled or unshelled. You can also use them in salads, soups, breads, muffins, granola, trail mix, pesto, butter, and more. Sunflower seeds are rich in protein, fiber, healthy fats, vitamins, minerals, and antioxidants. They can help manage high cholesterol, blood pressure, and inflammation and boost your immune system, brain function, and mood. Here are some tips and tricks to enjoy your sunflower seeds: Roast To roast your sunflower seeds, spread them in a single layer on a baking sheet and bake them in a preheated oven at 300°F for about 15 to 20 minutes, stirring occasionally, until golden and crisp. You can season them with salt, pepper, garlic, onion, paprika, cumin, or any other spices you like.  Shell To shell your sunflower seeds, you can use your teeth, your fingers, or a nutcracker. You can also soak them in water for a few hours to make them easier to shell. To remove the shells, you can blow them away with a fan, a hair dryer, or your mouth, or you can shake them in a colander or a sieve. Sunflower Seed Butter To make sunflower seed butter, you need to blend the shelled and roasted sunflower seeds in a blender until it turns smooth and creamy. You can add a little oil, honey, salt, or vanilla to enhance the flavor and texture. You can use sunflower seed butter as a spread for toast, crackers, or fruit, or as a dip for pretzels, celery, or carrots. Pesto To make sunflower seed pesto, blend roasted and shelled sunflower seeds with fresh basil, garlic, olive oil, lemon juice, salt, and pepper in a food processor or a blender until smooth and thick. You can use sunflower seed pesto as a sauce for pasta, pizza, or sandwiches, or as a dressing for salads or roasted vegetables. Wrapping It Up! Harvesting sunflower seeds is a fun and easy activity that you can do with your whole family. It is also a great way to enjoy the beauty and bounty of nature, as well as the health benefits of sunflower seeds. By following the steps and tips in this article, you know how to harvest sunflower seeds in a few simple steps, as well as enjoy them in various ways. I hope you found this article helpful and informative. If there are any other queries related to the same, please feel free to let me know. All that yo need to do is scroll down till you reach the bottom of the page. Then leave your comments and suggestions in the box below. And I will be ether to answer them all for you!  Learn More About: Best Material for Garden Sheds: A Guide for Everyone Asparagus 101: When, How, And How Often To Harvest? Best Gardening Tips For Beginners: Adopting A Relaxing Hobby

READ MOREDetails