Interiors to Reduce the Heat Build-up in Your Homes

Published on: 16 March 2016 Last Updated on: 04 October 2021
Content Rally

In countries like where though we experience all climate types, summers and humidity are still the dominant types. The soaring temperature the rising sun plays its role most of the year to give us a good splash of nature. Hence, beating the heat is one of the major concerns in most parts of India throughout the year.


Most of the time, the hot weather falling on the roof exacerbates the problem. To fight this, experts suggest passive cooling techniques which provide interiors with comfortable conditions using natural means. This refers to reflective and radiative techniques and processes which are used to reduce heat gain or absorption by facilitating the elimination of excess heat in your interiors.

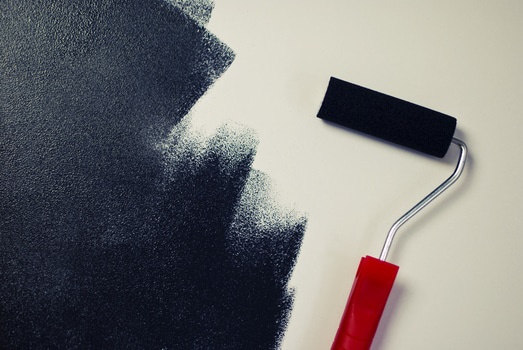
Heat gain in internal spaces can be controlled by modulating the temperature by using shading techniques, the color of the external surfaces of roof paint, and the color of the paints on external walls. Dark color tends to absorb more heat while light colors have a tendency of absorbing less heat. Therefore in countries like India, lighter colors like whites, light green, pale yellow, etc. for external walls are preferred.

The key lies in utilizing external heat sinks like the night sky, air, soil, water, etc. properly and sufficiently. The internal design and color scheme play a vital in optimizing to their best capability to maintain the thermal atmosphere of your space properly.

Evaporative cooling practices introduced in the interior design also helps in keeping the temperature of the house comfortable. In summers, the dry outside air supports this technique. Being a little innovative here helps to a great extent. Some of these are part of our enriched culture which can be used to amplify the design as well as serve the purpose of keeping the space cool. Indoor water features will create the perfect cooling and relaxing atmosphere for your home. For instance, the water rangoli, a small water fountain in internal space, indoor plants which will have wet soil are all good for this.

Reflective surfaces like glossy mirrors, glasses, vases, framed paintings, etc. react positively to the air floating around in the room which bounces to and fro and improves ventilation from the window in the direction of the air. Moreover, if the window has a green cover with branches of trees or stalks climbing over it, the view will also have a cooling effect.

After all, said and done, we come back to wall paint which definitively gives you the best bang for your buck. Having all your walls in the mildest shades and creating one wall as the focal point is the trendiest way ever. If the interiors remain very hot, and you still want to follow this art of accenting the central wall, you must use a cool color in a light hue. From a baby pink to lavender or even a delicate mauve will accent your wall and still create a soothing focal point. You can then hang a mirror décor or a mesmerizing painting here to complete the look.

This kind of design will help to overcome the build-up of heat in your homes and building and you create a calming environment to create beautiful memoirs you can cherish all your life.

Abdul Aziz Mondol is a professional blogger who is having a colossal interest in writing blogs and other jones of calligraphies. In terms of his professional commitments, he loves to share content related to business, finance, technology, and the gaming niche.

View all posts

Leave a Reply

Your email address will not be published. Required fields are marked *

Related

robot-vacuum

Robot Vacuum: Why You Should Buy

In today’s day and age, humans still labored over many daily chores and errands. These works can sometimes be very tiring and cause a lot of stress in our busy life. Fortunately, there has been a lot of advancement in daily home assistance. Technology has advanced so much that we have something known as robot vacuums also known as robovac. Such cleaners had inbuilt intelligent programming which enables them to clean our house efficiently. While the earliest model was low in features, the latest one is filled with the state of the art technology and capable of cleaning the whole house all by itself due to its intuitive, connected, and powerful processor. Advantages of buying a Robot vacuum are: Very easy to use Comes in every price range Cleans your floor tidily navigate most households without getting stuck Long battery life Equipped with Wi-Fi and can be accessed by smartphones These robot vacuum has been in use for the past 15 years and each model has been tested more than 100 times before the product is launched in the market. Why would someone buy a fancy gadget like a robot vacuum? These bots were never bored or procrastinated in their work. A bot like this who worked twice a week can clean a lot more than a half-hearted human doing the same job for 10 mins every day. Imagine your schedule to clean your house on weekend but you have to postpone it due to some reason can result in double the amount of work next time and no home party till you clean. This problem can easily be solved with robotics. These bots are most suitable for a pet’s owner, pet creates a lot of mess which needs to be clean from time to time. Not everyone can do that this is where the robot vacuum comes into play and cleans the house efficiently. These robots clean hair, plastic waste, or litter every day, so that the debris never gets a chance to build up at the end of the week. Now where to buy these from? The most trusted and reliable site on the internet is comparisono. We have chosen this site because it gives its customer a variety of options, filters to say the least. The site can easily help you choose the most suitable model for yourself. This site contains the very best robot vacuum has to offer in terms of technology, reliability, features etc. there are over 60+ gadgets available on this site which you can buy at the lowest of prices. The robot vacuums displayed on this site have a total of 50 inbuilt features such as scheduling, smartphone access, etc. The price ranges for this robotic are very flexible as well. With the cheapest one being at just 80 dollars while the most expensive one with the most technological advances of them all at just 1145 dollars. There is also a price filter available on the website which will show you a robot vacuum in your budget. Or you can just list them from high to low or vice versa. Another remarkable feature of the site is it has products from all the top brands including “iROBOT”, “EUFY”, “ILIFE” etc. along with some intermediate and startup companies’ products available as well. Another filter option is to search the product by alphabet not common or rarely seen on websites. You can even compare any robot vacuum with a feature available on this website “Add for comparison”. This option will help you decide the product you want from the few you shortlisted. Initially, after comparing the specs for each shortlisted vacuum, it also shows a comparison rating meaning the best among the above ones. This site is perfect to buy yourself a robot vacuum which gives you more time to spend with your friends or relax while at home. Read More: Home Hacks: Stuff You Can Clean in One Hour or Less. 6 Tips for Keeping Your Home Clean (With Pets and Kids).  

READ MOREDetails
Iron Clothes

How to Use Iron Clothes With Steam

Believe it or not, the amount of people that don’t know how to iron clothes is amazing. There’s no shame on it since most of us were thrown into society without really practicing skills that would definitely help us fight back as we become independent. These skills include things like cooking a proper meal before going to work, knowing what groceries to buy without spending all our money on unnecessary things, being able to pay bills accordingly without becoming a mess, cleaning the house every now and then, and of course, knowing how to use steam irons and what to do to properly iron our clothes to not look like folded toilet paper. Don’t worry though! In this guide, I’m going to teach you the essentials of how to iron, and how to deal with different types of fabric. To be honest, ironing is not something as complicated as many think. It’s all about knowing what to do, which is what most people lack. The process may require a little preparation and patience, though, so be prepared to practice with different pieces of clothing to get the main idea. One thing is sure, though. You have to be careful when using an iron because they can be harmful if dealt with without precautions! How to Prepare for It The first thing you’ll need is a flat surface where you can prepare your clothes to be ironed. Try to have everything neatly organized to avoid possible accidents, and if you can, try to do it on an ironing board. Some clothing is too delicate for the heat produced by the heated metal of the device, so have a piece of fabric to protect these. Read more: A Complete Guide on Using IRON on Transfer Paper Connect the Iron Irons can take some time before they are ready to be used. They usually show a sign that they are ready, so be sure to be attentive about them while you take care of the next step. Never try to do it before its ready, since it’ll lead to a slower and far less efficient process. Know the Differences Between Materials, and Sort Them Beforehand Depending on the type of fabric you are dealing with, you might want to change your approach while ironing. You can’t deal with a silk piece the same way you would deal with a cotton one, for example. Some pieces of clothing will require you to use the lowest setting of heat possible, while others may require even more heat. Separate silk, wool, rayon, and acetate to be dealt with the lowest settings. Wool clothes may require the protection of another piece of fabric that was previously dampened, so take that in mind! For polyester, go with the medium heat setting, and for cotton, you can go either medium and high heat setting. Both of them should be dampened to be protected from the heat. Before the iron is ready to go, you should have them sorted out. How to Iron Clothes When you deal with shirts with a collar, you should start with it. You can start with a pattern that follows the inside part of the collar, starting from the center of it, until you reach the edges. Then, fall back to the center, and keep moving between both sides. Once you’ve finished with it, you can work the outside. Lay down the shirt in a way that you can flatten it with the iron with simple movements. After that, you have to work your way down, slowly moving the shirt. Then, work the sleeves then the cuffs. Pants are much easier than shirts with a collar. You just have yo lay them down in a way that you can work both legs at the same time. Start with the waist, gently work with the pockets, and go your way down. Repeat the process until you are satisfied with the results, but make sure to be gentle and careful with the heat and the ironing. Considering that there are way too many types of clothing to teach all of the proper methods and techniques to iron them accordingly, you should check this guide on how to do it without fail. Safety Recommendations Ironing can be a pretty dangerous process if you are not attentive while you do it. If you don’t take safety measures, you might harm yourself or others, so make sure to pay attention to this part of the guide. The very first thing you should always make sure is that the iron is unreachable for children. Children can be curious and do things without knowing, so you will be the one to blame if you allow them to get closer while they are heated up. This is important even after you’ve finished ironing. These devices tend to remain heated up even after disconnecting them, so you should still be attentive to any possible situation. I recommend you to wait at least 10 minutes before taking your guard off. Remember to check just in case. While it rests, don’t leave it face down. You might burn something or damage the iron if you do. If an accident happens and you burn yourself or someone else gets burned, treat the burn with cool water for as much time as you can. 20 minutes should be more than enough. Don’t use things like butter or oil, since it might infect the injury. if the burn is too big, you should check yourself with a doctor. Read Also: How To Choose A Washing Machine? How to Pack Clothing Properly for Shipping Choose The Latest Collection Of Women Clothing For a Stylish Look 6 Benefits Of Buying Clothes Online – Why People trust online shopping

READ MOREDetails
Fabric Expansion Joint

How to Install a Fabric Expansion Joint

A fabric expansion joint is a metal device that attaches to your ceiling above the door frame and expands into the attic. It's then used as part of a roof venting system that reduces condensation. The installation process requires you to drill holes in the rafters and use a special shrink tube to seal the seams from inside and outside. What is a Fabric Expansion Joint? A fabric expansion joint is a metal device that attaches to your ceiling above the door frame and expands into the attic. It's then used as part of a roof venting system that reduces condensation. The installation process of a fabric expansion joint requires you to drill holes in the rafters and use a special shrink tube to seal the seams from inside and outside. The main benefit of installing a fabric expansion joint is that it allows for higher ventilation rates, which can result in lower humidity levels in your attic. This is especially helpful during times when people are prone to developing asthma symptoms due to high humidity levels. Additionally, with this option, you will also be able to install ductwork without having any openings visible from the outside of your home. And of course, there's no need for any work on your roof or chimney as well! Installation Process The installation process is pretty straightforward and doesn't require a lot of skill. If you're handy with tools, it should be relatively easy to do. First, you'll need to remove the old venting system and install the new fabric expansion joint. Then, you'll need to cut holes in the ceiling rafters and use a special shrink tube to seal the seams from inside and outside. Once your fabric expansion joint is installed, you can finally attach your fabric expansion joint. The entire process should only take about an hour or two. How to Install a Metal Roof Vent If you're a homeowner who wants to install a metal roof vent, you'll need to gain access to the attic space and remove some of your existing roofs covering. This includes removing the rafters, which could be difficult and costly if they're not accessible from the inside. To make it easier on yourself when installing a metal roof vent, here are some tips for how to go about it: Get help with this task. It can be very difficult to get up on top of your roof without any assistance, so be sure that someone with experience is available to help you out. If possible, use a ladder instead of climbing up on top of your house's roof. This will make it much more comfortable and less dangerous. Use wood shims or spacers to support the rafter while you drill holes in the ceiling above them. You can also use these shims underneath the vent where it meets the frame to create an airtight seal between the two components. Conclusion That's a wrap! If you're installing a metal roof vent, or a fabric expansion joint, you'll need to find a way to secure the vent to the roof. You'll need to find a way to secure the vent to the wall as well. There are a few options available: screws, nails, glue, wire, or screws and nails. If you have access to the roof from the exterior, use screws and nails. If you have access to the roof from the interior of your home, use screws and glue. If you have limited access to the roof, use wire or screws and nails. Read Also: Roofing Painting Contractor Leads: Ask Before Hiring One What Are The Services Offered By Roofing Companies? Ready Rooftops – How to Install Solar Panels Roof Repair: Should You Hire Roofers or DIY?

READ MOREDetails