What Can An Air Conditioning Installation Expert Assist You With?

Published on: 14 June 2023 Last Updated on: 29 December 2025
Air Conditioning Installation

Before putting resources into a challenging installation process, you should familiarize yourself with your options if you have never sought out a ventilating, heating, and central air conditioning installer, and supplier before.

In addition to installing new systems, qualified HVAC technicians can also clean and repair existing HVAC units and perform extensive ductwork. Here are some of the most common services you may anticipate when a Cincinnati air conditioning installation company handles your HVAC repairs or replacement:

They Perform Unit and Duct Inspection Services

An inspection is a crucial step if your home currently is equipped with a partially working HVAC system that needs repairs or adjustments. It is customary to have an existing system evaluated before purchasing a property with one.

However, when the unit and ducts are inspected during the home purchase inspection process, they typically do not perform the type of in-depth look at the unit, along with providing price quotes for the repairs or replacement unit that may be necessary.

These assessments help determine how long the current system and its elements have been in operation and for getting a general sense of how long it could be before you need to install new ductwork or a replacement system. When it comes to performing the replacement or repair, you will want to hire an experienced contractor who can give you a price and timeline to perform the task for you.

Upkeep and Parts Replacement

The filters are a crucial part of every ventilation system. Even the best HVAC systems become damaged over time by dust particles that accumulate. HVAC experts may easily install, maintain, and replace these filters without running the risk of causing harm to the system.

The majority of HVAC businesses provide maintenance service contracts that include the replacement of filters and yearly system testing to make sure everything is operating effectively.

Replacement of Drain Lines and Wiring/Coil Installation or Replacement

Evaporator coil replacement, drip pan replacement, and refrigerant pipe leak repair are all required maintenance procedures. If maintenance is neglected, the entire system might be compromised by mold, moisture, along with other electrical problems.

This is a more in-depth set of repairs and can get rather costly once they are started. Before having any of these repairs and parts replacements, be certain to get a quote from your service company for the total of the job. An HVAC service contract may cover some of this work, but you should check your agreement to be sure that it also includes maintenance and replacement components.

Installation of Cooling Material Lines

Through copper refrigeration wires, an air conditioner’s evaporator coil is linked to the pump. The special lines in your home may only be installed or fixed correctly by a qualified expert. They search for problems that could impair the system’s effectiveness, such as leaks and other types of harm.

It is critical to maintain refrigerant lines since they may become costly and dangerous if they become damaged or broken.

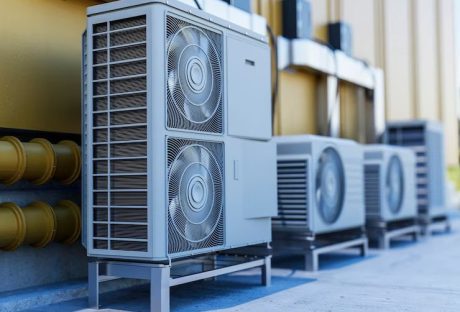
Condenser Maintenance

Without a condenser, an air conditioner would not be complete. The accumulation of dirt and dust encourages the growth of fungus and bacteria, which can cause mechanical systems to malfunction and cause allergic reactions in the inhabitants. For more on the mechanical operations of an HVAC system, click here.

Periodically, an HVAC contractor might clean the condenser. Additionally, the contractor will do testing to make sure the AC will keep you cold for several hours despite the soaring outside temperature.

How to Locate a Service Technician to Install an AC Unit

Look up reviews online and seek out personal suggestions from others. It is typical practice for online firms to send an HVAC specialist to your home to provide both online bids and in-person estimates. The latter is typically closer to the true cost.

Knowing When it is Time to Contact an AC Replacement Service is Important

Get your air conditioner serviced as soon as the winter is over to make sure it is ready for the summer. It is vital to keep in mind that service expenses might increase significantly in the summer. For HVAC systems (https://www.ftccollege.edu/article/what-are-the-main-components-of-an-hvac-system/), this time of year is the most demanding and therefore the most likely for them to entirely fail.

Therefore, if you are installing a new unit, you should schedule the installation for the end of the colder months or the starting point of spring.

What to Take into Account When Selecting a Professional or Do-It-Yourself Air Conditioner Installation

Installing a window unit air conditioner is not the same as installing a cutting-edge central air conditioner. Your only choice is to engage an experienced professional to install forced air via central air vents if your house is not equipped with them.

You may get assistance from a qualified HVAC supplier in determining things like the size of the unit you require and the location of the ductwork and condenser in your home. You can be sure that the job will be finished quickly and successfully if you select a qualified HVAC technician.

Read Also:

  • Signs Your Air Conditioner Might Be Dying
  • How To Save Money On Your Air Conditioning Costs This Summer
  • 6 Reasons You Need A Rooftop Air Conditioner On Your Van During The Summer Months

Arnab is a professional blogger, having an enormous interest in writing blogs and other jones of calligraphies. In terms of his professional commitments, He carries out sharing sentient blogs.

View all posts

Leave a Reply

Your email address will not be published. Required fields are marked *

Related

Drywall

Elevate Your Home With Unique Ceiling Textures

Drywalls are those construction materials that are used to create walls and ceilings in your home. Not all that, but drywalls also come in handy if you want to create design features like eaves, arches, or any mind-blowing architectural requirements!!! Do you know the best part about drywalls? These are super easy to install, highly durable, and only require simple repairs when damaged. So, drywall is a flat component composed of calcium sulfate dihydrate, typically between thick sheets of backer paper, and facer, used to construct interior ceilings. Let’s talk about the ceiling textures and the drywall options you can choose for your home!!! The Ceiling Textures And Your Drywall Options Decorating your home can be a real challenge for many !!! Therefore, choosing the right drywall finish or texture can prove to be a hard nut to crack. And it’s very natural to get in a state of indecision if you are handpicking it for your new home or renovation project. There are so many options that it feels like you are “searching for a pearl in an ocean.” Making up your mind about whether or not to go texturing your ceiling can be a tough job. And even if you choose to texture your ceilings, there are chances you’ll be confused about which one to go for!!!! And remember, getting the drywall right is the first step of tiling projects?”. But No Need to Worry!! This article will guide you in choosing the perfect texture and drywall option for your ceilings to look more elegant than ever!! 1. Sheetrock Texture: Old Is Gold Sheetrock ceiling texture is a drywall ceiling texture that has been famous since 1917. The reason this drywall texture is so awesomely renowned is because of the artistic look that it gives to your ceiling And the best part is you don’t need to use any sort of spray paint in this case. You can achieve this texture by using your artistic hand technique and without using any special brushes. This texture is perfect for any room. There are no restrictions on the use of this ceiling texture. 2. Stipple Brush Texture: A Test Of Your Skill This texture is not as easy as it seems. You need skills to create this texture. To create this texture, you need a roller and slap brush. The fascinating fact about this texture is it can cover the bumps and holes on your ceiling. And if you have the skills, then this texture can surely make your ceiling look gorgeous than ever!! 3. Swirl Texture: Creativity Taken To A New Level To achieve this texture, you need either a roller or sprayer. You can also do this by using a technique called “the basic swirl” method. But one thing that you need to keep in mind is while creating this texture, you’ll need a lot of patience to get the best result. And the difficult part is you need to create the pattern before the mud dries. So, make sure to have a helping hand by your side. Overall, the texture can really give that awesome look on your ceilings if you do it in the right way!!! 4. Orange Peel Texture: A Color Of Choice The name suggests all the colors of orange skin, but sometimes it’s also called “an eggshell” ceiling texture. If you really love this color, then this can be on the top of your favorite lists. To create this texture, you need to apply thin mud to the ceiling using a spray gun set at very high pressure. The more artistic mind you have, the more artistic look it has got!!!! 5. Smooth Textures: Choice Of Many If you are someone who wants the best at a cheap cost, then this texture is just the right choice for you. Moreover, you don’t need to have many skills to create this texture design. The look of this texture is just mind-blowing, and if you are someone who likes things to be consistently gorgeous, then this is the texture you can have for your ceiling. This texture is effortless to remove and is also perfectly suited for any room. 6. Tree Bark Texture: Beauty Of Nature If you are someone who loves nature and wants to bring the reflection of nature inside your home, then this textured style is just the option you can have. This ceiling has the look of a tree. You can create this texture just by using a heavy roller. The texture might look simply, but it’s very artistic and can surely catch the eyes of many. If you have a farmhouse, then this texture will double the beauty!!!!! 7. Slap Brush Texture: Slap The Beauty Out Artistic, gorgeous, beautiful, and elegant are the nicknames you can give to this texture. A complete package of beauty!!!! To get this texture, you’ll need a brush with very stiff bristles and thin mud. Firstly, you have to cover your ceiling with mud using a roller, then take the brush and slap the ceiling from the edge. This can be a hard nut to crack because if you don’t get it right on the first shot, the whole ceiling might end up looking messy. 8. Popcorn Texture: Cottage Cheese This texture, also known as the “cottage cheese” or “acoustic” ceiling texture, is probably one of the most famous ceiling textures ever!!! If you look closely, you’ll see it’s kind of a look-alike of “popcorn.” That’s why it’s called “popcorn texture.” To achieve the correct texture, you need to use a sprayer to apply to your ceiling. This contains Styrofoam with mud which gives that puffy effect. But it will require you to have a lot of skill to achieve this effect. That’s because the “popcorn texture” is both challenging to apply and remove. I hope this article will help you to know about the needs of ceiling textures and drywall options. And now I believe you’ll be able to get yourself the perfect texture for your ceilings. How Can I Remove Old Ceiling Textures Safely? Removing old ceiling textures can be a big job, but it doesn’t have to be intimidating! If you want to update your ceiling and get rid of that outdated texture, I’m here to help. No matter if you have popcorn, stipple, or another type of texture, this process takes a little bit of care, but don’t worry! Here’s a step-by-step guide on how to remove an old ceiling texture without breaking your back or the bank. Step 1: Test For Asbestos Before you get out any tools…safety first!  Remember, many older ceilings (especially those with popcorn texture installed prior to 1980) contain asbestos. Before doing anything else, have your ceiling tested for asbestos. You can hire a pro to test the ceiling or buy a self-test kit. If asbestos is present, halt all work and consult pros immediately. Asbestos removal is not a do-it-yourself job because it poses serious health risks if mishandled. Step 2: Clear The Room If there’s no asbestos present, it’s time to get the room ready. Cover all the furniture. You’d be amazed at how far a fine mist of water, compound, and paint can travel! Also, plastic should be removed from the floors, and tape should be around any ceiling fans or lights that are not being removed. I can personally tell you we didn’t do this. We found dried white dust on our bedspread when we were stripping the wallpaper in our bedroom, and we had to clean up all the residual dust a little too late. It was wild! Step 3: Soften The Texture For Better Finish Here’s where the fun starts! To make that texture easier to remove, you’ll need to soften it. Fill a spray bottle with warm water and mist the ceiling. You don’t want to drench it. If you put too much water on the ceiling, it could end up damaging the drywall underneath. Allow the water to sit for about 15–20 minutes or so, giving it time to penetrate and loosen up that texture material. Don’t rush this step. It’ll only cause more work for you in the long run. Step 4: Clean Your Work Grab a wide putty knife or scraper and start scraping off the texture. Do small sections at a time, and scrape at a shallow angle so that you don’t gouge the drywall underneath. If it’s not coming off well, spray some more with the water bottle and let it sit for a little longer. This step can be kind of messy and time-consuming, but have patience because, in the end, you will have a nice smooth ceiling. Step 5: Patch & Sand Once the texture is gone, you may notice a few dings or dents in the ceiling. Don’t worry! Just fill them with some joint compound, sand it smooth, wipe away any dust and you’re ready for a new ceiling. And that’s it! A fresh, smooth ceiling in no time! Read Also: Here’s How to Turn Your Garage into a Bedroom on a Budget! Turn your attic into a living space

READ MOREDetails
Sound Dampening

What Does Sound Dampening Mean?

Noise traveling to and from rooms can be distracting when trying to work, read, or enjoy some peace and quiet. It can be hard to focus on what you are trying to do when you can hear music blaring, a loud television, or children screaming through the walls, not to mention a million other potential distractions. Fortunately, there are ways to reduce sound transmitted through the walls, which can be invaluable when preventing sound transfer inside or outside a room. Felt Right has a unique way to achieve this. Depending on the materials you use for this procedure, you can obstruct more or less sound, even blocking the transmission of sound waves entirely, if you choose. What is Sound Dampening? Sound dampening is installing materials within a home, vehicle, or other location to absorb, reflect, or diffuse sound. This reduces the amount of noise that passes through and can also improve a room’s acoustics, which is why sound dampening is also known as “acoustic treatment.” It is a significant reason that recording studios make use of this technique. Sound dampening can eliminate approximately 80% of the sound transfer, meaning that you can prepare a room for studying, work, hobbies, or mental health. However, there is just enough sound to hear if there is an emergency in another room or someone yells for you. This is especially ideal if you have children in the house or others who may need your attention so that you can focus on what you are doing while still being accessible to others if required. If you need even greater solitude, one option is to soundproof a room similar to sound dampening but endeavors to block any sound infiltration whatsoever completely. However, this process is far more intensive and to prove entirely successful generally requires planning in architectural design before room construction to ensure complete soundproofing. What Materials Work Best for Sound Dampening? When you sound dampen locations, you must decide which materials you wish to use. Different materials can prove effective to different degrees; some are external solutions, while others require installation within the walls or other surfaces. Keep in mind if air can pass into an area, so can sound. For best results, address windows, spaces between and under doors, and other airflow conduits. No matter how effective your sound-dampening materials are, if air passes freely through such openings, you will have more noise. Felt Tiles One of the easiest methods for sound dampening is through the use of felt tiles. These panels have an adhesive back designed not to damage walls or paint, creating a plug-and-play solution. Felt tiles are versatile, coming in various shapes, sizes, and colors, so they are excellent choices if you wish to snazzy up the interior design of your room and enjoy the benefits of the felt’s sound-dampening qualities. Choosing felt tile designs to match your taste or set a professional tone can be invaluable when creating a relaxing atmosphere or environment conducive to work. A soothing, welcome decor has proven effective in improving mental health by reducing stress and anxiety. Having an attractive backdrop during work video calls provides an air of credibility to a home office space. In either situation, the reduced noise permeation is invaluable. Polyurethane Foams These polymer foams come in rolls or sheets and can serve as a suitable sound-dampening barrier, particularly when reducing high-frequency noises. However, low-frequency sounds are more likely to penetrate if the foam is not sufficiently thick, so keep this in mind if you want more effective noise reduction. Also, be aware that polyurethane foams are flammable, so only place them in areas where they will not be susceptible to open flames or other fire risks. As a result of this quality, this type of sound dampening should be for home use in fire-safe locations rather than used in an industry setting, where there is a greater risk of inflammation. Polyester Fibers These dense materials are excellent for sound dampening in industrial settings or other noisy areas. They work best on high-frequency sounds and are often lauded for their strength and durability, making them incredibly resistant to general wear and tear and fire. Plus, it is a lightweight material, which makes it easier to transport and install. Cork This porous material is surprisingly effective as it can trap a significant quantity of air, which means it can catch sounds and convert them to vibrations, effectively deadening noise. Cork is effective even in thin sheets, and the material is incredibly lightweight. Furthermore, it is an accessible material to install and can be purchased in tile forms for easy customization. Mass-loaded Vinyl A popular choice because it is one of the least expensive sound-dampening options, mass-loaded vinyl is explicitly intended for sound dampening. It is easy to find and acquire this material, but remember that the denser the material, the more effective it will be. Mass-loaded vinyl does not have much elasticity, so it forms a solid barrier that sounds waves have trouble passing through. Green Glue, Gaps, and Spaces Remember that sound can pass through any space air can, so for better sound dampening, you need to find spaces where air can pass through, such as cracks or gaps within the walls. Green glue is an excellent choice for filling holes, blocking airflow, and reducing the noise that can enter (or exit) the room. For areas you will not want to seal, such as windows, you can find sound-reducing curtains that can serve as sound dampening, combatting unwanted outdoor sounds such as those from traffic, industries, and neighbors. For doors, sound dampening can be as simple as placing a blanket against the gap beneath. Alternatively, you can install a door stop, soundproofing rubber, or acoustic panels to block sound from entering. The Bottom Line When you want to keep from traveling in or out of a room, one of the most effective ways to reduce sound is to find appropriate materials that function as sound-dampening agents, placed along walls and wherever there are gaps or cracks in which sound can pass. Proper sound dampening can create an atmosphere conducive to work or relaxation or prevent televisions, music, musical instruments, and other loud forms of recreation from disturbing others. Read Also: How To Get 60 Day Trial For Luxury Beddings Five Bedroom Rug Ideas – Area Rugs and Decorating Ideas Living Ideas In Small Bedroom House Plans With Efficient House Designs

READ MOREDetails
Wood-burning Stove

5 Great Reasons Your Home Needs a Wood-burning Stove

When autumn begins to fade into winter, the temperature starts to reduce and gets even colder. The need to keep the house warm also arises. You definitely have some other form of heating your home since this won’t be your first winter. But your being here means that you are considering an alternative heating method. The efficiency of wood-burning stoves is one of the many reasons one should be the alternative on your mind. But there are also so many other reasons and they would all be discussed in this article. But first, what are wood-burning stoves? What Are Wood-burning Stoves? Wood-burning stoves are home appliances that are made of metals like steel or cast iron and are used for heating the house. As the name implies, wood is the fuel for the stove and it is burnt inside a fire chamber that is usually enclosed. The gases and fumes they produce have to be taken out of the room either through a flue or a chimney just like a traditional fireplace. Although these stoves have existed for a long time, they only just rose in popularity. And this is because more people have begun to appreciate their benefits. But what are these benefits? Let’s find out below. Reasons You Should Get a Wood-burning Stove The following are the major reasons a wood-burning stove is a great heating system for the home… 1. Efficiency The heat that this heating system produces is very impressive. Your home gets to enjoy a great form of heat output with one of these burner stoves. This means that the house will get warm effectively and a lot more quickly. They come in various sizes and energy levels, this way you can select one that will adequately suit your home’s size 2. Stylish and Decorative They not only get your house adequately warm, but they also provide aesthetics as they look so great. When one is placed in a room in the home, it is sure to become a new point of attraction by adding style and character to the room. There are a lot of styles to choose from like contemporary or classic and so much more. You simply need to be deliberate when you shop for the burner and ensure you get one that will match the home’s décor. 3. Gives Your House a Homely Ambiance When the weather is chilly and bent on making everyone miserable, one way to beat the weather is to get cozy at home. And a wood burner is sure to provide that homely ambiance that is much needed during this time. The cozy heat from the burner and the roaring flames inside the fire chamber provide a calm and soothing visual impact that will leave you comfortable in no time. Visit https://apnews.com/article/a53e297b6fbc4481a0c917dc41c3842f to find out other ways you can stay comfortable during the cold season. You can sit in front of the fire with a cup of coffee while watching the flames dance. 4. Good for the Environment We are in an age where eco-awareness is at its peak and a lot of people are trying their bests to do right for their environments. One way to contribute towards this goal of a better environment is a wood burner. How is this burner environmentally friendly you may ask. Well, it is because wood which is the fuel of this type of burner is carbon neutral even though it releases carbon dioxide. The amount of carbon dioxide that is produced equals the amount that is consumed by trees which takes the carbon dioxide and then releases oxygen. This way, the burners do not impact the carbon dioxide level in the environment. 5. Cost-Efficient Energy price is constantly going up and people are beginning to find it more expensive heating up their homes with electrical and gas means. Wood burners on the other hand are very energy efficient and thus help you save money that would otherwise have been used on the energy required by other home heating systems. You will surely find this heating method a lot more economical as you will notice an obvious reduction in your heating bill. The heating bill is reduced and not cut off because you may still have to make use of the central heating where you haven’t placed a wood stove. The initial cost of getting the burner bought and installed may be on the high side compared to other heating systems. But, we assure you that it would only be a matter of years for this cost to be gotten back through the energy-saving nature of the burner. If you need to learn about more of its benefits, you can check here. Conclusion Getting a wood-burning stove may very well be the best decision you may make when it concerns heating your home. This article discusses 5 great reasons why this heating system is great for your home. Read Also: 5 Things You Should Know About Heating and Cooling Tiny Homes Advantages Of Using A Water Heater At Home

READ MOREDetails