Published on: 23 July 2019
Last Updated on: 12 September 2024
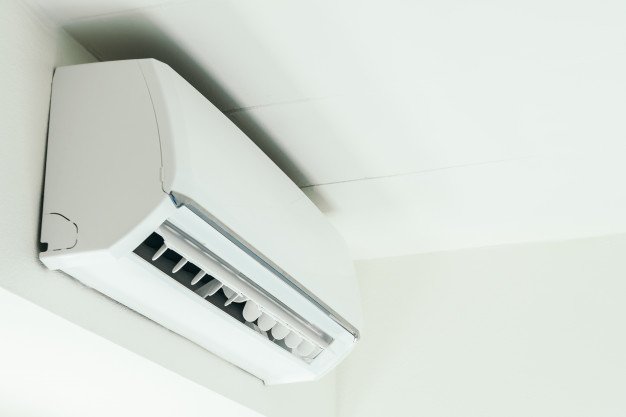
Selecting the best Air Conditioner can be a difficult task, especially when you want to make a long-term investment in your home. It is not easy to tick your requirements against the desired features and functions. However, doing so will determine whether you will go home with a costly lesson or a cooling solution. So, if you would like to experience excellent air conditioning benefits, check out the following list.
10 Amazing Air Conditioners to Try Right Now:
LG LW8017ERSM:
LG LW8017ERSM has been acknowledged as one of the most proficient and energy-efficient air conditioners that can cool a 340 square feet area. The unit can be a bit expensive to operate than the others, but what matters is a quality machine that does a lot more than the standard models. LG LW8017ERSM can remove up to 2.2 pints of moisture every hour.
Keystone KSTAW05B:
Keystone KSTAW05B has 5000 BTU, and this makes it suitable for small rooms. It can cool a 150 square feet area. It only weighs 40 pounds making it easy to be installed in most of the windows. Additionally, it is cost-efficient due to its small size and lower power consumption attributes. Keystone air conditioner has many features, such as remote control, programmable timer, and auto mode, making it comfortable to operate.
Haier HWF05XCR-L
Haier HWF05XCR-L is another fantastic air conditioner that you can try out. On its high setting, it can only make a maximum of 49 decibels of noise. The appliance can work better in small rooms since it can only cool up to 150 square feet of area. Moreover, it is a louver and can only point in one direction instead of four. The AC has a dehumidifying setting for pulling air moisture, ensuring a dry home.
Honeywell HL09CESWK:
Honeywell HL09CESWK is a powerful and dependable AC that is stylishly made. It can cool a room of up to 400 square feet. For safety purposes and peace of mind, it contains thermal overload protection. Additionally, Honeywell HL09CESWK has dual filters that are set to protect your system from dust and hair, and this extends the appliance’s life and performance. The system also has a 24-hour energy saver timer and remote control that bears a digital display.
Frigidaire Gallery 12,000 BTU Cool Connect Smart Cylinder Portable Air Conditioner is the 21st-century wonder of efficiency and luxury. It contains 12000 BTU allowing it to cool larger room spaces for approximately 550 square feet. It is incorporated with LED lighting and the latest mesh grill. The fact that it has 360 degrees airflow enables it to move upwards in a continuous spiral motion, and this ensures sufficient air circulation in the room for evenly cooling.
Whynter Elite ARC-122DS:
The Good Housekeeping Institute named Whynter Elite ARC-122DS as the overall best portable air conditioner. It can cool approximately 400 square feet of space. It has full thermostatic control with a digital readout and a 24-hour programmable timer. It is also eco-friendly as the auto drain function removes the entire condensate in most environments. Whynter Elite ARC-122DS also has a remote control and activated carbon air filter.
Whynter ARC-14S:
Whynter ARC-14S is another fantastic air conditioner that you can choose. It weighs approximately 80 pounds. The appliance can cool up to 5000 square feet of space. It has full thermostatic control of 61°F – 89°F containing digital readout. It is eco-friendly and a dehumidifier. The Fan also includes Activated Carbon Filter.
GE AEM05LX:
GE AEM05LX is an efficient unit for small or medium houses. It can cool a space of about 260 square feet. It contains the energy-saving mode. Companies such as Cool Runnings Darwin offer a one-year warranty for the labor, parts, and compressor of this appliance. GE AEM05LX is lightweight meaning it is easy to install. Its yearly cost of energy is also low.
Friedrich Chill CP06G10B:
Friedrich Chill CP06G10B can cool up to 250 square feet of space, and this makes it suitable for larger houses. It has a timer to control when to go off or on throughout the day. It also has energy saver mode, and auto restart mode that turns the AC back to your preferred setting after the power is back.
Della 8,000 BTU Portable AC:
Della 8,000 BTU Portable AC is an affordable unit that can cool up to 150 square feet of rooms. It contains a digital display with custom touch controls. It includes a quick install kit and one hose to make the setup easy. It also has a minimal volume of noise, making it suitable for small rooms.
Content Rally wrapped around an online publication where you can publish your own intellectuals. It is a publishing platform designed to make great stories by content creators. This is your era, your place to be online. So come forward share your views, thoughts and ideas via Content Rally.
If you are an avid tomato grower you're probably envious of all the different varieties that other growers talk about, but that you can't find transplants for in your area. In many cases, those growers are growing tomatoes from seed.
Growing tomatoes from seed really isn't that difficult, as long as you understand a few basic things. Well, I will walk you through this process below. Read on.
Why is it necessary to start tomato seeds early?
Tomato seeds planted in the garden won't germinate until the ground is warm enough. What's the ideal ground temperature? They germinate best at temperatures in the 70-80 degree range.
If you plant seeds directly into the ground, odds are the summer will be too short for tomatoes to become productive before the end of the growing season unless you live in one of the warmest climates in the US.
The days to harvest number that is on a packageof tomato seeds assumes that you are using transplants.
To decide if your area is warm enough to plant directly in the ground, add 30-50 days to that number. So if it says 90 days you would need 120-140 days of temperatures above 70 degrees to get your first ripe tomato if you plant the seeds in the ground!
When should I start my seeds?
Most people who are growing tomatoes from seed start 4 6 weeks before the last expected spring frost date in their area. You need to wait to plant the seedlings outdoors about 2 weeks after that date when the soil has warmed up to at least 50 degrees.
The date you start growing tomatoes from seed can vary depending on the space you have available and the length of your growing season.
First, you need to gather some important items:
Containers: Start with clean, sterile containers to grow your tomato transplants in.Your local garden center or big box store should have seed starting kits that consist of a black plastic tray with peat pots or plastic inserts and a clear plastic dome cover that fits over the top.
If you're only starting a few seeds, you may want to just plant them in paper or foam cups with holes punched in the bottoms.
Many of us like to save money and reuse flats or recycle containers like plastic milk jugs for starting seeds. This is fine as long as you wash them thoroughly and then sanitize in a 10% bleach solution (1 cup bleach in 10 cups of water).
Note: Be sure whatever container you use has drainage holes in the bottom so that excess water can drain out.
Lights: You cannot grow a healthy transplant without proper light. Even a sunny, south-facing window is not really adequate. Using a led grow light or fluorescent light on a timer that it is on for 12 hours and then off for 12 hours, will ensure that when you are growing tomatoes from seed your plants get all the light they need to grow properly.
You will need to plan a way to raise the lights so that the top leaves of the plants are 2- 3î below the lights. One method is to use a wire shelving unit. The chain that comes with a fluorescent shop light works perfectly to hang it from the shelf above your plants.
Growing Media: Use fresh, sterile germination mix labeled for seed starting. These mixes are usually peat-based and do not contain garden soil.
Tip: More than 50% of people who are growing tomatoes from seed for the first time lose their seedlings to damping-off disease. This fatal disease can literally wipe out your seedlings overnight. Starting with sterile containers and soil mix will greatly decrease the chance of your seedlings becoming infected.
Read also: How To Choose The Right Containers For Your Container Garden
Growing tomatoes from seed are the only way to have the very best tasting and old fashioned heirloom varieties which are not usually available as nursery started plants.
Read also: Does Organic Gardening Improve Soil Quality?
The convex mirror otherwise known as a fish-eye mirror is used in many places for protection and to avoid accidents. It is one of the simple ways to alert you to impending dangers. You don't need to spend a fortune for sophisticated security systems in order to protect your home. There are many varieties of mirrors for your safety like dome mirrors and bathroom safety mirrors. However, they are one of the most flexible mirrors. These mirrors allow you to view different directions without having to adjust the mirror or allowing others to know what you are looking for.
What is a Convex Mirror?
Convex mirrors are made of acrylic or glass and are hardened to make it unbreakable. They diverge light to reflect images. These mirrors have a broad view as against ordinary mirrors. Vehicles use these mirrors to provide a rear view to the drivers. It is also used in stores, grocery shops, etc. as a security device. They can be used both indoor and also in outdoor. They are easy to install and affordable.
Why do you need a convex mirror?
A convex mirror has several applications. It is used in huge apartment complexes and commercial buildings for security. It allows security personnel to check on intruders and to help them in alerting for a possible attack or security breach. It is important because it can provide adequate time to plan and be prepared for any attack either by calling the police or face them yourself. You can avoid a lot of damage to the people and property just with this simple device. It also saves a lot of money since it can avoid shoplifting.
You can use these mirrors as an additional accessory along with a camera to enhance the visibility. They provide multiple angles simultaneously allowing the camera to record several angles of a scene. It can be a very useful investigative material for law enforcing agencies to nab the guilty. You could also use them effectively in parking spaces to regulate and avoid any untoward accidents. These mirrors at street bends can make the riding safer. An outdoor mirror can avoid a lot of accidents since they provide a view of the corners.
Advantages & disadvantages
The most important advantage of a convex mirror is the ability to provide different angles from a stationary point. However, the clarity is sacrificed which is the major disadvantage of the convex mirror. They are also resistant to extreme weather conditions making them ideal for outdoor use. You just have to take care that they don't get covered in frost. If the mirror is covered with frost then it will lead to dangers since people will have a false sense of security which can be damaging.
How to use?
When you are choosing the mirror, you need to make sure that you decide on the location you intend to install them. If the location is a small one, it is enough if you use a flat mirror. However, larger areas need a convex mirror for better visibility from different angles. You should also decide whether you want to use them indoors or outside. These mirrors can also be used in cell phones to take better selfies.
Where to buy?
You can but these mirrors from a store at your location selling mirrors or order them from online stores, it sells security items for both indoor as well as outdoor use. Online stores provide at a much cheaper cost. You could buy them for as little as $20. However, the cost varies depending on size and the type of use. If the size is bigger and is for outdoor use, it may cost higher going up to even $180.
These are one of the low-cost convex mirrors safety devices to protect yourself & your property. You can use them outdoor to avoid accidents or indoors to prevent shoplifting etc. You can buy them online at an affordable cost.
Basil is one of the most popular and versatile herbs you can grow in your garden or indoors. It has a fresh and aromatic flavor that can enhance any dish, from salads and soups to pizzas and pastas. Basil is also rich in vitamins, minerals, and antioxidants just like cilantro. It can benefit your health and well-being. But how do you harvest basil properly so that it keeps growing and producing more leaves?
If these are some of the things you want to know, I have you covered! In this article, I will answer all these questions and more and give you everything you need to know about harvesting basil! So, keep on reading this blog till the end to learn more…
How to Harvest Basil Leaves?
The first thing you need to know about harvesting basil is when to do it. The best time to harvest basil leaves is in the morning when the plant is still fresh and moist. Avoid harvesting basil in the afternoon or evening when the plant is dry and wilted. Also, avoid harvesting basil when it is raining or wet, as this can cause the leaves to rot or mold.
Steps to Harvest Basil Leaves
To harvest basil leaves, you will need a pair of scissors or a sharp knife and a basket or a bowl to collect the leaves. You can also use your fingers to pinch off the leaves, but be careful not to damage the stem or the plant. Here are the steps to follow:
Start from the top of the plant, and look for the stems with leaf clusters. These are called the terminal buds, and they are where the basil flowers will grow. You want to remove these buds, as they will make the plant stop producing new leaves and focus on flowering and seeding. This will reduce the flavor and quality of the basil leaves.
Cut or pinch off the stem just below the terminal bud, leaving about a quarter of an inch of stem above the next pair of leaves. This will encourage the plant to grow two new stems from the leaf nodes and produce more leaves. You can also cut or pinch off any other stems that are too long or leggy and leave about four to six pairs of leaves on each stem.
Repeat this process for all the stems that have terminal buds, and collect the leaves in your basket or bowl. You can also harvest some of the lower leaves but leave enough leaves on the plant to allow it to photosynthesize and grow. You should not harvest more than a third of the plant at a time, as this can stress the plant and reduce its growth and health.
After harvesting, rinse the leaves with water and pat them dry with a paper towel. You can use them fresh or store them for later use.
How to Harvest Basil So It Keeps Growing
One of the benefits of harvesting basil is that it stimulates the plant to grow more leaves and branches and prevents it from flowering and seeding.
However, you need to harvest basil regularly and correctly, so that it keeps growing and producing more leaves.
Here are some tips to follow. For instance, you must harvest basil:
At least once every two weeks, or more often if you see the terminal buds forming. This will keep the plant bushy and compact and prevent it from becoming woody and bitter.
From different parts of the plant, and not always from the same spot. This will ensure that the plant grows evenly and does not become lopsided or uneven.
Before it flowers. This is because the flowers will reduce the flavor and quality of the leaves. If you see any flowers forming, remove them as soon as possible. You can also pinch off the flowers and use them as edible garnishes or decorations, as they have a mild and sweet flavor.
Before the frost, as the cold weather will kill the plant. You can either harvest the whole plant and store it for later use, or bring it indoors and keep it in a sunny and warm spot. You can also propagate the plant by taking cuttings and rooting them in water or soil and grow new plants for the next season.
How to Harvest Basil Without Killing The Plant?
Harvesting basil is different from harvesting lettuce or other plants. The process is good for the plant and you, as you can enjoy the fresh and aromatic leaves in your dishes.
However, you need to be careful not to harvest too much or too often, as this can harm and kill the plant.
Here are some dos and don'ts of harvesting basil without killing it:
Do harvest basil from the top of the plant, not the bottom or the middle. This will allow the plant to grow stems and leaves from the lower nodes and maintain its shape and structure.
Don't harvest basil from the main stem or cut it too close to the ground. This will damage the plant and prevent it from growing new stems and leaves. Leave at least four to six pairs of leaves on each stem and about an inch of stem above the ground.
Do harvest basil gently and carefully, and not roughly or forcefully. This will avoid injuring the plant and exposing it to diseases or pests. Use a sharp and clean tool, such as scissors or a knife, and make clean and smooth cuts. You can also use your fingers to pinch off the leaves but be gentle and precise.
Don't harvest basil when it is stressed or unhealthy, such as when it is wilting, yellowing, or diseased. This will weaken the plant and make it more susceptible to further damage. Wait until the plant recovers and looks healthy and green before harvesting. You can also water and fertilize the plant to help it grow and thrive.
Do harvest basil when it is young and tender, not old and tough. This will ensure the leaves are fresh, flavorful, and not bitter or woody. Harvest basil when the leaves are about two to three inches long before they curl or turn brown.
How to Pick Basil Leaves?
Picking basil leaves is another way to harvest and use the leaves in your dishes. You can pick basil leaves with your fingers or with a pair of tweezers, depending on your preference and convenience. Here are some tips on how to pick basil leaves. For instance, you can pick it:
From the top of the plant, not the bottom or the middle. This will allow the plant to grow stems and leaves from the lower nodes and maintain its shape and structure.
From the stems that have terminal buds, not from those that have none. This will prevent the plant from flowering and seeding and producing more leaves. You can also pick some of the lower leaves but leave enough leaves on the plant to allow it to photosynthesize and grow.
Gently and carefully, and not roughly or forcefully. This will avoid injuring the plant and exposing it to diseases or pests. Use your fingers to pinch off the leaves or a pair of tweezers to pluck them off. Be gentle and precise, and do not pull or tug on the leaves or the stems.
When they are young and tender and not when they are old and tough, this will ensure the leaves are fresh, flavorful, and not bitter or woody. Pick basil when the leaves are about two to three inches long before they curl or turn brown.
How to Store Basil Leaves?
Storing basil leaves is a great way to preserve and enjoy them for later use. You can store basil leaves in different ways, depending on how long you want to keep them and how you want to use them. Here are some of the best ways to store basil leaves:
Refrigerate Them
You can refrigerate basil leaves for up to a week, by wrapping them in a damp paper towel and placing them in a resealable plastic bag or an airtight container. This will keep them moist and fresh, and prevent them from wilting or drying out. However, you should not wash them.
Freeze Them
You can freeze basil leaves for up to six months, by blanching them in boiling water for a few seconds, and then plunging them in ice water to stop the cooking process. This will preserve their color and flavor, and prevent them from browning or oxidizing. Then, pat them dry with a paper towel, and place them in a resealable plastic bag or an airtight container. You can also chop them and mix them with some olive oil, and freeze them in ice cube trays. This will make it easier to use them in soups, sauces, or dressings.
Dry Them
You can dry basil leaves for up to a year, by hanging them upside down in a warm and dry place, such as a closet or a pantry. This will dehydrate them and concentrate their flavor, and make them last longer. However, you should avoid drying them in direct sunlight, as this can bleach them and reduce their quality. You can also dry them in an oven or a microwave, but be careful not to burn them or overcook them. Once they are dry, you can store them in a glass jar or a spice container, and crush them or grind them before using them.
Make Pesto
You can make pesto with basil leaves, by blending them with some garlic, pine nuts, parmesan cheese, and olive oil. This will create a delicious and versatile sauce that you can use for pasta, sandwiches, salads, or dips. You can store pesto in the refrigerator for up to a week, or in the freezer for up to six months. You can also customize pesto by adding other herbs, nuts, cheeses, or spices, according to your taste and preference.
How to Cut Basil?
Cutting basil is a simple and easy way to harvest and use the leaves in your dishes. You can cut basil with scissors, a knife, or your fingers, depending on your preference and convenience.
Here are some tips on how to cut basil:
Wash and dry the basil leaves before cutting them to remove any dirt or insects. You can rinse them under running water or soak them in a water bowl with a few drops of vinegar. Then, pat them dry with a paper towel or spin them in a salad spinner.
Cut the basil leaves just before using them, to preserve their flavor and aroma. If you cut them too early, they will lose their freshness and wilt. You can also bruise or damage the leaves if you cut them too roughly or with a dull tool.
Cut the basil leaves according to the size and shape that you need for your recipe. You can either leave them whole or chop them finely or coarsely. You can also cut them into ribbons or strips, by stacking several leaves together, rolling them up, and slicing them thinly. This is called the chiffonade technique, and it creates a beautiful and elegant garnish.
Cut the basil leaves with a sharp and clean tool, such as scissors or a knife, and not with a blender or a food processor. This will avoid bruising or crushing the leaves and releasing their oils and juices. You can also use your fingers to tear or pinch off the leaves but be gentle and careful.
How to Use Basil Leaves?
Using basil leaves is a fun and easy way to add flavor and aroma to your dishes. You can use basil leaves in different ways, depending on your mood and occasion. Here are some of the best ways to use basil leaves:
Fresh
You can use fresh basil leaves to garnish and enhance your dishes, such as salads, soups, pizzas, and pastas. Also you can use fresh basil leaves to make salads, such as caprese salad with tomatoes, mozzarella cheese, and basil, or Greek salad with cucumbers, feta cheese, and basil. You can also use fresh basil leaves to make drinks, such as lemonade, tea, or cocktails, with basil, lemon, sugar, and water.
Cooked
You can use cooked basil leaves to flavor and season your dishes, such as sauces, stews, curries, and casseroles. Also you can use cooked basil leaves to make dishes, such as tomato sauce with basil, garlic, and onion, or chicken with basil, cream, and mushrooms. You can also use cooked basil leaves to make breads, such as focaccia with basil, olive oil, and salt, or muffins with basil, cheese, and eggs.
Preserved
You can use preserved basil leaves to store and enjoy them for later use, such as freezing, drying, or making pesto. Also you can use preserved basil leaves to make dishes, such as pesto pasta with basil, garlic, pine nuts, and parmesan cheese, or roasted vegetables with basil, olive oil, and salt. You can also use preserved basil leaves to make snacks, such as crackers with basil, cheese, and honey, or popcorn with basil, butter, and salt.
Wrapping It Up!
Basil is a wonderful herb that you can grow and harvest in your garden or indoors. It has a fresh and aromatic flavor that can enhance any dish, and a rich and nutritious profile that can benefit your health and well-being. By following the tips and tricks in this article, you can learn how to harvest basil properly, so that it keeps growing and producing more leaves, how to cut basil, pick basil leaves, and store them for later use, and how to use basil leaves in different and delicious ways.
Read Also:
Some Facts You Need to Know About Rainwater Harvesting
Asparagus 101: When, How, And How Often To Harvest?
Exploring Ideas For A Biophilic Home Design