Everything You Need To Know About Metal Roofing: Pros, Cons, And Costs

Published on: 22 December 2021 Last Updated on: 05 February 2025
Metal Roofing

Are you looking for a roofing solution?

Are you thinking about installing metal roofing?

Do you want to have a detailed idea about metal roofing?

This article will offer you the basics of metal roofing when you are looking for a roofing solution. Along with the advantages and disadvantages of the metal roofing system, we will also guide you with an overall idea about the cost.

For further details and costs, you can visit https://www.loaconstruction.com/metal-roofing-austin/.

The Pros Of Metal Roofing

The Pros Of Metal Roofing

Let’s start with the pros that you will be able to get if you go with metal roofing.

Lasts Longer

When installed properly, quality metal roofing can last for at least 40 to 50 years by surviving high winds, sealing waters, and easily shading snow. Apart from that, a metal that can withstand fire, insects, mildew, and rot is indeed an added benefit and contributes to the longer life of metal roofing.

It Is Lightweight

If we consider the weight of metal roofing, it is around 1 to 3 pounds for every square foot, on the basis of the material and thickness. Among all the roofing materials, it is one of the most lightweight roofing solutions.

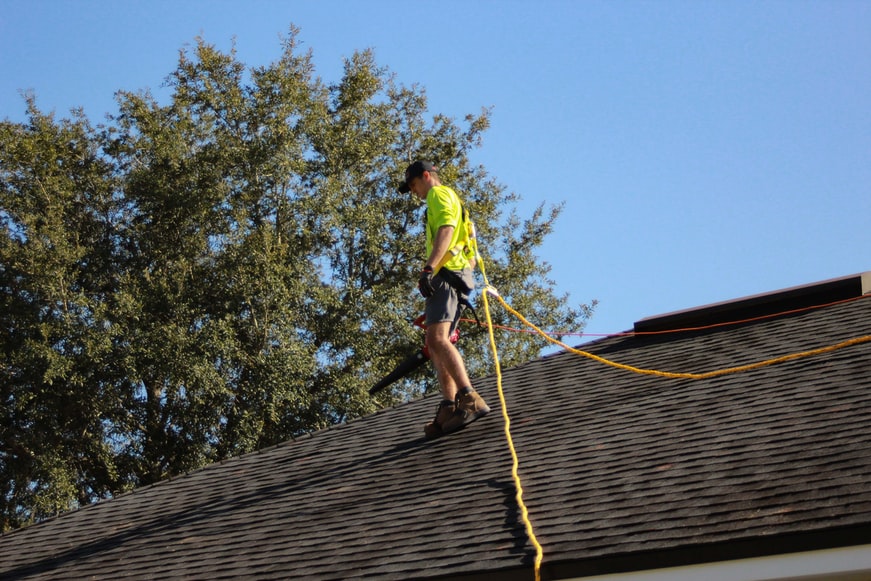
Fast Installation And Cost Saving

You can get a large size metal roofing material or also can opt for multiple shingles. You also can customize them as per your requirements. An experienced contractor can install metal roofing systems quicker than others.

In short weather, the quicker installation actually offers great advantages. Apart from that, when the installation becomes faster, you also can save on your installation cost by cutting down the labor cost.

Does Not Catch Fire

The other major advantage of metal roofing is that it does not catch fire. So, in case of a fire breakout, you can be a little less worried about the roofing of your house. The materials of metal roofing are noncombustible and come with a Class A fire rating. Those tiny flying sparks and embers will not be able to set fire to your roof.

Reflects Heat

Metal is known for reflecting the heat from the sun and minimizing that midday heat gain. Theis reflective characteristic of your metal roofing also lets you save a lot on your energy bill.

The insulation value of metal roofing is great both in hot and cold weather. As metal roofing has less insulation R-value, it is advised to apply it over foam insulation with a high R-value.

Great At Shedding Rain And Snow

Metal roofing is actually improvised for rainy and snowy places. As the panel’s interlock, the slipper, and hard surface let the snow and rain flow down really easily. So, there is simply no chance of water or snow clogging in those metal roofing. Plus, the dark-colored metal roofing becomes warm quickly in the dun and lets the snowmelt really quickly.

Standup Hurricanes And Tornadoes

There are different types of metal roofing, which are designed and also tested to withstand wind power of upto 140 miles per hour. This wind speed is equivalent to an F2 tornado. It means, in the case of tornadoes and hurricanes, you are getting more improvised protection with metal roofing. As per the experts, metal roofing tends to be most hurricane-resistant.

The Cons Of Metal Roofing

The Cons Of Metal Roofing

Now, as you get an overall idea about the major benefits of metal roofing, it is time to get an idea about the disadvantages of metal roofing.

Noisy

The major and most prominent disadvantage of metal roofing is it is a bit noisier. Whether it is the rainy, or stormy weather, or the weather or hail, you will experience a lot of noise with metal roofing. A small contraction can make a bigger noise here, which sometimes becomes really irritating.

High Initial Costs

However, metal roofing is considered eco-friendly for homes and saves more on labor costs, but the initial cost of metal roofing is huge. For every square foot, you might need to pay around $150 to $600. But as the material offers greater longevity, if you pay the initial cost, it will serve you longer.

Metal Can Dent

Just the way, your car gets a dent in case a golf ball hits your car; metal roofing also gets dents. So, in those hail storms, your metal roofing will receive a lot of dents. In case your roof is made of soft metal, the impacts will be more severe. In case your area experiences heavy hail, it is advised to use roof metals which offer a no dent guarantee.

Modifying Can Be Challenging

Metal roofing materials are usually installed on larger panels, which are really difficult to replace when they get damaged. In comparison to this, individual shingles are always a better option. In case you are thinking of remodeling your house after ten or twenty years, you might not be able to get the perfect matching material.

No Foolproof Installation

When you are thinking about installing a metal roofing system, you have to ensure that you are hiring a professional with plenty of experience. Unlike a wood shingle roof, or asphalt shingle roof, or most of the other roofing materials, the materials of metal roofing roofers should be well trained at installing.

Metals Contract And Expand

We all are aware of the basic properties of metal; contraction and expansion are the basic characteristics of metals. So, in those hot weather days, metal can expand, and in those cold days, it can contract. Over time, this will pull loose, and leaks can develop in those joints and nail areas.

What Is The Approximate Cost of Metal Roofing?

The initial installation cost of metal roofing is higher than most of the other roofing solutions. However, on the basis of the material or metal, the cost can vary. Approximately the cost will be between $150 to $600 for every square foot.

If you choose steel metal roofing, the price will be less, and it will increase when you choose copper. The price also varies on the basis of the thickness and coating of the metal roofing.

Read Also:

Content Rally wrapped around an online publication where you can publish your own intellectuals. It is a publishing platform designed to make great stories by content creators. This is your era, your place to be online. So come forward share your views, thoughts and ideas via Content Rally.

View all posts

Leave a Reply

Your email address will not be published. Required fields are marked *

Related

home ac

Don’t Get Caught in a Heatwave: 5 Signs That Your AC Is About to Go Out

Air conditioners cost Americans homeowners about $29 billion each year. But of course, you don't want to pay for a new home AC until you have to. Read on for a list of 5 signs that you need emergency AC repair before a heatwave strikes. 1. Not Enough Cool Air: Is your home AC running and running but the air streaming from the vents just isn't cold? A sign that you have a broken AC is when it begins to blow hot or warm air. It might mean that your AC has a problem with the compressor. Or the Freon levels are too low. Even if the air is cool but not as cold as it used to be, it's time to consider air conditioning installation. 2. High Utility Bills: As your AC unit gets older, it becomes less efficient. Each year, a unit's efficiency goes down a little bit. When an AC reaches around 10 years, it may be half as efficient as it was when new. If you keep getting high utility bills, it's time to look at the condition of your home AC. 3. Little Air Flow: You hear the AC unit kick on, but when you put your hand in front of your AC vent, you only feel a slight push of air. Lack of air flow will cause some parts of your home to get cooled air but not others. Usually, low airflow means there is a problem with your compressor. But it could also be a problem with the ductwork in your house. Especially if you aren't in the habit of getting regular vent cleaning. 4. Strange Sounds: Another way to know that you need AC repair is if you start to notice strange sounds and smells coming from your home AC unit. There are all sorts of sounds you might hear such as grinding, squealing, grating or squeaking. These noises are signs that things are wrong inside your unit. A high squealing sound means that your AC belt has come loose. Or that one of the metal parts in the unit needs lubrication. Grinding noises tend to mean that the bearings in the motor are broken. You may be able to get your AC repaired if you act quickly. Wait too long and you may need to replace the entire system. It's best to have a licensed HVAC technician come to your home to inspect your unit every year. This way your technician can alert you to possible issues that could crop up if left unattended. It's wise to use a springtime monthly home checklist so you can be aware of the conditions in and outside your home. It's often cheaper to repair or replace the part then let the problem go on for a long time. 5. Bad Smells: A strong stinky smell flowing out from your AC vents is a bad sign. It can mean that the wire insulation has burnt out. Musty smells coming out of the vents typically mean there are mold and mildew either in the ducts or in the AC unit. Mold can cause respiratory illness. You should have this issue fixed as soon as possible for the health of your family. Final Thoughts on Home AC Warning Signs: We hope these 5 home AC warning signs will help you avoid an AC malfunction during a heat wave. Remember, it's better to maintain your AC than it is to neglect it and pay for costly repairs. Now that the warmer weather is here, check out these 10 pest control tips to keep pests out this summer. Read Also: 5 Signs The Roof In Your Edmonton House Needs A Repair Interiors To Reduce The Heat Build-Up In Your Homes

READ MOREDetails
Iron Clothes

How to Use Iron Clothes With Steam

Believe it or not, the amount of people that don’t know how to iron clothes is amazing. There’s no shame on it since most of us were thrown into society without really practicing skills that would definitely help us fight back as we become independent. These skills include things like cooking a proper meal before going to work, knowing what groceries to buy without spending all our money on unnecessary things, being able to pay bills accordingly without becoming a mess, cleaning the house every now and then, and of course, knowing how to use steam irons and what to do to properly iron our clothes to not look like folded toilet paper. Don’t worry though! In this guide, I’m going to teach you the essentials of how to iron, and how to deal with different types of fabric. To be honest, ironing is not something as complicated as many think. It’s all about knowing what to do, which is what most people lack. The process may require a little preparation and patience, though, so be prepared to practice with different pieces of clothing to get the main idea. One thing is sure, though. You have to be careful when using an iron because they can be harmful if dealt with without precautions! How to Prepare for It The first thing you’ll need is a flat surface where you can prepare your clothes to be ironed. Try to have everything neatly organized to avoid possible accidents, and if you can, try to do it on an ironing board. Some clothing is too delicate for the heat produced by the heated metal of the device, so have a piece of fabric to protect these. Read more: A Complete Guide on Using IRON on Transfer Paper Connect the Iron Irons can take some time before they are ready to be used. They usually show a sign that they are ready, so be sure to be attentive about them while you take care of the next step. Never try to do it before its ready, since it’ll lead to a slower and far less efficient process. Know the Differences Between Materials, and Sort Them Beforehand Depending on the type of fabric you are dealing with, you might want to change your approach while ironing. You can’t deal with a silk piece the same way you would deal with a cotton one, for example. Some pieces of clothing will require you to use the lowest setting of heat possible, while others may require even more heat. Separate silk, wool, rayon, and acetate to be dealt with the lowest settings. Wool clothes may require the protection of another piece of fabric that was previously dampened, so take that in mind! For polyester, go with the medium heat setting, and for cotton, you can go either medium and high heat setting. Both of them should be dampened to be protected from the heat. Before the iron is ready to go, you should have them sorted out. How to Iron Clothes When you deal with shirts with a collar, you should start with it. You can start with a pattern that follows the inside part of the collar, starting from the center of it, until you reach the edges. Then, fall back to the center, and keep moving between both sides. Once you’ve finished with it, you can work the outside. Lay down the shirt in a way that you can flatten it with the iron with simple movements. After that, you have to work your way down, slowly moving the shirt. Then, work the sleeves then the cuffs. Pants are much easier than shirts with a collar. You just have yo lay them down in a way that you can work both legs at the same time. Start with the waist, gently work with the pockets, and go your way down. Repeat the process until you are satisfied with the results, but make sure to be gentle and careful with the heat and the ironing. Considering that there are way too many types of clothing to teach all of the proper methods and techniques to iron them accordingly, you should check this guide on how to do it without fail. Safety Recommendations Ironing can be a pretty dangerous process if you are not attentive while you do it. If you don’t take safety measures, you might harm yourself or others, so make sure to pay attention to this part of the guide. The very first thing you should always make sure is that the iron is unreachable for children. Children can be curious and do things without knowing, so you will be the one to blame if you allow them to get closer while they are heated up. This is important even after you’ve finished ironing. These devices tend to remain heated up even after disconnecting them, so you should still be attentive to any possible situation. I recommend you to wait at least 10 minutes before taking your guard off. Remember to check just in case. While it rests, don’t leave it face down. You might burn something or damage the iron if you do. If an accident happens and you burn yourself or someone else gets burned, treat the burn with cool water for as much time as you can. 20 minutes should be more than enough. Don’t use things like butter or oil, since it might infect the injury. if the burn is too big, you should check yourself with a doctor. Read Also: How To Choose A Washing Machine? How to Pack Clothing Properly for Shipping Choose The Latest Collection Of Women Clothing For a Stylish Look 6 Benefits Of Buying Clothes Online – Why People trust online shopping

READ MOREDetails
Painting Interior Doors

Tips for Painting Interior Doors

Freshly painted doors can enhance the makeover of any house. You can paint your doors on your own or hire a professional painter to do it for you. Many people prefer painting their doors themselves as they want to enjoy painting them on their own. However, if you don’t have any experience or want high-quality paintwork, you should always hire professionals for complete painting service. If you choose to paint or spray paint your interior doors, you need to know some tips and skills to do the job right. Let us explore some tips by professional painters that you can use to paint your doors. Remove or cover the door handles: Paint can stain the door handles and locks. So, it is better to remove them or cover them with painter’s tape to prevent them from getting stained. You will need a screwdriver with multiple heads to remove the handles and locks. Call a locksmith to remove the inbuilt lock systems as they are difficult to remove. Removing these things will make it easy to clean, sand and then paint the doors. Fill the cracks and holes: If there are any holes or cracks in your doors, you can fill them with a wood filler, gypsum plaster, or a filling compound. Put a small amount of wood filler or filling compound on a putty knife and put it into the hole or crack uniformly. Place it as uniformly as possible and leave it to dry for at least two hours. Check the filling the next day, and it requires more filling, add the required amount of filling compound to fill the space completely. Sand the surfaces: The old paint gets worn and imperfections develop with time on the door surfaces. That is the reason why homeowners want to repaint their doors. Sanding removes the worn paint and imperfections easily and prepares the surfaces for a clean and uniform finish. Start painting with a Roller: If you have already chosen the paint color, mix several cans in a bucket so that you can have the same shade on every door. Sometimes, the shade in different cars can vary a little, although not noticeable in the interiors in low light. Use a 4-inch roller to apply a thin layer of paint on the door starting from an edge. If you want to paint the trim first, you can use a 2-inch brush. To remove any lines, move the lightly loaded brush or roller from bottom to top. Using this technique will help you paint quickly and uniformly while leaving a wet edge. Painting a paneled door: Many homes have paneled doors and the technique to paint them is different from painting a flat door. Paint every panel beginning from the upper left side downwards in a sequence. Always use a brush of appropriate width to paint a paneled door. Don’t worry if you paint a bit outside the edges of a panel. Once the edges are painted, use a small roller to paint the space between the panels. If the rollers of appropriate size are not available, use a 2-to-4-inch brush to paint the center of the panels. Minimize the drying time: Paint in light and uniform coats to minimize the drying time. Thick coats of paint take a bit longer to dry and may look nonuniform after drying. If you are using a brush, you should dip its bristles halfway in the paint and tap the brush against the container edge slightly to remove the excess paint. If you plan to use a roller, place it in a pan and use the back-and-forth strokes to paint uniformly without soaking it. Let the paint dry before installing knobs and locks: Let the paint dry completely before installing the doorknobs and locks. Also, tell your kids and family members not to touch the doors until they dry completely. Once they dry up completely, you can install the accessories and start using the doors as you use them normally. Final Words: Painting the doors is not difficult, even if you are painting them for the first time. All you need to do is to follow the correct sequence of steps, use the right size of tools and prepare the surfaces before grabbing a brush or roller. Following these tips can help you to paint your interior doors easily and conveniently. Read Also: 10 Pro Tips To Minimize Commercial Door Repair & Maintenance Cost All About Commercial Fire Doors Why Should you Consider Security Doors for Your House?  

READ MOREDetails