Toilet Flush Button: Understanding The Nuts And Bolts

Published on: 03 August 2023 Last Updated on: 13 September 2024
Toilet Flush Button

Though our bathrooms play a critical role in daily life, they’re often forgotten until a problem arises. Of all its components, one that stands out is the toilet flush button’s use – and understanding. This article looks closely at its workings, maintenance needs and replacement considerations.

The Fundamentals Of The Toilet Flush Button

What Exactly Is A Toilet Flush Button?

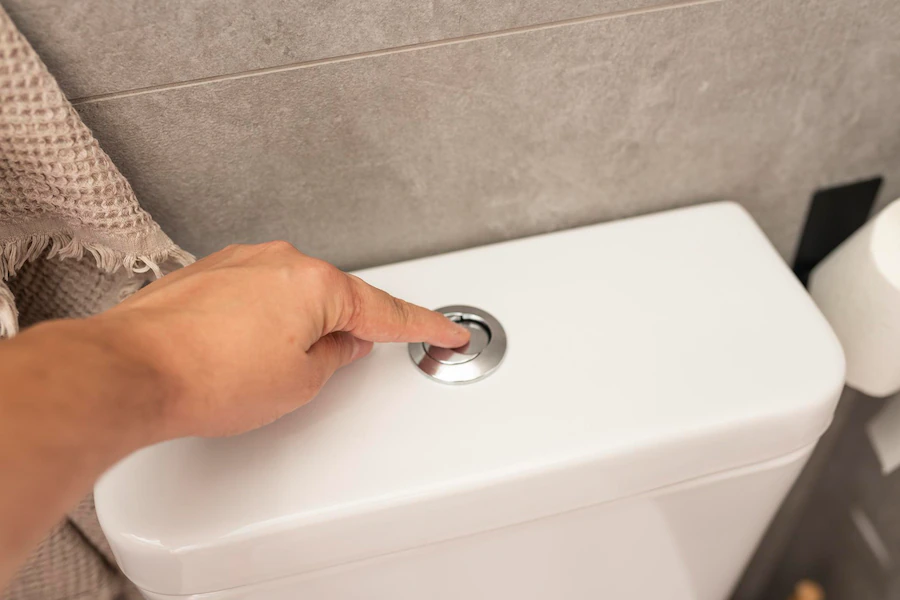
A toilet flush button is the mechanism responsible for initiating the flushing process in your toilet system. Situated on the tank’s exterior, we press or push this component when using our toilet to flush out its contents into the sewage system. By activating this flush button, we begin an action chain within our bathroom that sends water from its tank into our bowl to flush away its contents into sewer lines.

How Does The Flush Button Work?

The magic of the toilet flush button lies in its ability to control a more complicated mechanism. Pressing it lifts a lever connected to a chain inside the tank; that chain connects to a flapper (or flush valve seal), covering up drain holes at the bottom.

When the flapper is raised, water stored in the tank begins rushing from its source into the bowl through its drain hole and siphon tube into the sewage system. As soon as this process completes, however, the flapper falls back down, sealing off its drain hole once more – and replenishing its supply in readiness for another flush cycle.

Maintenance Of The Toilet Flush Button

Regular Cleaning

Regular cleaning of your toilet flush button is vital to its optimal operation, as dirt can clog the switch and make it less responsive, leading to inconvenient situations for users. A non-abrasive cleaner and soft cloth should be used for exterior cleaning; internal components should be checked regularly to avoid build-up and potential mechanical problems.

Checking For Wear And Tear

Given how often flush buttons are used, wear and tear are inevitable. Look for signs of damage, such as cracks or looseness. If the control becomes less responsive when pressed or sticks down without returning up when released, this may indicate internal components need to be reviewed for potential problems.

Troubleshooting Common Problems

Is The Button Hard To Press, Or Is It Sticking

A toilet flush button that is difficult to press or sticks down often points to a problem with the connected lever or chain inside the tank. It could be that the chain is too tight or too slack, or the lever needs to be aligned or fixed. A careful inspection and adjustment of these components usually solve the issue.

The Button Doesn’t Activate The Flush

If the button doesn’t activate the flush, the issue could be that the switch is no longer effectively connected to the lever, or the flapper isn’t lifting. A look inside the tank should reveal the issue. The button, lever, or flapper may need to be replaced.

Replacing The Toilet Flush Button

When Should You Replace The Button?

As with any mechanical component, toilet flush buttons have a finite lifespan. Over time and through regular use, their controller may wear out or become damaged, requiring replacement. Signs to replace it include physical damage to its housing and sticky buttons or ones that no longer activate flushing actions. Looking for a portable toilet rental might also be necessary if you need to fix your toilet for a couple of days.

Toilet Flush Buttons: More Than Meets The Eye

Though seemingly simple, toilet flush buttons are critical in maintaining sanitation in homes and public spaces. Understanding their inner workings helps us better appreciate their importance, maintain them properly, and effectively troubleshoot any potential issues with them. So next time you press one, remember its critical function while giving it some love and consideration.

Conclusion:

Understanding how a toilet flush button works may initially seem complicated, but understanding its mechanics is crucial to efficient bathroom operations and sanitation practices. Knowing their inner workings could save us from future inconvenience or repair costs.

Maintaining the toilet flush button regularly is vital to prolonging its lifespan and guaranteeing reliable performance within a plumbing system, thus streamlining home maintenance. By periodically inspecting it for signs of wear and tear, individuals can identify and address potential issues early on and prevent more significant ones from developing into larger problems later. By taking proactive measures like this one, individuals save both time and money on costly repairs and ensure an effortless toilet operation experience.

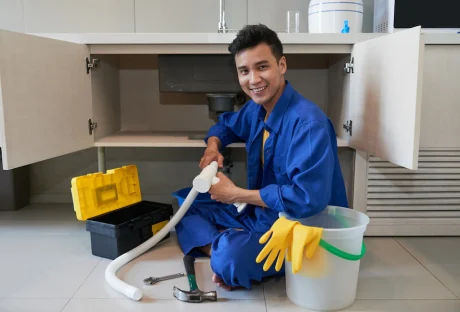
Maintaining a flush button is an accessible DIY project for anyone, provided they possess basic knowledge and the appropriate tools. Even if it eventually succumbs to wear or damage despite regular maintenance efforts, replacing the button remains straightforward, making this an achievable DIY project for homeowners.

Read Also :

Abdul Aziz Mondol is a professional blogger who is having a colossal interest in writing blogs and other jones of calligraphies. In terms of his professional commitments, he loves to share content related to business, finance, technology, and the gaming niche.

View all posts

Leave a Reply

Your email address will not be published. Required fields are marked *

Related

First home renovation Ideas and tips

First home renovation Ideas and tips

Homes are the blessings which offer comfort, shelter, peace, and security. However, like every other thing in this world, homes do require proper maintenance and care. After some time, we have to renovate our home. We need to make changes according to the modern world and also make necessary repairs and developments. As part of this process, it’s important to plan for waste disposal. Knowing where to rent a dumpster in my area can make managing debris during renovations much easier, ensuring the project runs smoothly from start to finish. If it is the first time that you are renovating your home, then you seriously need some good advice for first home renovation. Most of the people consider hiring a home improvement contractor is the most crucial task and rest will be handled by them. However, the truth is you have to handle certain things by yourself. In this piece of writing, we are going to share some of the tips that will be helpful for your first home renovation. Take first home renovation decision : So the first tip involves the decision making phase. You have to decide whether or not the property you are going to renovate will be your permanent spot? If you are planning to live there for a long time, then it will be a good aides to go for renovation. Consider the details : I know that renovating a home is a very heartfelt experience for most of us. However, we have to see everything in deep detail. Do some little research about home and garden DIY projects to save money or you can also and find the costs involves, house pricing of the area, contractors fees, etc. without proper homework you would end up making a bad decision. Never ignore your budget : First Home renovation is more likely to cause an adrenaline rush through our body and we try to change the overall condition of our home. However, you have to conscious about eh budget aspect in the renovation project. The budget is the most significant part of any renovation project as you can do nothing without money. Calculate all the costs involved and then gather all the resources to fund those costs. Do not go for borrowing : I would highly recommend going to the saving option rather than borrowing. I would justify my recommendation on the fact that when we borrow money for the renovation we increase the financial burden on us. Moreover, borrowing makes a bit drift away from the budget and we unconsciously started investing more and more money. However, if you save the money for your home renovation and then it will retain you within budgetary limits. Moreover, there will be not burdened on you at the end. Participate in renovation : Another most amazing tip to save bucks on your home renovation is to do whatever you can do by yourself. If you know any of the skills involve and then use it to save money for other purposes. Contractor hiring : It is by far the most difficult stage of renovation. Hiring a competent and professional contractor need time and effort, find out more about home improvement contractors here, also, you have to search the market to find the most competitive rates and services. Putting a little effort will definitely pay you off at the end. Home renovation is an entirely exciting process but at the same, it also consumes your energy and money. If you are renovating your home for the first time and then we would be wise to seek advice from the experienced. Indulge yourself in the project : Although we strongly recommend hiring some professionals or experts if you are having your home renovated for the first time. However, that does not mean that you should leave everything on them and wait for the final product. Showing a keen interest in the whole project ensure the interesting development of the whole team. You have to keep a close watch on all the things going on. Moreover, try to visit the place and inspect the project on a regular basis. However, your indulgence should not cause a disturbance in the whole project. Ensure your home renovation is on point : You have to make sure that your home has been renovated according to your inspiration and desires. After all, who wants to go through all the dusty and muddy task? We all want our home to represent our personalities and emotions. All this could be achieved by hiring a professional construction company with a good reputation. Home renovation is an entirely exciting process but at the same, it also consumes your energy and money. However, if you just adore your home enough to let it go or if you do not have enough money to purchase a new home, home renovation is the best option. We have mentioned some of the most important points necessary to be kept in mind while renovating for the first time. If you are renovating your home for the first time and then I would be wise to seek advice from the experienced. Read More : Basic Idea Of Power Tools For Home Improvement Additional Ways To Keep Your Home Warm

READ MOREDetails
the ottoman

The Versatility Of The Ottoman Makes It A Must-Have

The ottoman is one of the most versatile pieces of furniture available. You can use them in just about any room – living room, dining room, kitchen, den. An ottoman is comfortable, flexible seating for kids and adults, a handy footrest, a makeshift coffee table, and may also double as storage. Ottomans were first introduced into Europe in the 18th century from Turkey. At the time, Turkey was the heart of the Ottoman Empire, hence the strange name of this piece of furniture. Its comfort and flexibility meant that it soon took off in European parlors, especially in Britain. How many ways are there to use an ottoman? These are just a few ideas to get you started. 1. Coffee Table : Whether your ottoman is leather, upholstered, or wicker, you can quickly transform it into a coffee table. Use a classic wood or metal tray to set down food and drinks and you can enjoy coffee or breakfast with a book on the sofa. This is a great idea for smaller spaces where both an ottoman and a coffee table would take up too much room. 2. Kitchen Table Seating : Want to add some unique flair to your kitchen table? Use a pair of ottomans as kitchen table seating, especially paired with two traditional chairs on the other side to add some dynamic asymmetry and character to your kitchen table. Leatherworks well here as it’s easy to clean. 3. Movable Living Room Seating : One of the great things about an ottoman is that many are lightweight and easy to move around. This makes them a great solution for adjustable living room seating. If you have kids or regularly invite over guests, they bring the flexibility you wish you had in a living room when you sit down to watch a movie or the game or gather around a table to play a board game. You won’t have guests sitting on the floor. The flexibility of the ottoman makes it a must-have in any living room. If you have a living room with limited space, you can also tuck ottomans away for everyday use and bring them out when you need extra chairs. 4. End of the Bed : Need seating in your bedroom that’s not just the bed? An ottoman tucked at the end of the bed gives you a place to sit while you change or get ready in the morning. It can also become a convenient place to put all those outfits you pulled out of the closet and decided against at the last minute. Many ottomans also open and turn into storage space. A hinged top ottoman provides extra storage space in the bedroom when your dresser just isn’t big enough. 6. Footrests : You don’t need to get creative with ottomans to enjoy them. Use your ottoman as a classic footrest and kick up your feet after a long day at work or with the kids. In fact, using a footrest when you relax might even help with back pain. Bring an ottoman into your home and enjoy flexible furniture. Read Also : Relax In Style In The Comfort Of Your Homes Choosing The Right Roof For Your Home – Types To Select From What To Know About Your Furnace Filters

READ MOREDetails
Painting Interior Doors

Tips for Painting Interior Doors

Freshly painted doors can enhance the makeover of any house. You can paint your doors on your own or hire a professional painter to do it for you. Many people prefer painting their doors themselves as they want to enjoy painting them on their own. However, if you don’t have any experience or want high-quality paintwork, you should always hire professionals for complete painting service. If you choose to paint or spray paint your interior doors, you need to know some tips and skills to do the job right. Let us explore some tips by professional painters that you can use to paint your doors. Remove or cover the door handles: Paint can stain the door handles and locks. So, it is better to remove them or cover them with painter’s tape to prevent them from getting stained. You will need a screwdriver with multiple heads to remove the handles and locks. Call a locksmith to remove the inbuilt lock systems as they are difficult to remove. Removing these things will make it easy to clean, sand and then paint the doors. Fill the cracks and holes: If there are any holes or cracks in your doors, you can fill them with a wood filler, gypsum plaster, or a filling compound. Put a small amount of wood filler or filling compound on a putty knife and put it into the hole or crack uniformly. Place it as uniformly as possible and leave it to dry for at least two hours. Check the filling the next day, and it requires more filling, add the required amount of filling compound to fill the space completely. Sand the surfaces: The old paint gets worn and imperfections develop with time on the door surfaces. That is the reason why homeowners want to repaint their doors. Sanding removes the worn paint and imperfections easily and prepares the surfaces for a clean and uniform finish. Start painting with a Roller: If you have already chosen the paint color, mix several cans in a bucket so that you can have the same shade on every door. Sometimes, the shade in different cars can vary a little, although not noticeable in the interiors in low light. Use a 4-inch roller to apply a thin layer of paint on the door starting from an edge. If you want to paint the trim first, you can use a 2-inch brush. To remove any lines, move the lightly loaded brush or roller from bottom to top. Using this technique will help you paint quickly and uniformly while leaving a wet edge. Painting a paneled door: Many homes have paneled doors and the technique to paint them is different from painting a flat door. Paint every panel beginning from the upper left side downwards in a sequence. Always use a brush of appropriate width to paint a paneled door. Don’t worry if you paint a bit outside the edges of a panel. Once the edges are painted, use a small roller to paint the space between the panels. If the rollers of appropriate size are not available, use a 2-to-4-inch brush to paint the center of the panels. Minimize the drying time: Paint in light and uniform coats to minimize the drying time. Thick coats of paint take a bit longer to dry and may look nonuniform after drying. If you are using a brush, you should dip its bristles halfway in the paint and tap the brush against the container edge slightly to remove the excess paint. If you plan to use a roller, place it in a pan and use the back-and-forth strokes to paint uniformly without soaking it. Let the paint dry before installing knobs and locks: Let the paint dry completely before installing the doorknobs and locks. Also, tell your kids and family members not to touch the doors until they dry completely. Once they dry up completely, you can install the accessories and start using the doors as you use them normally. Final Words: Painting the doors is not difficult, even if you are painting them for the first time. All you need to do is to follow the correct sequence of steps, use the right size of tools and prepare the surfaces before grabbing a brush or roller. Following these tips can help you to paint your interior doors easily and conveniently. Read Also: 10 Pro Tips To Minimize Commercial Door Repair & Maintenance Cost All About Commercial Fire Doors Why Should you Consider Security Doors for Your House?  

READ MOREDetails