3 Top Tips To Help You Increase The Lifespan Of Your Ratchet Straps

by

21 January 2026

Blog

How To Increase Rachet Straps Lifespan

Tie-down straps are an invaluable part of any cargo hauler’s arsenal.

I can assure you that they are excellent for securing loads efficiently and safely.

Additionally, they’re also easy to use on just about anything.

That said, using your tie-downs every day usually means they face the toughest weather conditions.

You know, these can often lead to extensive wear and tear.

Now, some of you might buy your Ratchet straps online. Or, some of you, like me, have a local supplier.

No matter what, it’s essential to always invest in quality tie-downs and accessories. You must know how to increase rachet straps lifespan.

Additionally, you must ensure proper care practices. They are very important for ensuring that your straps function efficiently.

In fact, this will ensure that they last a long time.

This post takes a closer look at the most effective ways to keep your ratchet straps in mint condition.

What Are Ratchet Straps?

Okay so are you planning a move or a quick trip? If yes, I have got to tell you something.

If you are moving a few items around town, you may not be all that familiar with ratchet straps. In fact, I am expecting you not to know how they work.

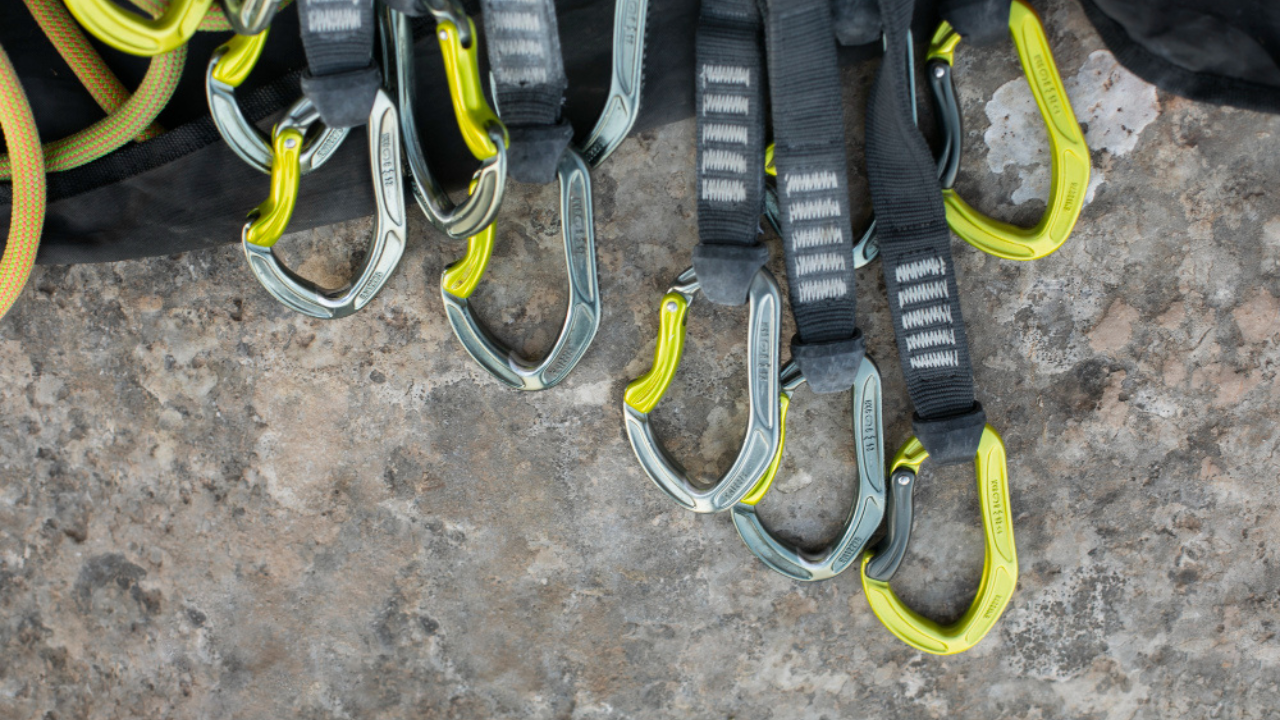
Essentially, ratchet straps, or tie-downs if you prefer, are heavy-duty straps.

These are designed to restrain all types of loads during transport.

For the most part, the straps are designed using a strip of long, robust webbing material such as polyester or nylon.

Then, Ratchet mechanisms and end fittings complete the rest of the ratchet strap design, such as:

  • Loops
  • Hooks

If you’re a first-time ratchet strap user, here’s what you need to know:

  • Firstly, you have to place the loose end of the tie-down strap into the metal mandrel part of the ratchet.
  • Secondly, you need to gently pull the strap securely through the slot in the mandrel.
  • Thirdly, you ned to tighten the strap. You can do this by pulling the slack out.
  • Then, you need to gently crank the ratchet. This important for you to reach the desired tightening.
  • Also, you must keep the strap in line with the other one. This one step will ensure avoiding locking or tangling.
  • In addition, you need to tighten the strap to secure it. Additionally, you have to lock the handles down.
  • At the end of the trip, reverse these steps. This will help you to avoid damaging or tearing the straps.
  • Finally, you must ensure your straps are dry. Also, you need to check if they are undamaged before you put them away for storage.

How To Increase Rachet Straps Lifespan: Some Real Tips

Now that you know what the product is, the next probable question will be: How to increase rachet straps lifespan? Well, I am here to tell you just that!

Quality ratchet straps will last a long time if you take proper care of them.

Fortunately, there’s no complex maintenance attached. Here are a few tips to help you care for your tie-down straps.

1. Always Inspect Your Ratchet Straps Before Each Use

The first tip to know is to inspect your ratchet straps before every use.

This is because little issues, such as damaged hardware or frayed webbing, can affect the integrity of the straps.

This can lead to them snapping or tearing loose during the trip.

The general rule of thumb is that if 10% or more is torn, the strap should be replaced. Check for damages in the following ways:

  • Hardware: Check the ratchet and hooks for bends, deformation, and rust. Hooks can be bought separately if they need to be replaced.
  • Webbing: Inspect the webbing material for tears, fraying, or signs of excessive wear.
  • Stitching: Run your hand over the stitching and check for broken threads.
  • Labels: Quality straps should have a Working Load Limit (WLL) tag. Check that this is legible and intact.

2. Straps Should Be Kept Clean

The frequency and types of cargo you’re loading can leave your straps dirty. In fact, it can even damage them.

This is because oil, dirt, and chemicals can seriously degrade webbing material over time.

So, not only does this reduce flexibility, but it also affects the strength of the straps.

You should aim to clean your tie-downs and all their accessories after each use.

Additionally, this rule applies especially if you’ve used them for loads containing chemicals.

Here’s what you need to know:

  • Always use a solution of warm water and mild soap to remove debris and dirt.
  • Additionally, you must avoid harsh solvents. Also, you cannot use any chemicals as these can weaken polyester fibres.
  • You need to gently scrub the webbing with a soft-bristled brush. This will effectively remove stubborn dirt.
  • Finally, you have to rinse thoroughly. Also, you must air-dry it completely before storing.

3. Proper Storage Is Crucial

If you are wondering how to increase rachet straps lifespan, this step is very important.

Once you’re done with your straps for the day, it’s essential to store them properly.

Improper storage exposes the webbing to UV rays and moisture, which can weaken or damage it. Here’s how you should do it:

  • Firstly, you need to roll the straps neatly. This step comes right after cleaning and drying. You have to roll the straps to prevent kinks and tangles.
  • Then, you need to store it in a dry and cool place. I suggest that you always avoid storage areas. This is where the straps will be exposed to dampness or direct sunlight.
  • Finally, I will suggest that you opt for storage containers or bags. You need to use good-quality air-tight storage containers.

Additionally, you can go for sealable bags to keep your straps safe and dry.

Also, I feel like it’s a good idea to place them in a cupboard.

How To Increase Rachet Straps Lifespan: Explained

No matter how often you’re using your ratchet straps, it’s always a good idea to use our care tips to keep them in mint condition.

This not only reduces the likelihood of having to buy new straps every time you need to use them, but it will also give you peace of mind that your straps will remain efficient every time you need to use them.

This will keep your cargo and everyone around your vehicle safe!

Read Also:

Nabamita Sinha loves to write about lifestyle and pop-culture. In her free time she loves to watch movies and TV series and experiment with food. Her favourite niche topics are fashion, lifestyle, travel and gossip content. Her style of writing is creative and quirky.

View all posts

Leave a Reply

Your email address will not be published. Required fields are marked *

Related

Accessible Living

Designing Homes For Life: The Rise Of Accessible Living Solutions

You know how our lives keep changing? Well, so should our homes. They’re not just static spaces anymore—they’ve got to flex with us. A house these days isn’t just somewhere you crash, it’s somewhere you grow into.   And honestly, one of the biggest shifts we’re seeing is toward accessible living. Whether it’s for aging gracefully, recovering from an injury, or just making the place more inviting for everyone, people are finally giving thought to upgrades that mix safety, style, and just plain practicality. Accessible Living: A New Standard Let’s be real—people are living longer, and that changes everything. The World Health Organization says that by 2050, we’ll have an expected to total 2.1 billion people over 60. That’s… a lot. So, homes? They need to work at every stage of life now. And here’s the kicker: these design changes aren’t just for seniors. Think about it—wide doorways, lever-style handles, no-step entryways—pretty handy for anyone, right?   Whether it’s a kid zipping around, someone on crutches, or even you carrying way too many grocery bags, these “accessibility features” suddenly make life easier for everyone. No wonder they’re becoming pretty standard in new builds and renovations. 1. Innovative Elevation: Lifts For Residential Use Now, here’s where things get interesting—home lifts. Sounds fancy? Not anymore. These are quickly becoming a go-to for folks who want to ditch the whole “stairs vs. knees” battle.   One standout? The residential through-the-floor lift. It’s compact, sleek, and doesn’t require tearing up your house for a massive elevator shaft. Even smaller homes can pull it off, which makes it way more doable than people expect. Accessible Living Ensures Health, Safety, And Peace Of Mind Here’s something sobering: According to the CDC, one in four seniors falls every single year. And most of those falls? At home.   Which makes adding things like lifts, stairlifts, or even a simple grab bar less of a “nice idea” and more of a necessity. They can seriously cut that risk and, let’s be honest, give everyone in the house some peace of mind. And it’s not just about avoiding injury. Being able to move around your home on your own? That’s independence. That’s confidence. And if you’ve ever seen someone light up when they can finally navigate their space without help, you know how big of a deal that really is. 2. Smart Homes Meet Accessibility  Oh, and then there’s tech—because of course there is. We’re talking voice-activated lights, blinds that open themselves, thermostats you adjust from your phone, even faucets that turn on when you wave at them. It’s the little things that make daily life so much smoother. And with devices like Alexa or Google Home, you can pretty much run your house with your voice. No wonder 77% of adults over 50, according to an AARP, in their 2021 Home and Community Preferences Survey, say they want to stay in their homes as they age.   Who wouldn’t? Even the National Institute on Aging says aging in place takes some real planning, so these upgrades? They’re part of that plan. 3. The Heart Of The Home: Kitchen Accessibility  The kitchen is the home hub that needs to be accessible so that all can be independent.  A good kitchen creates a sense of independence and competence at living daily life when preparing safely and effortlessly.  Accessible living counters need to be reached at a level comfortable for both persons in a wheelchair or for those who like to sit and do activities.  Smart technology occupies a game-changer role in this regard. Voice-operated appliances or smartphone-operated appliances allow consumers to operate kitchen appliances without involving their hands.  Firms can boost their businesses by cooperating with smart appliance firms to offer consumers affordable and convenient solutions.  4. Ensuring Safety And Comfort In Bathrooms  One of the most critical areas to focus on when planning an accessible home is the bathroom. It is an environment where safety, comfort, and privacy must come together.  An efficiently designed bathroom reduces the risk of injury and allows individuals to be self-sufficient in personal hygiene activities.  A functional bathroom begins with an open-barrier entrance. Doorways can be widened to a minimum of 32 inches to provide wheelchair mobility, and sliding doors or pocket doors are fantastic space savers with better accessibility.  5. Enhancing Outdoor Accessibility   The benefits of accessible living don't remain indoors. Outdoor spaces such as gardens, patios, or driveways are also part of designing a sense of freedom and connection with nature.  Outdoor passageways should be wide, clear, and level. Slip-resistant materials such as concrete or pavers are ideal for walkers or wheelchair use.   The incorporation of ramps with slowly rising slopes and hand-supported railings makes it easy to move from floor to floor.  Outdoor lighting is essential for visibility and security, especially around stairs, ramps, or uneven terrain. Solar lights or motion-sensing lights are suitable alternatives for efficient and energy-efficient options.  6. Personalizing Bedrooms For Comfort And Accessibility  A bedroom is a haven, a place where one can relax and sleep. For people with disabilities, it must also be a place that is designed with well-thought-out accessibility features conducive to comfort and independence.  Creating a functional and tailored bedroom allows individuals to be comfortable and accommodate their unique needs.  Adjustable beds are a gem for individuals experiencing mobility impairment or chronic pain. Adjustable beds make it easy for people to switch positions, thereby making them more comfortable and reducing the risk of pressure sores. Voice control or remote adjustment is handier.  The Importance Of Accessible Living! Accessibility isn’t some afterthought anymore. It’s kind of becoming the blueprint for smart home design. And the perks go way beyond just safety.   We’re talking higher home value, more comfort, and a space that keeps working for you no matter what stage of life you’re in. So whether you’re updating your house for a parent, planning ahead for yourself, or just wanting a space that feels good for everyone, these solutions—lifts, smart gadgets, universal design—are paving the way.   Honestly? In a world where our needs keep shifting, accessible design just feels like the smartest, kindest move you can make. Read Also: Ultimate Home Styles: 16 Ways To Add Character To Your Home Important Things to Know Before Starting a Home Improvement Project Enhancing Spaces With Greenery: The Art Of Plant Styling In Interior Design

READ MOREDetails
how to install metal roofing

How To Install Metal Roofing Over Shingles The Right Way?

Today’s topic: How to install metal roofing? If you’ve been thinking about upgrading your roof without tearing everything off first, you’re not alone. One of the most common questions I hear as a roofer is: “Can you put a metal roof over shingles?” The answer is yes—you can, and when it’s done right, it can save you time, money, and a whole lot of mess. I’ve spent years working on both residential and commercial roofing projects, and I can tell you there’s a right way and a wrong way to tackle this job. Let me guide you through the process step by step, with a few pro tips and common mistakes to avoid along the way. Why Should You Consider Installing Metal Roofing Over Shingles? Metal roofs have gained significant popularity over the past decade, and for good reason. They’re durable, energy-efficient, and they look sharp on just about any home or building. By installing metal roofing over shingles, you: Save on tear-off costs (no dumpster rentals or labor for removing shingles). Add an extra layer of insulation, which can help with energy efficiency. Reduce installation time, since you’re working over an existing roof deck. That said, this method isn’t right for every roof. Before you start, it’s essential to ensure that your roof structure can handle the added weight and that your local building codes permit this type of installation. Additionally, you may want to consider checking out Cleveland roofing companies, thanks to their reputation and expertise, especially if you are located in the United States.  How To Install Metal Roofing Over Shingles? So, without wasting time, let’s find out how you can install metal roofing over shingles.  Step 1: Inspect Your Roof Before Doing Anything Here’s the truth: the success of your metal roofing project depends on the prep work. Before laying down panels, conduct a thorough inspection. Inspect the decking for signs of rot or soft spots. If your roof sheathing is compromised, it needs to be replaced. Look for more than two layers of shingles. Most codes don’t allow more than two layers total. Check flashing, chimneys, and vents for proper installation. Any existing leaks must be repaired before the new roof is installed. Pro Tip: Walk the roof carefully. If you feel any spongy areas underfoot, you have decking issues that must be addressed first. Step 2: Lay Down A Moisture Barrier Although shingles already provide some protection, you’ll want to add a layer of underlayment before installing metal panels. This extra layer protects against condensation that can form under the metal. I usually recommend using a high-quality synthetic underlayment. It’s lightweight, tear-resistant, and holds up better in the long run compared to traditional felt paper. Step 3: As An Optional Step, Add Furring Strips This is one of those “pro versus DIY” differences. Many homeowners skip this step, but furring strips (also called purlins) create a flat, even surface for the metal panels to sit on. They also improve ventilation, which helps reduce moisture buildup under the roof. Install the strips vertically, spacing them every 2 feet or so. Make sure they’re fastened securely into the rafters, not just the shingles. Pro Tip: Furring strips are especially important if your shingles are uneven or curling. Without them, your new metal roof could end up looking wavy. Step 4: Choose The Right Metal Panels Not all metal roofing is created equal. The most common options are: Corrugated panels: Budget-friendly and great for sheds or garages. Standing seam panels: Sleek look, hidden fasteners, and very durable—perfect for homes and commercial buildings. Metal shingles or tiles: Designed to mimic traditional roofing but with the strength of metal. Your choice ultimately depends on your budget, style preferences, and the desired lifespan of the roof. Personally, I recommend standing seam if you’re planning to stay in your home for the long haul. Step 5: Install The Metal Roofing Panels Now comes the main event. Installing metal roofing over shingles isn’t overly complicated, but it does take precision. Start at the bottom edge (eaves) and work upward. Lay the first panel square with the edge of the roof. If your first panel is crooked, the entire roof will appear uneven. Overlap panels properly—follow the manufacturer’s guidelines for overlap distance. Fasten with the right screws. Use screws with rubber washers to seal holes, ensuring they penetrate solid decking or furring strips. Continue up the roof, checking alignment every few rows. Pro Tip: Don’t overtighten screws. If the rubber washer is squished too flat, it won’t seal properly and may crack over time. Step 6: Flashing And Trim Work This is where many DIY jobs go awry. Flashing around chimneys, skylights, and valleys is critical for keeping water out. Trim pieces at the ridges and edges give the roof a finished, professional look. If you’re unsure about flashing details, this is the step where you may want to consider hiring a professional. A metal roof is only as good as its weakest point, and improper flashing is the most common cause of leaks. What Are The Common Mistakes To Avoid? I’ve seen many metal roofs fail due to simple errors. Here are the top mistakes to watch out for: Skipping the underlayment. This leaves your roof vulnerable to condensation. Using the wrong fasteners. Nails or cheap screws won’t hold up—always use roofing screws with rubber washers. Poor alignment. Once panels are on, it’s tough to fix crooked lines. Take your time. Ignoring ventilation. Without proper airflow, you risk moisture damage and reduced lifespan of your roof. How To Maintain Metal Roofs? Tips Now that you know how to install metal roofing, the next issue is: how to maintain it? One of the perks of a metal roof is its low maintenance, but that doesn’t mean zero maintenance is required. Inspect screws and fasteners yearly. Tighten or replace any that have loosened. Keep gutters clean. This prevents water from backing up and damaging flashing. Trim overhanging branches. Metal roofs are tough, but falling limbs can still cause dents or scratches. Wash occasionally. A simple rinse with a hose keeps the roof looking sharp and removes debris. Know How To Install Metal Roofing In 2025! If you’re handy and comfortable working on a roof, installing metal over shingles is a doable task. But here’s my honest advice: it’s not for everyone. Working on a roof is inherently dangerous, and even a minor mistake can result in significant financial consequences down the road. As a roofer, I’ve fixed plenty of DIY jobs that started with good intentions but ended up leaking or looking crooked. If you’re unsure about any part of the process—especially flashing and sealing—don’t be afraid to call in an expert. Installing metal roofing over shingles can be a smart move if it’s done right. You’ll save money, boost curb appeal, and enjoy a roof that could last 40–50 years. If you’re ready to take the next step, don’t hesitate to reach out to a professional roofer. Whether you just need advice, an inspection, or a full installation, we’re here to help. After all, a roof isn’t something you want to gamble on—it’s what keeps your family, your business, and everything inside safe and dry. Read More: How Often Do You Need A Roof Inspection? Elevate Your Roof’s Health With Aerial Roof Inspections What Is The Average Life Span Of A Tile Roof in Albuquerque?

READ MOREDetails
Bitcoin mining for beginners

A Beginner’s Guide to Setting Up A Home Bitcoin Mining Operation

Bitcoin mining has transformed dramatically since its early days.  Evolving from a simple hobbyist pursuit into a sophisticated technical endeavor that still manages to attract curious newcomers.  Well, it is no news that the landscape's gotten more competitive, and there's no denying this.  But setting up a home mining operation isn't an impossible dream. That is, if you are ready to dive into the learning process, you can set it up in a jiffy. This guide breaks down the essential considerations and practical steps you'll need to establish your own mining setup at home. So, here I am going to discuss how Bitcoin mining works. Making it easier for beginners to get started with the complex process in the simplest way. Now, whether you are drawn by the profit potential, fascinated by the technology, or just want to grow in the Bitcoin network, here is everything you need. So, as long as you are looking for the ultimate guide to Bitcoin mining for beginners, I have got you covered. Just keep reading to know more! What Is Bitcoin Mining For Beginners? At its core, Bitcoin mining serves as the engine that creates new bitcoins while simultaneously verifying transactions across the blockchain network. Complex, right? Let me simplify thisprocess. So, basically, Bitcoin mining for beginners refers to the process of cultivating new Bitcoins by cracking puzzles and completing tasks.  That is, people can gain bitcoins through verified transactions in blockchain technology. Now, most miners know how to crack the code. That is, they take the help of complex computers with robust system upgrades to decode the puzzles. But the real competition heats up when:  The first miner, A beginner, or even A professional cracks the puzzle and wins the privilege of adding a fresh block of transactions to the blockchain.  What's in it for them? Successful miners pocket newly minted bitcoins along with transaction fees from all the transactions bundled into their block.  Moreover, the best part is that the system allows users to recalibrate their Bitcoin transactions. That is, after around 2,000 blocks of blockchain transactions, they can recalibrate them to their own advantage. How To Set Up Bitcoin Mining For Beginners? Now, it is simpler than you think. That is, setting up the perfect Bitcoin mining setup at home for beginners is easy-peasy. So, just follow these simple steps to set it up the right way— 1. Essential Hardware Requirements Coming to the core elements required to get started with the bitcoin mining. That is, you need to build the perfect foundation for the process. So, it is better to directly invest in ASICs from the beginning. That is, Application-Specific Integrated Circuit devices are the key element for Bitcoin mining. Moreover, they are designed to handle all kinds of cryptocurrency mining. And, bitcoin mining is just a simple game for these devices. So, investing in one of these can pave the way for enjoying the benefits of bitcoin mining. 2. Calculating Costs And Profitability Now, before investing, it is safe to tally the costs and the profitability of the bitcoin mining to ensure you are making the right decisions. So, before taking a dollar out of that pocket, calculate the investment costs and profitability in the process in the long term. This way, you can prevent any expensive miscalculations. Moreover, for professionals who need to buy bitcoin miner equipment for their operations, evaluating both upfront costs and long-term operational expenses is critical. Now, you must think that this is it. But let me open the pandora’s box and reveal the truth to you — it isn’t. Rather, it is only the tip of the iceberg of the amount of expenses in bitcoin mining. That is, the electricity required for handling the bitcoin mining process usually tops the list of expenses. So, it is better to calculate the cost of the power consumption. Also, don’t forget to add the cooling cost for the equipment for handling the Bitcoin mining operations. 3. Setting Up Your Mining Environment Creating the right physical space for your mining equipment demands attention to several practical factors that can support your operation. For instance— Location of the mining equipment, Volt circuits for the hardware, and Ventilation for the ASIC devices. Your chosen location needs adequate electrical capacity to handle the substantial power requirements. And, that too without overloading circuits or creating dangerous fire hazards.  Moreover, most miners require dedicated 220-240 volt circuits, similar to what powers electric dryers or ovens. That is, you might need to invest in a licensed electrician for proper installation.  Along with that, ventilation deserves serious consideration. Given that ASIC miners generate staggering amounts of heat that can transform a room into an oven surprisingly fast. 4. Joining A Mining Pool And Configuration Let's be realistic. Solo mining Bitcoin with home equipment has become essentially impractical given the enormous computational power of today's global mining network.  Mining pools offer a sensible alternative for beginners.  That is, combining the hash rate of numerous individual miners so participants receive more frequent (though smaller) payouts proportional to their contributed computing power.  So, when you're shopping for a mining pool, investigate factors like— fee structures,  payout methods,  server reliability, and  geographic location of pool servers.  Moreover, pool fees typically hover between one and three percent of mining rewards.  But on the other hand, payout thresholds determine how much Bitcoin you must accumulate before receiving a transfer to your wallet. 5. Legal And Tax Considerations Running a home mining operation comes with legal and tax implications that vary depending on where you live, and ignoring these can create serious headaches down the road.  Some residential zones enforce restrictions— limiting or outright prohibiting commercial activities in homes,  running mining equipment, or using mining hardware for Bitcoins. So, it is better to know the rental terms and conditions to avoid violating homeowners' association rules or the terms of your rental agreement.  Taking time to research local regulations makes sense, and consulting legal professionals provides valuable peace of mind regarding compliance with applicable laws.  On the tax front, things get interesting. Setting Up Bitcoin Mining For Beginners The Right Way Setting up a home Bitcoin mining operation offers an engaging pathway into cryptocurrency and blockchain technology, but success hinges on thorough research, grounded expectations, and meticulous planning.  From grasping the technical fundamentals and choosing appropriate hardware to calculating realistic profitability and maintaining legal compliance, each element deserves careful attention.  Yes, Bitcoin mining's competitive nature and substantial upfront investment present genuine challenges that shouldn't be minimized.  Yet a thoughtfully planned operation can deliver both potential financial returns and invaluable hands-on learning experiences that deepen your understanding of cryptocurrency.

READ MOREDetails