A Rundown of the Basic Led Lighting

by

23 February 2016

Home & Garden

led_flood_lighting

“This blog shares some basic options available for LED lighting a house.”
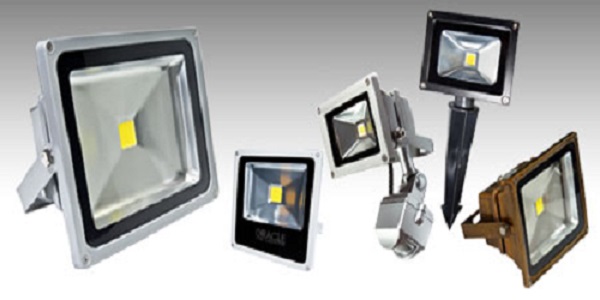
What is LED?

The term LED refers to “Light-emitting diodes”.

When these lights first made their appearance in the market, people were skeptical about their use as they emitted a bluish-white light, a bit unconventional for homes.

But things have changed now. Advancement in technology and continuous researchers have made this high-efficiency LED lights to produce, the warm yellow hue that homeowners prefer in their interior.

Read also: Secrets to the Perfect Bedroom Light

People, worldwide have now shifted from the traditional incandescent bulbs to LED lighting in spite of their high initial cost, because of their efficiency. This high efficiency LED home lighting, ensures lower power bills, better quality of lighting and last much longer than a normal lamp.

The other feature of these lamps is their versatility, which has made people switch from traditional bulbs to LED lighting. These lamps offer a varied range in lighting- from soft, cool lights to warm and crisp ones. They come in a wide range of designs and lets you play with the interior lighting scheme. Some of the variety in which LED lights are available for home décor are:

 Tape, Ropes, Smart Bulbs, Pucks, Panels, and more.

Here is a quick rundown of the basic options that you get with High-Efficiency LED Home Lightings inside your home:

 LED Tape Lighting

A flexible lighting option that can be used in two shades to create a light and shadow ambiance in a room, preferably bathrooms and kitchens. Use the usual “white” LED tape above the kitchen cabinets for a bright glow and stick “soft and warm” LED tape under the cabinets for warm illumination.

LED tape light is a flexible tape of circuit boards with LED chips come with a self- adhesive back for easy installation anywhere. The tape can be cut according to preferred size. The chips are the lights that come in a range of brightness options.

Read More: The Right Light Set-Up For Your Band

LED Panel Lights

The LED Panels are multiple of LED light chips, enclosed within a metal channel covered by a transparent acrylic case. They are brighter than the LED tapes as more LED chips are included in one space. The Panels come in a wide range of color options and can be dimmed and brightened as preferred.

The LED Panels are of great use in bathrooms, for illuminating a bathroom vanity. Attached along the entire length of the mirror below and above, they give a soft, dramatic look. These panels are ideal for bathroom use as they are protected additionally by the acrylic case.

LED Smart Bulbs

The latest technology has brought LED Smart Bulbs in the market. The “smartness” factor in these bulbs comes from their management through smartphones, and other similar gadgets or the Wi-Fi network of a home. They allow the use of a wide spectrum of colors in lighting and also the control of the light warmth.  Use LED Smart Bulbs with Industrial Steampunk Pipe Light fixtures and change the look of your home.

Ideal for a kitchen with a modern, minimalist look. Create a dramatic atmosphere by using these Industrial Steampunk Pipe Light Fixtures above the kitchen island to brighten up space and highlight it as well. You can also use this light fixture to lighten up the kitchen working space. Other than a kitchen, Industrial Steampunk Pipe Light Fixtures with LED Smart bulbs can also be used in studies as well as the poolside with appropriate interior planning.

LED Puck Lighting

LED lights create a pool of light in an area and let off less heat than Xenon puck lights. They are ideal for illuminating inside the cabinets and small corner spaces. The discs are ideal for creating a drama with light and shadow as the areas that fall outside the light focus, are left in the dark. You can get LED Puck lights in individual units or in kits as well.

LED Ropes

Ideal for outdoor lighting of a home, for patios, poolside, walkways LED Ropes to offer a soft bluish light. These are actually LED chips encased in a round plastic tube. The durability of the plastic and its waterproof nature makes LED Rope a better option of outdoor lighting.

Read More:

  1.  Create A Stunning Outdoor Space With These Residential Landscape Lighting Tips
  2. Secrets To The Perfect Bedroom Light

Lucia Patterson is the woman behind TheLegalGuides, a blog solely focused on legal guides, tips, and advice. Lucia loves essay writing and blogs at EssayWritingGuides from her college days.

View all posts

Leave a Reply

Your email address will not be published. Required fields are marked *

Related

baby’s room

How to set up your baby’s room

Are you expecting to welcome a new member into your family? If so, then you should definitely prepare before they are here. One of the best ways to begin is by setting up your baby’s room. Giving it a good theme, setting a decent wallpaper, getting all the furniture plays a very important role when it comes to setting up nurseries. Not only that, you have to keep many other things in mind while getting it all done. We can help you with all of this with today’s post! Read ahead to find out more! Select the right theme for yourself Before you set up your baby’s room, make sure to set up a theme. There are several ideas available on Pinterest and various other free apps that will open your mind, improve your creativity and actually help you decide what sort of theme you should go for your little one. However, make sure it isn’t too bright or shiny. You can keep the look of the room subtle and it will still look great! Know what essentials you require: Some of the most important things you require while setting up your baby’s room are cribs, changing tables, cupboards, soft carpets, a nursing chair, baby bath toys, baby blankets, toy boxes, and a nice drawer for clothing. Once you have got these things in place, you can get on with the rest such as design and styling. Great wallpaper: The first thing you need to do is begin with a good nursery wallpaper. A baby’s nursery could easily look a lot better if you get hold of a fun pattern and paper that fills up the entire room or maybe a single wall. Building on the pattern with great colors or art could improve the whole look of your baby’s room as well. Get rid of all the clutter: If there is a lot of stuff that you want to keep in the nursery, make sure to use closed storage. This helps to keep all the clutter far away. Shelves that come without doors look good but they can get messy if you pile them with a whole bunch of stuff. In this case, you can use a few baskets or boxes that will help your staff stay more organized. Invest in the best baby change baskets: A baby change basket is necessary if you are setting up a nursery for your little one. A great treasure basket can be kept in the middle of the circle so that your baby can reach inside it easily. Allow all of them to explore each item. There are several accessories available online to help style the treasure basket. Also, the best baby change baskets are available in several stores online. You can take a look at all, compare the prices and then make the final decision. Educational toys in your baby’s nursery: Having educational toys in your baby’s nursery is essential. You could hang a mobile on the crib so that your baby can play with it whenever he/she is bored. You can add some nursery rhymes and audio collections that will keep them happy. Those who invest in things like this tend to find more success in their relationship with kids more than others. Use geometric patterns: Using geometric patterns on the walls with some strong colors could be an amazing way to add some fun and spark to your baby’s room. This could be on the rug, the walls and so much more. Babies who are developing eyes will be more attracted to a contrast of high color. If you really want to highlight the appearance of your baby’s room, this could be a helpful tip! Decorating your baby’s nursery: Decorating your baby’s nursery doesn’t have to be boring. If you like finding the perfect set of curtains and bed sheets that match with the wall paint, this could actually be perfect for you. If decorating is not really your thing, don’t give yourself the pressure to create the best baby nursery. You can ask your friend to help you out or simply stick to the basics and your home will look somehow. Test all the designs: Finally, make sure to test all the designs with the help of a sample board. It will bring your wall, flooring, window, bedding, and samples together. It will help you play around with the options as well. Several baby nurseries are set up after a few trials and errors so be open to fun and some experimenting until you have achieved what you fully desire. With that, we bring our post to an end. If you have liked reading our post, do let us know in the comment section below. Also, if there are questions you have in mind, drop them down. We would love to answer all your questions in detail!   Read Also: 10 Helpful Kid Closet Organization Hacks. 8 Newborn Baby Care Tips for First-Time Parents.  

READ MOREDetails
Move House

A List of Last-Minute Things You Should Check before You Move House

When we are moving house, it’s relatively easy for us to remember a good number of things, such as packing our belongings for our move and making sure all the items are properly packed and secured, and making sure that we inform our utility providers, both present and future as well. But there are indeed some other aspects which we may end up forgetting or neglecting simply because we are too focused on the major things we have to do. So what are these last-minute things you should check before you move house? Here’s a list. Things from repair shops, dry cleaning shops, tailors, and more: Yes, you probably have a lot of clothes to pack. But before you close and seal your boxes, make sure you have collected all your clothing from the dry cleaning shop and tailor, and you have taken all your items from repair shops as well. If you neglect to take things from the dry cleaners or the tailor or the repair shop, you may be faced with regret, especially if you are moving hundreds of kilometres away. Your personal paperwork, records, and documents: It may be surprising, but many individuals actually neglect to take care of their personal paperwork, records, and documents before it's too late. In essence, you should be taking care of your paperwork, records, and documents about two months prior to your move, as some files and documents may take time to process and retrieve, such as health records for your family from your local GP and records from the veterinarian if you have pets. If you have a local pharmacist, you may also want to take your list or a copy of your prescriptions from them. Some medical centres and pharmacies can transfer your records to your new general practitioner; it's still best to make sure of this before you move. Valuables and spare keys: You shouldn’t forget your valuables and spare keys, either, especially if you have a spare key with, for example, a neighbour, or hidden somewhere in your garden or property. Make sure you give your extra keys to the new occupants of your home; this is good protocol, even if the new occupants choose to change the locks in the end. Before you move to your new home, make a thorough sweep of your old home to see if there are any valuables you may have forgotten about, such as wads of cash hidden in a tin box, or jewellery which you have stashed away in a cupboard or shelf. You never know if you have forgotten a particularly valuable item, especially if you have lived in your old home for a long time, this is a common occurrence according to Advanced Removals & Storage, who offer a man with van in Cheltenham moving service. Gym memberships and library books: Aside from the things mentioned above, don't forget your gym memberships and library books too. Return whatever library books you may still have in your possession, and remember to inform the library about your move as well (this way, they can cancel your library card). If you have a membership for the local gym, make sure to cancel your membership – better yet, if they have a branch in your new location, you can simply ask them to transfer your gym membership to the other branch. Good luck, and happy moving! Read Also: 8 Home Gym Systems You’ll Want To Try Out Moving House? Here’s The Ultimate Checklist How To Sell Your House Fast?! Five Must-Know Tips To Move Your Property!

READ MOREDetails
how to harvest asparagus-

Asparagus 101: When, How, And How Often To Harvest?

If you are a gardener like me, you must have thought about harvesting greens that you eat at restaurants at your house. One of these days, I was with my friends from my university, and we were discussing the importance of eating veggies for staying healthy. And they could not figure out the best ways to effectively do so. Reading my previous blog about cilantro, Laila asked me, “how to grow and harvest asparagus?” Well, surely asparagus is one of the most delicious and nutritious vegetables you can grow in your garden. But what a lot of people do not know is that it's also one of the easiest once you know how to harvest asparagus properly. In this article, I will cover everything you need to know about harvesting asparagus, from when to start, how to cut, and how often to do it. Additionally, I will also share some tips on how to store and freeze asparagus, as well as the benefits of eating this green wonder. So, keep on reading till the end to learn more...  How Does Asparagus Grow? Before I dive into the seemingly difficult process of how to harvest asparagus, let me help you grow it.  Asparagus is a perennial plant that grows from a crown of roots that can live for up to 20 years. The crown produces spears, which are the edible part of the plant, every spring. The spears grow rapidly, sometimes up to an inch per day, and can reach a height of 6 to 10 inches. The spears are harvested before they open into fern-like leaves, which are edible and tough. Asparagus grows best in well-drained, sandy soil with a pH of 6.5 to 7.5. It prefers full sun and moderate temperatures and needs regular watering and fertilizing. Asparagus can be grown from seeds or crowns, but crowns are easier and faster to establish. Crowns are planted in trenches about 12 to 18 inches apart and covered with 2 to 3 inches of soil. As the spears emerge, more soil is added until the trench is filled Benefits of Asparagus  https://giphy.com/gifs/food-asparagus-taylor-lee-nicholson-pejh5q5BBXxi2m4PgF Asparagus is not only tasty, but also healthy. It's low in calories and high in fiber, vitamins, minerals, and antioxidants just like spinach. It can help lower blood pressure, regulate blood sugar, support digestion, and prevent urinary tract infections. Asparagus also contains a compound called asparagine, which is a natural diuretic that helps flush out excess fluids and salts from the body. Asparagus is also a good source of folate, which is essential for pregnant women and fetal development When to Harvest Asparagus? The first year after planting, you should not harvest any asparagus spears, as they need to grow and strengthen the root system. The second year, you can harvest a few spears for a short period, about two to three weeks. The third year and beyond, you can harvest asparagus for a longer period, up to eight weeks, depending on the climate and the health of the plants. The best time to harvest asparagus is in the early morning when the spears are crisp and tender. You should harvest asparagus when the spears are about 6 to 10 inches tall, and before the tips start to open up. If you wait too long, the spears will become woody and bitter. How to Plant and Care for Asparagus? Asparagus is a long-term investment that can reward you with years of delicious harvests. However, it requires some planning and preparation before planting.   Here are some steps to follow to plant and care for asparagus:  Choose the Day  Choose a sunny and well-drained spot in your garden, preferably with sandy or loamy soil. Avoid areas where water tends to pool or where weeds are hard to control. Asparagus also needs plenty of space, so make sure you have at least 4 to 5 feet between rows and 12 to 18 inches between plants. Prepare the Soil  Prepare the soil by adding organic matter, such as compost or manure, and adjusting the pH to 6.5 to 7.5. You can use a soil test kit to check the pH and nutrient levels of your soil. You may also need to add some fertilizer, such as 10-10-10 or 10-20-10, to boost the phosphorus and potassium content. Dig it Deep Dig a trench about 8 to 12 inches deep and 12 to 18 inches wide. You can make the trench longer or shorter depending on how many asparagus crowns you have. Asparagus crowns are the dormant roots of the plant that you can buy from nurseries or online. They usually have one-year-old or two-year-old crowns, which are more reliable and productive than seeds. Fertilize Spread some fertilizer along the bottom of the trench, about 2 pounds per 100 square feet. Then, cover the fertilizer with 2 to 3 inches of soil, forming a ridge in the center of the trench. Placing the Plant Place the asparagus crowns on top of the ridge, about 12 to 18 inches apart, with the buds facing up. The crowns should be slightly below the soil surface, about 1 to 2 inches deep. Do not bury them too deep, as this will delay the emergence of the spears. Focus on the Crown Cover the crowns with another 2 to 3 inches of soil, and water well. As the spears grow, gradually fill in the trench with more soil, until it is level with the ground. This will help protect the crowns from frost and weeds. Add Mulch  Mulch the bed with straw, leaves, or wood chips, to conserve moisture and prevent weeds. You can also add some organic fertilizer, such as fish emulsion or seaweed extract, every few weeks during the growing season, to encourage healthy growth. Keep in Mind Do not harvest any asparagus spears in the first year, as they need to establish a strong root system. In the second year, you can harvest a few spears for a short period, about two to three weeks. In the third year and beyond, you can harvest asparagus for a longer period, up to eight weeks, depending on the climate and the health of the plants. How to Harvest Asparagus? Now, coming to the most important part that you wanted to know about. Let us talk about the ways to harvest asparagus! To harvest asparagus, you need a sharp knife or a pair of scissors. You should cut the spears at the base, about an inch below the soil surface. Be careful not to damage the crown or the emerging spears. You should also avoid cutting too many spears from one plant, as this will weaken the plant and reduce the yield. A good rule of thumb is to leave at least one-third of the spears on each plant. You should harvest asparagus every day or every other day, depending on how fast the spears grow. You should stop harvesting asparagus when the spears become thinner than a pencil, as this indicates that the plant is running out of energy. You should then let the spears grow into ferns, which will replenish the crown and prepare it for the next season. How to Store and Freeze Asparagus? Unlike lettuce, which you can store for more than a week, asparagus is best eaten fresh, as it loses its flavor and texture quickly. If you can't eat it right away, you should store it in the refrigerator for up to a week. To keep it fresh, you should trim the ends of the spears and stand them upright in a glass of water or wrap them in a damp paper towel and put them in a plastic bag. If you want to preserve asparagus for longer, you can freeze it. To freeze asparagus, you should first wash and trim the spears, and then blanch them in boiling water for two to three minutes, depending on the thickness.  Blanching is a process of briefly cooking and cooling the vegetables to stop the enzyme activity that causes them to spoil.  After blanching, you should drain and cool the spears, and then pack them in freezer bags or containers, leaving some space for expansion. You can freeze asparagus for up to a year, and use it in soups, casseroles, or stir-fries. How to Prevent and Treat Asparagus Pests and Diseases?  Asparagus is generally a hardy and resilient plant, but it can still suffer from some pests and diseases that can affect its growth and quality. Here are some of the most common problems that affect asparagus plants, and how to prevent or treat them: Asparagus beetles These are small, black or red beetles that feed on the spears and the ferns, causing them to wilt and turn brown. They can also lay eggs on the spears, which hatch into larvae that chew on the stems and leaves. To prevent asparagus beetles, you should keep the area around the plants clean and weed-free, and remove any old or damaged spears. To treat asparagus beetles, you can hand-pick them and their eggs, or spray them with insecticidal soap or neem oil. Fusarium wilt This is a fungal disease that infects the roots and the crowns of the plants, causing them to rot and die. It can also cause the spears to become yellow, twisted, and stunted. Fusarium wilt is more likely to occur in poorly drained, acidic, or infested soil.   To prevent fusarium wilt, you should plant disease-resistant varieties, rotate crops, and avoid overwatering or injuring the plants. To treat fusarium wilt, you should remove and destroy any infected plants, and apply fungicides to the soil. Rust This is another fungal disease that affects the ferns, causing them to develop orange or brown spots and pustules. Rust can reduce the vigor and yield of the plants, and make them more susceptible to other diseases. Rust is more likely to occur in humid, wet, or shady conditions.   To prevent rust, you should plant resistant varieties, space the plants well, and prune any excess or infected ferns. To treat rust, you should apply fungicides to the ferns, and avoid watering them from above. Crown rot This is a bacterial disease that causes the crowns and the bases of the spears to become soft, mushy, and foul-smelling. Crown rot can spread quickly and kill the plants. Crown rot is more likely to occur in wet, compacted, or poorly drained soil. To prevent crown rot, you should plant healthy crowns, improve the drainage and aeration of the soil, and avoid overwatering or injuring the plants. To treat crown rot, you should remove and destroy any infected plants, and disinfect the tools and the soil. Bonus: How to Cook and Enjoy Asparagus?  There are many ways to cook and enjoy asparagus, from steaming, boiling, roasting, grilling, to sautéing. The key is not to overcook it, as it will become mushy and lose its flavor. You should cook asparagus until it is bright green and crisp-tender, which usually takes about 5 to 10 minutes, depending on the method and the thickness of the spears. You can season asparagus with salt, pepper, butter, lemon juice, garlic, herbs, cheese, or any other condiments you like. You can also pair asparagus with eggs, bacon, ham, chicken, fish, pasta, rice, or salad. Asparagus is a versatile and delicious vegetable that can complement any meal. Wrapping It Up! Asparagus is a wonderful vegetable that you can grow and harvest in your own garden. It's easy to care for, once you know how to harvest asparagus properly. You should harvest asparagus when the spears are about 6 to 10 inches tall and before the tips start to open up. You should cut the spears at the base and leave some on the plant to grow into ferns. It would be best to store asparagus in the refrigerator for later use. And yes, you should also enjoy the many benefits and flavors of asparagus, by cooking it in various ways and pairing it with different dishes. Asparagus is a springtime delight that you don't want to miss. Learn More About: Planting & Harvesting Mint 7 Health Benefits of Black Seed Oil Spirulina: The Complete Plant Based Protein Source | Health Benefits

READ MOREDetails