Top 10 MySQL GUI MacOS

by

08 December 2022

Technology

MySQL

Databases are the primary data storage location for all software applications. For instance, when someone conducts a web search, logs into an account, or completes a transaction, a database system maintains the information so users can retrieve it whenever they choose.

A relational database, on the other hand, organizes data into tables, rows, and columns. Furthermore, it combines tables and creates a link between the data, making it simple to acquire insights into the relationship between multiple data points.

Among the different relational databases, MySQL is the most popular. It supports different OS like Linux, Windows, and even macOS (Apple). In addition, it powers several popular web applications, including Twitter, Netflix, Uber, and Facebook.

There are several MySQL GUI for macOS. However, this blog article will discuss the top 10 MySQL GUI Clients for MacOS.

1. dbForge Studio for MySQL

dbForge Studio for MySQL

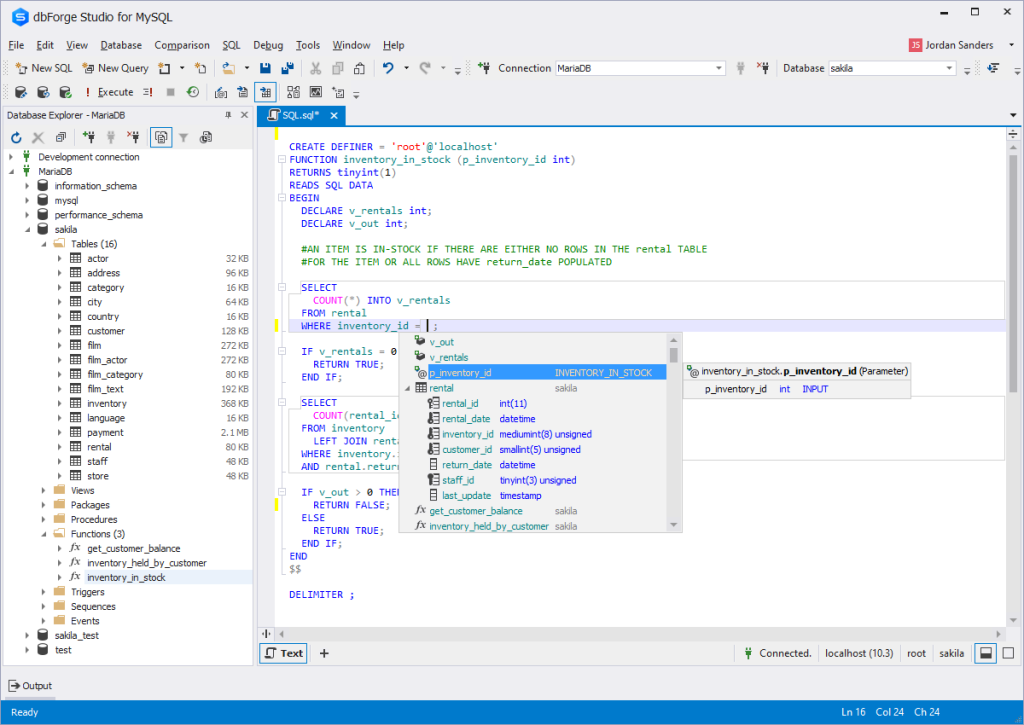
dbForge Studio for MySQL is a MySQL GUI for macOS. It is used to create, maintain, and design databases.

dbForge Studio for MySQL allows you to build and execute queries, develop and debug stored procedures, and manage database objects.

Furthermore, it has a user-friendly UI and consists of intelligent coding features like code completion, enabling you to write SQL queries easily and effectively.

PROS

  • Code completion
  • Automatic run-time query
  • Visual Query Builder, which helps you create queries using drag-n-drop
  • Simple to debug
  • Simple backup and restoration

CONS

  • The free edition has limited functions
  • It is compatible with only MySQL and MariaDB
  • dbForge Studio for MySQL cannot be used offline.

Price: 30-day free trial, $179.95 for a perpetual license of the premium edition.

2. TablePlus

TablePlus

TablePlus is a native MySQL GUI application with an easy-to-use interface. Its native architecture enables speedier processing of SQL queries. As a result, you can quickly build, query, edit, and save databases.

Furthermore, TablePlus has an appealing user interface that enables you to manage numerous relational databases at the same time, such as MySQL, PostgreSQL, SQLite, Microsoft SQL Server, Redshift, MariaDB, and others.

PROS

  • It executes queries in split seconds
  • It consists of a simple UI
  • It only consumes a little space – about 180MB to install
  • no code query features
  • you can connect to multiple databases simultaneously
  • code formatting features

CONS

  • The free version limits you to 2 opened tabs and 2 opened windows
  • No rollback button

Price: $79, $99, and $49 for basic, standard, and custom license, respectively.

3. DBeaver

DBeaver

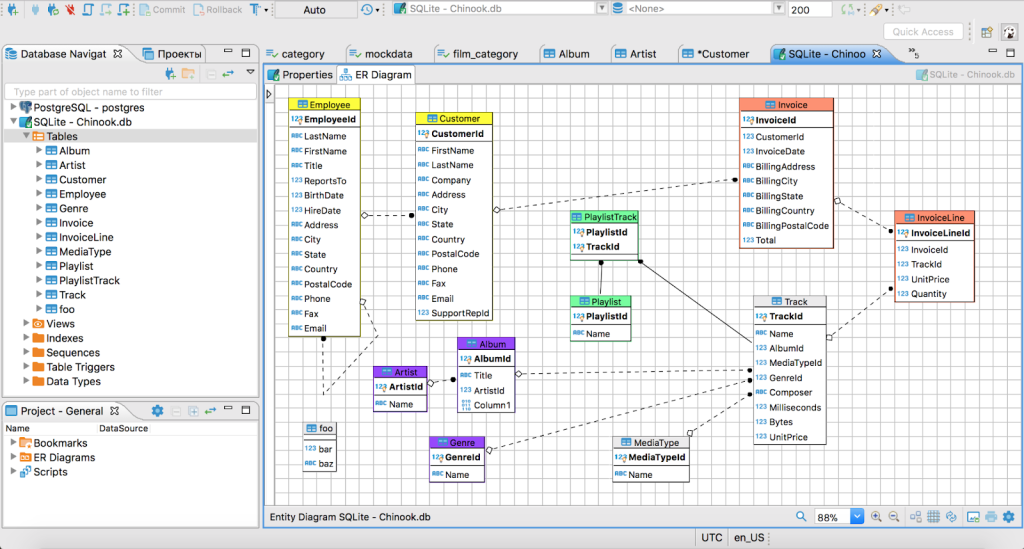
DBeaver is a graphical database administration tool for database developers and administrators. It is a free and open-source tool that supports popular DBMSs like MySQL, PostgreSQL, MariaDB, SQLite, and Oracle. Aside from MacOS, it also works on Windows, Solaris, and Linux.

DBeaver is highly functional and user-friendly. It consists of the typical features one should expect from a GUI database management tool. Features like code completion, code formatting, data editing, database analysis, SQL editor, and so on

PROS

  • Can connect and work on different databases simultaneously
  • It has easy navigation through the Schema object tree
  • It saves coding time through code completion

CONS

  • The free edition has limited functions
  • It consumes a lot of RAM space
  • You cannot install it without Java

Price: The community edition is free, and the Enterprise edition is $10/month.
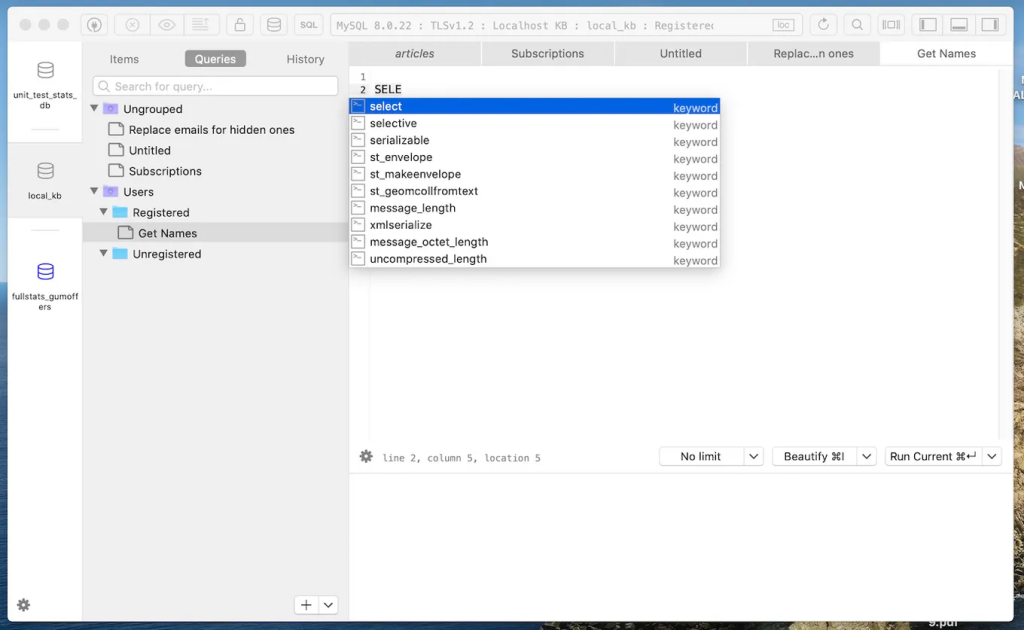
4. Sequel Ace

Sequel Ace

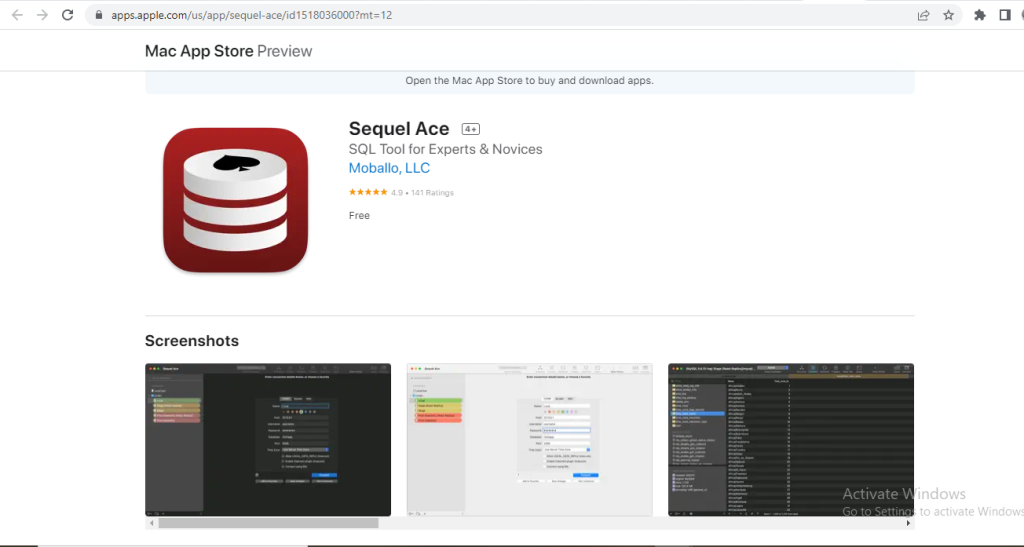
Sequel Ace is a popular Mac database management tool for MySQL and MariaDB databases. It serves as a replacement for the longtime MacOS tool – Sequel Pro.

Sequel Ace allows easy writing of custom queries, easy accessibility to all your databases, and a filtering system to find what you need quickly.

PROS

  • It rarely crashes
  • It is fast and easy to install
  • It has flexible connectivity

CONS

  • It does not support multiple result tabs for multiple queries
  • The query editor window is slow

5. SQLPro Studio

SQLPro Studio

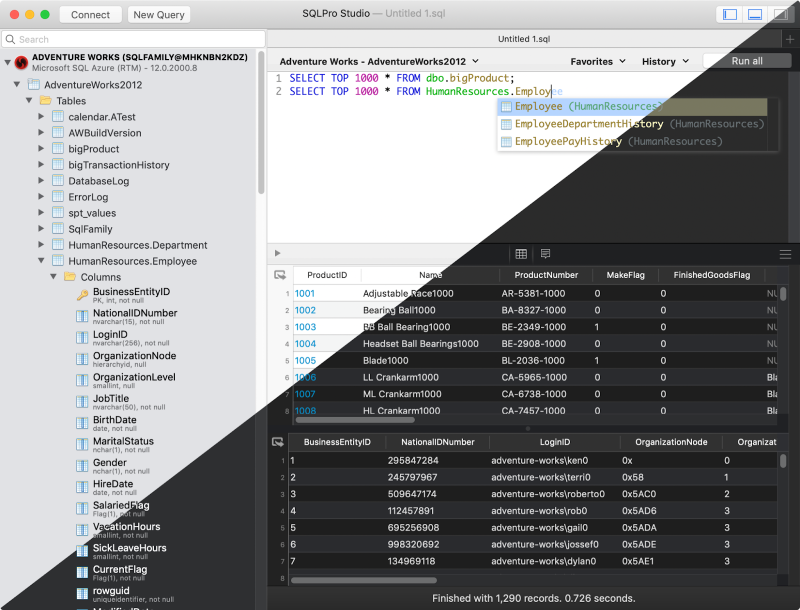
SQLPro Studio is a high-end database management software for Postgres, MySQL, Oracle databases, and Microsoft Management Studio.

It is well-known for its smart features, such as syntax highlighting, the ability to execute several queries simultaneously, autocomplete, keyword inclusion, and exporting files as CSV, among others.

PROS

  • The table filters are easy to use
  • It can install plugins
  • You can easily connect it to local Docker containers

CONS

  • It is a little bit slow
  • It does not have NoSQL DB management
  • It crashes randomly.

Price: $99.99 per year.

6. DataGrip

DataGrip

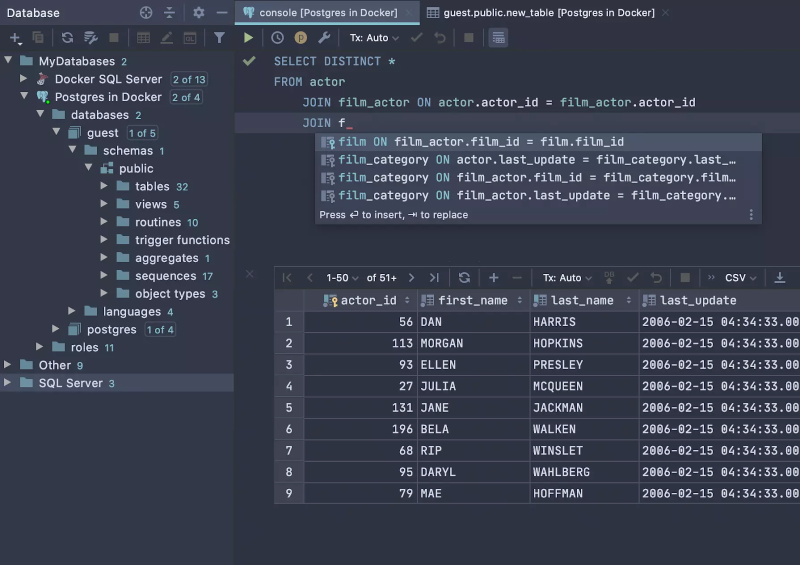
DataGrip is a multi-engine database management tool. It is compatible with MySQL, PostgreSQL, Microsoft SQL Server, Oracle, Sybase, SQLite, and so on.

DataGrip is characterized by many amazing features, such as code auto-completion, bug detection, and version control integration, among others. In addition, it provides a query console for performing and profiling queries.

PROS

  • The interface is user-friendly and very easy to understand.
  • The support is substantial, and the tool deployment is highly authentic
  • You can manage multiple databases simultaneously.

CONS

  • It consumes too many computer resources, which slows down its performance.
  • If you plan using of MySQL DB only, its functionality is poorly

Price: $199 per year

7. Beekeeper Studio

Beekeeper Studio

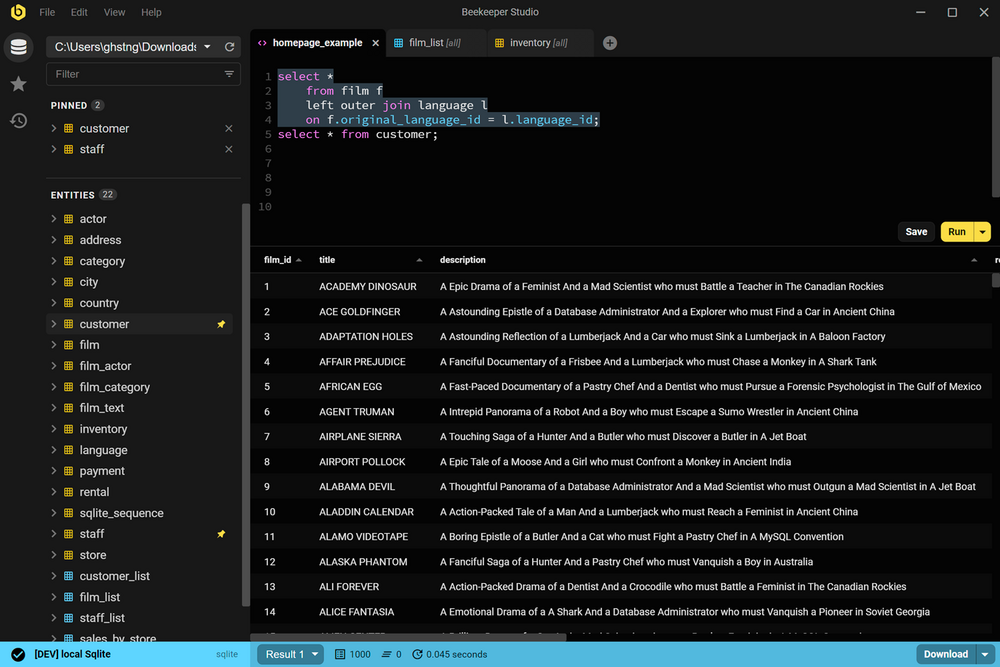
Beekeeper Studio is an open-source SQL editor and database management tool for MacOS, Linux, and Windows. It has a friendly user interface and is very easy to understand. Also, Beekeeper studio is GPL licensed, which makes it free to use.

The tool is characterized by various smart features, such as a tabbed interface for multitasking, keyboard shortcuts, query history, code auto-completion, and syntax highlighting, among other features.

PROS

  • It has keyboard shortcuts
  • It enables users to multi-task
  • You can use the tool without the internet
  • You can save your queries to visit them later

CONS

  • It takes a while to load multiple tables in a database
  • The UI could be better

Price: $99

8. Adminer

Adminer

Adminer is a PHP-based database data editing tool that is both simple and user-friendly. It is appropriate for general users because it allows for high-level data manipulation.

Adminer was previously known as phpMyAdmin. It does, however, have a simpler and more user-friendly layout.

PROS

  • The security features are top-notch
  • It is fast in executing queries
  • It restricts the number of connection attempts to prevent cyberattacks

CONS

  • The user interface could be more user-friendly
  • It is not easy to move database schemas across the workspace

Price: it is free

9. Navicat

Navicat

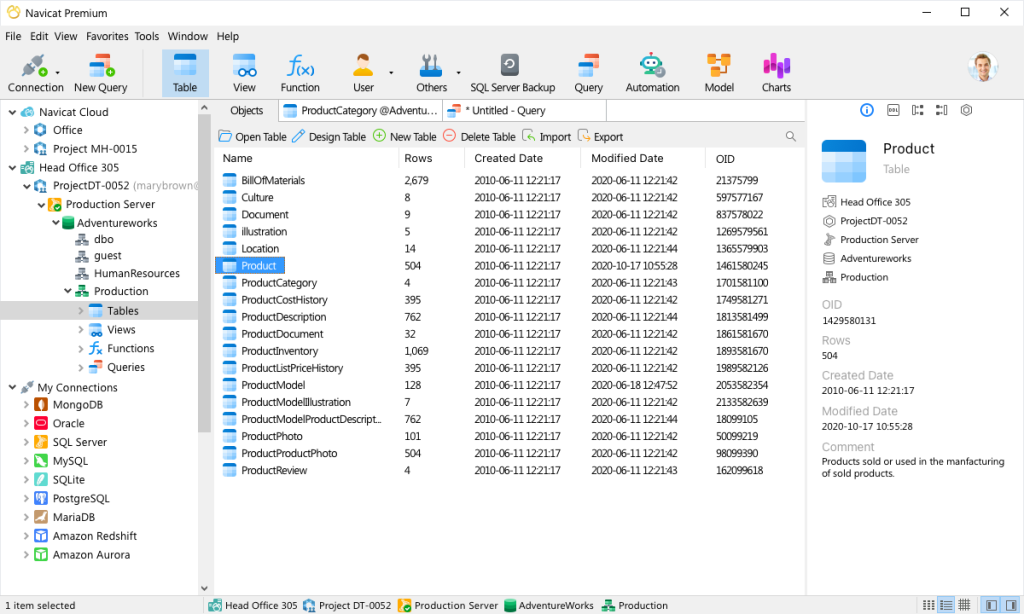
Navicat is a graphical front-end database administration tool that allows you to connect to several databases simultaneously, including MySQL, MariaDB, SQL Server, Oracle, PostgreSQL, and SQLite.

Navicat allows you to create and manage database objects, move data between databases, synchronize, and deploy updates.

Furthermore, its efficient functionality allows you to quickly complete complex jobs, such as importing a large number of file data into a database table without interruption.

PROS

  • It is beginner friendly
  • It runs SQL queries very fast
  • You can easily move data across different tables and databases.

CONS

  • The subscription is very costly
  • It has a short free trial period (14-day free trial)

Price: $69.99 monthly subscription, $1399 for a permanent license.

10. Querious

Querious

Querious is a new MySQL database management software for MacOS. It is precise and simple to use, giving you complete control of your work.

Furthermore, Querious is beginner-friendly and comes with smart features that enable users to view, edit, search and structure their data how they deem fit.

PROS

  • A simple user interface
  • It executes queries quickly
  • Complete control over user privileges
  • It rarely crashes

CONS

  • Autosuggestion can only suggest table names
  • It only supports MySQL
  • It is available only on MacOS

Price: $25.

Read Also:

Arnab is a professional blogger, having an enormous interest in writing blogs and other jones of calligraphies. In terms of his professional commitments, He carries out sharing sentient blogs.

View all posts

Leave a Reply

Your email address will not be published. Required fields are marked *

Related

which is a benefit of using server–to–server app conversion tracking over an SDK?

Which Is A Benefit Of Using Server–To–Server App Conversion Tracking Over An SDK?

Which is a benefit of using server–to–server app conversion tracking over an SDK? Is this the answer that you are searching for? If yes, then you have reached the right place… Question: Which is a benefit of using server–to–server app conversion tracking over an SDK?Options:(a) Server-to-server connections are easier to set up than code-less conversion tracking(b) Adding multiple SDKs for various advertising or analytics platforms have no impact on app code file-size(c) If not implemented correctly, adding the SDK and conversion tracking code could result in bugs in the app(d) Adding SDK and conversion tracking changes to your app doesn’t require review by the Google Play StoreAnswer: (c) If not implemented correctly, adding the SDK and conversion tracking code could result in bugs in the app If your answer is option (c) If not implemented correctly, adding the SDK and conversion tracking code could result in bugs in the app, then you are absolutely correct! But now is the time for you to understand the reason behind this being the answer. Keep reading this article till the end to learn more… What Are SDK Files? But before talking about "which is a benefit of using server–to–server app conversion tracking over an SDK?" it is important for you to know a little about the SDK files. So what are they? The full form of SDK is Software Development Kit. It is a set of tools that are needed to help the software developers make or create the application for a particular platform. They are generally made and provided by the manufacturer of the hardware platform or a programming language. There are a number of things that are included in an SDK file. According to Red Hat, "a basic SDK will include a compiler, debugger, and an application programming interfaces (APIs)." However, these are not the only things that are included in the SDK files. They can also include things like drivers, libraries, documentation, and testing/analysis tools. And network protocols. Some of the best examples of SDK files are: Java Development Kit (JDK) iPhone SDK MacOs X SDK Windows 7 SDK Cloud SDK So, What Is S2S? Well, if you are planning to choose a server-to-server app conversion tracking over the SDK file, it is important to learn a bit about S2S as well, isn't it? A server-to-server or S2S tracking is a method in which the data is shared from one server to another. The major benefit of this is the fact that there is no need for cookies on the website at the time when a visitor enters the website. So, if the software does not take cookies, how do they get the data, and how can they track it? Well, I have the answer for you! The S2S tracking works in a simple way. It works by generating and storing the unique identification. This UID can be anything in the form of the clicks made by the user or even by the impression on the ads. This is how the data is collected. When the same user visits the website again and takes part in such an action that will be tracked, the UID matches, and that is how tracking is done! Pretty simple and efficient, isn't it? Now let me explain the answer that you were searching for! Read More: How Does Google Ads Generate Responsive Search Ads? Explanation Of "Which Is A Benefit Of Using Server–To–Server App Conversion Tracking Over An SDK?" Now that you know what an SDK file is, it is important for you to understand the explanation behind the question, "which is a benefit of using server–to–server app conversion tracking over an SDK?" So here I go! The server-to-server or an S2S app conversion tracking helps the customers to send the details or credentials that they want to, to the website. These details or data are required for tracking the AdWords app user conversion. In this method, the AdWords app sends the tracking details from their server to the Google server during the event of conversion. On the other hand, the SDK files are not easy to implement or operate. When they are incorporated into an app, most of the time, you are supposed to add a piece of code. Furthermore, the tracking is also not controlled by the users. This also adds to the worries as they are not the ones to decide whether the process of data tracking is safe or not. Additionally, the most important benefit that you might have in choosing server–to–server app conversion tracking over an SDK is the fact that S2S is a much easier way of implementation. You will not be able to face any errors or bugs. The SDK, as I have already mentioned, has many complex technicalities. Thus, if the file is not implemented properly, you will have to go through the annoying experiences of bugs in the app. Wrapping It Up! SDK Files are the ones that are kind of a binary file type that some of the software use. They are the software development kit with which a lot of the software is embedded. However, if you are considering choosing server-to-serve app conversion tracking over an SDK file, then there is one major benefit. And that is the fact that it is much easier to implement. But, of course, if there is an error while implementing the SDK file and the tracking code, there could be bugs. In case you were searching for the answer to "which is a benefit of using server–to–server app conversion tracking over an SDK?" I hope that this blog has been of help to you. If there are any other queries related to the same, feel free to write them down in the comment box below at the bottom of the page. Read Also: Which Kinds Of Hits Does Google Analytics Track? When Does The Tracking Code Send An Event Hit To Google Analytics? 7 Ways A Software Development Company Can Help Mitigate Technology Risks In Business

READ MOREDetails
Safety Valves

Why Use Safety Valves? Introduction to Safety Valves

A safety valve is one of the important mechanical devices used in several industrial applications to protect systems from overpressure. Excess pressure build-up in the system can cause explosions, fires, and damages to critical components and products. Safety valves are designed to stop these problems by reducing or removing excess pressure from the system. They are specially designed to be actuated by the fluid being controlled; hence, it works when pneumatic or electronic safety controls fail. Below, we have covered more about safety valves: types, working principles, applications, selection criteria, and everything in between. Safety Valve Working Principle The general working mechanism of safety is simple. When the pressure of a system exceeds the maximum allowable working pressure (MWAP), safety valves quickly open to remove the excess pressure before it even builds up. These valves are fast-acting, and they open fully until the system pressure comes back to normal. Most safety valves have a smaller inlet port and a larger discharge outlet. This ensures that any overpressure can be quickly corrected without damaging the sensitive machine parts. The detailed working principle of safety valves from opening to closing depends on the design and application of the valve. We've highlighted more on this below. Types of Safety Valves and Use Cases There are three main types of safety valves. These are: Spring-loaded safety valves Pilot-operated safety valves Safety valves with balanced bellows a. Spring-loaded Safety Valves This is one of the most common types where the valve is held closed by a spring, and the balance between the input force and the spring force determines the closing and opening of the valve. Most spring-loaded valves used in everyday applications come with a flat poppet valve, but those designed for specific liquids and gases come with varying valve shapes. Some even come with a lifting chamber that provides more lift, reducing the time it takes to eliminate the excess pressure in a system. Spring-loaded valves for vapor and gases often open before the MWAP is reached, and the valve is lifted at least 50% at the MWAP. The problem with this type is increased backpressure that interferes with the safety of the valve. Backpressure is defined as the pressure that builds upon the outlet of the safety valve as the fluid medium flows out. Most spring-loaded valves are available for pressure ranges between 1 bar and 1400 bar. Figure 2: (A) Expansion chamber, (B) Spring, (C) Disc, (D) Nozzle ring (E) Nozzle. b. Valves with Balanced Bellows This type of safety valve comes with metallic bellows that increase the poppet valve's surface area. The benefit to this is reduced backpressure hence more safe operation. The spring mechanism is also isolated from the fluid media; thus, there's no undesirable influence on the spring force. That said, most valves with balanced bellows are designed to handle backpressure not exceeding 16 bar. c. Pilot-operated Safety Valves A pilot-operated safety valve has its popper valve held onto the nozzle by the inlet pressure, helping avoid leaks or undesired openings. When the inlet pressure is lower than the maximum working pressure, the safety valve will always remain open. However, as soon as the inlet pressure goes beyond the response pressure, the valves open instantly, allowing the media to flow and reducing the pressure. As soon as the pressure comes back to normal, the valve closes. All three types of safety valves find applications in different industrial settings. Some of the common areas where safety valves are used include oil and gas, manufacturing, food processing plants, refineries, pressure booster systems, and more. Choosing a Safety Valve Before picking a safety valve in the flooded market, you should always consider the following: The response pressure or the maximum allowable working pressure. The backpressure at which the valve can operate without causing safety issues. The discharge capacity of the safety valve. The valve's operating temperature. Valve and sealing material. Besides the above factors, you should also check the certifications required for your specific industry. For instance, safety valves used in the oil and gas industry will vary significantly from those used in the beverage and food industry. Some of the common certifications and standards in the market include ASME, TUV, and ISO 4126. Summary A safety valve is an important mechanical device that helps solve the problems associated with overpressure. There are three main types of safety valves: spring-loaded valves, pilot-operated valves, and those with balanced bellows. When the inlet pressure is higher than the maximum allowable working pressure, safety valves open up to avoid pressure build-up. This, in turn, avoids damages, fires, explosions, and injuries. The right choice of safety valve will largely depend on your unique needs. Some of the critical factors to consider are response pressure, operating temperature, seal and valve material, discharge capacity, and backpressure. You may also want to do thorough research before choosing a safety valve from a given manufacturer. For instance, check the manufacturer's reputation, warranty, industry experience, customer reviews, etc. Read Also: The Fishing Industry Needs More Sustainability Awareness 8 Ways you can Improve Safety in a Workplace 7 Things to Do After a Car Accident in Fort Worth For Your Protection and Safety LPG Safety Tips and Precautions for your Home

READ MOREDetails
how to turn off chromecast

Fix: How To Turn Off Chromecast? – Latest Update 2021

Are you the regular users of the Chromecast devices? Then you already notice sometimes the Chromecast turning off is becoming very troubling. Turning off the Chromecast helps you to hide the connected device’s presence when people start searching in your network. In that respect, the most important question which comes to your mind is how to turn off Chromecast? As Chromecast sometimes gives you more sweat than the usually hot summer weather can. As every one of the users is aware of these facts, the Chromecast does not come up with an on and off switch.  Many users are preferring the Chromecast device showing in their home network while it is not being used. But many of the regular users do not prefer the Chromecast device showing in the home network. How To Turn Off Chromecast In Television? The easiest method of turning it off is just to unplug the device. Or the easiest answer is just to disconnect the wifi connections of the Chromecast. But both of these ways are not the fully authentic and technical way to stop working. Before asking how to turn off Chromecast, you have to learn about the Chromecast turning off technical functions. How to turn off Chromecast on tv is a very common question when you are accessing multiple television connections with the Chromecast. For your better understanding and knowledge, here is the step-by-step guide on how to turn off the Chromecast device from your home network, android phone, and Television. Turning Off The Chromecast By Switching Off The Plug As we told you, switching the power off is the easiest method to turn off the Chromecast devices. Chromecast is coming with a separate power port, which was connected with the main switch. You have to plug in the wall charger to get the connection. If you can unplug the charger from the port, the device is automatically getting disconnected from the network. If the Chromecast device is connected with your television, you can switch off the television. But that move does not turn off the Chromecast device. If you face a problem turning off the main power switch, you can use the aromatic switch to get the operation done automatically. But still, then the Chromecast device is connected with your home wifi networks. And the Chromecast device is still showing in the available connected devices like the android phones. How To Turn Off Chromecast On Android? In many Chromecast devices are getting used in the single house, then most of the time the android phone users are facing more trouble turning off the devices. If you are using the Chromecast devices, then turning off the Chromecast on android is the common question arising in your mind when you are facing the interruption in the middle of your streaming videos.  Most of the users want to turn off the Chromecast to preserve the phone’s safety-related concerning issues. And most of the users are facing problems during the streaming of the video because, in the middle of your streaming video, some content can pop up. You can simply stop the casting by simply enabling the Chromecast device from your android phones. And this is the simple process of how to turn off Chromecast. Step 1: Just click on the image of the Chromecast device from your android phone. Step 2: Open the file of the Chromecast devices. Step 3: Click on the settings of the Chromecast devices options and open the setting options. Step 4: After entering the setting of the disable Chromecast option, let others control your cast media. Step 5: And you can turn off the Chromecast from the android devices. How To Stop Casting To Chromecast? If you want to stop the casting of the Chromecast, as you already know, there are many apps that are getting compatible with the Chromecast. Still, if you are using these apps to operate the Chromecast, then you lose control over the Chromecast. And if the remote control over the Chromecast is disabled, then your manual controls are also limited. How to turn off Chromecast is a common feature of turning off the multiple connectivities of the television. But if you lose control over the Chromecast, the volume bar to pause button everything is in a non-functional state. For these purposes, you can use google chrome. Here is the step-by-step process to stop the casting of the Chromecast. To stop the interference from popping up, casting closer is an essential task. Step 1: Go to the google chrome browser settings. Step 2: Then go to the cast options after opening the browser setting options. Step 3: If you see the Chromecast options in the blue color mode, which means the Chromecast is now in the functional state. Step 4: You have to make it white by disabling the options. Step 5: After disabling the options, then cross the chrome and restart your device. Step 6: After restarting your device, recheck the casting option after opening the browser. Step 7: You can also shut down the Chromecast casting from your google homepage. Bottom Line If you are using the Chromecast in multiple ways and the different devices, switching off the devices and turning off Chromecast is necessary. How to turn off Chromecast is a common question that has multiple ways of solving.  If you ask us why you need to turn off the Chromecast devices, here are the answers. If you want to preserve your device security and are eager to close the outside’s external interference, then turning off the Chromecast is the easiest solution.  When you are connected with the Chromecast devices, you automatically see how many other devices are connected with the network, and this causes interference and trouble in the network. More Resources: Headphones vs Earbuds: How to Choose for the Best Music Experience. Your Guide In Buying Kid-Friendly Gadgets. Alexa Voice Assistant: Why It Succeeds Where Others Fall

READ MOREDetails