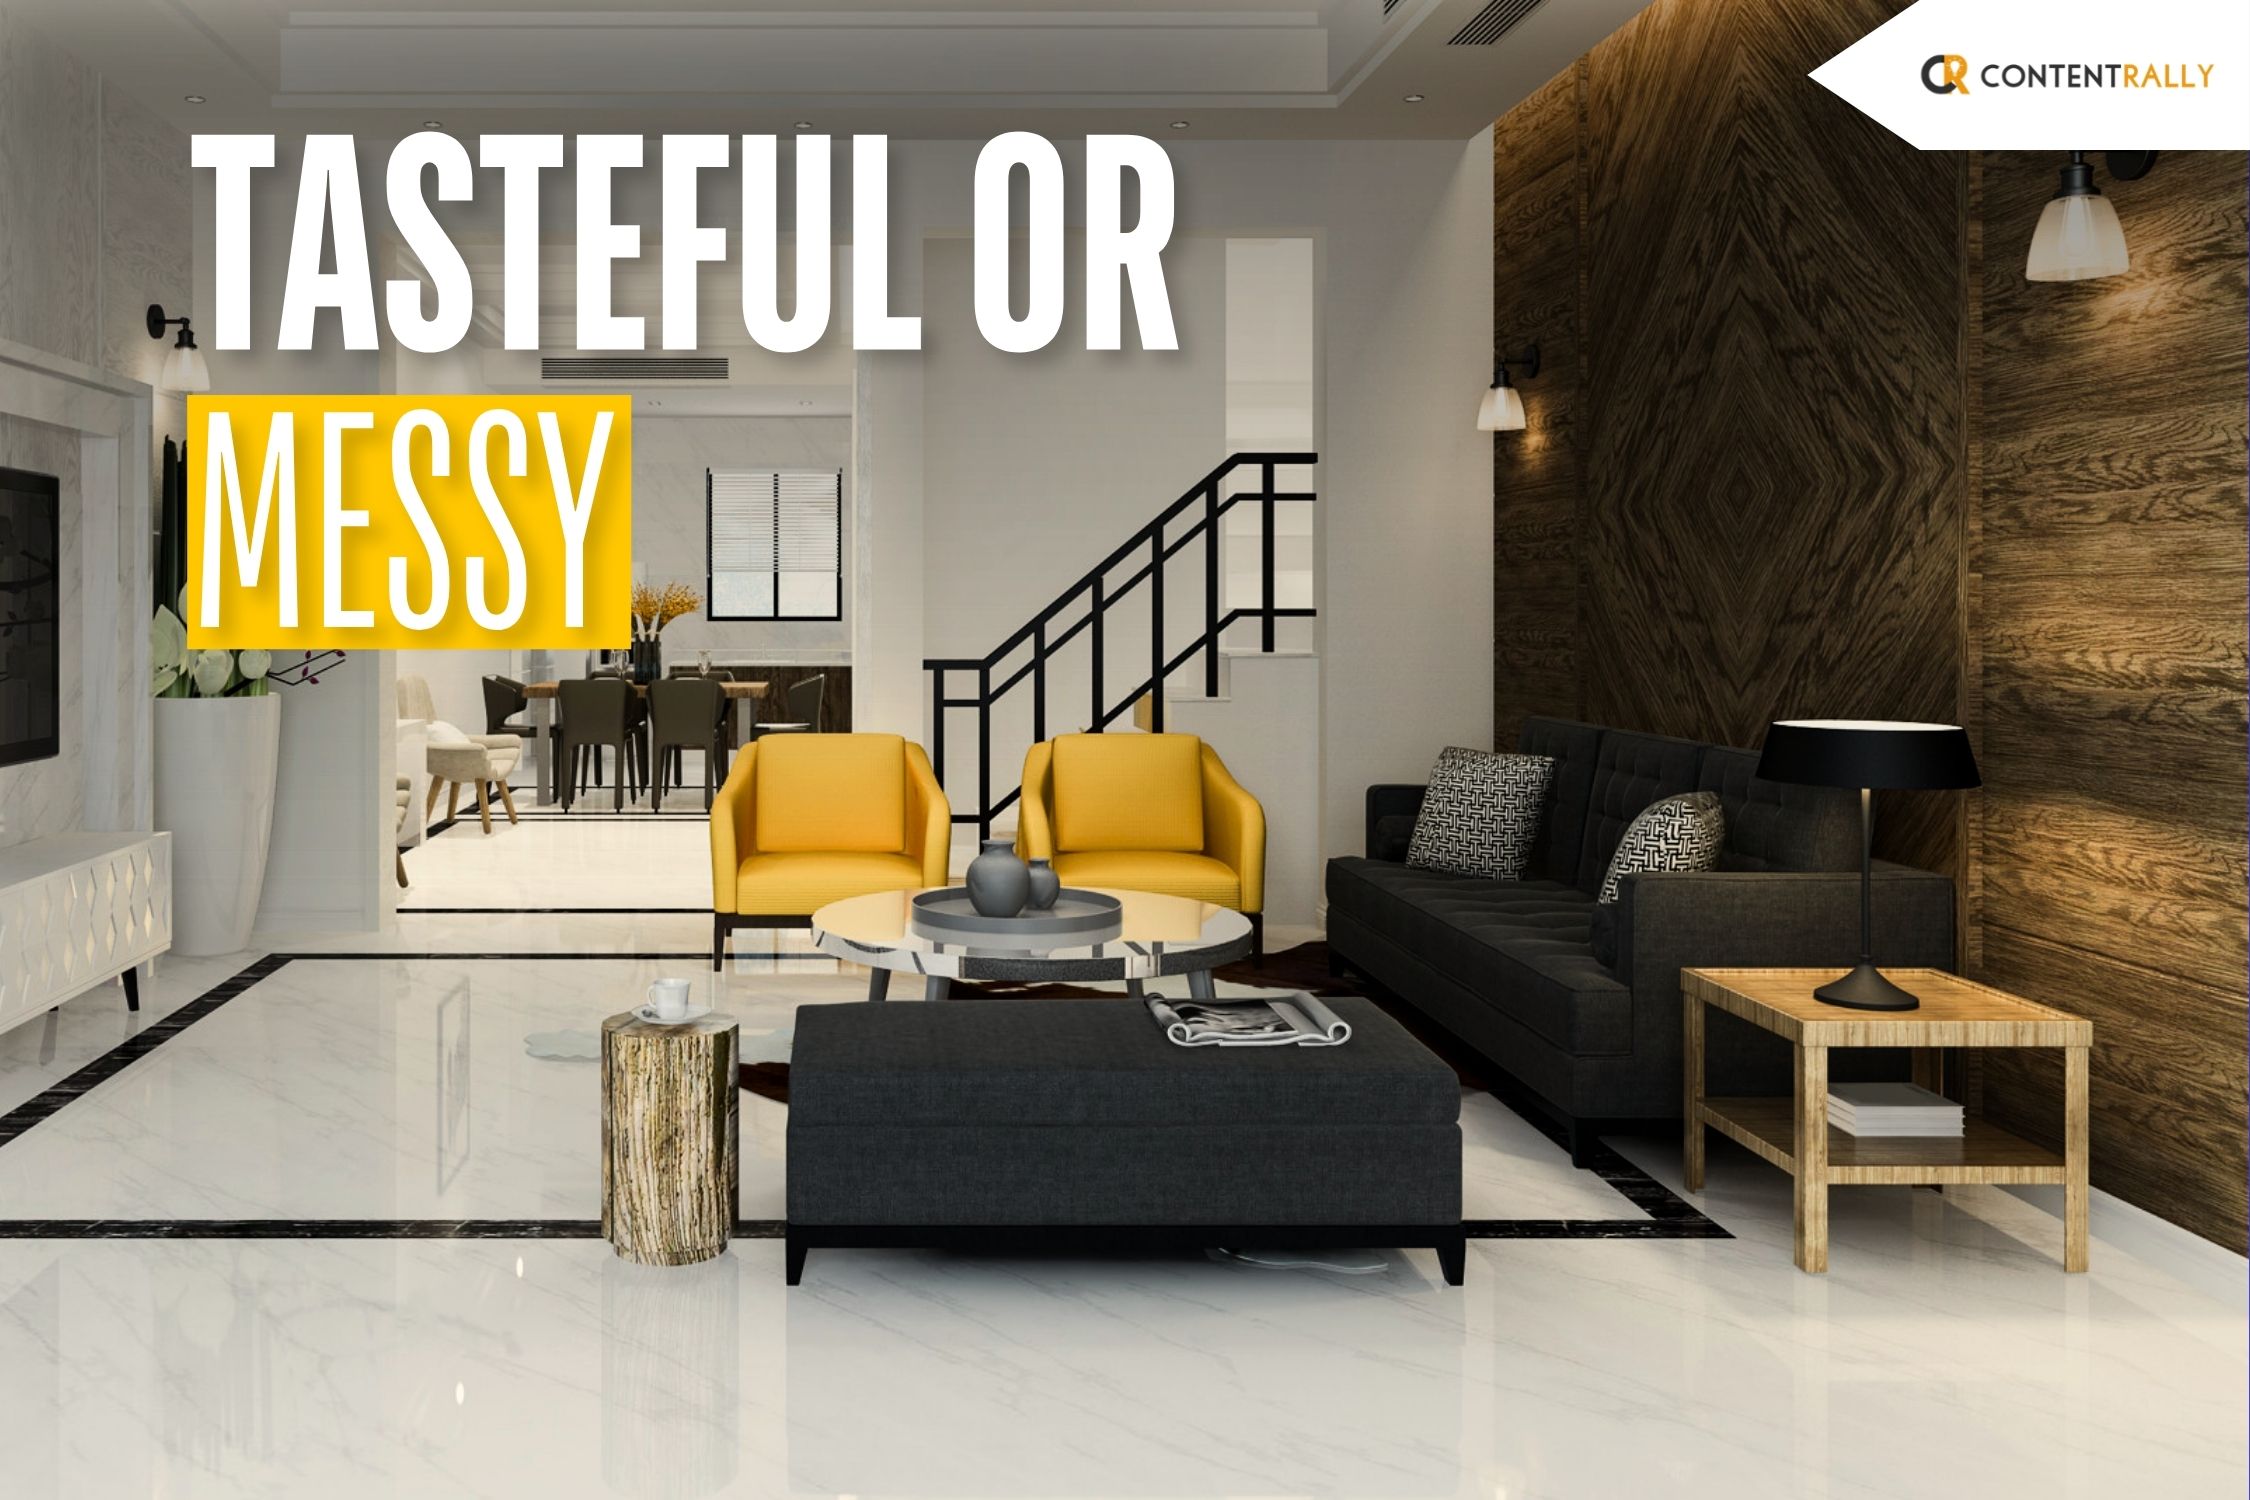
Rug layering, a trend that has gained popularity in interior design, can be perceived as both artsy and deliberate or, alternatively, as a bit sloppy, depending on the execution and context. When done with care and a discerning eye, rug layering can add depth, texture, and visual interest to a space, elevating it to a more eclectic and personalized level.
The key to artful layers
Artful layering involves combining rugs of varying patterns, textures, or sizes in a way that complements the overall design scheme, creating a harmonious and intentional aesthetic. Starting with a Large selection of stylish rugs is the best way to move forward in a stylish and purposeful way by allowing for a dynamic interplay of colors and materials, contributing to a space that feels curated and thoughtfully designed.
While a good rug collection is the best way to nail this trend, some thought and artistic design is still required in the process. If not executed thoughtfully, rug layering runs the risk of appearing haphazard or messy. The key to avoiding a sloppy look lies in keeping a sense of cohesion and balance. It’s essential to consider the color palette, scale, and patterns of the layered rugs, making sure they work together rather than clash.
Proper placement is also crucial; overlapping rugs in a purposeful manner can create zones within a room, defining different functional areas and enhancing the overall design. Without this intentional approach, however, rug layering may come across as disorganized and lacking in visual harmony.
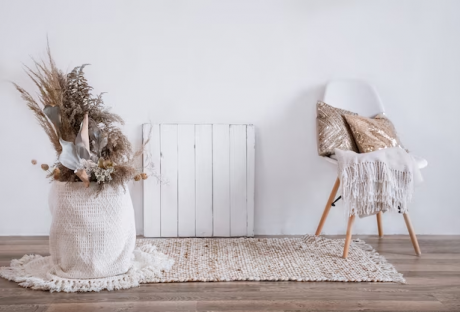
If you would like to add additional warmth to your home, and perhaps find a way to tie your rooms and decor together, then blankets are a great way to do that. They blend in easily and provide both aesthetic and practical value.
Why add warmth with rugs and blankets?
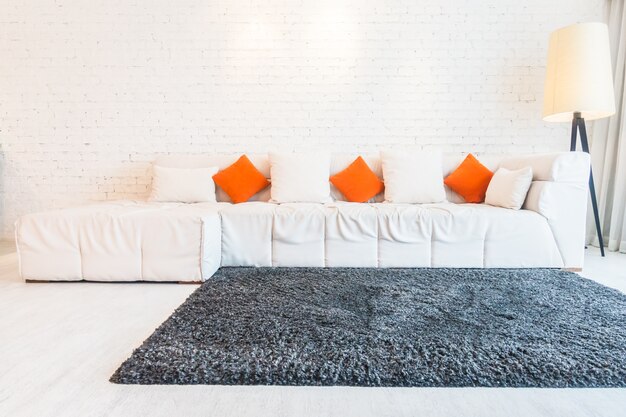
Rugs and blankets play crucial roles in enhancing the comfort, aesthetics, and functionality of a home. Rugs, with their diverse textures and patterns, serve as versatile decor elements that can tie together various design elements within a room. They not only add warmth to hard flooring surfaces but also define and delineate living spaces. Whether it’s a luxurious Persian rug in the living room or a cozy sheepskin rug in the bedroom, these floor coverings contribute to the overall ambiance of a home.
Similarly, blankets are multifunctional essentials that go beyond providing warmth. They introduce layers to interior design, allowing homeowners to infuse colors and textures that complement their style. Blankets draped over sofas or neatly folded beds serve as both decorative and functional accessories. In addition to their aesthetic value, blankets offer a sense of coziness, inviting individuals to snuggle up during chilly evenings. Together, rugs and blankets contribute to a home’s atmosphere, creating a welcoming and personalized space where style meets comfort.
Ultimately, the method of rug layering chosen is really dependent on individual taste. For those who appreciate a more eclectic and bohemian look, carefully layered rugs may be considered artsy and avant-garde. The key here is to strike a balance that aligns with the overall design vision and the desired atmosphere of the space.
Ankita Tripathy loves to write about food and the Hallyu Wave in particular. During her free time, she enjoys looking at the sky or reading books while sipping a cup of hot coffee. Her favourite niches are food, music, lifestyle, travel, and Korean Pop music and drama.
Big leaf plants can add an aesthetic touch to your home. If you are an admirer of home decoration, you cannot miss indoor plants as a part of your decoration.
Indoor plants require very minimum sunlight, and they are pretty easy to take care of. But, most important of all– they keep your indoor environment refreshed and fill it with fresh oxygen.
So, if you want to decorate your sweet home with beautiful big leaf aesthetic plants, you need to check out the few recommendations I have here in this article.
10 Best Big Leaf Plants For Indoors
If you are looking for recommendations for indoor plants with big leaves, please check out the ten recommendations I have here.
1. Swiss Cheese Plant
The botanical name of the Swiss Cheese Plant is Monstera deliciosa. This tropical beauty is enough to add a green touch to your indoors. It has big heart-shaped leaves to adorn your indoors. They do well if you keep them in indirect sunlight.
The heart-shaped leaves can grow up to 36 inches in length, and they are healthy for your indoor environment.
☀ Sun: They need bright but indirect sunlight.
🌡️Temperature: They are tropical plants, so you need to keep them in warm places. A temperature between 20°C - 30°C is ideal
💦Watering: You need to keep the soil wet most of the time. Watering them ⅔ times every week is enough.
🌷Type Of Soil: The soil needs to be moist and adequate fertilizers. A pH level of 5.5 to 7.5 works the best.
2. Dwarf Banana Plant
You can keep a large banana plant indoors. They are also big leaf plants. This is a tropical foliage plant that you can plant in a large plant. The leaves have quick growth, and the leaves are harmless to children and animals.
☀Sun: You can keep your Dwarf Banana Plant in full sunlight or in light shade.
🌡️ Temperature: They are big leaf tropical plants, so they enjoy a warm atmosphere. You can keep them at a temperature between 10°C to 33°C.
💦Watering: They need regular Watering– twice/ thrice every week in the warm season water them. Once every week is enough for the cold weather.
🌷Type Of Soil: The soil needs moisture. They need regular fertilizers.
3. Bird Of Paradise
If you want some flowers to highlight the big leaf plants you have indoors, then Bird Of Paradise is just the right plant to choose. These plants have long-lasting flowers and waxy leaves that add extra beauty to your indoors.
☀ Sun: Keep them in semi-shade or in full Sun.
🌡️ Temperature: Medium Temperature between 18°C to 22°C is just fine.
💦Watering: Keep the soil moist. The soil should not get completely dry.
🌷Type Of Soil: They need fertilizers in spring. Well-drained soil is better.
4. Elephant Ear Plant
These are the cheapest big leaf house plants. You can pull them from anywhere and plant them indoors. You can find these plants growing outdoors. These plants are toxic for small children and animals, so if you want to keep them, you need to be very careful.
☀Sun: They don't need full sunlight. Indirect bright sunlight is the best.
🌡️ Temperature: A temperature between 20°C to 30°C is best.
💦 Watering: The soil needs consistent moisture.
🌷Type Of Soil: Acidic, moist soil is the best.
5. Pinstripe Houseplant
Not many tabletop plants look as pretty as the Pinstripe Houseplant. These big leaf plants have gorgeous jungle green color with pink stripes to compliment the big leaves. They aren't too fond of direct bright sunlight. These plants are not harmful to animals and children.
☀ Sun: Keep them in indirect sunlight.
🌡️Temperature: 18°C to 30°C temperature is good enough.
💦Watering: You need to maintain the soil moisture.
🌷Type Of Soil: You peat and pebbles to balance the moisture.
You May Like To Read This: 10 Best Trailing Indoor Plants To Buy In 2022
6. African Mask Plant
These big leaf plants are native plants of the Philippines. They get their name from their resemblance to an African mask. The large dark leaves can grow up to 18 inches. The silvery-white veins of the leaves make them even more attractive.
☀ Sun: Avoid direct sunlight. They love diffused sunlight.
🌡️Temperature: 15°C to 30°C is ideal for them.
💦Watering: They need regular watering during growth. Keep the pot moist and well-drained.
🌷Type Of Soil: Keep the soil well-drained using pebbles. Fertilize frequently after ⅔ months.
7. Majesty Palm
If you are looking for long leaf plants or big leaf indoor plants, the Majesty Palm is the one. They grow ten feet tall indoors. The leaves are toxic for animals and children, so you need to be careful if you are planting them indoors.
☀ Sun: Bright indirect sunlight is best.
🌡️Temperature: 18°C to 30°C is best.
💦 Watering: Water once after 1 or 2 weeks. Let the soil get dry before watering again.
🌷Type Of Soil: The soil is best if it is acidic.
8. Calathea Orbifolia
Are you looking for low-maintenance plants that keep the indoor air purified? Then there is no better option than Calathea Orbifolia. They can remove toxins from the air while also looking pretty with big textured leaves. There are silvery-white forks in the leaves that make them appear outwardly beautiful.
☀ Sun: They love bright sunlight but not direct sunlight.
🌡️Temperature: 18°C to 30°C is enough.
💦Watering: You can water them once or twice every two weeks.
🌷Type Of Soil: Well-drained soils rich in fertilizers are the best.
9. Philodendron Gloriosum
A native plant of Colombia, the Philodendron Gloriosum is a big leaf foliage plant. These plants love to crawl and climb. In humid weather, you can keep them indoors. These big leaf plants have gorgeous pink, light green, and white running across the leaves. The leaves, stems, and roots are toxic for humans and animals.
☀ Sun: Indirect and right sunlight is best.
🌡️Temperature: 7°C to 35°C is good enough.
💦Watering: The soil needs to be damp. You can water two to three times every week.
🌷Type Of Soil: Organic soil rich in fertilizers works the best.
10. Fiddle Leaf Fig
The fiddle-shaped leaves of the Fiddle Leaf Fig are large and waxy. They inhabit their pots quite well. These big leaf plants are poisonous to humans and animals. But they are aesthetic-looking bedroom plants, and they are gorgeous.
☀ Sun: These plants need bright sunlight. Do not keep them in the shade.
🌡️Temperature: 15°C to 30°C is good enough for them.
💦 Watering: Regular Watering is necessary.
🌷Type Of Soil: You need well-fertilized moist soil.
Frequently Asked Questions (FAQs):
Here are some frequently asked questions that you may find interesting.
Q1. How To Care For Big Leaf Plants? Taking care of big leaf aesthetic plants is easy. You need to keep them in medium indirect sunlight and keep the potting soil moist. They don't need frequent fertilizing; once or twice every year is enough. Q2. How Do You Encourage A Big Leaf To Grow? The water, light, fertilizer, soil, and care are all crucial to growing your big leaf plants. Q3. Why Is My Big Leaf Plant Dying? There can be several reasons for this; excessive Watering or little Watering can cause your plant to die. Varying sunlight and bad incompatible soil can also be the reason behind your indoor plant's death. Q4. What Affects Leaf Size? The amount of Sun, water, air, and fertilizer your plant gets has an effect on the leaf size.
Bottom Line
If you want to grow big leaf plants indoors, then you can choose from these ten plants I have recommended here. All of these plants are low maintenance, and they are pretty in look. Aside from that, some of these plants purify your indoor environment.
Did you like this list? Please let us know in the comment; also, if you purchased any of them, let us know which once was your favorite.
Read Also:
10 Best Tall House Plants To Buy In 202210 Best Spiky Plants To Decorate Outside Your HouseWhat Are Trailing Plants? – What Are The Types Of Trailing Plants?
Being a gardener, I know Spinach is one of the most popular and versatile leafy greens you can grow in your garden. It's rich in vitamins, minerals, antioxidants, and fiber and can be used in salads, soups, smoothies, and more. But how do you harvest spinach the right way so that you can enjoy it fresh and crisp and make it last longer?
In this article, I will show you how to harvest spinach, so it keeps growing. I will also explain how to harvest spinach seeds, how to store and freeze spinach, and the health benefits of spinach. Additionally, I will also share some tips and tricks on how to grow spinach successfully and how to use it in delicious recipes.
Whether you're a beginner or an expert gardener, this guide will help you make the most of your spinach harvest. So, keep on reading till the end to learn more, and thank me later!
Driven by Benefits: Why are People Growing Spinach?
Spinach is not only tasty but also healthy. It's low in calories and high in fiber, vitamins, minerals, antioxidants, and phytochemicals. It can help improve various aspects of health, such as:
Eye Health
Spinach is rich in lutein and zeaxanthin. These are carotenoids that protect the eyes from age-related macular degeneration, cataracts, and glaucoma. Spinach also contains vitamin A, which is essential for vision and eye health.
Blood Pressure
Spinach is high in potassium, magnesium, and nitrates, which are compounds that help lower blood pressure and relax the blood vessels. Spinach also contains folate. This helps prevent homocysteine, an amino acid that can damage the blood vessels and increase the risk of cardiovascular diseases.
Bone Health
Spinach is a good source of calcium, magnesium, and vitamin K, which are important for bone health and density. Spinach also contains vitamin C, which helps the body absorb calcium and produce collagen, a protein that strengthens the bones and connective tissues.
Immune System
Spinach is loaded with vitamin C, which is a powerful antioxidant that boosts the immune system and fights off infections and inflammation. Spinach also contains vitamin E, which enhances the immune response and protects the cells from oxidative stress.
Digestion
Spinach is high in fiber, which helps regulate digestion and prevent constipation, diarrhea, and bloating. Fiber also feeds the beneficial bacteria in the gut. This improves the digestion and absorption of nutrients. It also supports the immune system.
Skin And Hair
Spinach is rich in vitamins A, C, E, and iron, which are essential for healthy skin and hair. Vitamin A helps maintain the moisture and elasticity of the skin and prevents acne and wrinkles. Vitamin C helps produce collagen, which keeps the skin firm and smooth.
On the other hand, vitamin E helps protect the skin from sun damage and aging. Iron helps deliver oxygen to the skin and hair cells and prevents anemia, which can cause hair loss and pale skin.
How To Harvest Spinach So It Keeps Growing
One of the best things about spinach is that it's a cut-and-come-again crop. This means you can harvest it multiple times throughout the season if you do it correctly. Here are the steps to follow to harvest spinach so it keeps growing:
Choose the right time to harvest
The best time to harvest spinach is when the leaves are young and tender. This is usually about 40 to 50 days after planting. You can also harvest baby spinach leaves earlier, about 25 to 30 days after planting.
You should harvest spinach before it starts to bolt. This is when it produces flowers and seeds and becomes bitter and tough. Spinach usually bolts when the days get longer and warmer. So, you should harvest it more frequently in the spring and summer.
Use a sharp knife or scissors to cut the leaves
You can either cut the whole plant at the base, leaving about an inch of stem, or cut individual leaves from the outer part of the plant, leaving the inner leaves to grow.
You should cut the leaves about an inch above the soil, to avoid damaging the crown and the roots. Moreover, you should also avoid cutting too many leaves from one plant, as this will weaken the plant and reduce the yield. A good rule of thumb is to leave at least half of the leaves on each plant.
Wash and dry the leaves
You should wash the spinach leaves as soon as possible after harvesting, to remove any dirt, bugs, or pesticides. You can use a colander or a salad spinner to rinse the leaves under cold water. After this, pat them dry with a paper towel or a cloth. Additionally, you should remove any damaged or yellow leaves, and trim any tough stems.
Enjoy or store the leaves
You can eat the spinach leaves fresh, or store them in the refrigerator or freezer for later use. We'll explain how to store and freeze spinach in the next sections.
How to Harvest Spinach Seeds?
If you want to save some spinach seeds for the next season or share them with your friends and family, you must let some spinach plants bolt and produce flowers and seeds. Here are the steps to follow to harvest spinach seeds:
Select the best plants to save seeds from
It would be best if you chose healthy, vigorous, and productive plants with the desired characteristics. Some of these are the flavor, size, color, and disease resistance.
Apart from these, you should also avoid saving seeds from hybrid varieties, as they will not produce true-to-type plants. You should look for open-pollinated or heirloom varieties, which will produce plants that are similar to the parent plants.
Isolate the plants to prevent cross-pollination
Spinach is a wind-pollinated crop, which means that it can cross-pollinate with other spinach plants or related plants, such as beets, chard, or quinoa, within a distance of up to a mile. This can result in seeds that have different traits than the parent plants. To prevent cross-pollination, you should isolate the plants you want to save seeds from, by either planting them far away from other spinach plants or related plants, or covering them with a mesh bag or a cage.
Let the plants flower and set seeds
You should let the plants bolt and produce flowers, which are small and yellow, and then wait for the seeds to form and mature. The seeds are round and black, and they are enclosed in a spiny husk. The seeds are ready to harvest when they are dry and hard, and the husks are brown and brittle, usually about four to six weeks after flowering.
Harvest and clean the seeds
You should cut the seed stalks and place them in a paper bag or a bucket, and then shake or rub them to release the seeds from the husks.
Furthermore, you should then winnow the seeds, which separates the seeds from the chaff or the husks and other debris. You can do this by blowing or fanning the seeds or using a screen or a sieve. You should end up with clean and shiny seeds.
Store the seeds
It would be best if you stored the spinach seeds in a cool, dry, and dark place, such as a jar, a tin, or a plastic bag. You should also label the seeds with the variety name and the date of harvest. Besides, you can store the spinach seeds for up to five years, but they will germinate better if you use them within two to three years.
How to Store and Freeze Spinach?
Spinach is best eaten fresh, as it loses its flavor and texture quickly. However, if you have a large harvest, or you want to preserve spinach for later use, you can store or freeze it. Here are the best ways to store and freeze spinach:
Store spinach in the refrigerator
You can store fresh spinach in the refrigerator for up to a week if you keep it in a perforated plastic bag or a container with a lid. However, you should avoid washing the spinach before storing it, as this will make it wilt faster. You should wash the spinach just before using it.
Freeze spinach raw
You can freeze raw spinach without blanching it, which is a process of briefly cooking and cooling the vegetables to stop the enzyme activity that causes them to spoil. However, freezing raw spinach will result in a mushy and watery texture and a loss of flavor and nutrients. To freeze raw spinach, you should wash and dry the leaves, and then pack them in freezer bags or containers, leaving some space for expansion. You can freeze raw spinach for up to six months, and use it in smoothies, soups, or casseroles.
Freeze spinach blanched
You can freeze blanched spinach, which will retain its color, texture, flavor, and nutrients better than raw spinach. To freeze blanched spinach, you should wash and trim the leaves, and then blanch them in boiling water for one to two minutes, depending on the size of the leaves.
You should then drain and cool the leaves, and squeeze out the excess water. You can then pack the leaves in freezer bags or containers, leaving some space for expansion. Furthermore, you can freeze blanched spinach for up to a year, and use it in salads, sandwiches, or quiches.
Things to Keep in Mind: How to Grow Spinach Successfully?
Spinach is a cool-season crop that grows best in the spring and fall, when the temperatures are between 40°F and 75°F. It can tolerate light frost but not heat or drought. Spinach also prefers moist, fertile, and well-drained soil with a pH of 6.0 to 7.0. Here are some tips and tricks on how to grow spinach successfully:
Choose the right variety
There are many types of spinach, but the most common varieties are savoy, semi-savoy, and flat-leafed. Savoy spinach has dark green, crinkly leaves that are great for salads and wraps. Semi-savoy spinach has slightly curled leaves that are more resistant to diseases and bolting. Flat-leafed spinach has smooth, broad leaves that are easy to clean and process. You can also choose spinach varieties based on their maturity time, bolt resistance, flavor, and color. Bloomsdale, Tyee, Space, Melody, and Red Kitten are popular spinach varieties.
Sow the seeds
You can sow spinach seeds directly in the garden, or start them indoors and transplant them later. The best time to sow spinach seeds is in early spring, as soon as the soil can be worked, or in late summer or early fall, for a winter harvest. You can also sow spinach seeds every two to three weeks, for a continuous harvest.
Besides this, you should sow the seeds about half an inch deep, and one to two inches apart, in rows that are 12 to 18 inches apart. You should water the seeds well, and keep the soil moist until they germinate, which usually takes seven to 14 days.
Thin the seedlings
When the spinach seedlings have two to four true leaves, you should thin them to avoid overcrowding and competition. You should leave about four to six inches of space between each plant, and eat or transplant the thinned seedlings. You should also weed the area around the spinach plants regularly, to prevent pests and diseases.
Harvest the leaves
Depending on the variety, you can start harvesting spinach leaves when they are big enough to eat, usually about 25 to 50 days after sowing. You can either harvest the whole plant or pick individual leaves from the outer part of the plant, leaving the inner leaves to grow.
Additionally, you should harvest spinach in the morning, when the leaves are crisp and fresh, and before the sun gets too hot. You should also harvest spinach before it starts to bolt, which is when it produces flowers and seeds, and becomes bitter and tough.
How to Use Spinach in Different Cuisines and Recipes?
Spinach is a versatile vegetable that can be used in many different cuisines and recipes. Whether you want to make a salad, a soup, a pasta, a pie, or a smoothie, spinach can add flavor, color, and nutrition to your dish. Here are some examples of how to use spinach in different cuisines and recipes:
Mediterranean cuisine
Spinach is a staple ingredient in many Mediterranean dishes, such as spanakopita, a Greek pie made with spinach and feta cheese wrapped in phyllo dough, or spinach and chickpea stew, a Moroccan dish flavored with cumin, paprika, and lemon juice. You can also make a simple spinach salad with tomatoes, olives, and feta cheese, dressed with olive oil and vinegar.
Asian cuisine
Spinach is widely used in Asian cuisine, especially in Chinese, Japanese, and Indian dishes. You can make a Chinese spinach and tofu stir-fry with garlic, ginger, soy sauce, and sesame oil, or a Japanese spinach and sesame salad with rice vinegar, sugar, and soy sauce. You can also make an Indian spinach and potato curry with onion, garlic, ginger, turmeric, and garam masala, or a spinach and paneer cheese dish with cream, tomato, and fenugreek.
Italian cuisine
Spinach is a common ingredient in Italian cuisine, especially in pasta, pizza, and lasagna. You can make a spinach and ricotta ravioli with butter and sage sauce, or a spinach and mushroom pizza with mozzarella and parmesan cheese. You can also make a spinach and cheese lasagna with béchamel sauce, or a spinach and artichoke dip with cream cheese and sour cream.
American cuisine
Spinach is also popular in American cuisine, especially salads, sandwiches, and casseroles. You can make a spinach and strawberry salad with almonds and poppy seed dressing or a spinach and bacon sandwich with mayonnaise and mustard. You can also make a spinach and cheese casserole with eggs, milk, and breadcrumbs, or a spinach and artichoke quiche with pie crust and cheddar cheese.
Wrapping It Up!
Spinach is a wonderful vegetable that you can harvest, store, and use in various ways. It's easy to grow, harvest, and store spinach, as long as you follow some simple steps and tips. It's also healthy, delicious, and versatile, as you can use it in many different cuisines and recipes. Spinach is a green treasure that you don't want to miss.
If you want to know about how to harvest spinach, I hope that this blog has been of help to you. If there are any other queries related to the same, please feel free to let me know. All that you need to do is scroll down till you reach the bottom of the page. Then, leave your comments and suggestions in the box below. And I will be ether to answer them all for you.
Read Also:
How to Harvest Lettuce: A Step-by-Step Guide for Fresh and Crispy Salads
Everything You Need To Know About Harvesting Basil!
Asparagus 101: When, How, And How Often To Harvest?
One of the most used herbs in the world, cilantro, is also referred to as Chinese parsley or Coriandrum sativum. Fresh and zesty, cilantro gives your recipes a flavor boost. Mexican, Middle Eastern, Indian, Mediterranean, Chinese, African, and even Scandinavian cuisines use it extensively. Even cilantro microgreens are grown from it!
Since cilantro itself doesn't keep well and loses aroma and flavor once dried, most people prefer to use it fresh. To have cilantro on hand, you should also have a few plants in the garden.
You can harvest the plant for its flavorful cilantro seeds, also known as coriander, even if you don't use the leaves in your recipes. The leaves of the cilantro plants come throughout the spring and summer. Allow them to go to seed at that time since they grow easily in the garden!
You must know how to harvest cilantro properly if you want to have a steady supply. Keep reading to find out all you need to know about harvesting cilantro.
Harvesting Cilantro: Overview
Most people either love or hate the flavor of cilantro leaves. However, you should still think about cultivating a few coriander plants in your garden and saving the seeds for a range of culinary uses.
Most people in the US grow this delicious herb for its leaves. But the tasty coriander seeds are also worth harvesting. They have a distinct flavor from cilantro leaves. This fragrant herb of the cool season, cilantro, quickly goes to seed in the long, sweltering summer months.
As the plant reaches higher in the sky, its rounded, lobed leaves become feathery. Pretty clusters of tiny white blossoms quickly emerge. Many pollinators are drawn to these nectar- and pollen-rich blossoms, particularly syrphid flies and honeybees. Little round coriander seeds with a kelly green color emerge as the blossoms start to fade.
What To Expect from Cilantro?
The distinctive flavor of coriander is citrusy and slightly nutty. It goes incredibly well with rice, beans, lentils, and roasted or grilled veggies. You can pick the seeds while they are still young and vibrant green. Or you can wait until they start to turn brown.
Since green coriander seed is only found in gardens, it is better to harvest them when they are still green because of their stronger, more distinct flavor. You will not find them in the farmers’ market or the grocery store.
If the seeds are kept in a glass container with a lid, then they can be refrigerated for several weeks and frozen effectively as well. Wait until most of the seed turns brown if you want to harvest the mature brown seed for winter grinding or planting next year.
Next, trim off a few inches of stalk and the seed heads, then hang them upside down in a brown paper bag. The seeds will drop out of the heads and land in the bag's bottom once they are completely dry. The dry seed should be kept in a dry, cool place in a glass jar with a lid.
For optimal flavor, grind it just before using. The flavor difference between freshly ground coriander seed and the pre-ground variety typically found in stores will astound you. Try adding green coriander seeds to dressings and marinades. Frequently adding an equal amount of ground coriander to recipes that call for cumin makes the flavors of the two go particularly well together.
How to Harvest Cilantro?
The most exciting aspect of growing plants is undoubtedly harvesting. Pick individual cilantro leaves if you plan to use a small amount. It is best to leave at least 1-2 inches of stem above the soil's surface when harvesting larger quantities of cilantro.
It is preferable to leave a few lower leaves on the plant to support the herbs until they grow back. To cut the stems cleanly, use harvesting snips, long reach harvesting snips, or sharp, sterilized garden shears. To guarantee that your herbs regrow, it is best to remove only a small portion of the plant at a time.
Furthermore, when the cilantro plant blooms and sets seed, the herb may start to taste bitter. So, when wondering how to harvest cilantro, it is preferable to harvest before the plant bolts because the leaves will be less appetizing at that point.
When is The Best Time to Harvest Cilantro?
When the morning dew has cleared and the sun hasn't set, it's the ideal time of day to harvest a variety of fruits, vegetables, and herbs, including cilantro. This way you can lessen the stress on your cilantro plant and give the fresh stock cuts enough time to dry before dusk, which lowers the risk of illness.
Before it bolts, harvest cilantro when it is 6 to 8 inches tall. The flavor of cilantro leaves significantly decreases after they have bolted. The lifespan of the cilantro plants can be increased by careful and routine harvesting. It is crucial, though, to wait for your plant to become established before beginning to harvest.
The plant develops numerous long, thin stems as it grows. They are ready to be harvested when the stems are long, and the leaves have a lacy appearance. The cilantro herbs are about ten to twelve inches tall at this point. Gather your cilantro in the spring and into the first part of the summer.
Your plants may bolt to seed if summertime full sun conditions prove to be too hot for them. The best time to harvest cilantro is early morning. You can either choose to harvest it once a week or source just individual leaves whenever you need them.
Most of the time, it takes about 2-3 weeks for regrowth, so you must harvest accordingly. You must remember that regular cut-and-come-again harvesting is the most ideal while the plant keeps producing foliage.
How To Store Fresh Cilantro?
Part of knowing how to harvest cilantro is also knowing how to store them. It's best to know how much you should take from the garden before you harvest. You will need to learn how to store cilantro if you do not intend to use the leaves right away to extend its shelf life. There are several approaches to try.
Storing Cilantro in Water
To keep the cilantro leaves dry, wait to wash them after harvesting. For storage purposes, store the stem ends in a glass or jar with 1 to 1.5 inches of water and refrigerate for a few days. At a minimum, change the water once a day. Use a plastic bag to cover the top loosely to preserve the humidity surrounding the herbs.
Storing Cilantro in The Freezer
Freezing cilantro is another low-maintenance way to store it. Shake off any extra moisture and rinse the leaves to get rid of any garden soil. Tear the leaves into small pieces and stuff them into ice cube trays, covering the herb with just enough water to barely cover.
You can pre-measure if you'd like to ensure that you know precisely how much is in each cube for recipes in the future. After the cubes are completely frozen, place them in a freezer bag. Add as needed to marinade, smoothies, soups, and sauces. You can freeze cilantro for up to six or eight months.
Read More: Everything You Need To Know About Harvesting Basil
How To Dry Cilantro?
There are two methods for drying cilantro. You can use the oven to dry cilantro. Since hot air can greatly affect the flavor of the finished and dried herb, you might want to avoid using heat if you want to enjoy flavorful dried cilantro.
Air drying or hanging drying is a better way to dry cilantro. Gather the stems of the herbs into a small bunch and secure them with a string. Place the bunch in a dark, well-ventilated area and hang it upside down. Alternatively, you can wrap the bunch in a brown paper bag to keep the cilantro from getting dusty.
After the bunch has been hanging for about a week, begin to check its level of dryness every day or two. It's ready to be crushed or powdered and stored for later use when it crumbles when touched.
Cure the cilantro ahead of time to reduce the possibility of mold growth. Put the dried cilantro in a glass mason jar to cure. Open the jar and give it a good shake every day to let fresh air into it and mix the contents. This will assist in achieving moisture content parity. If you'd like, you can also include a moisture-absorbing packet.
How To Harvest Cilantro Seeds?
You can harvest the coriander seeds even if you don't like cilantro leaves. The plant can grow to 20 inches when it flowers. This requires temperatures above 75 degrees. Pods will form once they have flowered, and the flowers will fade.
Before being harvested, these should be green to brown in color. These pods release the mature seed when it's ready. Tie the stems with the seed pods still attached into a bunch. Next, hang them upside down in a paper bag in a cool, dry place to harvest the seeds.
With time, the seeds will sprout and drop into the bag. Store your seeds in a dry, cool place in an airtight jar. Unground dried seeds can be kept for three to four years in storage. Before using dried seeds in your recipes, grind them for the best flavor.
How To Harvest Cilantro So It Keeps Growing?
If you sow cilantro seeds every two weeks from spring until late summer, you can be sure to always have fresh leaves available. We advise chopping them up and firmly packing them into an ice cube tray filled with water. Then, just place the tray in the freezer. These can then be added directly to hot pans when preparing soups or sauces. Or they can be dropped into hot or cold water for cooking or drinking.
What To Do If Cilantro Bolts?
It's time to collect and preserve your own coriander seeds once your plant produces seeds. Picture each of those tiny white blossoms turning into a flavorful spice for your cooking or seeds for the following year! In addition to being aesthetically pleasing and tasty, cilantro flowers are also excellent pollinators.
There is a short window of time when the growing seasons of cilantro and tomatoes coincide. This proves they go well together. It usually happens that my tomato and pepper plants are just starting to take off when my cilantro plants bolt, sending forth gorgeous white flowers.
To maximize the amount of fruit your plants produce for you, beneficial insects that are feeding on your cilantro flowers will collide with your fruiting plants, vibrate their leaves, and assist in pollination. Ladybugs, butterflies, and bees all love cilantro flowers. It truly is a win-win!
Choose Slow Bolt Seeds
Seek out seed packets labeled "long-standing" or "slow bolt cilantro," as these varieties have been cultivated to endure longer in the garden. You can find your go-to slow bolt seeds that are 100% certified organic from Seeds of Change.
Finding a local seed producer is another smart move. Buying local seeds means you'll be growing a climate-adapted variety of cilantro, which increases the likelihood that you'll keep it longer.
Harvest Cilantro Regularly
Regularly chop your cilantro leaves. This preserves the health of the plant and guarantees that the leaves of this herb are fresh when you use them. Your cilantro will continue to produce new leaves from the center of the plant if you regularly harvest it by chopping off the older outer leaves.
Additionally, your chances of cutting off those immature flower stalks increase with the amount of cilantro you harvest. This will aid in postponing any bolting.
Since cilantro is incredibly obstinate, you can delay as long as you can. Cut that thick center stalk as soon as possible. After that, the plant will start to send outside shoots, giving you a little extra cilantro before it eventually bolts completely. For sun protection, surround your cilantro with tall plants.
Plant Taller Plants Around Cilantro for Sun Protection
Encircle your cilantro with large warm-season plants (like tomato or pepper plants) so that the taller plants can shade your herbs slightly and help keep the soil cooler as the temperatures rise. After all, four to six hours of sun is sufficient for cilantro to grow. To increase the lifespan of your cilantro in the garden, interplant it with larger plants.
Wrapping Up
You will need to have patience if you want to collect the seeds for your cilantro. Before seeds can be harvested, cilantro needs to blossom. Before harvesting, the resulting seed heads need to be allowed to dry on the plant for a while.
Harvesting the seeds is then as simple as shaking them into a paper bag or chopping off the entire seedhead and placing it inside the bag. If you have thoughts to share or questions to ask about how to harvest cilantro, please leave a comment below. We would love to hear from you!
Read Also:
Asparagus 101: When, How, And How Often To Harvest?
Some Facts You Need to Know About Rainwater Harvesting
How to Harvest Lettuce: A Step-by-Step Guide for Fresh and Crispy Salads