Transform Your Wedding With The Top 10 Centerpiece-Inspired Decor Trends

Published on: 01 November 2023 Last Updated on: 17 March 2026
Centerpiece-Inspired Decor

Weddings, the celebration of love and unity, are occasions where every detail matters. And they are certainly incomplete without incorporating centerpiece-inspired decor trends. The magic of the event is found not only in the bride’s gown or the perfect ceremony but also in the decor that sets the mood and theme of the wedding. 

Wedding decor trends have evolved over the years, with creativity and personalization taking the forefront. Couples are now leaning towards decor that reflects their personalities, love story, and even their favorite hobbies.

However, with so many options available, it can be overwhelming to decide which trend to follow. From rustic to modern, vintage to boho, the choices are endless. With the right guidance, you can decode the vast world of wedding decor trends and choose the ones that suit you best.

In the realm of wedding decor, one aspect that holds significant importance is the centerpiece. Let's delve into its significance and how it can transform your wedding.

Importance of a Centerpiece in Wedding Decor

The centerpiece is not just a mere decoration, it is the heart of the table setting that brings everything else together. It sets the tone for the table decor and, ultimately, the entire room. A well-chosen centerpiece can create a cohesive look, reflect the wedding theme, and even serve as a conversation starter among guests.

Centerpieces can be simple or elaborate, minimalistic or extravagant, depending on your personal style and wedding theme. Regardless of its design, a centerpiece should be engaging, drawing your guests' attention and leaving an impression.

However, the power of a centerpiece extends beyond aesthetics. It can also evoke emotions, create a mood, and tell a story. A well-thought-out centerpiece can speak volumes about your personality, taste, and the love story that brought you to this day.

As with any other aspect of wedding decor, centerpiece trends are also ever-evolving, reflecting the changing tastes and preferences of couples. Below are the top 10 centerpiece-inspired decor trends that can add a touch of elegance and personality to your wedding.

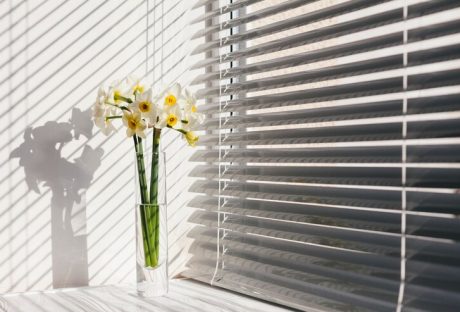
  1. Botanical Bliss: This trend involves using a variety of plants, from succulents to ferns, to create a natural, eco-friendly vibe.
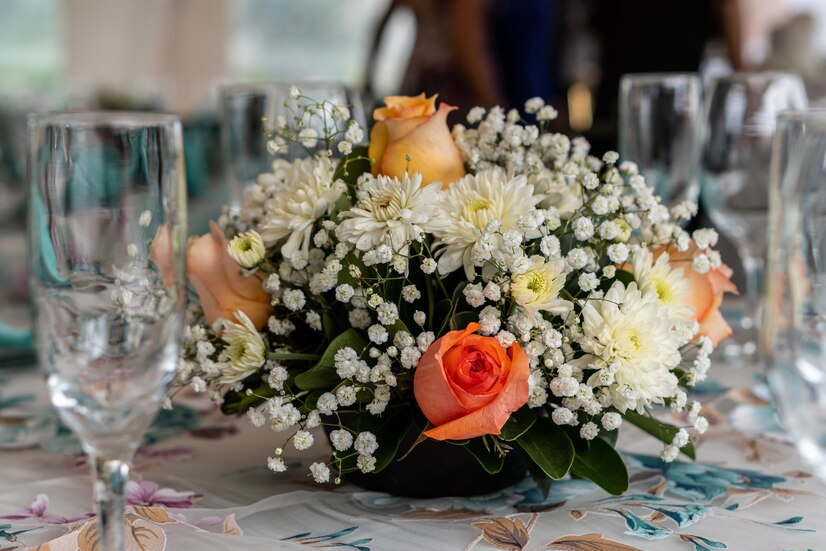
  2. Floral Fantasia: Floral arrangements will forever be a classic choice, but the trend now is to go for unconventional flower types, colors, and arrangements.
  3. Vintage Charm: Antiques, heirlooms, and vintage items can be used to create a nostalgic and timeless atmosphere.
  4. Rustic Allure: Using elements like burlap, wood, and mason jars can create a cozy, rustic charm.
  5. Glamour and Glitz: For those who love sparkle and shine, incorporating crystals, sequins, and metallic accents can add a glamorous touch.
  6. Boho Chic: This trend involves using eclectic elements like macrame, dream catchers, and vibrant colors to create a bohemian, free-spirited vibe.
  7. Modern Minimalism: For a clean, sophisticated look, go for minimalistic centerpieces with geometric designs and neutral colors.
  8. Exotic Elegance: Incorporate elements from different cultures to create a unique, worldly vibe.
  9. Nautical Nuance: If you love the sea, use elements like shells, sand, and sea glass to bring a coastal charm to your wedding.
  10. Playful Pop Art: For a fun, vibrant atmosphere, use bold colors and pop art-inspired designs.

Now, let's see how some of the most popular centerpiece-inspired trends can transform your wedding.

Transforming your Wedding with Welcome Sign-Inspired Centerpieces

Welcome sign-inspired centerpieces are a trend that's gaining popularity. Instead of a traditional guest book, the centerpiece can be a beautifully decorated welcome sign where guests can leave their well wishes. It's a creative and interactive way to engage your guests and create a keepsake that you can cherish forever. Couples might even prefer exploring different styles of a wedding welcome sign to match their decor, from elegant acrylic boards and floral framed canvases to rustic wooden displays that can blend smoothly with the overall wedding theme.

A welcome sign centerpiece can also give your guests a warm welcome and set the tone for the rest of the wedding. It can reflect the wedding theme, your personality, or even your love story. You can personalize it with your favorite quotes, images, or even a timeline of your relationship.

The possibilities are endless. You can go for a rustic wooden sign for a barn wedding, a sleek acrylic sign for a modern wedding, or a vintage chalkboard sign for a retro wedding. Whatever your preference, a welcome sign centerpiece can definitely add a unique touch to your wedding.

Enhancing Ambience with Candle-Inspired Centerpieces

Candles have always been a favorite when it comes to centerpiece-inspired decor trends. They add a warm, romantic glow to the setting and can transform the ambiance of your wedding. However, the trend now is to think beyond traditional candle arrangements and to get creative with your candle-inspired centerpieces.

You can place candles in lanterns for a rustic charm, float them in water-filled glass bowls for a magical effect, or arrange them among flowers for a classic look. You can also experiment with different candle shapes, sizes, and colors to create a unique centerpiece.

But apart from their aesthetic appeal, candles also create a warm, intimate atmosphere. The soft, flickering light can make your guests feel relaxed and comfortable, setting the perfect mood for a celebration of love.

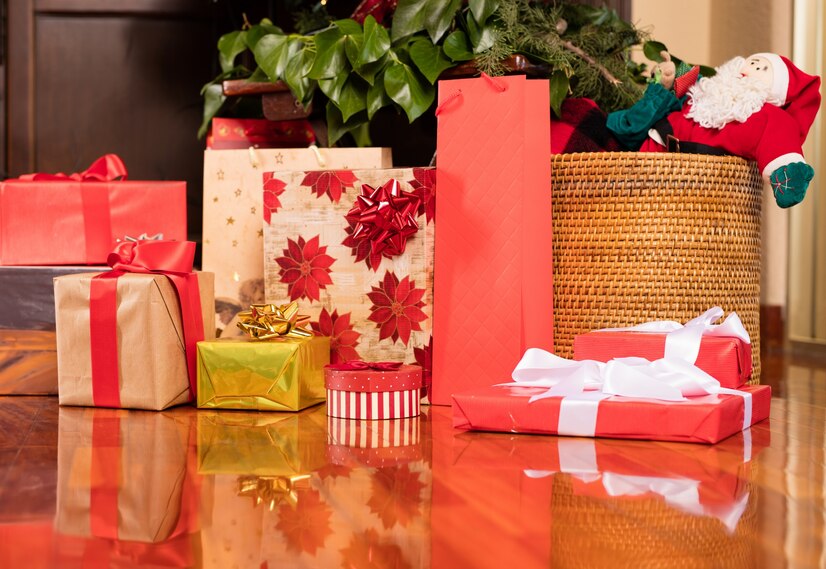
Delighting Guests with Gift-Inspired Centerpieces

Another trend that's making waves is the gift-inspired centerpiece. Instead of traditional decor, the centerpiece can be a beautifully wrapped gift that adds a festive touch to the table. This can double as a thank-you gift for your guests, making them feel special and appreciated.

You can personalize the gifts based on your wedding theme, your personality, or even your guests' preferences. It could be a small plant for a green wedding, a custom-made candle for a romantic wedding, or a jar of homemade jam for a rustic wedding.

Gift-inspired centerpieces not only add a unique touch to your decor but also create a memorable experience for your guests. It's a small gesture that can leave a big impact, making your wedding unforgettable.

Gift-Inspired Centerpieces

How to Choose the Best Centerpiece for Your Wedding

Choosing the perfect centerpiece for your wedding can be a daunting task, but with a few tips and considerations, you can find the one that best suits your style and theme.

Firstly, consider the size and shape of your tables. The centerpiece should complement the table and not overpower it. Also, it should not obstruct the view or conversation among guests.

Secondly, take into account the overall theme and color scheme of your wedding. The centerpiece should blend in seamlessly and enhance the aesthetic of your decor.

Lastly, think about your personal style and preferences. Your wedding is a reflection of you and your partner, so choose a centerpiece that speaks to your personality and tells your story.

DIY Tips for Creating Your Own Centerpiece

If you're a crafty couple who loves DIY projects, creating your own centerpiece can be a fun and fulfilling experience. Here are a few tips to help you out.

Start by gathering inspiration. Look at wedding magazines, decor blogs, and Pinterest to get ideas. Once you have a clear vision, start sourcing materials. You can find a wide range of supplies at craft stores, thrift shops, or even online.

When it comes to design, simplicity is key. Choose one or two main elements and build around them. You can use flowers, candles, vases, or any other items that fit your theme.

Lastly, don't be afraid to experiment and get creative. Your centerpiece is a reflection of your personal style, so make it unique and memorable.

Where to Buy Wedding Centerpiece-Inspired Decor Trends?

If DIY is not your thing, there are plenty of places where you can buy trendy wedding centerpieces. From online marketplaces like Etsy and Amazon to local florists and decor rental companies, you have a myriad of options to choose from.

When shopping for centerpieces, keep in mind your wedding theme, color scheme, and budget. Look for reputable sellers with good reviews, and make sure to order well in advance to avoid any last-minute stress.

Conclusion: Making Your Wedding Unforgettable with Centerpiece-Inspired Decor

In conclusion, the centerpiece is an integral part of your wedding decor that can set the tone, create a mood, and tell a story. Whether you opt for a welcome sign-inspired centerpiece, a candle-inspired centerpiece, or a gift-inspired centerpiece, you can transform your wedding and create a memorable experience for your guests.

So, embrace the latest trends, get creative, and let your personality shine through your centerpiece. After all, your wedding is a celebration of your unique love story, and every detail should reflect that.

Read Also:

Shahnawaz is a passionate and professional Content writer. He loves to read, write, draw and share his knowledge in different niches like Technology, Cryptocurrency, Travel,Social Media, Social Media Marketing, and Healthcare.

View all posts

Leave a Reply

Your email address will not be published. Required fields are marked *

Related

Student Apartment

How to Make Your Student Apartment Feel Like Your Own House?

Feeling a bit homesick while away at college is pretty common and almost everyone goes through it at some point. And, if you are a student living abroad in student housing, it might be even more difficult for you.  Feeling a bit homesick while away at college is pretty common, and almost everyone goes through it at some point. And, if you are a student living abroad in student housing, it might be even more difficult for you.  After all, being in a different environment, like student apartments, can sometimes make you feel disconnected from home. First things first, you might need to find apartments near campus so that you can at least save some commute time.  The good news is — there are several other strategies that’ll help you make your new place feel just like your own house.  Let’s keep reading to know more about it. Let’s keep reading to know more about it. 1: Add a Little Bit More Light Improving the brightness of your living space is essential for comfort and health. Dim or insufficient lighting can create a dreary atmosphere, making your student accommodation feel cramped and less inviting. Enhancing the illumination may also create a curious illusion of spaciousness, akin to the roominess of your bedroom back home.  If your current light fixtures aren't effective, consider investing in stylish lamps to brighten up your place. Not only will this boost the ambiance, but it'll also revive the space, making it feel more lively and homely. Choosing lamps that align with your personal style will not only add a touch of flair but also bring back the cozy feelings of home that you're missing. 2: Instill Life in Those Lifeless Walls  If your new apartment has plain white walls and feels a bit empty, bringing in cherished photos or posters can liven up the space.  Whether it's capturing your family moments or displaying images of beloved sports icons, incorporating these elements, can personalize your living area.  Consider engaging a professional house painter in CT or a painting company in Prospect, CT, to introduce more depth and texture to your walls with a fresh coat of paint. 3: The Plants… Don’t Forget Them If you enjoy plants but lack the time or skill for care, consider placing a few low-maintenance plants in your student apartment.  They can bring color, improve air quality, and enliven your living area effortlessly.  However, if you don't have the time or inclination for plant care, there are a lot of attractive artificial plants available that can still lend a sense of style and coziness to your new home. 4: Blankets, Rugs, and Pillows Can Be Your Best Friend Simple tile, carpets, or hardwood floors might lack excitement.  To spruce things up, consider adding stylish throw rugs to your apartment—they not only enhance decor and color but also bring comfort and a personal touch.  Additionally, throwing blankets and vibrant pillows on sofas and chairs might further elevate your space with a touch of flair. 5: Gather Your Favorite Food and Stuff Food serves as a strong cultural link and a way to bring people together, although it can also spark heated debates like the pineapple pizza controversy. It holds significant value in our lives, often tied to cherished family recipes.  Exploring those recipes with loved ones can be a wonderful experience. Yet, not all favorite dishes originate from family recipes; some hail from local restaurants.  Recreating these meals can be achieved through copycat recipes found online or by purchasing specialty sauces or dishes from these establishments. If all else fails, discovering new eateries can lead to new culinary favorites and create fresh memories. 6: Make Your Space Smell Better Is there a particular aroma that evokes the feeling of being home? It could be the comforting scent of your mom's Sunday morning cinnamon buns or the nostalgic fragrance of garden flowers from your childhood bedroom.  Whatever brings you that sense of security, consider finding ways to incorporate that smell into your space. If burning candles isn't an option in your apartment, there are alternatives like oil diffusers, wax melts, and candle warmers that can help recreate that familiar scent. 7: Have a Motivating Study Space In college, studying is inevitable. While some apartments offer study rooms, you might opt to carve out your own study nook within your place.  Thankfully, the additional room in an apartment lets you craft a cozy workspace to ease the studying grind. Locate a peaceful corner with minimal interruptions. Then, deck it out with a comfy chair, a quality reading lamp, and enjoyable stationery to amp up your study vibes. 8: Cozy and Ambient Lighting Fluorescent lights commonly found in dorm rooms might not be appealing. Instead, opt for a stylish desk lamp for your study area or a larger floor lamp to illuminate the entire space.  You could also think about getting a budget-friendly light timer to automatically switch on your lamps in the evening.  Walking into a softly lit room late at night creates a much more inviting atmosphere than entering a completely dark space. FAQs - Frequently Asked Questions Q: How can I personalize my student apartment on a budget? Personalizing on a budget is possible! Consider using affordable decor items like posters, string lights, and inexpensive furniture. DIY projects and second-hand stores are also great options. Q: What are some easy ways to add a personal touch to my living space? Incorporate items that reflect your personality, such as photos, artwork, or memorabilia. Adding throw pillows, rugs, and curtains in your favorite colors can also make a significant difference. Q: How can I maximize storage in a small apartment without making it feel cluttered? Optimize vertical space with shelves and organizers. Use under-bed storage bins, wall-mounted hooks, and multi-functional furniture like ottomans with hidden storage to keep things organized. Q: Can I paint the walls of my student apartment, or are there alternative options for adding color? Check with your landlord first regarding painting. If not allowed, use removable wallpaper, wall decals, or large fabric panels to add color and personality without causing damage. Q: How can I create a productive study space within my apartment? Choose a quiet area with good lighting and invest in a comfortable chair and desk.  Personalize the space with motivating quotes, plants, and organizational tools to make it conducive to studying. Q: Are there any low-maintenance plants that are suitable for a student apartment? Yes, consider plants like snake plants, pothos, or succulents that require minimal care. These can add a touch of nature to your space without demanding too much attention. Q: Any advice for maintaining a clean and organized apartment? Develop good habits, such as cleaning up after yourself daily and having a designated place for everything. Regular decluttering sessions and a cleaning schedule can help maintain a tidy and organized living space. Read Also: How To Quickly Rent  An Apartment In New York? Things You Can Do to Your Apartment to Raise Its Value 7 Expert Hacks for Downsizing to a Smaller Apartment

READ MOREDetails
Repairing Your Roof

Repairing Your Roof – How Should You Get Started?

Your house's roof is its ultimate defense against harsh weather, pesky creatures, and infestations.  If your roof is not in top condition, your entire house is at risk. It's crucial to schedule roof repair as soon as you notice a leak, even if it's small, as it can cause significant damage.  Repairing your roof is more cost-effective than replacing it entirely and is vital to maintain its integrity.  Left unaddressed, roof leaks can cost you tens of thousands of dollars.  This article will discuss the basics of roof repair, what you need, and how to do it. Ensuring your roof is in top condition is essential to protect your home from the elements and ensure its longevity. Steps For Repairing Your Roof Given below are the steps that will guide you in the process of roof repairing at your home— 1. Examine The Damage Following a systematic approach is vital when searching for a leak in your roof. Begin by surveying the visible damage to your roof, including shingles, gutters, and roof edges.  It's essential to start with the most obvious issues and progress to less apparent ones. Once you've assessed the exterior, examine the interior for signs of water damage.  Look for indications of water stains, dripping water, sagging, pooled water, and dampness. Inspect during rainy weather, as some leaks are intermittent and only occur when there is enough rain.  Access the attic using a flashlight to locate the water source through the roof deck. Check around all rafters for indications of water.  Water can travel through the roof decking and rafters due to the force of gravity, which may result in dripping in different areas. If you observe water dripping, trace it back to its origin. 2. Find A Reliable Contractor After a thorough inspection of your roofing system by a professional roofing consultant, you will receive an accurate and detailed bid or estimate. The estimate will be based on the materials you choose for your roofing projects. Moreover, you must consider the unique measurements of your roof. The roofing consultant will also consider any special conditions that may affect the cost. This can include the complexity of the roof design or any existing damage that needs repairing. When evaluating your options, it can be important to take the time to vet contractors beyond just the numbers. Look for a company with a strong local track record. Checking online reviews, verifying licenses, and confirming they carry proper insurance can save headaches later. Whether you're working with a san antonio tx roofing company or a contractor elsewhere, these vetting steps apply universally and help ensure you're trusting your roof to someone reputable. Once you receive the bid or estimate, your roofing contractor should provide a written contract outlining the details. This contract should include a comprehensive breakdown of the costs, the expected timeline for completion, and any warranties or guarantees included. Therefore, you must carefully review and understand the contract before agreeing to any work to ensure everything is clear and fair for both parties. 3. Select The Suitable Material  It's crucial to have a complete set of roofing tools when undertaking any repair project. These hand tools have various uses throughout the house. They include the following: Roofing hammer. Pry bar. Nail puller. Utility knife. Shears. Tin snips. Handbrake. Tape measure. Chalk box. Roofing nails (also known as roofers). Speed squares. A pencil for notes or markings. A 10 oz clay gun. Choosing the right roofing sealant depends on the roofer's needs, but any kind will suffice.  While shingles are optional, matching them is optional. For flashing work, it's recommended to use aluminum coil stock, which is available in various colors at most box stores. A tape measure is recommended for all measurements and layout work, and a chalk box is ideal for snapping reference lines and general layout work.  Roofing nails, or "roofers," are recommended for their durability. The materials used for the roofing sealant, shingles, and aluminum coil stock are also essential. 4. Ensure That All Cracks Are Sealed Using an uncomplicated roofing sealant is important to seal any cracks on your roof.  To apply a sealant, you must pierce a thin aluminum membrane with the tube, allowing the sealant to flow.  Next, load the sealant into a caulk gun and aim it at the crack or hole to seal it.  The sealant will dry in a few hours and be set entirely in 24 hours without intervention.  Finally, you can cover the hole with shingles or flashing and move on to other projects. Ensuring that the roof sealant is compatible with your caulk gun is crucial. This is because some construction materials come in 28-ounce tubes that won't fit a standard 10-ounce gun. 5. Ensure The roof Is Insulated When planning to replace your roof, it's also a good opportunity to consider upgrading your insulation.  However, if you opt for new blown-in insulation, your roofing contractor will install it while they remove the decking.  This insulation process requires running a hose through the exposed roof and into your attic. It allows the insulation to be installed quickly and easily without causing any damage to your walls or ceilings.  Therefore, with the new insulation, you can enjoy improved energy efficiency and a more comfortable indoor environment. 6. Leave It Clean After the roofing crew installs your new roof, they should clean up any debris around your home. This includes loose shingles and nails and leaves them in their original condition.  They should also haul away old roofing materials for proper disposal. Additionally, you must ensure not to dispose of in landfills, which can contribute to pollution. The roofing expert must inspect the final product to ensure it meets all industry standards and building codes.  They should also check for potential leaks or damage and address any concerns. It is important to address any concerns and take steps to correct any issues. Therefore, ensure you’re completely satisfied with the new roof and its reliable protection for years. Can You Repair Your Roof Yourself? Understandably, as a homeowner, you may want to save money. Therefore, taking care of some home maintenance tasks can help you save a lot.  However, it is important to know your limits when it comes to your roof.  You may be capable of handling minor tasks such as replacing caulking or cleaning gutters. On the other hand, leaving any roofing projects to the professionals is highly recommended.  Moreover, roofing maintenance requires specific skills, knowledge, and equipment that only experienced and trained professionals possess.  Even a seeming DIY project can quickly spiral into a much bigger roof repair if something goes wrong.  Therefore, it's always wise to prioritize the safety of your home and family. Look for an efficient roofing service provider and explain the damage. You can get your roof cost-effectively repaired under expert supervision! Read Also: How Often Do You Need A Roof Inspection? Elevate Your Roof’s Health With Aerial Roof Inspections Choosing A Siding And Roofing Companies In Delaware

READ MOREDetails
how to harvest lettuce

How to Harvest Lettuce: A Step-by-Step Guide for Fresh and Crispy Salads

Since lettuce plants grow best in cool growing seasons, most lettuce varieties are classified as spring or fall greens. However, if the longer days are keeping your lettuce plant producing leaves well into the summer and it hasn't bolted yet, here are some excellent tips to follow to maximize your harvest. Taking individual leaves off the plant is one way to increase its yield. Alternatively, you could sow in succession every two weeks in the early spring or fall to continue the harvest. To offer lettuces shade and protection from the hot summer sun and high temperatures, a third method is to interplant with a taller crop. Lastly, cultivators should seek out cultivars known for their slow bolting, like the looseleaf varieties "Slobolt" and "Sierra." Here is how to harvest lettuce so you can eat some leaves right away and encourage the plant to continue growing more. How To Harvest Lettuce? If you want to harvest lettuce and do not know how to go about it, here are all the details. Follow the steps closely to get the healthiest and crispiest lettuce for your salads and sandwiches. Plant Looseleaf Varieties Your lettuce variety should be ready to harvest in 35 days, according to the seed packet, which means you should have large enough leaves to pick a little more than a month after planting. By regularly picking the outer leaves, you may be able to extend the harvest until late June if you sow seeds in March or April. Begin Harvesting Early in The Season Young lettuce plants will be harmed by light frost, but mature plants can withstand it. If you live in an area where there is no winter frost, you can plant early and begin harvesting the outer leaves when they get to be 4 or 6 inches long. Your harvest can last up to 30 days longer if you plant and harvest early. Pick Lettuce in The Morning It is ideal to harvest lettuce early in the day to avoid the leaves wilting due to the intense heat. The leaves are crispest and flavorful in the morning because they contain the most water. Look For Plants with Large Outer Leaves The center of the crown is where the new growth starts on the lettuce. You must remove the largest, oldest leaves that are about 4-6 inches long. You will find these leaves on the outside of the plant. Cut or Pinch The Outer Leaves At 1/4 to 1/2 inch from the base, pinch off each outer leaf. To break the leaf off the crown, apply just enough pressure with your thumb and forefinger. Another option is to use a sterile, sharp scissor or snipping tool, though there is disagreement about whether doing so accelerates the browning of cut edges. Harvest Until it Flowers When older, mature leaves are consistently removed, the lettuce plant is encouraged to grow new leaves in their place. Harvesting individual leaves is possible until the plant produces a flower stalk, which indicates that it is ready to bolt and set seed. Lettuce turns bitter once it bolts. When to Harvest Lettuce? As soon as the lettuce is large enough to pick, it can be harvested. A seed packet will typically tell you how many days it will take to harvest. For the "cut and come again" method of harvesting loose leaves, standard-size varieties are the most effective. When outer leaves are 4 to 6 inches tall, that's the best time to begin harvesting. There are many varieties of lettuce seeds available, including blends and mesclun mixes. The best varieties to plant for a continuous harvest are called bi-colored, spotted, or loose-leaf lettuces in green and red or burgundy tones. The following are some varieties you might want to try: Black Seeded Simpson Green Salad Bowl Freckles Lolla Rossa Gourmet Mesclun Blend Deer Tongue Garden Leaf Blend Loose leaf lettuce varieties yield the best results from the cut-and-come-again method. Red, green, and oak leaf lettuce are a few examples. Additionally, you can wait to pick until a full head has matured or harvest early leaves from loose-heading varieties like butterhead and romaine. When and How to Gather Lettuce Heads The growth habit of head lettuce is akin to that of cabbage. In order to form a dense, rounded, or clumped shape, younger leaves emerge from the center, and older leaves form layers. There are two types of head lettuce: loosehead (similar to romaine) and crisphead (like iceberg). Let the crisphead varieties mature for a single harvest and keep an eye on them in accordance with the days to harvest specified on the seed packet. When the heads are dense and the appropriate size, they are ready to be picked. If you remove the outer leaves once or twice, loosehead lettuces will still head. However, the size of the fully mature head may decrease as a result. These lettuces can produce a head of looser layering or wrapping leaves (butterhead) or a clump of tall, straight leaves (romaine). Remove crispheads by chopping off the stem just below the center. Loose heads can be trimmed similarly or removed, with roots and subterranean stems cut back to the leaf base, depending on size. What Happens If a Flower Stalk Bolts A lettuce plant will eventually shoot up a flower stalk in the center, a sign that it has reached the end of its life and is ready to bolt, or bloom, and set seed. Though they might still be edible, the lettuce leaves are starting to get tough and bitter. There is no stopping flowering once this process has begun. Throw away the plant and plant again if the weather permits. Types of Lettuce There are four types of lettuce you can choose from when choosing which to grow: leaf, butterhead (loosehead), romaine, and head lettuce. When it comes to cultivation and harvesting, the main distinction is that leaf lettuce crops yield several harvests, whereas head lettuce varieties, such as iceberg, romaine, and butterhead, only yield one harvest. Leaf lettuces are, therefore, a favorite among home gardeners since you can grow them in raised beds, on the ground, or in patio containers. Keep in mind that lettuce is a cool-season crop, so you should schedule your harvest for the spring when the temperature is still cool. Such temperatures are usually around 70 degrees. Find out when the first frost occurs in your area each fall and plant appropriately. Starting fall crops from seed indoors and moving them outside as the weather cools down may be the best option. Seek out head lettuce cultivars such as Crisphead and Iceberg that you can grow from seed. In roughly six weeks, the lettuce will reach maturity and be ready for harvest after the seeds have germinated in 10 to 21 days. One loose butterhead variety that you can grow from seed or seed tape is called Buttercrunch. It takes 65 days to be ready for harvest. Vivian is one of the romaine varieties that yields soft, flavorful leaves. Directly sow seeds in the garden in the spring. Start seeds indoors in the fall and transplant them to your garden. Varieties of loose-leaf lettuce grow quickly and are enjoyable to experiment with in salads, sandwiches, and other culinary creations. Look for mesclun mixes and heirloom cultivars such as "Black Seeded Simpson." Many come in simple-to-grow seed tapes that can be harvested in roughly seven weeks. How to Harvest Leaf Lettuce? When the weather gets chilly, you can harvest salad from a leaf lettuce crop in your home garden whenever you're ready to eat. You can harvest an entire crop of lettuce at once by waiting for it to mature. However, cutting fresh lettuce leaves off as they grow is the easiest way to prepare them for consumption at any time. Depending on the variety, lettuce leaves should be harvested when they reach a length of 3 to 6 inches. Gather leaves continuously until the lettuce plant "bolts." This indicates that the plant has focused its energy on developing seeds and flowers, and as a result, the leaves typically develop tough stems and a bitter taste. How to Harvest a Full Head of Lettuce? A lettuce plant can continue to grow until it produces a full head of leaves. Use the "one and done" approach when harvesting head lettuce. Just make a clean, above-soil knife cut across the entire head of lettuce at the base of the plant. For this, a harvest knife comes in handy. Remember the seed packet and note the maturity or harvesting days. As your plants get bigger, keep an eye out for indicators of maturity, which are typically firm, full heads. Harvest in the spring before it gets too hot, usually when the daytime highs hit 70 degrees Fahrenheit. The bitter taste of the leaves and the mushy head of lettuce can result from warm weather. How to Store Lettuce? When the lettuce is inside, you can use a colander to wash the leaves and thick cotton towels to dry them so you can use them in salads and sandwiches. In case you cultivate a lot of lettuce, investing in a salad spinner would be wise. It helps dry and wash Lettuce quickly. Lettuce leaves without water should be refrigerated. For most greens, store the leaves in a loose plastic bag for approximately a week. When the salad greens are ready to be eaten, give them a good rinse in several runs of cold water and then pat dry. How to Harvest Lettuce Microgreens? Microgreens are incredibly simple to harvest! When the first true leaves appear, after ten to fifteen days of planting the seeds, they will be ready. When the microgreens are two to three inches long, harvest them if you are measuring them by height. Investigating the flavor profiles of the microgreens at various heights is enjoyable. Cut the entire plant ½ inch above the soil line with a pair of scissors or grass shears. If you need more inspiration, check out our many other interesting gardening tips for growing microgreens, like growing lettuce microgreens! How to Harvest Romaine Lettuce? The leaves of romaine lettuce (also known as cos) have the perfect amount of crunch or crispness. The lettuce plant's outer leaves can be harvested as it grows. The leaves can be chopped off one to two inches above the ground. Gathering these tender green leaves now will give the lettuce more time to ripen before full plants can be harvested. Before Romaine lettuce reaches maturity, it can take 55–70 days to grow from seed. To determine when the lettuce is ripe, examine it directly. When the romaine lettuce leaves are 6 to 8 inches tall, the ribs are firm and juicy, and the leaves have formed a tightly compacted head, the lettuce is ready for harvesting. To test if the lettuce head is firm, squeeze it. Overripe head lettuce will be tough, while young head lettuce will be soft. Harvest by making a cut an inch above the ground, saving the crown for a subsequent harvest. You can harvest the lettuce head by digging up the entire plant if it is nearing the end of its garden lifespan. Read More: Everything You Need To Know About Harvesting Basil! Loose Leaf lettuce The harvest window for leaf lettuce varieties is quite broad. After planting, the young, baby lettuce leaves can be harvested 25 days later, and the plant will mature fully in 50–60 days. Make sure your crop is harvested prior to it bolting. Since you can harvest loose-leaf lettuce more than once during the growing season, it's ideal for repeated harvesting. You can chop the entire lettuce plant 1-2" above the soil line once the leaves reach 4".  In 10 to 15 days, fresh leaves that have sprouted from the base will be ready for harvesting again if the crown is left intact.  Try spreading out your seed sowings and doing multiple sowings to ensure a consistent harvest all season long. If you want to preserve the crisp flavor of the young baby greens, you should sow them again. Another method of harvesting involves leaving the inner leaves to grow while pruning the young leaves on the outside of the head for greens. When the plants are 4 inches tall, you can begin harvesting lettuce by cutting them just above the soil line. Crisphead Lettuce When grown locally, crisphead or iceberg lettuce makes for incredibly tasty salad greens.  You might not get a whole head of lettuce, but this can be a cut-and-come-again harvest.  A single harvest is more appropriate for this green lettuce. After planting, there is a 50 to 75-day window for harvest. Iceberg lettuce can be harvested as soon as the head appears before the outer leaves turn brown and as soon as the center feels firm, and the leaves are compacted tightly. Before the crisp lettuce starts to open and the seed stalk starts to form, harvest it. More importantly, if you see the lettuce beginning to bolt—a common issue in hot weather—or the seed stalk, harvest it right away. Harvesting iceberg lettuce is best done by digging up the entire plant and then cutting off the stalk. Because of its thick stem, this lettuce plant can be challenging to harvest while it is still in the ground.  If you decide to harvest the lettuce while it's still in the ground, please take care not to harm it.  You can cut the stem just below the leaves by lifting the lettuce upwards. Wrapping Up Nothing compares to the sheer satisfaction of harvesting and regrowing fresh, new lettuce from the same plant. You are far superior to other lettuce owners if you can figure out how to harvest lettuce correctly so that it keeps growing. Thus, if you want to become a rich lettuce farmer, make sure you constantly and meticulously follow all the above steps! If you have thoughts to share or questions to ask about how to harvest lettuce, then please leave a comment below. We would love to hear from you. Read Also: Some Facts You Need to Know About Rainwater Harvesting Asparagus 101: When, How, And How Often To Harvest? Exploring Ideas For A Biophilic Home Design

READ MOREDetails