Elegance of Zebra Blinds: Functionality and Style

Published on: 17 October 2023 Last Updated on: 11 September 2024
Zebra Blinds

Zebra blinds, also known as transitional shades, have emerged as a popular window treatment option for those seeking a harmonious blend of style and functionality. These versatile window coverings are gaining recognition for their unique design and ability to transform any space. 

In this article, we will delve into the world of zebra blinds canada, exploring their features, benefits, installation, and maintenance. Let’s embark on this journey to uncover the elegance that zebra blinds can bring to your home.

What  Do You Know About Zebra Blinds?

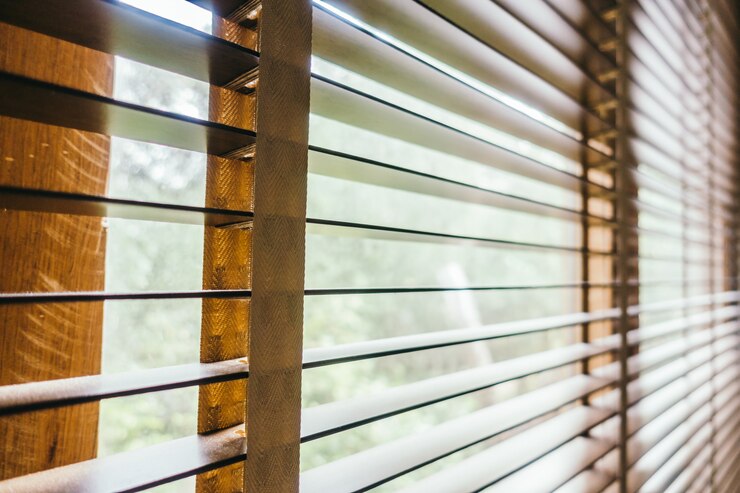
Zebra blinds are a modern and innovative window treatment solution that gives homeowners optimal control over light and privacy. They consist of two layers of fabric with solid stripes and alternating sheer, giving them their distinctive appearance. The ingenious design allows you to adjust and control the position of the fabric layers, creating varying degrees of light filtration and privacy.

The Zebra blinds are available in different shades, transitional shades, alternating shades and others. These solid bands offer privacy and then block out the lights. It can help you get the soft, diffused glow in your space.

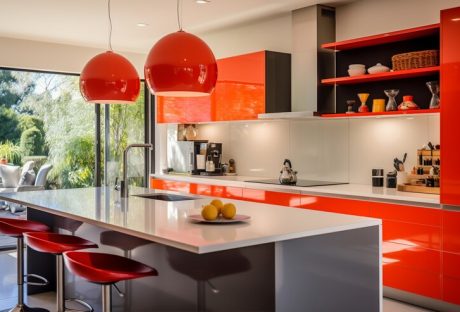
These zebra blinds are available in different options. You can fix them in different places, the living rooms, the bedrooms, the home office and others. They offer you a contemporary, modern look that complements the different design styles. 

Benefits of Zebra Blinds

Benefits of Zebra Blinds

The Zebra blinds are available in different shades and styles, as we mentioned above. But they are more used for the advantages they carry. Here, we provide you with the advantages that you have with the help of the zebra blinds.

So, let’s get started with the discussion to have a better understanding of the facts. 

1. Light Control

Zebra blinds offer exceptional control over natural light. You can perfectly balance a well-lit room and a shaded private space by aligning the sheer and solid stripes. This adaptability is especially valuable for rooms with changing light conditions throughout the day. It requires mention that you need different shades of light for different occasions. If you have control over the amount of lights entering your house, you can undoubtedly be able to regulate the temperature of your home. 

2. Privacy

Maintain your privacy without sacrificing natural light. Zebra blinds allow you to obscure the view from the outside while still enjoying the scenery outdoors. It’s an ideal solution for homes in densely populated areas or those facing busy streets.

Among the top requirements that you have, privacy is undoubtedly one of them. From this aspect, the zebra blinds are of great benefit without a hint of doubt. 

3. Stylish Aesthetics

Zebra blinds are not just functional; they also serve as a stylish design element in any room. Their contemporary look complements various interior styles, from modern to traditional, making them versatile. There are different categories of zebra blinds that define your core requirements. You have to be highly specific about your own requirements. They help you get the best look and feel. 

But you can not shift your focus or attention from the aesthetics.  This is the reason they are effective in terms of the overall look and feel of both your zebra blinds and at the same time, the aesthetics. 

4. Easy Maintenance

Keeping zebra blinds clean is hassle-free. Regular dusting or gentle vacuuming is usually sufficient to maintain their pristine appearance. Their durability ensures they remain an attractive window treatment for years to come. What you simply need is to allocate some minutes, once or twice a week. It will be more than sufficient to provide you with the necessary maintenance. 

Installation

Installing the zebra blinds has their own fun and, at the same time, their own challenge. You can say that there are both positives and the negatives. But you can not overlook the fact that you, too, have your own requirements. 

Installing zebra blinds is a straightforward process that can be done by a professional or as a DIY project. Here’s a basic guide:

1. Gather Your Tools

To begin, you’ll need a measuring tape, a level, a screwdriver, and a pencil. 

2. Measure Your Windows

Accurate measurements are crucial for a perfect fit. Measure the width and height of your window frame, noting down the dimensions.

3. Mounting Brackets:

Attach the mounting brackets to the top of your window frame, ensuring they are level.

4. Install the Blinds

Insert the zebra blinds into the mounting brackets and secure them in place.

5. Test Operation

Test the blinds to ensure they raise, lower, and adjust smoothly.

Another angle of this action is the availability of time. You may not have sufficient time for installation. Or it might be possible that you are not good at it and it’s not your among your priorities. Then, in that case, you make the best of professionals. They have a thorough knowledge of the nitty-gritty of the art. They can help you out with the inputs.

Maintenance Tips

Buying aesthetically appealing zebra blinds will not be enough; you must also focus on maintenance. It involves your daily time investments. You must mop it daily or do it twice or thrice a week. It may be that you don’t have sufficient time. But if you can not mange your maintenance, then in that case you must take the help of helping hands, be it the 

To keep your zebra blinds in pristine condition, follow these maintenance tips:

  • Regularly dust or vacuum the blinds to prevent dust buildup.
  • Spot clean any stains with a mild detergent and a soft cloth.
  • Avoid using harsh chemicals or abrasive cleaners, as they can damage the fabric.

Conclusion

In conclusion, zebra blinds offer a unique combination of functionality and style for your windows. Their innovative design can help you control light and privacy effectively while adding a touch of elegance to your living spaces. Whether you’re redecorating your home or simply looking for a practical window treatment solution, zebra blinds are an excellent choice. So consider these points while you look to select zebra blinds for your home. 

Read Also:

Ankita Tripathy loves to write about food and the Hallyu Wave in particular. During her free time, she enjoys looking at the sky or reading books while sipping a cup of hot coffee. Her favourite niches are food, music, lifestyle, travel, and Korean Pop music and drama.

View all posts

Leave a Reply

Your email address will not be published. Required fields are marked *

Related

Garden Fences

Tips For Planting And Maintaining Greenery On Garden Fences

Garden fences are an essential part of any outdoor space, providing privacy, security, and aesthetic appeal. One way to enhance the look of your garden fence is to plant greenery on it.  Not only does it add visual interest, but it can also provide shade and habitat for birds and other wildlife. However, planting and maintaining greenery on decorative garden fences can be challenging.  How To Maintain Greenery On Garden Fences? Maintaining greenery on decorative garden fences addition is a beautiful and natural touch to your outdoor space. When it comes to maintaining greenery on garden fences, consider the versatility of custom window boxes. These personalized window boxes can enhance your garden's aesthetic and provide a perfect space for your favorite plants. Without proper care theses, the beautiful natural touch can look like a small wild bush. More than installing the fence panels, regular maintenance is required to ensure the long life of the fences. Check out cedarmountainfence.com for fencing repair and maintenance ideas. Let’s see the easy caring tips that do not require expert help. You can apply these tips on your own by using small and readily available tools. 1. Choosing The Right Plants For Your Garden Fence The first step in planting greenery on your garden fence is to choose the right plants. When selecting plants, consider the amount of sunlight your fence receives and the soil quality.  Some plants, such as ivy and jasmine, are ideal for shady areas, while others, like clematis and morning glories, prefer sunny spots. You should also choose plants well-suited to your soil type and moisture levels. It's also important to choose garden fences and plants that will complement your existing landscaping and the style of your garden fence. Consider planting wildflowers or climbing roses if you have a rustic wooden fence. You might opt for succulents or grasses if you have a more modern fence. 2. Planting Your Greenery Once you've chosen the right plants for your garden fences, it's time to start planting. Before you begin, be sure to prepare the soil. Clear any present debris or weeds from the area, and amend the soil with compost or other organic matter to improve drainage and fertility. When planting your greenery, be sure to follow the specific planting instructions for each plant. Some plants, such as climbing roses or ivy, may require a trellis or other support structure to climb up the big or small garden fences. Other plants, like clematis, may require regular pruning to keep them from becoming too heavy and damaging the fence. 3. Caring For Your Greenery Proper care is essential for the health and longevity of your greenery. Be sure you are watering your plants daily, especially during hot and dry periods. Fertilize your plants as needed, following the specific instructions for each plant. Regular pruning is also important to keep your greenery healthy and well-maintained. Be sure to remove any dead or diseased branches and prune back any overgrown areas that are crowding out other plants or obstructing your view. 4. Protecting Your Garden Fence While planting greenery on your garden fences can be a beautiful and eco-friendly solution, it's important to protect your fence from damage. Be sure to use plant ties or other support structures to prevent your plants from pulling down or damaging your fence. You should also be aware of any potential pests or diseases that could harm your greenery or your fence. Be sure to monitor your plants regularly and take action if you notice any signs of infestation or disease. 5. Provide A Sufficient Amount Of Water And Nutrients Make sure your plants receive enough water and nutrients to thrive. Consider using a slow-release fertilizer or compost to give your plants the necessary nutrients. Regular pruning helps your plants to maintain their shape. And regular pruning also prevents them from becoming overgrown or damaged. Prune away dead or diseased branches, and remove any growth encroaching on other plants or structures. Keep your eye out for pests and diseases which can damage your plants. Using the natural pest control methods, like companion planting or organic pesticides, keeps your plants healthy. Conclusion Planting greenery on your garden fence is a great way to add beauty and interest to your outdoor space. If you are concerned about deer damaging your garden, installing a deer fence from https://www.critterfence.com/hemp-drying-mesh by a professional can provide the protection you need while adding value to your property. By choosing the right plants, planting them properly, and providing proper care and maintenance, you can create healthy and thriving garden fences that will enhance the look and feel of your outdoor space for years to come. Read Also: 5 Reasons Why You Absolutely Must Have Houseplants In Your Life How To Plant Grass Seed On Hard Dirt? – Latest Update 2022 10 Best Bedroom Plants To Buy In 2022

READ MOREDetails
how to harvest asparagus-

Asparagus 101: When, How, And How Often To Harvest?

If you are a gardener like me, you must have thought about harvesting greens that you eat at restaurants at your house. One of these days, I was with my friends from my university, and we were discussing the importance of eating veggies for staying healthy. And they could not figure out the best ways to effectively do so. Reading my previous blog about cilantro, Laila asked me, “how to grow and harvest asparagus?” Well, surely asparagus is one of the most delicious and nutritious vegetables you can grow in your garden. But what a lot of people do not know is that it's also one of the easiest once you know how to harvest asparagus properly. In this article, I will cover everything you need to know about harvesting asparagus, from when to start, how to cut, and how often to do it. Additionally, I will also share some tips on how to store and freeze asparagus, as well as the benefits of eating this green wonder. So, keep on reading till the end to learn more...  How Does Asparagus Grow? Before I dive into the seemingly difficult process of how to harvest asparagus, let me help you grow it.  Asparagus is a perennial plant that grows from a crown of roots that can live for up to 20 years. The crown produces spears, which are the edible part of the plant, every spring. The spears grow rapidly, sometimes up to an inch per day, and can reach a height of 6 to 10 inches. The spears are harvested before they open into fern-like leaves, which are edible and tough. Asparagus grows best in well-drained, sandy soil with a pH of 6.5 to 7.5. It prefers full sun and moderate temperatures and needs regular watering and fertilizing. Asparagus can be grown from seeds or crowns, but crowns are easier and faster to establish. Crowns are planted in trenches about 12 to 18 inches apart and covered with 2 to 3 inches of soil. As the spears emerge, more soil is added until the trench is filled Benefits of Asparagus  https://giphy.com/gifs/food-asparagus-taylor-lee-nicholson-pejh5q5BBXxi2m4PgF Asparagus is not only tasty, but also healthy. It's low in calories and high in fiber, vitamins, minerals, and antioxidants just like spinach. It can help lower blood pressure, regulate blood sugar, support digestion, and prevent urinary tract infections. Asparagus also contains a compound called asparagine, which is a natural diuretic that helps flush out excess fluids and salts from the body. Asparagus is also a good source of folate, which is essential for pregnant women and fetal development When to Harvest Asparagus? The first year after planting, you should not harvest any asparagus spears, as they need to grow and strengthen the root system. The second year, you can harvest a few spears for a short period, about two to three weeks. The third year and beyond, you can harvest asparagus for a longer period, up to eight weeks, depending on the climate and the health of the plants. The best time to harvest asparagus is in the early morning when the spears are crisp and tender. You should harvest asparagus when the spears are about 6 to 10 inches tall, and before the tips start to open up. If you wait too long, the spears will become woody and bitter. How to Plant and Care for Asparagus? Asparagus is a long-term investment that can reward you with years of delicious harvests. However, it requires some planning and preparation before planting.   Here are some steps to follow to plant and care for asparagus:  Choose the Day  Choose a sunny and well-drained spot in your garden, preferably with sandy or loamy soil. Avoid areas where water tends to pool or where weeds are hard to control. Asparagus also needs plenty of space, so make sure you have at least 4 to 5 feet between rows and 12 to 18 inches between plants. Prepare the Soil  Prepare the soil by adding organic matter, such as compost or manure, and adjusting the pH to 6.5 to 7.5. You can use a soil test kit to check the pH and nutrient levels of your soil. You may also need to add some fertilizer, such as 10-10-10 or 10-20-10, to boost the phosphorus and potassium content. Dig it Deep Dig a trench about 8 to 12 inches deep and 12 to 18 inches wide. You can make the trench longer or shorter depending on how many asparagus crowns you have. Asparagus crowns are the dormant roots of the plant that you can buy from nurseries or online. They usually have one-year-old or two-year-old crowns, which are more reliable and productive than seeds. Fertilize Spread some fertilizer along the bottom of the trench, about 2 pounds per 100 square feet. Then, cover the fertilizer with 2 to 3 inches of soil, forming a ridge in the center of the trench. Placing the Plant Place the asparagus crowns on top of the ridge, about 12 to 18 inches apart, with the buds facing up. The crowns should be slightly below the soil surface, about 1 to 2 inches deep. Do not bury them too deep, as this will delay the emergence of the spears. Focus on the Crown Cover the crowns with another 2 to 3 inches of soil, and water well. As the spears grow, gradually fill in the trench with more soil, until it is level with the ground. This will help protect the crowns from frost and weeds. Add Mulch  Mulch the bed with straw, leaves, or wood chips, to conserve moisture and prevent weeds. You can also add some organic fertilizer, such as fish emulsion or seaweed extract, every few weeks during the growing season, to encourage healthy growth. Keep in Mind Do not harvest any asparagus spears in the first year, as they need to establish a strong root system. In the second year, you can harvest a few spears for a short period, about two to three weeks. In the third year and beyond, you can harvest asparagus for a longer period, up to eight weeks, depending on the climate and the health of the plants. How to Harvest Asparagus? Now, coming to the most important part that you wanted to know about. Let us talk about the ways to harvest asparagus! To harvest asparagus, you need a sharp knife or a pair of scissors. You should cut the spears at the base, about an inch below the soil surface. Be careful not to damage the crown or the emerging spears. You should also avoid cutting too many spears from one plant, as this will weaken the plant and reduce the yield. A good rule of thumb is to leave at least one-third of the spears on each plant. You should harvest asparagus every day or every other day, depending on how fast the spears grow. You should stop harvesting asparagus when the spears become thinner than a pencil, as this indicates that the plant is running out of energy. You should then let the spears grow into ferns, which will replenish the crown and prepare it for the next season. How to Store and Freeze Asparagus? Unlike lettuce, which you can store for more than a week, asparagus is best eaten fresh, as it loses its flavor and texture quickly. If you can't eat it right away, you should store it in the refrigerator for up to a week. To keep it fresh, you should trim the ends of the spears and stand them upright in a glass of water or wrap them in a damp paper towel and put them in a plastic bag. If you want to preserve asparagus for longer, you can freeze it. To freeze asparagus, you should first wash and trim the spears, and then blanch them in boiling water for two to three minutes, depending on the thickness.  Blanching is a process of briefly cooking and cooling the vegetables to stop the enzyme activity that causes them to spoil.  After blanching, you should drain and cool the spears, and then pack them in freezer bags or containers, leaving some space for expansion. You can freeze asparagus for up to a year, and use it in soups, casseroles, or stir-fries. How to Prevent and Treat Asparagus Pests and Diseases?  Asparagus is generally a hardy and resilient plant, but it can still suffer from some pests and diseases that can affect its growth and quality. Here are some of the most common problems that affect asparagus plants, and how to prevent or treat them: Asparagus beetles These are small, black or red beetles that feed on the spears and the ferns, causing them to wilt and turn brown. They can also lay eggs on the spears, which hatch into larvae that chew on the stems and leaves. To prevent asparagus beetles, you should keep the area around the plants clean and weed-free, and remove any old or damaged spears. To treat asparagus beetles, you can hand-pick them and their eggs, or spray them with insecticidal soap or neem oil. Fusarium wilt This is a fungal disease that infects the roots and the crowns of the plants, causing them to rot and die. It can also cause the spears to become yellow, twisted, and stunted. Fusarium wilt is more likely to occur in poorly drained, acidic, or infested soil.   To prevent fusarium wilt, you should plant disease-resistant varieties, rotate crops, and avoid overwatering or injuring the plants. To treat fusarium wilt, you should remove and destroy any infected plants, and apply fungicides to the soil. Rust This is another fungal disease that affects the ferns, causing them to develop orange or brown spots and pustules. Rust can reduce the vigor and yield of the plants, and make them more susceptible to other diseases. Rust is more likely to occur in humid, wet, or shady conditions.   To prevent rust, you should plant resistant varieties, space the plants well, and prune any excess or infected ferns. To treat rust, you should apply fungicides to the ferns, and avoid watering them from above. Crown rot This is a bacterial disease that causes the crowns and the bases of the spears to become soft, mushy, and foul-smelling. Crown rot can spread quickly and kill the plants. Crown rot is more likely to occur in wet, compacted, or poorly drained soil. To prevent crown rot, you should plant healthy crowns, improve the drainage and aeration of the soil, and avoid overwatering or injuring the plants. To treat crown rot, you should remove and destroy any infected plants, and disinfect the tools and the soil. Bonus: How to Cook and Enjoy Asparagus?  There are many ways to cook and enjoy asparagus, from steaming, boiling, roasting, grilling, to sautéing. The key is not to overcook it, as it will become mushy and lose its flavor. You should cook asparagus until it is bright green and crisp-tender, which usually takes about 5 to 10 minutes, depending on the method and the thickness of the spears. You can season asparagus with salt, pepper, butter, lemon juice, garlic, herbs, cheese, or any other condiments you like. You can also pair asparagus with eggs, bacon, ham, chicken, fish, pasta, rice, or salad. Asparagus is a versatile and delicious vegetable that can complement any meal. Wrapping It Up! Asparagus is a wonderful vegetable that you can grow and harvest in your own garden. It's easy to care for, once you know how to harvest asparagus properly. You should harvest asparagus when the spears are about 6 to 10 inches tall and before the tips start to open up. You should cut the spears at the base and leave some on the plant to grow into ferns. It would be best to store asparagus in the refrigerator for later use. And yes, you should also enjoy the many benefits and flavors of asparagus, by cooking it in various ways and pairing it with different dishes. Asparagus is a springtime delight that you don't want to miss. Learn More About: Planting & Harvesting Mint 7 Health Benefits of Black Seed Oil Spirulina: The Complete Plant Based Protein Source | Health Benefits

READ MOREDetails
Garden During Winter

How to Maintain a Bright and Beautiful Garden During Winter

Throughout the year our gardens are constantly changing from season to season, which creates a fresh and exciting feel every month. From beautiful blooms in the spring to crisp, frosty layers during the winter, our gardens always provide a captivating aesthetic to enjoy. When it comes to the winter months, many people neglect their gardens and wait until the warmer days arrive again, but this shouldn’t be the case. There are lots of ways to keep your garden looking its best throughout the winter, including adding a deer fence to protect your garden and property from animals and wildlife, and here’s other tips… Invest in a Greenhouse Greenhouses are a must for anyone keen to continue gardening during the winter months and maintain a beautiful garden aesthetic. From the moment you introduce a greenhouse, you open up your gardening options, giving you the chance to work on all kinds of wonderful projects. You’ll also find that a greenhouse helps to bring character to the garden, adding to the overall look of your outdoor space. A greenhouse also enables you to work on projects that may need a little encouragement in a warm environment, before adding them back to your garden to help brighten the area and enhance the aesthetic. Take a look at Two West’s wide selection of greenhouses here to find the right fit for your garden. Embrace Winter Colour Keep your garden looking bright and colorful by adding a selection of winter-blooming plants to your pots and beds. From winter-blooming daphne to pansies and cyclamen, you can bring an assortment of gorgeous winter colors to really bring life to your garden. Whether you opt to plant these bloomed plants during the winter for instant color, or you decide to plant your seeds earlier in the year for winter blooms, you can create a stunning aesthetic and add a trendy feel to your garden. Find the perfect winter blooms here available at Dobies to bring a seasonal touch to your garden. Install Outdoor Lighting Having a display of outdoor lighting can really help to illuminate your exterior, not only adding to the overall aesthetic but also enhancing your home's security. There are lots of different ways to introduce lighting, from subtle lights positioned neatly along the outskirts of your lawn or along the path, to brighter lights that stand tall and brighten the whole space. Do a little research into different types of outdoor lighting to see which would work best with your home's style and layout and invest in the best style for you. It’ll be much easier to enjoy your garden on those darker evenings once you have your outdoor lighting fitted. Visit Lights.co.uk here to find inspiration for outdoor lighting to introduce to your home and garden. Frequently Sweep Up Leaves   Many people see sweeping up the leaves in the garden to be a pointless task, as sooner or later they’ll be back to sweep up again. This may be the case, but by sweeping up the leaves you are able to keep your garden looking its best, even during the winter. Leaves and generic debris can create a very messy, untidy look for the garden so it’s always beneficial to keep on top of sweeping them off to the side or removing them from flower beds and your lawn area. You’ll be amazed how much of a difference this small but practical task will make! Read Also: How to Maintain Your Garden Railings? Grow these flowering plants in your home garden 5 Best Vegetables You Should Try Growing In Your Garden Looking for a Gardener: 8 Questions to Ask Before Hiring a Professional

READ MOREDetails