Published on: 20 March 2021
Last Updated on: 27 December 2024
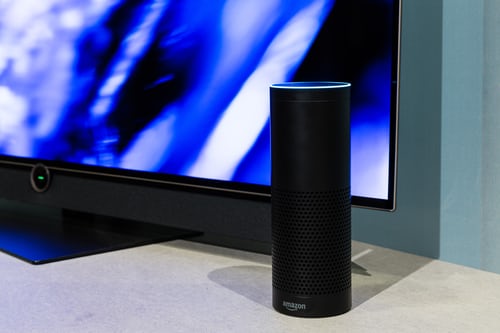
Alexa is a virtual assistant, which works with an echo dot in order to fulfill all the demands of its users. With its thousands of attractive features, Alexa has made the life of its users super easy and also entertaining at the same time. With its hi-tech features,Alexa can do almost everything from controlling smart home lights to set reminders, playing songs, jokes, news, quizzes, and much more things. But due to some reasons, you may find your Alexa not responding to the commands that you are giving it. Do not worry if you are facing the Alexa not responding issue. Here we have the most effective and easiest troubleshooting steps to fix this issue.
Troubleshoot The Alexa Not Responding Issue:
Here are the troubleshooting steps that you need to follow for solving the Alexa not responding issue with your echo dot. There are a bunch of reasons for what you may be facing this Alexa not working issue. So, let’s head towards the troubleshooting steps.
1. Check The Microphone Button
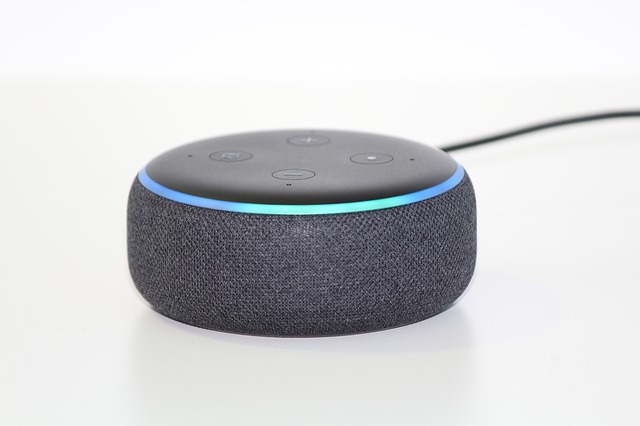
There are many instances when we find that the reason behind Alexa not responding is because the microphone is damaged or we forget to turn the button on. The microphone button is one of the most common reasons for this issue. So, check the microphone button first. If the issue persists and it seems that everything is totally fine there. You can step to the next process.
2. Reboot The Device
This is one of the most effective and easiest ways in the whole troubleshooting process of Alexa is not responding issue. There is not much trouble, all you need to do is just restart the device and the issue will get resolved. But this restarting has a definite name called power drain, and it is more than just powering off the power button and power on it again. Here is the step-by-step guide for the power drain process.
First, you need to check the power light. In case it is showing blue light, that means the device is able to hear you but simply the Alexa device is unresponsive to your commands.
Disconnect the power cable from the power source for at least 30 seconds.
Wait for a little while, and after that, connect the power cord again with the power outlet.
Now, when your device is ready completely, try to give it any command again.
If the issue is resolved, then it is fine. But in case the issue of Alexa not responding continues, head to the next step.
3. Echo Dot Hard Reset
In case the above described troubleshoot does not work for your echo dot. Here is the step-by-step guide to hard reset.
You will find the reset button at the bottom of the device. You can use a pin to press the button.
As soon as you press the button, the device will power off.
Here, you need to wait for a little and then power the device on again.
All the settings of the device will then reset to the original.
4. Disable And Enable Alexa Privacy
If Alexa not responding after all the above-mentioned troubleshooting steps, now is the time to enable Alexa privacy and in order to do so, follow the below steps.
You will find a button at the end of Alexa’s nucleus screen. You need to press the button.
This button is to enable the privacy of Alexa. If you press the button again, the device will hear you again.
Give a command to Alexa in order to check whether the issue is resolved or not.
5. Check Your WiFi Connection
Behind the “Alexa not responding” issue, there is a huge chance that maybe your wifi connection is not working properly. That is why Alexa is finding it difficult to respond to your commands. Well, let me tell you that if you do not have a properinternet connection, there will be no use for this Alexa device. So, check the router now. In case you find anything wrong, contact your network service provider.
6. Try Changing The Position
In case you have placed your echo dot device far from your router or in someplace where it is having issues connecting with the router. This can be the main reason why you are experiencing “Alexa not responding.” Make sure that you are placing Alexa within the wifi range. The place should be accessible to yours as well so that your echo dot device can connect with the network properly and also can hear you clearly.
7. Set Echo And Smartphone On The Same Network
Always keep in mind that the smartphone that you are using and Alexa have to be connected within the same network. In case they are connected with different routers or your phone is not connected with the router’s network, you will face the “Alexa not responding issues.” Connect both of them on the samerouter’s network in order to resolve the issue.
8. WiFi Congestions
If you have connected a lot of devices within the same router’s network, it may create the “Alexa not responding” issue. Due to excessive wifi congestions, your echo dot is not able to respond to your given commands. Remove or disconnect some other devices, and then try to give your device command and check if the issue is resolved.
Still Alexa Not Responding?
All the steps that I have told you in this troubleshooting guide are enough for resolving Alexa not responding to voice issue. But if you face the same problem after performing all the troubleshooting steps. You should contact Alexa customer care. Call on the Alexa helpline number and ask for help.
Mashum Mollah is the feature writer of Search Engine Magazine and an SEO Analyst at Real Wealth Business. Over the last 3 years, He has successfully developed and implemented online marketing, SEO, and conversion campaigns for 50+ businesses of all sizes. He is the co-founder of Social Media Magazine.
After buying a gun, the most important thing that you need to consider is buying a gun holster. There are many types of holster in the market. Sadly, only a selected few can be used as a conceal carrot holster.
Seeing how our readers are asking us about the conceal carry holsters, we decided to write an article covering everything about the conceal holsters. In this article, we will talk about holsters from We The People Holsters.
What Is Conceal Carry Holsters?
First things first, we are not talking about the waistband holster. Here in this article, we are talking about concealed carry holsters as a whole.
A concealed carry holster is a type of holster that can help you carry firearms concealed in your clothes. There has been a lot of debate in the gun world about conceal and open carry.
Many experts believe that concealed carry is best while taking care of criminals. With the concealed carry, you have an element of surprise and gold tactical advantages over your target.
Why Is A Conceal Holster Better Than An Open Carry?
Whether you are a veteran or a newbie, you must have surely heard about the current debate: whether concealed carry holsters are better than open carry if you are in the gun world. Well, you ask us, it is a tough call to make. There are many variables that influence choices.
Attention
It goes without saying, concealed carry holsters have more tactical advantages over open carry. However, there are gun owners who like to flaunt their guns to attract attention. This attention can be seen in both good and bad ways. If seen in a bad way, you lose your tactical advantage over the criminal. And as for the other way around, you can keep the anti-social people in control.
Access
Access is the key to effective self-defense. Most of the American carry guns for self-defense. That means the more accessible your weapon is, the safer you will feel. However, with the conceal carry, few extra layers of covers are added to the access. This makes the open carry more accessible than the concealed carry holster.
Convenience
While carrying your gun, you need to ensure that you are comfortable. If you are not comfortable while carrying your gun, you might find inconvenience in the long run. In terms of convenience, open carry is far better than a concealed carry holster.
Conceal carry holsters are directly in contact with your skin. With time, it creates rashes on the skin and gives off a sensation of irritation.
Legal restriction
Every state of America caters to different rules and regulations regarding carrying firearms. Some accept open carry, while some prefer to conceal carry. In which state you are living in will determine the types of holsters you refer to.
What Makes A Great Carry Holster?
As we have already mentioned, there are a lot of types of the holster in the market. Unfortunately, only a selected few are good to consider a concealed carry holster. While you are in the market looking for the best conceal carry holster, ensure that it has the followings:
Positive Grip.
Sturdy Material.
Good Retention.
Good Concealment.
Skin Protection.
Let's explore them more thoroughly.
Positive Grip
This is very important. If your holster does not allow youtube to have full combat grip as soon as you grab your gun, you are looking at the wrong holster. No matter which position you're in, your holster should be capable enough to allow you a full grip on your handgun.
Good Retention
Another way to say retention is that your gun stays put in one position. The best way to test its retention is to keep your gun inside the holster. Turn it upside down and see whether it falls or not.
Good Concealment
When you are looking for a concealed carry holster, you need to ensure that the holster allows you to carry your firearm discreetly. The concealment also depends on body types. A holster might suit one person, but at the same time, it might not suit the other.
Skin Protection
A holster should have enough surface area to protect your skin from the gun. The guns are made of metal, which creates irritations when it comes in contact with body sweat.
Frequently Asked Questions
There are many things about the concealed carry holster that only a few people know about. We have presented those things in the form of Q n A.
Who Can Carry Guns?
Every state has its laws regarding the use of firearms. However, in our research, we have seen that Texas is the top state that permits carrying guns. In 2019, it was seen that more than 1.2 million Texas residents were holders of licensed concealed handgun permits. To carry a gun in public, you need to be at least 21 years of age and need a license to carry (LTC).
When Can You Carry A Gun Without Permit?
You can carry a gun only if you have LTC. However, some bills exempt you from any punishment for carrying guns without permits. For instance, according to bill 1177, you can carry a gun in a state of disaster.
Senate Bill 741
Some property owners feel anxious about gun-carrying tenants. On the other hand, tenants might feel unsafe without a gun. This is where Senate Bill 741 comes into action. This bill allows gun holders to carry guns as long as they have permits.
Conclusion
Conceal carrying is an accessory that comes with heavy responsibility and should be adhered to with responsibility and care. You also need to be careful while handling guns. Guns are no playing thing. One mistake and a person can hurt themselves. To ensure that you are good at handling guns, you should seek professional guidance and apply for a permit and license.
With that being said, we conclude our article here. We hope that this article was able to give the answer you were looking for. For more queries, you can directly contact us.
Read Also:
Not Sure How to Keep Gun Safe at Home? These Tips Work!
How Gun and Security Gear Advanced through the Years
What is an Airsoft Gun?
A modern home seems useless without having the best smart home devices.
This is the main reason most homeowners like to install smart home devices.
That makes their home a better place to live, what you understand by the best smart home devices. From the door to the alarm everywhere, you will require intelligent equipment like familychristiandoors.
Let’s have a look at the definition of smart home devices.
Top 10 Smart Home Devices For Your Home:
What do you understand by the name of the smart home? The fact is when you are having a smart home you can complete every household work within a very small time frame.
Here are the names of the top ten most popular smart home devices which can easier your living styles.
1. Honeywell Thermostat:
A great choice for those who want to save money on their energy bills, the Honeywell thermostat can be controlled remotely via a smartphone or tablet.
It also features a 7-day programmable schedule, so you can always keep your home at the perfect temperature.
2. Wifi Router:
A must-have for any smart home, a wifi router allows you to connect all of your devices to the internet without having to rely on Ethernet cables.
It also provides a better range and speeds than other types of routers, making it ideal for large homes or homes with multiple floors.
3. Smoke Detector
A vital part of any home safety system, smoke detectors can alert you to fire even when you're not at home.
Many smart smoke detectors also feature carbon monoxide detection, so you can be sure your family is safe from both fires and poisonous gas.
If you're looking for a reliable, wired smoke and carbon monoxide detector, the google nest protect wired is a great option.
4. Smart Light Bulbs
One of the simplest ways to make your home smarter, smart light bulbs can be controlled remotely via a smartphone or tablet.
They can also be set to turn on and off at specific times, or even change colors to suit your mood. Looking for an energy-efficient way to light your home? LED light bulbs are a great option! energy efficient led light bulbs use less energy than traditional ones.
5. Smart Door Locks
A great way to increase security in your home, smart door locks allow you to remotely lock and unlock your doors as well as see who is coming and going.
Some models even allow you to grant access to specific people for specific periods of time.
6. Smart Thermostats
As well as being able to save you money on your energy bills, smart thermostats can also be controlled remotely via a smartphone or tablet.
Many models also feature heating and cooling schedules that can be customized to suit your needs.
7. Home Security Cameras
A great way to keep an eye on your home, security cameras can provide peace of mind whether you're at home or away.
Some models even allow you to view live footage from your smartphone or tablet. For added protection, alarm systems in Adelaide can complement smart locks, cameras, and other connected home devices.
8. Wireless Speakers
The perfect way to enjoy music in any room of your home, wireless speakers can be controlled remotely via a smartphone or tablet.
They can also be linked together to create a surround sound system for your TV or home cinema.
9. Water Leak Detectors
Water leak detectors are an important part of any home's plumbing system. They can help you save money on your water bill, and they can also prevent serious damage to your home.
There are a few different types of water leak detectors on the market, but the most common is the float switch. This type of detector is installed in there are many advantages to using smart home devices. They can help you save energy, stay connected, and automate your home.
If you're like most people, you probably don't give much thought to your garage door. But what if your garage door could be smarter?
10. Smart Garage Door
A smart garage door opener can make your life more convenient and secure. With a smart garage door opener, you can control your garage door from your smartphone, tablet, or computer. You can also get alerts if your garage door is open or closed, and set timers to automatically close the door.
If you're looking for a smart garage door opener, check out our top picks. We've got options for every budget, including models from Chamberlain, Genie, and more.
Pros Of Installing The Smart Home Devices
There are many advantages to using smart home devices. They can help you save energy, stay connected, and automate your home.
Here are some of the advantages of installing smart home devices at your home.
Smart home devices can help you save money on your energy bills by making your home more efficient. Hence you can also use smart devices to stay connected to your family and friends, even when you’re away from home.
Automating your home with smart devices can make your life easier by controlling your lights, locks, and thermostat from your smartphone or tablet.
If you’re looking for ways to save money, energy-saving smart devices are a great option. Smart thermostats can help you regulate the temperature in your home, so you’re not wasting energy heating or cooling an empty house.
Smart lights can also be programmed to turn off when you’re not home, so you’re not needlessly using electricity.
If you want to stay connected to your loved ones, there are plenty of smart devices that can help. therefore they use the smart doorbell comes. You can see who’s at your door, even when you’re not home.
Smart security cameras can also be placed around your home to keep an eye on things while you’re away. And if you have young kids, you can use a smart baby monitor to check in on them from anywhere.
Frequently Asked Questions!!! (FAQs):
Q1: Is A Smart Home Actually Worth It? Yes, a smart home will make your life easier. The devices which are performing based on voice commands are improving your quality of life. The most important part is enhancing the convenience. Q2: Are Smart Homes Going To Save Money? Smart home devices are not just making your life simple. Your safety and security of the houses will also increase. But smart homes are increasing the energy use ratios. People can get all sorts of help by simply taking the facilities. Q3: How Much Do You Have To Invest For An Entirely Smart Home? The average four-bedroom flats and the three-bath homes require nearly $15,000. Investments. But for luxury apartments, costs are much higher. That cost is going to touch the bar of $10,000 to $150,000.
Wrapping It Up:
All of these smart home devices are designed with the latest smart technologies. So if you want to lead the order fast convenience life style. Then these are the most essential items you need. But every smart device requires a well-revised maintenance system. So it will be better to tap on that point. What is your opinion? Do not forget to share your opinion through the comment section.
Additionals:
10 Effective Homework Tips for Your Kids
Basic Idea on Power Tools for Home Improvement
Benefits Of Having A Cordless Vacuum Cleaner At Home
Power tools have become indispensable for professionals and DIY enthusiasts, making tasks more accessible and efficient. RYOBI stands out as a reliable choice among the numerous brands in the market.
However, like all power tools, RYOBI devices can occasionally encounter issues. In this guide, we'll explore techniques for troubleshooting for RYOBI power tools and power tools in general, focusing on the common problems and solutions that can apply to various brands and models.
Power Issues
Begin by examining the power source. Ensure that the cord is securely connected for corded tools and that the battery is adequately charged for cordless ones. For persistent issues, inspect the tool's switch for damage or debris. Also, check for loose or frayed wires and replace them as needed.
If you're dealing with a cordless tool and it's not turning on, the battery might be the culprit. Before assuming the worst, try charging the battery fully and then attempt to use the tool.
Sometimes, a drained battery can give the appearance of a malfunctioning tool. Consider using a different, fully charged battery if this doesn't work. If the device still doesn't work, the issue may be with the tool itself or the charger.
Loss Of Power In Power Tools
Power loss may result from a worn-out or damaged motor or brushes. Inspect the brushes for signs of wear and tear and replace them if necessary. Clean the air vents and cooling fans to prevent overheating, which can lead to power loss.
If your tool still experiences power loss after checking the brushes and vents, it may be due to an issue with the motor. Motors can wear out over time, mainly if the tool is used heavily. In this case, it might be necessary to replace the engine, which is a job best left to professionals unless you're experienced with power tool repair.
Overheating
Overheating can damage your tool and pose safety risks. Proper maintenance is crucial in such cases. Ensure air vents are clean and unobstructed.
If overheating persists, consider shorter usage intervals and allow the tool to cool down between sessions. Regularly check for proper lubrication in moving parts and replace worn-out components.
Excessive heat buildup in a power tool often indicates it's being pushed too hard or used beyond its recommended capacity. Pay attention to the tool's specifications and try to match it with the right type of work. If you frequently overheat a device, consider upgrading to a more robust model that can handle the demands of your projects.
Vibrations And Noise
Vibrations and noise can indicate loose or damaged components. Tighten all screws, bolts, and nuts. Inspect the blade or bit for damage and replace it if necessary. Lubricate moving parts following the manufacturer's recommendations to reduce friction and noise.
Excessive vibrations and noise are annoying and can indicate potential safety hazards. Loose parts in power tools can lead to accidents or damage to the tool. Regularly inspect your tool for loose fasteners and tighten them as needed. If you notice unusual vibrations or noise persisting after this, it's advisable to have the device checked by a professional technician.
Battery Troubles
Battery issues can stem from a lack of use, overcharging, or a faulty battery. Always follow proper charging and storage guidelines from the user manual. If battery performance remains subpar, consider investing in a replacement battery.
Batteries, especially rechargeable ones, have a finite lifespan. Over time, they can lose their ability to hold a charge effectively. If your cordless tool's battery life has significantly decreased, it may be time to invest in a new battery pack. Make sure to recycle old batteries properly, as they can be hazardous to the environment.
Blade/Bit Issues In Power Tools
Dull or damaged blades/bits can hamper performance. Sharpen or replace them as needed. Ensure you're using the appropriate type of blade/bit for the material at hand, as using the right one can lead to efficiency and damage.
The blade or bit's quality and sharpness directly impact your power tool's performance. When you notice a decrease in cutting or drilling efficiency, it's time to inspect and maintain these essential components.
Regularly sharpen blades or replace them if they're excessively worn or damaged. Also, be mindful of the material you're working with, as using the wrong type of blade or bit can result in subpar performance and even safety hazards.
Trigger Sticking
Disassemble the tool's handle and clean the trigger mechanism. Lubricate moving parts with a manufacturer-recommended lubricant. If the problem persists, consult your user manual or contact the manufacturer's customer support.
A sticking trigger can be a frustrating issue, and it can also be a safety concern. Before attempting any repair, ensure the tool is disconnected from its power source.
Disassemble the handle carefully and clean the trigger mechanism. Lubricate any moving parts as recommended in the user manual. If the issue persists, consult the manufacturer's customer support or take the tool to a professional repair service.
Conclusion
These tips are not limited to RYOBI tools; they apply to various power tool brands and models. Always refer to your user manual for specific guidance and safety precautions. Safety should be your top priority when troubleshooting and repairing power tools.
Read Also:
Home Warranty Plans: How To Choose The Right One
We Buy Houses Companies Saving Homeowners From Foreclosure
Top Fixer-Upper Improvement Ideas That Make A Huge Impact


 Here are the troubleshooting steps that you need to follow for solving the Alexa not responding issue with your echo dot. There are a bunch of reasons for what you may be facing this Alexa not working issue.
So, let’s head towards the troubleshooting steps.
Here are the troubleshooting steps that you need to follow for solving the Alexa not responding issue with your echo dot. There are a bunch of reasons for what you may be facing this Alexa not working issue.
So, let’s head towards the troubleshooting steps.