


Category: Home Improvement
ContentRally is a leading source of reliable news and trending topics on Home Improvement. Get hard-to-find insights and advice on Home Improvement from industry-specific leaders.
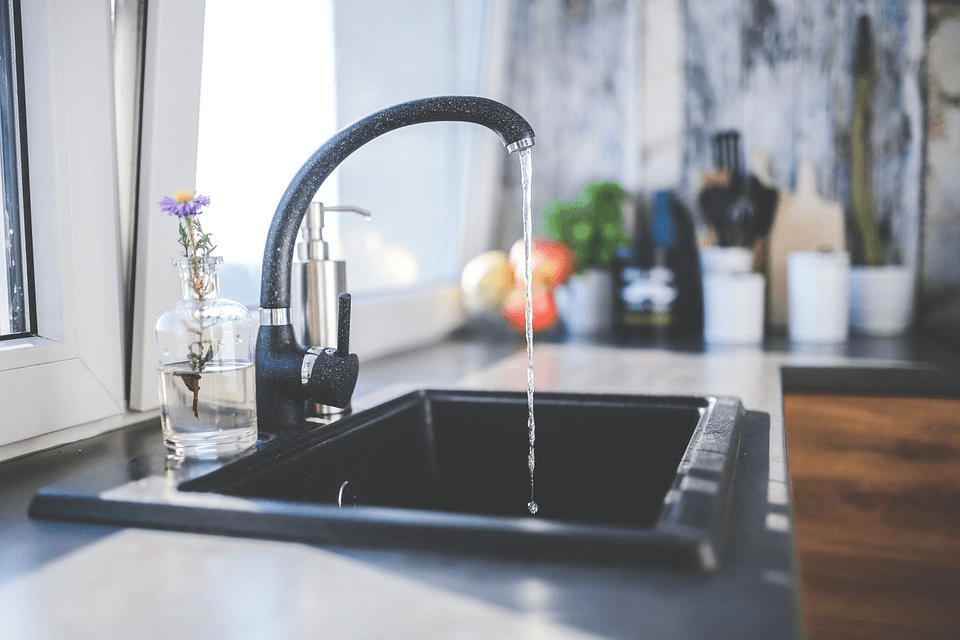
10 Plumbing Myths Debunked
Colepepper Plumbing plumber home services often get calls to fix issues that are caused by misguided beliefs and even myths on how plumbing systems work. An easily preventable plumbing problem can escalate to a full-blown emergency in no time if you believed such myths and hold on to habits that will wreak havoc both on your pipes and on your budget. Below are 10 of the most common plumbing myths and the truth behind them. 10 Plumbing Myths Debunked: Myth 1: It’s OK to Have a Dripping Faucet: A dripping faucet, according to the United States Environmental Protection Agency, can waste as many as 3,000 gallons of water a year. To give you an even clearer picture, you can take approximately 200 showers with that much water. If you have a dripping faucet, you are essentially paying for 3,000 gallons of water that you don’t use every year. That’s definitely not acceptable. Myth 2: It’s OK to Throw Oil and Grease Down the Drain: Some folks mistakenly believe that oil and grease will end up in the sewers even before it solidifies in the drain pipes. The truth, however, is that grease may become solid even before it gets to the main sewer line. Throwing grease down the drain is a sure way of clogging up the drain. Myth 3: Pouring Hot Water Down the Drain Will Clear Up Blockages: This is somehow related to the previous myth. There are those who believe that pouring hot water will cause grease blockages to melt and flow straight into the sewers. What this will do is just melt the grease a bit and then spread it down the drain further, causing an even bigger problem as it will spread the clog deeper into the pipes. Myth 4: Drain Cleaners Do a Better Job Than Hot Water: Although this may be true to some degree, drain cleaners do more harm than good. Drain cleaners have strong solvents that can eat away at pipes. In time, the clogged pipes will be the least of your problems. Myth 5: Combination of a Plunger and Drain Cleaners Are Very Effective: Slow-moving drains can lead to some of the most unwise attempts to clear out a clog. Pouring drain cleaner down the drain and then trying to work at the clog with a plunger can cause serious injuries to you. This should not even be attempted at all. Myth 6: Toilet Tank Cleaners Help it Perform Better: Toilet tank drop-in cleaners hardly do anything to make toilets flush better. What is even worse is that it can eat away at some of the more delicate parts of the flushing system, thus causing it to malfunction over time. Myth 7: Placing a Brick Inside the Toilet Tank Will Help Save Water: The brick will degrade inside the tank over time and its particles can cause blockages or may cause the flushing system to malfunction. You can just tweak the water level adjustments inside the tank if you want your toilet to use less water to flush. Myth 8: Ice Cubes Can Sharpen Garbage Disposal Blades: Your sink’s garbage disposal unit has no blades. However, the ice will help clean its grooves that impel the solid waste down the waste bin. Myth 9: Flushable Baby Wipes: These supposedly flushable wipes have been observed in too many cases of clogged toilets. Even some toilet paper brands can cause blockages. It's better to throw the wipes in the trash can instead. Myth 10: Toilet Water Spin the Other Way Down in the Southern Hemisphere: Even if this myth were true, which it's not, it won’t make your domestic life any better. Rather than believing these and other myths related to plumbing, it's better to exercise caution and develops habits that will help keep your home’s plumbing system in good shape. It will also be a good idea to schedule a yearly maintenance inspection by expert plumbers to catch any potential plumbing emergency. Read Also: 5 Best Type Of Plumbing Pipe Guide To Choose An Authentic Plumber Service Company
READ MOREDetails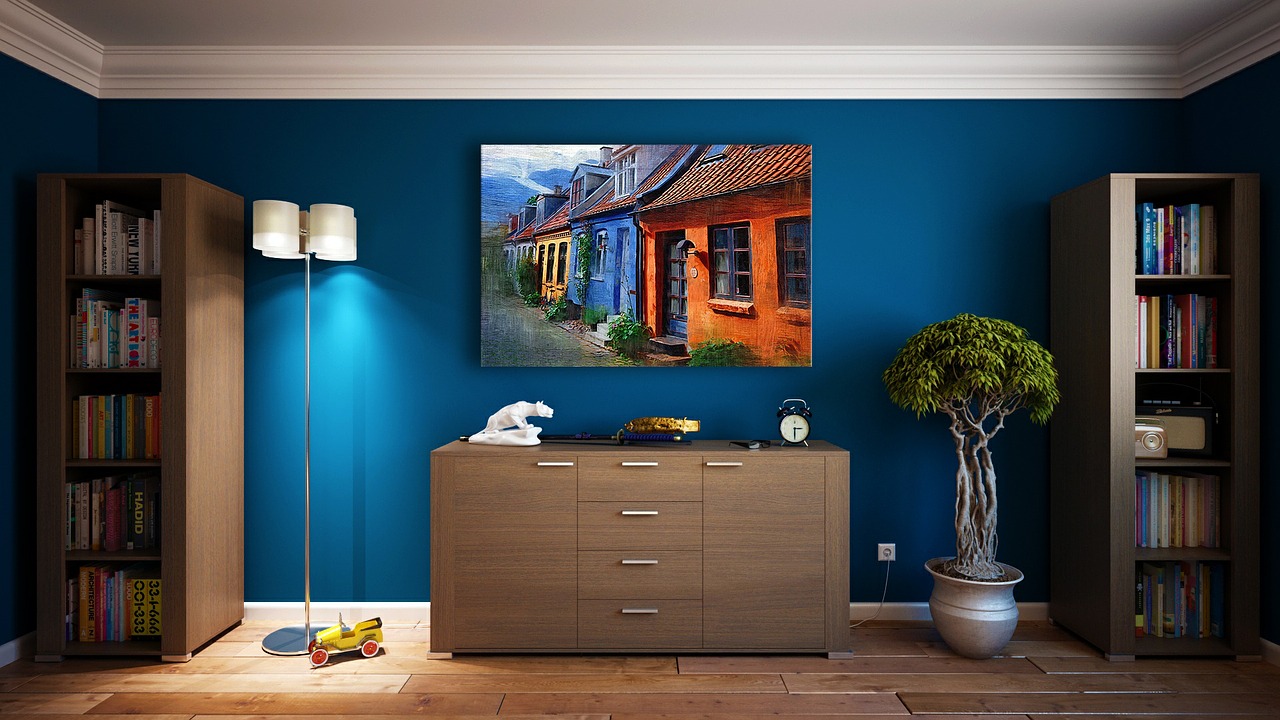
How to Make Your Home Look Like You Hired An Interior Designer
Buying a house is always thrilling and exhilarating for young people or couples when first starting out. Finding a beautiful place to live in the ideal neighborhood can really get your juices flowing and set your imagination running wild. Some people seem to get tripped up afterward when they attempt to turn their new house into a welcoming and inviting home. Does this sound familiar to you? Interior design is a difficult skill to master if you’re new to the game. That’s why it’s often best to hire an interior designer to lend a helping hand. But, if hiring an expert isn’t in the cards for one reason or another, then consider the next best thing. Consider learning a few clever interior design tricks that’ll make your home look elegant, luxurious, and so amazing that your friends and family members will be floored to learn that you didn’t have any professional help whatsoever. If this seems even a little bit exciting to you, please stick around to discover our best expert tips and tricks. How to Use Colors Effectively Like You Hired An interior designer When painting your brand spanking new house to make it look and feel more like a home, remember to use colors effectively. As an example, you should always make it a point to begin the basic color palette like green, blue, and orange. But instead of painting your home with these colors, you can create new colors by mixing and matching. And you can use these freshly discovered colors to paint your walls, windowsills, closets, and kitchen cabinets which you’ll find more info on by clicking the link. It’s going to be easier to mix and match the colors than you think. First, take a well-known primary color like royal blue. Next, find another complementary color and mix them up to create a new and better color. You can do this throughout your entire home to give it a makeover from top to bottom. In fact, you may want to consider the 50/150 rule. One of your batches of paint should be 50% lighter while the other batch should remain 150% darker. Add Eye-Catching and Pleasing Textures Just as important as altering your colors, textures will make a world of difference to the look, feel, and vibe of your new place. When you first walk into a room in your home and get a glance of the place, it may seem like it’s all one shade. But then you focus even further and realize that there are lots of different textures and shades of color all threaded throughout the furniture like the lamps, cushions, sofa, throw rugs, pillows, and everything else. Or maybe you walk into a specific room and notice none of these things. That’s when adding different textures is incredibly important to the overall look and feel of your new place. You can add colorful silk cushions on the couch, shiny and colorful lamps on the desks, a beautiful teal green, royal blue, or brown leather sofa, or whatever your heart desires. Just make sure the different textures and colors go well together and you’ll create a pleasing look that looks like it was created by a professional interior designer. Glass Showers of the Way to Go A traditional bathtub with a shower and a shower curtain is certainly functional and definitely nice to an extent. But if you really want to go above and beyond and make it look like an interior designer designed your place, you should add glass showers to your bathroom. Not only are these showers incredibly attractive, but they are also roomy, spacious, and very accommodating. You’ll have lots of space to move around and breathe and you can install a stand for your shampoos, conditioners, shaving supplies, toothbrush, toothpaste, or just about anything else you might want on hand while taking a shower. Even better, a large shower makes your bathroom looks so much bigger and the glass door is incredibly attractive to boot. So you’ll definitely get a kick out of glass showers in your bathroom and you’ll really enjoy and appreciate this new addition that looks like it came straight from the mind of an interior designer. Final Thoughts Did any of this information help you? Or do you feel even more confused than ever? If we’ve answered some of your questions then you should definitely use this information to design your new house and make it feel like a home. If not, feel free to hire an interior designer to help you make it look absolutely perfect. The choice is yours so we’ll leave it up to you. Read Also: Top Expert Tips For A Stunning Condo Interior! Experts Recommend: Top Interior Design Trends For 2017 5 Factors To Consider In Choosing The Right Floor Colors
READ MOREDetails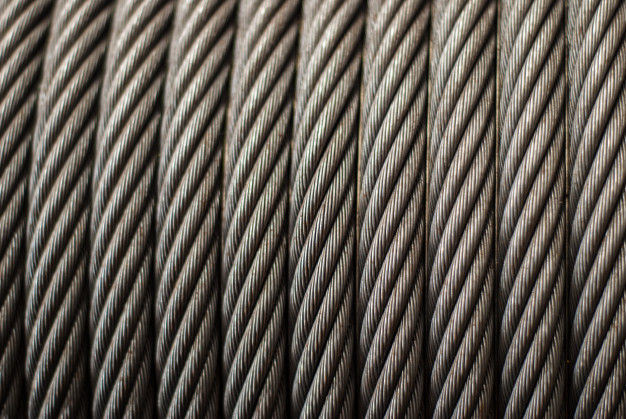
The Subtle Art Of Stainless
All materials have certain qualities. People like have lots of different textures around them. One material that has gained a great many fans in recent years is stainless steel. Stainless steel is a modern material with lots of varied uses. It can be made into stainless steel wire rope, used in cookware and become part of your appliances. Those who have explored the many possibilities of stainless steel are often amazed and delighted at what they find. The Subtle Art Of Stainless: Better Control: Cooking well means following many skills. A good cook is someone who can make the most of any ingredient. Part of this process is having the right kind of tools on hand to do the job properly. For many home cooks and professional chefs, stainless steel items are a must. A set of stainless steel knives, for example, offers the kind of control that people need in order to do many different types of cooking chores. This makes it possible to use the knife carefully in order to cut vegetables with intense precision. Doing so helps any cook make everything from soups to salads and serve it in a way that pleases the eyes. Gorgeous Shine: Shine is one quality that many people enjoy having in their private spaces. A set of appliances with a nice shimmer helps bring in light to any kitchen space. Stainless steel appliances offer a modern look that fits in well with other elements in the kitchen such as ceramic tile flooring and thoughtful shelving. These are also appliances that are easy to keep clean. Given these qualities, it is no wonder that stainless steel is such a popular material for the contemporary kitchen design. Less Likely to Rust: Another great quality of using stainless steel is the fact that it does not rust. Rust is a process that can destroy many different types of materials and render them virtually useless. Using stainless steel overcomes these problems. There are no worries about the possibility of having the material cave in because it was not kept up. People can rely on this material to stay in good shape for as long as they own something. Doing so helps people retain the use of a product and avoid having to spend a lot of time protecting it against the elements. Long-Lasting: People often turn to stainless because they know it will last. This is not a flimsy material that might be subject to all sorts of problems as the person has it in on hand They know they can have knives in their home that are always ready for use. They also know that any items that are made from it are items that will always have a place in their home. There's no rushing to get things fixed because they've broken down yet again. Items made from stainless are items that will last as long as they are needed. Not as Thick: Many common items are quite thick. This can make it hard to work with them. Not so items made from stainless. For example, the blade of a paring knife needs lots of precision in order to properly remove a tomato skin or break down an apple for apple pie. The thin blade of the knife that is made from stainless steel is much easier to use and control properly than a knife that might be bulkier. A person can use a set of stainless steel knives with ease even if they don't have much formal training. Doing so makes it possible for anyone to be a better cook. Recycle With Ease: It can be hard to recycle certain materials such as plastics. They may not break down or find use in other items. Stainless steel can be used again and again. The strength of the material means that it has a lot of uses in many areas of life. People will find it used to create beautiful, towering skyscrapers. They'll also see it used in the home in many areas from sinks to saucepans that can handle heavy heat. This makes it easy to find new uses for this product when you are done with it. Read Also: Asphalt Pavement Maintenance Tips 10 Most Amazing Chemicals To Prevent Rust In Steel
READ MOREDetails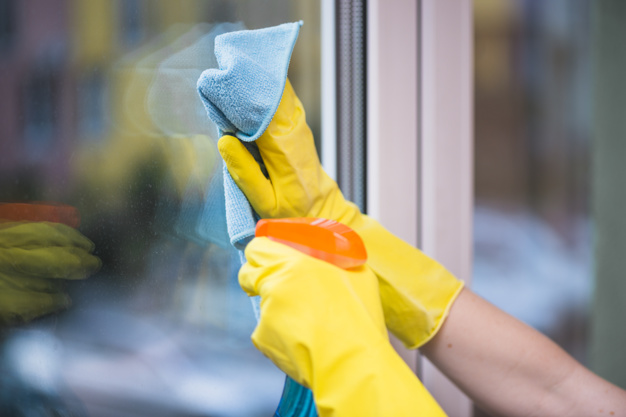
10 Tactics To Maintain Clear Windows
There is nothing as wonderful as sunshine to perk up your mood, create a sense of calm, or rejuvenate your spirit after considerable hard work. After all, hotel advertising utilizes actresses and actors walking out into the sun and smiling to instill a sense of relaxation, but scientific studies have shown that sunshine helps boost serotonin levels in your brain (the chemical that boosts your mood). But, in our busy lives, it isn't always possible to step outside for a dose of sunshine, leaving the majority of people to rely on their windows. And if that sunlight has to fight through dirt, smudges, and everything else that the weather (or children) have smeared over it, there just isn't as much of that mood-lifting light reaching you. Ideally, you should wash your windows twice a year, and despite the clear benefit, that is a daunting task. Here are 10 tactics to clean and maintain your windows. 10 Tactics To Maintain Clear Windows: 1. Gather Your Materials: It is important to have the right materials to clean your windows. Using the wrong ones will leave you with dirt and smudges regardless of your vigorous scrubbing. A squeegee is a superior choice over a rag, which will move the dirt from one part of the window to another. With a squeegee, you can pull all the dirt to the bottom without transferring a single spec. For small-paned windows, you may require a sponge instead of the squeegee to fit in tight spaces. And lastly, you will need several clean rags for sills, sashes, and drips. 2. Cleaning Solution: Next, you will need the right cleaning solution, two gallons of water mixed with 1 teaspoon of dish soap or equal parts water and vinegar. This amount of soap creates fewer suds and thus less soap residue to smear a clean window. 3. Pick the Right Day: Windows should not be cleaned on any day. It may seem sensible to pick a warm sunny one (after all, a little sunshine is beneficial), but the sun will dry up the cleaning solution before it can be wiped away. Therefore, a cloudy day will give you enough time to spray and wipe down your windows without any streaks. 4. Wash the windows: With a sponge or spray bottle, wet the windows with the cleaning solution. For tall windows, or windows on the second story, you may want a ladder, or you can attach the sponge to a long handle or broom. 5. Dry Immediately: And then dry the window with the rag or squeegee. For smaller windows, pull the squeegee straight down, but with larger ones pull the squeegee from side to side to clear off all dirt and cleaning solution. Make sure to wipe all drips as it is important to remove the water before the window dries to prevent streaks. 6. Clean the Rest of the Window: Make sure the clean the sills and sashes as well. They have taken just as much or a beating from the weather (and children) as the glass and deserve a little TLC. 7. Stubborn Stains: Occasionally, dirt takes a little extra work to clean off, but that doesn't necessarily mean scrubbing. Apply either straight vinegar and let it sit for 5 minutes or gently rub the stain with a mineral deposit remover before cleaning normally. 8. Saving Time: If all of this sounds like your whole afternoon, an afternoon that could be spent more enjoyably at the pool or more productively at the office, consider a window cleaning service such as Thistle Perth Window Cleaning. Let someone else do the difficult part for you, while you enjoy all the sunshine benefits. 9. Keeping Windows Clean: With all the strenuous work and cash spent on cleaning windows, maintain them by vacuuming blinds and window sills inside to keep dust from accumulating. 10. Enjoy: Now you can enjoy all the mood enhancements that sunshine brings. It is time to relax and enjoy the room. Or, if you are feeling an energy boost with the newfound light, perhaps it's time to conquer that junk drawer. Read Also: speedwrite Automatic Text Generator Review & Alternatives How to Plant Grass Seed on Hard Dirt? Is Other Consumer Services A Good Career Path In 2021?
READ MOREDetails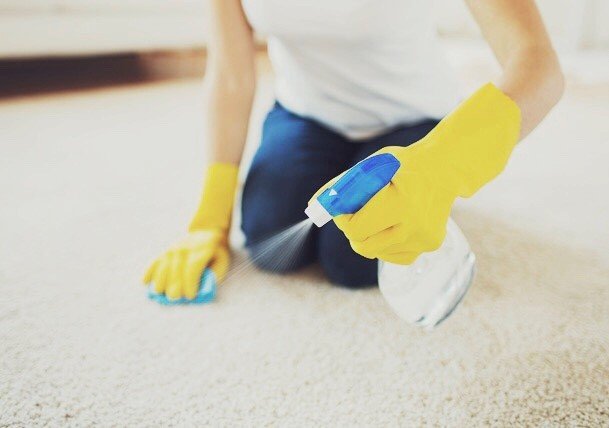
10 Trends About Homemade Carpet Cleaner You Should Know
There are a lot of do-it-yourself enthusiasts in the world. It’s because there are so many things you can make on your own without having to purchase expensive products. There are many homemade solutions that work just as well, if not better than anything you could buy from a store. The 10 trends below are homemade carpet cleaning solutions that can help you in a bind. 1. Food Stains: Dropping something like ketchup on your carpet can be frustrating because of its bright color and the concern that you’ll never fully remove the stain. There are many ways to remove this type of stain. A preferred method is to use a paper towel and a detergent made from liquid soap. After combining the detergent with water, dab it onto the stain gently and allow it to sit for 20 minutes. Then use another paper towel to remove excess water. You can also use a vinegar and water solution for this type of stain. Sometimes food stains are stubborn, so you might need to use the solution more than once. 2. Beverage Stains: There are so many different beverages that can be problematic when spilled on the carpet. This includes juice, coffee, wine, and just about anything else that has a dark color. A great way to remove beverage stains from carpet is by using a cloth soaked with warm water and blotting the area until the substance is completely removed. Sometimes water alone will remove the liquid if it’s taken care of immediately. However, there’s a chance that you’ll need a strong solution, which can also be made at home. You can simply add an equal part of white vinegar to the water before dabbing it onto the carpet. 3. Oil Stains: Oil stains on the carpet can come from a lot of different sources. Sometimes it’s from using creams and lotions that end up on the carpet. Perhaps there are stains from butter or some type of cooking oil. Many types of oils can be removed with a solution made from either liquid detergent and water or vinegar and water, depending on your preference. Once you’ve made your preferred solution, press down with a clot on the stain for just under a minute. It’s important not to scrub because that will enlarge the stain. 4. Tracked in Mud: It’s inevitable that mud will be tracked into your home, especially if you live in an area of the world where there is a lot of rain. That’s usually when you end up entering your home with shoes covered in dirt and mud. Depending on how much mud has been tracked in, the first step might be to sweep up or vacuum the area to eliminate as much mud as possible before applying a solution. Then you’ll need to create a solution with liquid detergent and warm water. This solution should be dabbed onto the carpet numerous times for less than a minute. You should be able to see the difference, but a true assessment will take place after it dries. 5. Chewing Gum: Removing gum from carpet can be tricky, especially if it’s been stuck for a while. A great way to remove it is by placing an ice cube onto the gum until it is completely frozen, which might take a few minutes. You can then break the frozen gum for removal. You’ll then need to use the homemade carpet cleaning solution of your choice to clean any remnants. 6. Pet Accidents: There are few things as concerning pet accidents that seem to occur just before you have company. A great way to remove both any stains and odor is with a vinegar and warm water solution. This mixture should be pressed into the carpet on the location of the accident. The amount of vinegar used depends on the stain, but equal parts of both vinegar and water will usually suffice. 7. Ink Stains: Don’t be intimidated by ink stains. Although they are sometimes difficult to remove, it is possible. Liquid detergent and hot water mixture is the best place to start. You can blot this solution onto the carpet with a cloth, let it sit for two minutes and then use paper towels to dry it. You may need to repeat this process. 8. Strong Odors: Removing odors from the carpet will usually start with vacuuming to ensure you’ve removed any dirt and particles that might be causing the odor. Once that’s done, you can sprinkle baking soda onto the carpet to freshen things up. The baking soda should be left overnight before vacuuming again. 9. Natural Fiber Carpets: Sometimes natural fibers are easier to clean, but they might require extra care. A highly effective solution that can be used for virtually any type of stain on natural fibers includes about two tablespoons of ammonia and a cup of warm water. You can also make a solution with a half cup of vinegar and the same amount of water. Whether or not you choose to use a spray bottle or a bowl is up to you. When using a spray bottle, be sure to spray lightly. 10. Synthetic Fiber Carpets: Removing stains from a synthetic carpet can be handled in several different ways. Prepare a solution that you can pour onto a cloth and gently apply to the carpet. It’s best not to pour the solution directly onto the carpet. You can try a cup of white vinegar mixed with two cups of water to remove the stain for a natural option. You can also try using any liquid detergent that you like combined with warm water. The mixture is half a teaspoon of detergent and two cups of water. These are all great ways to remove different types of carpet stains. You can also get help removing tough stains at carpestology.com.au. Read Also: Five Easy Steps When Cleaning Your Mattress 10 Ways To Preserve Your Carpet’s Beautiful Design
READ MOREDetails
How to Choose a Mattress – 6 Top Tips
Your mattress: Without a doubt, it’s one of the most important things you own. Without a comfy place to rest, your body feels stiff and sore, your mood suffers, and your mind is nowhere near its best. The good news is that choosing the perfect mattress doesn’t have to be difficult and these days, there are great mattresses available for just about every budget. Ready to shop? Arm yourself with our mattress buying tips and you’ll find that it’s far easier to find a bed that’s just right. 1. Consider your sleeping position and size: Do you sleep on your back, or are you more of a side sleeper? Believe it or not, the way a mattress feels has a lot to do with your body position. For example, you’ll probably prefer a firmer mattress if you sleep on your back or your stomach. If you’re a side sleeper, something a touch softer is likely to feel better. Many manufacturers recommend different models for different sleeping positions and more than a few offer mattresses with sides customized to fit two individuals with different preferences so nobody has to compromise. Your body weight has an impact on the way your bed feels, too. In general, the heavier you are, the more likely you are to enjoy a medium-firm to a firm mattress. Slim and/or muscular individuals often find that they feel best on softer mattresses. These preferences definitely don’t apply to everyone but you might find it helpful to look a little outside your usual comfort zone. 2. Read reviews: Whether you’re planning to visit traditional furniture stores or shop for a mattress online, you’ll find that reviews can help you decide which brands and models to focus on and which ones are best to avoid. When reading reviews, keep in mind that no single mattress is ideal for every person; for example, someone who loves the feel of a firm mattress will probably give a soft one a lower rating and vice versa. The best mattress reviews contain plenty of details about everything from the quality of the materials to the way the mattress feels and performs. It’s true that reading takes some time but this is one of the best ways to create a shortlist of mattresses that are likely to meet your criteria. 3. Look for a reasonable trial period: If you’ve ever found yourself searching a traditional store for the most comfortable mattress, you know just how awkward it can feel to test different models right there and then. You’re probably wearing your shoes, you’re not in your favorite comfy PJs, you don’t have your special pillow, and the list goes on. Luckily, mattress manufacturers have come to realize that the old-fashioned method for choosing the best mattress just doesn’t work. That’s why many now offer trial periods that give you the opportunity to actually sleep on the mattress at home, let your body get used to the new sleeping surface (yes, this is a thing!) and return the mattress if it doesn’t suit you. Trial periods vary. Some are just a couple of weeks long and others are surprisingly generous; for example, a few offer one-year trial periods. 4. Consider different options: Remember when memory foam mattresses were the latest and greatest option available? They’re still very popular and if you love the way a memory foam mattress feels, then go for it! Some other choices include latex mattresses, organic mattresses, and ultra-comfy hybrid mattresses that combine the luxurious “floating” sensation of a memory foam mattress with the support and bounce associated with traditional Best innerspring mattress. There’s more: Some mattresses have to be supported by a traditional box spring, some are fine for placing on a plain platform bed, some are OK for those who prefer to have their mattress on the floor, and some are ideal for pairing with an adjustable base. Knowing how you’d like to set up your mattress isn’t something most people think about, but it’s key to shopping for the best one. 5. Look into temperature control and other unique features: In search of a little something extra? While advanced features can increase the cost significantly, you might like what you find when you look beyond standard options. Many of the newest mattresses offer unique features like special cooling fibers, cooling gels, and even covers that can be integrated with your smart home for pre-warming, better temperature control, and more. Some smart mattresses can give you insight into your sleep trends, some have built-in alarms, and some have adjustable firmness. As time passes, we’ll probably see even more unique mattresses with amazing features. 6. Recognize that a higher price doesn’t always mean higher quality: …At least if you’re shopping online! While most traditional mattress stores inflate their prices in order to cover the cost of doing business, it’s possible to get amazing mattresses online at about the same cost as a lower-grade one from a brick and mortar store. Read Also: 6 Myths Of Mattress You Must Know For Sure The Best Memory Foam Mattresses For Staying Cool This Summer
READ MOREDetails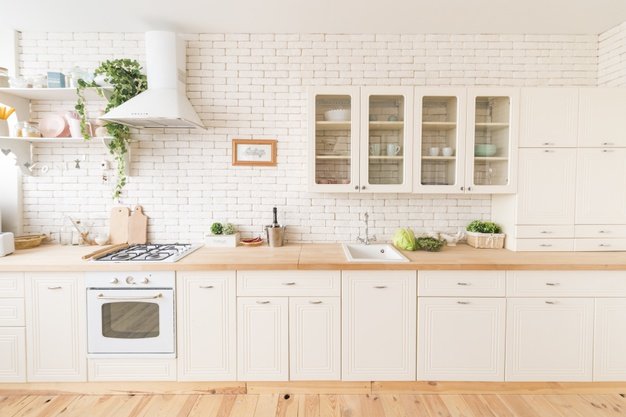
Best Practices That Extend The Life Of Your Appliances
Replacing your home appliances might not be an appealing endeavor because it carries a hefty price tag. When your appliance has been experiencing frequent breakdowns, you know that unit replacement is the only option you have. There are factors that determine the longevity of your units such as the brand, type, and age. Home appliances can serve you for many decades. However, the manner you are using your home appliances can either shorten or lengthen their lifespan. Your air conditioner, for instance, needs regular servicing. An AC repair technician should inspect your unit to find out if there are underlying problems that can cause the unit to breakdown. As for other home appliances, giving them TLC should be the best practice to follow. Even simple practices can definitely make a huge difference in extending the lifespan of your appliances. Clean and unplug your appliances: The simple and yet most frequently forgotten practices are cleaning and unplugging your appliances when not in use. It is important for your appliances to be as clean as possible because dust, stains, and grease can negatively impact your appliances. Whether it is a food processor, oven, fridge or air conditioner, all of them needs regular cleaning. When you are finished using an appliance, do not forget to clean it right away. Cleaning your home appliances might have already slipped your mind but it is an important practice that can keep your appliances in tip top shape. Keep your washing machine at a matching level: All appliances have moving parts which are the ones that wear out first. Even your washing machine has these moving parts and they need to be well taken care of so they stay fully functional. Your washing machine can only get longer lifespan if you consider keeping it level. Check the surface of your washing machine using a spirit level. Be sure to adjust the legs so you can keep them at a matching level to prevent fewer breakdowns and to maximize the performance of your washing machine. Your washing machine's internal motor and drum will thank you for it. Avoid putting firm items your food processor: Your food processor allows you to blend ingredients and speed up food preparation. However, your food processor's lifespan can be shortened if you use it for cutting hard ingredients like nuts or coffee beans. These ingredients might blend but they can have a negative impact on the food processor's blades. Avoid blending them whole. You should cut them into smaller pieces before you put these ingredients in your food processor. Your food processor will continue to serve you if you use it the way it is intended. pre-wash dishes before Placing them in the dishwasher: You can save time when you use your dishwasher for washing dirty dishes. However, if you directly put your dishes in the dishwasher without pre-washing them, this practice can do serious damage to your appliance. Dishes with sticky food items need to be prewashed as the dishwasher might not be able to wash them off completely. Not only will you reduce wear but also ensure that your dishes are free from grease or oil. Scheduled maintenance: Regardless of your home appliance, maintenance is sure to prevent untimely repairs or replacement. While home appliances are expected to last for a decade or even more in some cases, your appliances will stop functioning as they should if you do not consider scheduling regular maintenance. The purpose of maintenance is to ensure that minor problems are properly addressed before they become severe. Problems with your appliances that are not immediately addressed can be the reason for considering replacement earlier than you expected. While DIY maintenance can save you money, there is no guarantee that you have thoroughly inspected all aspects of your home appliance. You still need to consider calling a professional to do the job. They have the tools, knowledge, and expertise to ensure that your appliances will be in working condition. You do not have to buy new appliances if you know how to take good care of the existing ones. By following these practices, you can be sure that your home appliances will make your life easier even in many years to come. Read Also: How Can Appliance Repair Services Help You Smart House Technology For Saving Energy 5 Easy Ways To Detect A Water Leak In Your Home 7 Smart Tips To Improve The Efficiency Of Your Refrigerator
READ MOREDetails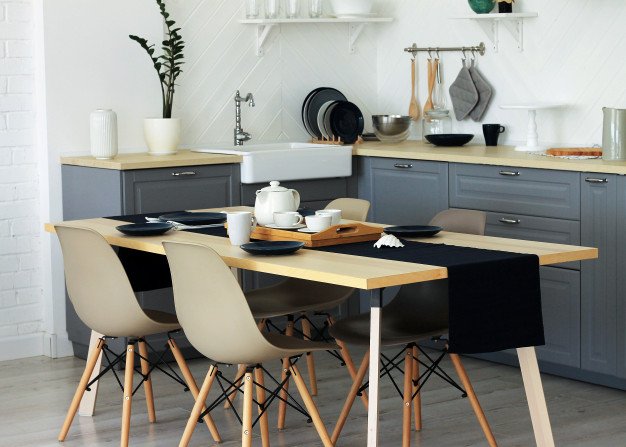
Tips To Care For Your Live Edge Wood Table
Live edge wood furniture is where the carpenter or the craftsman leaves the natural edges or incorporates them into the design. Live edge wood design is the new rave in town. This is because of its unique and stylish properties. Live edge wood can be used to make both furniture and decorations for your home. However, the thing about live edge wood furniture is that it can be hard to clean and maintain. Live edge wood is often left with visible knots and pits in addition to an uneven surface. These qualities are what make live wood furniture attractive. Below are some tips to help you keep those edges in shape. 1. Dry dusting: Use a microfiber cloth to dust off the edges of the live edge dining tables or any other furniture you have in your home. A microfiber cloth is best because it is soft and highly absorbent. You can be sure to get the dust off every corner or rut on the furniture with a microfiber cloth. You should always dry dust your live wood furniture regularly. 2. Do not use harsh cleaning products: Natural cleaning products are the best to use when cleaning your live edge dining tables. Most people are advised to use vinegar and warm water. Both elements should be mixed in equal parts and then use a microfiber cloth to clean the furniture. Just dampen the fabric with the mixture and then go ahead and start cleaning. Use your finger to reach the grooves of the wood. 3. Polish: Polishing wood always makes it look new. However, when it comes to living edge wood, it is typical for the wood polish to gather in the pits of the rugged edges of the timber. This can make your live wood look old and outdated. When using wood polish on live edge wood it is advisable to avoid the cracks and stick to the flat surfaces. Polishing your live edge wood furniture also helps to cover small stains and scratches. 4. Avoid moisture damage: When you have wood furniture in your house you will understand just how essential coasters are. Live wood furniture has a glass-like finish. It is common for homeowners to assume that the furniture can resist damage from water or moisture. This is not so, and you should use coasters or table mats on your live wood furniture to protect it from any moisture damage. A lot of live wood furniture pieces are got from waste wood. These are usually pieces of wood that were to be thrown away. Artisans have found creative ways to turn live edge wood into beautiful art pieces. Any live edge wood piece that you buy is enough to make a statement in your home or office. Furniture design companies today are also making custom live edge wood furniture for their customers. You can look at Dumond’s Furniture website to view their catalog and get ideas of tables, cabinets, made with live wood. They also have ready-made designs that you can order. Read Also: Why You Need A Solid Wood Office Desk Furniture In Utica: Benefits Of Buying Locally-Made Products What Species Of Wood Is Right For Your Wine Cellar Furniture?
READ MOREDetails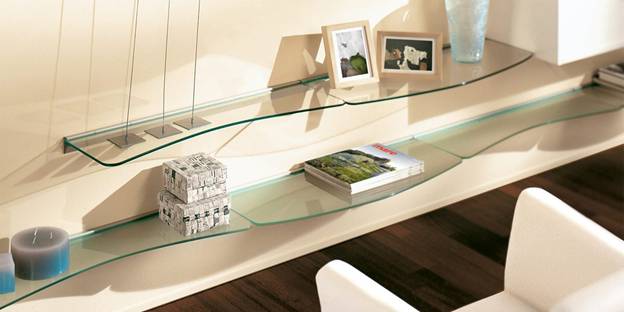
Create Wall Mounted Glass Shelves with Custom Cut Glass
Mounted Glass shelves are very handy in improving the interior décor of your space in a classical manner. Glass shelves have been in use for many years now and technological advancement has led to the generation of advanced glass version with more desirable features and greater strength. This implies that glass materials today can support more weight and withstand higher pressure than earlier pure glass versions. One important feature of glass shelves is that they can fit the walls of rooms and there are many designs from which one can pick from. The main consideration when choosing the best wall mount glass shelf design is the purpose of the shelf as well as where and how the shelf will be mounted to the wall. This paper discusses the various designs of wall mount glass shelves that can be created using different custom cut glasses. The shape of Glass Shelves The glass shelves can be made with glass cut in different shapes. Rectangular and square glass shelves are the most common. Rectangular glass shelves can be installed in various places like the bathroom, in the living room, kitchen, office, and in the bedroom as well. Square shelves are mostly installed at the corners of rooms to provide sufficient anchoring for shelve. There are also specific shapes of glass shelves designed specifically for installation at corners. They include triangle, corner pentagon, and quarter circle glass shelves. It is important to consider the purpose of the shelf when choosing the glass material for the shelf to ensure the material chosen can support the required load without breaking. Glass shelves can also be L-shaped and these are fit into or onto corners of rooms. There are many types of glasses to choose from for wall mounted glass shelves. Tempered glass is the commonly used type of custom cut glass for glass shelves. This type of glass is hardened to increase durability and resistance to high temperature and pressure. Tempered glass also breaks into blunt square pieces that are less likely to injure people as opposed to angled sharp pieces obtained when ordinary glass breaks. The other suitable glass type for wall-mounted glass shelves is the acrylic glass. Acrylic glass consists of a very transparent material that allows the glass to allow more light to pass through it than normal glass. The downside of acrylic glass is that it scratches easily but the scratches can be removed by buffing. Other types of custom cut glasses suitable for glass shelves are low-iron glass, textured or frosted glass, as well as colored glass. Various Types of Mounted Glass Shelves Uses There are also various wall-mounted glass shelf designs dependent on the shape of the horizontal cross-section of the glass. Some glass shelves are bent like the eclipse and triumph shelves. Eclipse glass shelves are slightly curved forming an arc while the triumph glass shelves have a bookend on one end, and are designed for keeping books and magazines. Another glass shelf type is the Fiora glass shelf which has a straight surface like the rectangular glass shelf. Fiora glass shelves are available in clear and colored glass materials. The other type of glass shelves is the Roya glass shelf which is simply rectangular in shape. Bent glass shelves are very decorative and are mostly used in the bathroom for keeping light-weight objects. Installation or Mounting to the Wall The glass shelves can either be mounted directly into the wall of the building or attached using brackets. Glass shelves with straight edges are the most suited for direct fixation into the wall of the building. When fixing glass shelves directly to the wall, a groove is first to cut into the wall using a chisel and hammer if the wall is masonry. The glass shelf is then fixed into the groove and a suitable adhesive applied to stick the glass to the wall. The other types of glass shelves are attached to the wall using brackets. The brackets are made of a strong durable material like stainless steel. Brackets are screwed or riveted to the wall and the glass shelves fixed to the brackets. Other types of glass shelves can be mounted to a frame which is then fixed to the wall. This type of glass shelves is manufactured as a set that is first connected together then fixed to the wall. Mounted Glass shelves can also be hanging at the top. This type of glass shelves is referred to as the hanging glass shelves. The shelves are fixed to a frame that is suspended from the top of the building. Hanging glass shelves are manufactured as a set in the factory and are suitable for rooms where the wall is not strong enough for mounting the glass shelves directly to it. Also, when the walls are filled with other things, using the hanging glass shelves provides extra space for storing stuff. Choose the Right Glass Thickness As stated in the introduction, the intended purpose of the glass shelf and where it will be installed determines the type of glass material that will be used. The material chosen should be strong enough to support the anticipated load. The thickness of the glass also determines its ability to support a given weight with thicker glass shelves being able to support higher loads than thinner glass shelves. It is also crucial to consider the material that makes up the wall on which the shelf will be mounted as it has a direct relationship to the weight that the shelf can support. Brackets should be attached to hard materials like concrete, or masonry walls to ensure maximum strength. Mounted Glass shelves have many designs from which people can choose from. In addition to providing more storage space, glass shelves including bent glass shelves, add aesthetic value to a room making it possible to display one’s collections with ease. The shelves allow light to pass through them helping to maintain the room well-lit which helps to brighten the mood of the place. One can also consider finishing the corners of the shelves in different shapes to make them more stylish and appealing. When installed properly, glass shelves match perfectly with any interior design theme. Read Also: 7 Unexpected Ways to Use Glass and Wood for your Home 10 Fabulous Ways to Update Your Home Interior Using Wallpaper
READ MOREDetails
5 Tips How to Live Clutter-Free In a Small Space with Kids
Despite kid's petite size, they occupy a considerable amount of space including their toys and games, specifically if you live in a small space apartment. This can be a never-ending puzzle with each additional child if you don’t find your way to place all of the stuff where it is meant to be! Are you wondering how to take the maximum usage of the spare areas in your apartment? Then, take a look at the 5 most useful and practical tips to use all empty areas in your small space: Make Your Living Small Space Kid-Friendly: Making your apartment jam-packed with a lot of loose showpieces and vases is a big no-no. It looks not only messy but also not suitable for kids in terms of safety. Look at some interesting tips to make your small space looks more open and expanded: Do not put plenty of stuff together in every corner of your apartment. Instead, put small pieces of stuff maintaining the theme as well. You can even use colorful baskets in your living area to keep the trash away instantly; it will help you in keeping the area clutter-free always. Instead of using glass pieces and vases, use a wooden one! It will safeguard your kid from an accident while he is crawling or playing all around in the apartment. Use Smart Storage Ideas: If you still struggle with keeping rarely-used things within your home, then self-storage units are at your rescue. You can also choose an ideal size for your stuff with different sizes available. People at the facility understand any concerns you might have and make the process easier than you would think. Regardless of the weather, they make sure that your valuable storage remains safe and secured. These units are not only meant for keeping your stuff near you but also they are helpful in terms of relocating. Take Advantage of the Usage of Vertical Spaces: Making the maximum use of vertical spaces, whether it is in your bedroom, kid's room or kitchen is one of the best ideas! It will make your small space more presentable and well-organized. You can buy shelves and cupboards, or you can consider creating customized units with accurate dimensions, placing them in the most suited areas. It will not only make your apartment look wider and open, but also gives you plenty of space to throw on random stuff inside. Keep It Minimal and Classy: As we have already discussed above, that is, try to keep as minimal stuff as possible. For instance, instead of keeping big indoor plants on floors, put tiny ones on your shelves keeping in mind your kid's safety. Likewise, instead of putting huge and heavy furniture, use small customized furniture that you can lift without many efforts. To give your kids the maximum area to play in the living room is to show some creative side in wall designing and paintings rather than focusing only on floors. Play With Colors but Do Not Overdo It: You probably got numerous interior designing ideas on the internet, but do not splurge your money without even considering whether or not it suits your apartment. Keep it simple instead! Now, it doesn’t mean that you use only one color, but try to use subtle colors. Let's say, white color is something that looks more spread-out and gives an illusion of a bigger space. When it comes to kids, bright colors will be more likely to make them joyful, so, why not give it a try into your kid's room! Read Also: 4 Tips For Finishing A Basement 5 Home Decor Ideas For The Times When Kids’ Grow Up 7 Ways To Add Character And Style To Your Home 5 Ways To Maintain And Decorate The Study Room For Kids
READ MOREDetails
8 Ways of Making the Best Use Out of a Small Office Space
What can be way more annoying than a hectic day, spending an average of eight hours sitting in a congested workspace? It’s stuffy, suffocating and most importantly, it’s unappealing to the employees and the visiting clients alike. Often it happens that one might lack the budget to shift to spacious premises but not to worry, londonofficespace.com shall walk you through 8 dynamic ways to make the best use out of small office space. For now, let’s familiarize ourselves with these eight useful ways of decluttering space- How Can You Use The Small Office Space? There are several ways you can make use of the small office space that can help your business to grow further in the right direction. 1. Consider using Shared Desks: Rather than having individual desks for your employees consider using a shared desk. In this way, not only will you be able to engage more people with work but make proper use of the limited space available. Oh and also, it will save you a good amount of money so you can save up for a bigger office. 2. Create Tea Points: Seldom we would omit the café or kitchen within a compact zone but it can dishearten the people spending a significant portion of their time working. Therefore, consider creating tea points where there will be an instant coffee brewing machine, a jar of cookies, and tea bags for everyone. Not only does it save up more space but also delivers a modern outlook. 3. Bring in a professional space planner: While planning on setting up an office in a small space can be difficult, professional space planners finish the job real quick. Therefore, we suggest you call in a professional space planner who can help you with the setup of the furniture, electrical outlets, and all the necessary devices required. If you are thinking this will cost you more money, moving onto bigger premises with a limited budget will cost you more money. 4. Your office needs storage walls: A small spaced office and tons of cabinet to fit in will eat up your already-limited amount of space. So, by installing storage walls would save you a lot of space, in fact, it will create more space for all those important files that need to be preserved at all times. On a positive note, the storage wall gives compact office spaces a fluid and contemporary aura. 5. It’s the era of wireless technology, utilize it: While those bulky machines even 10 years ago took up all the space, wireless technology has made the best use out of even the smallest of smallest places. Consider replacing those cables with laptops, they come at the same price yet takes away lesser space than the other. Use Wi-Fi connection throughout your office, in that way you won’t have to keep those wires lining all over the floors. So, make the best use out of the wireless era. 6. Paint your walls bright: It is a well-known fact that bright colors make any room appear larger than it really is. In the case of small office space, one should consider bright colors to paint the office walls to make it appear more spacious. For a suggestion, you may consider painting your walls in your brand’s color just to make your visitors more familiar. 7. Rely Less on Papers and files: As we are more into preserving tons of important paper documents in files and having them stack up year after year, not only does it use up space but the chances of causing damage to improve. Thus, work smart and start converting those important paper documentation into digital format, and save them on computer hard-drives. Print out only those specific docs that need printing or sending them via mail. 8. Make Use of the vertical space: Well, the main issue with small office space is that it mainly lacks horizontal space, which is why the space against the walls could really serve your purpose. Build wall racks or cabinets that touch the ceiling inside which you can store away everyday essentials. Have separate segments for files, papers, office accessories, in fact, you will have space for all those trophies, certificates and other accolades framed in a picture displayed against the glass. To conclude, we suggest that you go through each and every important consideration, and if necessary, consult a reliable space planner to completely utilize any small office space. Read Also: 5 Awesome Gadgets For Your Office Office Spaces – Which One Is Right For Your Business? Investing In Office Space For Your SME: What To Consider
READ MOREDetails
What You Should Know about Water Filter Systems
In most parts of our world, drinking water from the tap can be a hazardous affair. Water filter systems can work well in your favor. The reality is that most of us don’t know much about the water we consume, whether we are bathing in it or drinking it. We are just grateful to open the tap, and there is running water that has been treated to prevent waterborne diseases. But does that make your water safe? Municipally tested water is generally safe to use and consume once it goes through the vital processes in the treatment plants. However, as it passes through the old pipes that ferry it to your tap, it likely collects some contaminants that end up in your glass. Water filter systems increase the purity of the water you consume. They do this by removing some of the following elements. What You Should Know about Water Filter Systems: 1. Rust: Generally, water pipes in cities worldwide have been in operation for many years, and although they may receive regular servicing, they can begin to rust with time. Water filtration systems that contain a white filter demonstrate the amount of rust in the old iron pipework as they turn dark brown from the sediment they pick up from the pipe. While that is disgusting to see, it is also proof that filtration systems help clean water further. 2. Chlorine and Chloramine: Too much chlorine in water can lead to health issues like poor gut health. While chlorine is used to kill bacteria in the water, it has been proven to worsen the asthma condition and even be the cause of developing asthma. Some companies are opting to use chloramine, a mixture of ammonia and chlorine because unlike chlorine, it does not evaporate during water treatment. However, you also cannot remove it by boiling the water or even distilling it. Water filter systems can get rid of chloramine, ensuring the water is pure and safe for drinking. 3. Plastic: Plastic particles and fibres can find their way into the water because they come from items in our everyday lives. Plastic is present in the clothes we wear, containers like plastic bottles and even in the air as contaminated synthetic air from air conditioners and fans makes its way into the atmosphere. The most commonly found plastic in the water is polypropylene. 4. Fluoride: Fluoride is one of the most challenging water contaminants to remove. However, it can be removed using reverse osmosis and distillation water filtration systems. The use of a special arsenic and fluoride reduction medium known as activated alumina is also effective. Both the reverse osmosis and distillation water filter systems remove at least 95% of the fluoride in the water supply. 5. Heavy metals: The presence of lead and other heavy metals in water posses the threat of possible life-changing conditions like learning difficulties and mental/physical retardation in minors as well as the risk of high blood pressure, heart disease, and strokes in adults. Water filtration systems can remove up to 93% of the lead that finds its way into the water supply. The systems also eliminate other dangerous metals like copper, aluminum, and mercury. Conclusion: Apart from reverse osmosis and the distillation water filtration systems, there are granular activated carbon and IE treatment systems to suit your needs. Regardless of the type of unit you prefer, the best water filter system must have independent quality control approvals from industry standard-bearer organizations. That is to ensure that the resulting water is better, safer and healthier for consumption. Read Also: 5 Best Type Of Plumbing Pipe Pros And Cons Of Ductless Cooling What To Know About Your Furnace Filters
READ MOREDetailsPopular

Technologies For Creating A Startup Idea
20 Feb 2023

How to Download Facebook Videos on Android?
07 Feb 2019

7 Rules of Effective Ecommerce Web Design
28 Jan 2021
