If you recently obtained your Michigan CPL license, congratulations. You have made a smart and responsible move to help ensure you have the ability to protect yourself, your family, and your friends when facing an imminent threat of great bodily harm. Now that you have your permit, you might wonder what to do next.
Properly and legally carrying a concealed firearm requires more than having a pistol and a permit. You also need the right gear. Let’s take a closer look at the concealed carry gear you should obtain to legally carry concealed firearms all year long.
Concealment Holster To Secure Your Firearm
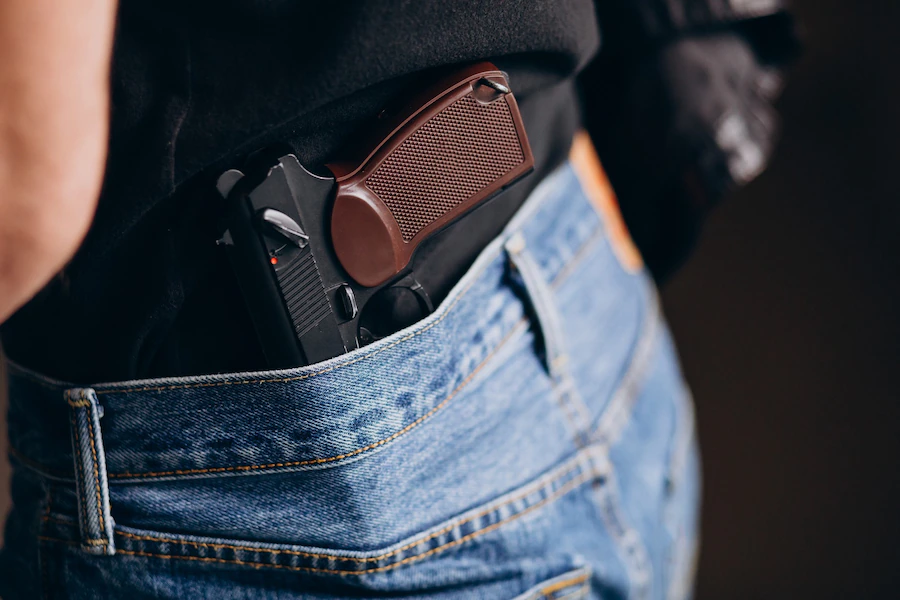
You should never tuck a pistol in your pants and count on the belt to keep it in place. You certainly do not want to carry a handgun in your pocket, because that could lead to an accidental discharge that lands you in the hospital and could trigger criminal charges. Instead, you need to obtain a dedicated concealment holster that enables you to carry your firearm securely and without tipping off others to its presence.
For example, a Glock 19 concealment holster should enable you to carry while securing the firearm comfortably. The holster might fit inside the waistband of your pants and have a hook and a belt loop to keep it in place. It also might fit outside the waistband, but you would need loose clothing to cover it – or do open carry where it is legal.
You also might try a shoulder holster that fits comfortably beneath a loose-fitting jacket or shirt, and a belly band holster could keep your firearms on your hip. A pocket or ankle holster could be useful for carrying a backup firearm, such as a snub-nose .38 or Ruger LCP. You might also use one type of holster during the hotter summer months and another during the colder winter weather.
Your clothing greatly affects your ability to carry a concealed firearm competently. It also makes a big difference in whether or not you are legally carrying concealed. Clothing that fits too tightly could make drawing and using your firearm impossible in an emergency. That consequence might be deadly.
You also need to wear concealed carry clothing that does not cause imprinting that clearly shows you have a firearm on your person. Loose-fitting jackets and shirts are ideal for carrying a concealed firearm. They give you a natural look without revealing the location of your concealed weapon. A normal-looking outfit that fits well while concealing your firearm is the perfect choice for carrying a concealed firearm.
Nabamita Sinha loves to write about lifestyle and pop-culture. In her free time she loves to watch movies and TV series and experiment with food. Her favourite niche topics are fashion, lifestyle, travel and gossip content. Her style of writing is creative and quirky.
In today's fast-paced world, stress has become an almost inevitable part of daily life. Balancing work, family, and personal commitments can leave us feeling overwhelmed and drained. However, investing in self-care can be a game-changer, helping us to manage stress and improve our overall well-being.
In this article, we will tell you the best way to invest in yourself so that you can have a more stress-free daily life. Whether it's small daily habits or bigger lifestyle changes, these tips will help you take care of your mental and physical health so you can handle whatever life throws your way with a bit more ease and a lot more calm.
How To Invest In Your Self?
When you start doing some research on the internet or ask your friends and family for advice on how to invest in yourself, the search results and the suggestions can overwhelm you.
On the other hand, Investing in a personal trainer or therapist, while beneficial for many, is both expensive and a big commitment. They are good options for making change, but if you are just beginning your self-care journey, there are plenty of ways to start small.
Paying a professional isn’t the only way to reduce stress and better your wellbeing. There are small ways to invest in yourself daily without spending too much money or time. Not only will it help in your personal growth and well-being, but it will introduce some calm to your busy week:
Your Closet
Deciding what to wear is a stressful part of most mornings, particularly before work. Digging through your options may slow you down and even cause you to be late. Giving yourself a good wardrobe selection doesn’t have to be costly.
Start by investing in essential basics like tees you can dress up or down. Having a couple of sweaters for layering will ease your transition into the colder seasons.
For those working from home, ensure you have a few cozy essentials like soft sweatpants and sweatshirts. Having these options in your closet will make it easier to make a quick decision in the morning.
Having good undergarments may relieve your stress as well. Comfortable socks that don’t slip down while you walk can prevent blisters. No-show socks will add comfort to shoes that don’t cover the whole foot.
Investing in high-quality underwear will enhance your comfort during the day. For women, purchasing a set of period underwear will prevent stress during that time of the month. These aspects, little by little, will relieve certain areas of stress that you may experience on any given day.
Skincare
Nobody likes waking up in the morning with a fresh pimple, and nothing causes that early morning stress like trying to hide a breakout. Products that are good for your skin and prevent breakouts may save you from having a last-minute panic.
There are also products like serums and oils that can help you treat specific needs. Investing time into your skincare may calm your anxieties and make you feel better about yourself over time.
Skincare is an opportunity to improve skin health while also making you smell and feel good. Buying quality body wash and lotion to fit your needs will make you excited to do your morning and evening routines.
Using a special scrub on important days puts a spring in your step, while calming lotions wind you down. Whether you have special skin concerns or just need a way to destress, skin care will make you feel more comfortable and confident in your body regularly.
Meal Delivery Service
For many people, planning meals and grocery shopping is a large source of stress. For those with children, making three meals a day requires even more time and effort. Even if dinner is the only meal you cook from scratch, it can still be a lot on your plate, especially after finishing a day at work.
Meal or food delivery services make the meal planning process easier for those working full-time. Even if you’d prefer to pick your own recipes, services like Instacart or Doordash will help you save a few hours every week by delivering groceries to your door.
For people with social anxiety, it also saves you the stress of walking around a bustling store. Those with kids can stay home and avoid managing young ones in public. No matter which subscription service you use, you'll be able to use your time to focus on family or self-care instead of meal planning and shopping.
Self-care Apps
When you have a busy life and are always on the move, it’s a challenge to fit in new self-care habits. Self-care mobile apps have allowed people to fit new routines into their pockets. Apps like Calm enable people to have guided meditation tools at their fingertips.
Meditation apps will introduce intentional relaxation into your routine. Including this routine right before bedtime may even encourage better sleeping patterns. Fitness apps can track your sleep and aid you in building those good habits.
Self-care apps on the market include more than just meditation and fitness. There are plenty of journaling and organizational apps that will motivate anyone to introduce a new habit into their daily life.
Journaling apps are a good way to relieve stress by getting all your thoughts out, especially after a long day. Organizational apps may help you better schedule your tasks for the week and will assist with time management. No matter your needs, you can find an app that aids your mental well-being and reduces stress in your day to day.
Invest In Yourself: It Will Be Worth It!
There are plenty of ways to invest in your self-care routine that don’t involve spending large sums of money. There are even more options than listed above that may help you relieve your stress and improve your mental well-being.
Whether it’s through changes in your appearance, planning, or tools you use, you can make positive changes in a number of different ways. It’s up to you to determine what works best for your needs and lifestyle, but regardless of your choices, your self-care habits will be worth the investment.
Read Also:
How Music Therapy Empowers Recovery in Substance Abuse Treatment
10 Tips on How to Ditch the Stress and Start Living a Peaceful Life
10 Health Problems Eased by Yoga
Inspirational quotes are, well, inspirational. But they usually don’t offer any great insights into the minds of the people they’re attributed to.
When they’re properly attributed at all. More often than not, quotes are apocryphal, which means they’re attributed to someone famous who didn’t actually say them (or, at least, wasn’t the first).
So let’s dispense with the inspirational quotes and go deeper. Let’s try our best to understand what actually makes successful people successful. Specifically, people who’ve founded and scaled successful businesses.
These Five Little-Known Founder Habits Are The Perfect Place To Begin
There are multiple five little-known founder habits that will be going to be perfect to begin a successful roadmap. Below I am going to discuss the five little-known habits that are a perfect place to begin.
1. Staying Humble, No Matter How Far You Get
Many entrepreneurs have humble origin stories. Throw an iPhone in Silicon Valley and you’ll probably hit someone who works for a company started in some guy’s garage.
What sets truly humble entrepreneurs apart from everyone else is what they do after hitting the big time. Founders like Steve Streit, who famously launched fintech pioneer Green Dot from his home, managed to stay down to earth after his company became a market leader.
Truly humble founders also tend to know when to step back. Streit now lets others run Green Dot and devotes his time to philanthropy and early-stage investing. Many others, from Bill Gates to Craig Newmark, followed similar paths.
2. Never Being Afraid to Ask Questions
There’s a fine line between projecting competence and being overconfident. The first is a good thing, on balance, for founders. The second is not.
What does this have to do with not being afraid to ask questions? Well, competent people are more than happy to ask questions they don’t know the answer to. That’s how they learn.
Overconfident people are scared of looking like they don’t know something, imagining it to be a sign of weakness. But the opposite is true — being so scared as to be unwilling to learn is a sign of weakness, and likely to hold you back from the success you might otherwise deserve.
3. Being Good at “Two Things” (Instead of One)
“Cross-disciplinary” capabilities are in high demand among founders (and their backers) these days. What this means is that investors and other stakeholders prefer leaders who are neither “a mile wide and an inch deep” nor “an inch wide and a mile deep.” People who can do at least two things very well — say, systems engineering and public communication, or marketing and supply chain management — tend to be better placed to lead growing teams.
4. Cutting Out the Business Jargon
A word of advice: Don’t use terms like “cross-disciplinary.” Instead, say “being good at two things at once.” Sure, it’s more of a mouthful, but everyone understands what you’re talking about, and you don’t sound like a know-it-all. Even if your down-to-earth style turns off industry insiders, it’ll endear you to the broader market.
6. Building a Team That Reflects Your Audience
Warren Buffett famously hires for “integrity first.” But integrity alone won’t get your team over the hump. Nor will competence alone, though it certainly helps.
The most resilient teams have a broad range of skills, perspectives, and influences, so much so that they can be said to accurately reflect the composition of their addressable markets. In a word, they’re as diverse — or nearly as diverse — as the broader public. Anyone who tells you “diversity” is a dirty word is selling something you don’t want to buy, or perhaps doesn’t understand the true meaning of “diversity.”
What’s Your Hidden Superpower?
Self-promotional founders might exaggerate a bit and call these six little-discussed habits “superpowers.” If they make the difference between success and failure, well, that’s a reasonable position to take.
Let’s turn the conversation back to you. Thinking about your own strengths and weaknesses, your own routines and work habits, does anything you do (or feel you’re capable of) rise to the level of “superpower”?
Probably so. The bigger challenge, once you’ve identified your own superpower, is to figure out how it translates to success in life and business. You’ve got the goods; now it’s time to use them.
What Are The 10 Habits Of Successful People?
Did you know that some successful people want to be involved in cultivating certain habits? Below, I will discuss the ten habits of successful people that will help you become successful.
1. Organization
One of the most significant habits of successful people is organization. In this case, organization includes planning and setting priorities along with goals. After researching the fact, it has been seen that Addicted2Success.com’s founder, Joel Brown, says that he always used to follow his self-made to-do list. This helps him to become a successful person.
2. Taking Action
Did you know that success comes from taking Action? Ultimately, taking Action is one of the most significant habits of almost every successful person. It means a person who dreams of achieving success and goals always has calculated plans. In this case, they also consistently implement their calculated plans. After that, they can see the future’s bright and prosperous light, which usually fills with joyful motivation and omnipotence.
3. Relaxation
When this is about relaxation, then it means not just taking naps. But this points to meditating for long hours by closing your eyes. This helps you to become successful in an easier manner. After all, meditation is a big medicine to get your life back; even this can turn your messy thoughts into something streamlined. This will help you think properly, make plans, and move ahead to move right.
4. Personal Care
If you have plans to be passionate about any significant domain, then it will not happen. In this case, always remember that taking care of yourself and keeping yourself clean is also part of achieving success. It is a fact that almost every successful person somehow takes care of their health. This can be done in any way, such as exercising regularly, practicing self-care, eating healthy foods, maintaining a good routine, etc.
5. Positive Attitude
What do you mean by positive habits? Well, this could be anything, right!! In this case, by becoming humble, expressing properly, talking with others politely, and so on. You always have to showcase your positive habits in your workplace. In this way, you can become successful. Not only that, but this is the easiest way to get courage.
6. Networking
Building a network would be an essential part of life. Some successful people always want to add value in exchanging their lives. Networking is mainly known as the value of teamwork and collaboration.
7. Frugality
Frugality is one of the most essential habits for being thrifty. This can happen with anything, such as resources and money. This is another habit that will help you learn economics by avoiding multiple wastages. This would automatically give results in this type of efficiency.
8. Rising Early
Did you know that you won’t be able to succeed without rising early? In this case, a late-morning person can’t get that success compared to an early-rising person. This habit will repeatedly help you to achieve success. This is one of the most remarkable and notable successes among other habits.
9. Sharing
Sharing is another way to become a successful person. Successful people will always have the habit of believing in their success and passions. This would help them to accumulate wealth, especially for themselves.
10. Reading
Books will help you to enhance your knowledge. After all, knowledge transfer and garnering knowledge are also notable habits of a successful person.
In Conclusion
I have discussed 5 Little-Known Founder Habits to Advance Your Career & Personal Life and ten Habits of a Successful Person. Building a good habit is a practice of becoming rich. This old proverb, “failure is the pillar of success,” means you must face failure to reach a thriving destination. Otherwise, it won’t be possible to become a successful person.
I hope you liked this article!
Learn More About:
The 7 Habits of People Who Live Debt-Free Lives
Books & Self Development – How Words Can Help Motivate Yourself
The Lifeline Of Hope: Exploring The Power Of Life Supports Counseling
In an era where consumerism and instant gratification are deeply woven into our lives, being savvy about our shopping habits can pay dividends.
There's a profound difference between purchasing to meet needs and purchasing for wants, a line that often gets blurred in the flurry of attractive deals and shiny new items.
This article aims to equip you with useful shopping tips to help you not only save money but also shop more consciously and intelligently.
Understand Your Spending Habits
The first step to a smarter shopping experience involves a thorough understanding of your spending habits. Ask yourself questions like, "Do I often make impulse purchases?" or "Do I usually shop when I'm emotional?" Analyzing your patterns helps in recognizing trigger points that could lead to unnecessary spending.
Budgeting Is Your Best Friend
In the world of finance, the word 'budget' reigns supreme, and for a good reason. Creating and sticking to a budget is an excellent strategy to curb overspending and maintain financial stability. Dedicate a specific amount for different spending categories and try your best to adhere to these limits. Use a budgeting app if you find it challenging to track your expenses manually.
Quality Over Quantity
While it's tempting to buy cheaper items to save money, this approach can be counterproductive in the long run. Lower-priced goods may lack durability, leading you to spend more as you replace them frequently. Investing in quality products ensures longevity, providing better value for your money.
Research and Compare Prices
Price comparison is an indispensable step before any purchase. Many online platforms provide price comparison features that allow you to see different prices for the same product across various online and physical stores. By doing this, you can ensure you're getting the best possible deal for your purchase.
Utilize Cashback and Reward Programs
Many companies offer loyalty programs, reward points, or cashback for your purchases. Make it a habit to leverage these programs as they can lead to significant savings over time. If you are an avid online shopper, consider using cashback websites that provide a percentage of your spending back.
Understand Sales and Promotions
Sales and promotions can be a boon if used correctly, but they can also lure you into spending more than you intended. Just because an item is on sale doesn't mean it's a good deal or a necessary purchase.
Evaluate your needs carefully before diving headfirst into these offers. It's also wise to keep an eye on annual sales like Black Friday, Cyber Monday, and EOFY sales (End of Financial Year). These sales usually offer deep discounts, making it the perfect time to purchase those big-ticket items you've been saving up for.
Plan Your Purchases
Planning purchases, especially for non-essential items, can help in reducing impulse buying. For instance, if you need to buy a new gadget, plan it ahead of time, save for it, and watch out for deals. This strategy not only helps you save but also enhances your purchasing power.
Shop Out of Season
For items not needed immediately, consider shopping out of season. Retailers often offer significant discounts on off-season items to clear their inventory. For example, buying winter clothing at the beginning of summer can save you a decent amount of money.
Practice Mindful Shopping
Mindful shopping is all about making intentional and conscious purchasing decisions. It helps you differentiate between your needs and wants, preventing unnecessary expenditure. Mindful shopping also promotes sustainable consumption, benefiting both your pocket and the planet.
Final Thoughts
While shopping is a necessary and often enjoyable activity, it is essential to approach it wisely. Adopting smart shopping practices will not only prevent you from falling into the trap of overspending but also lead to significant savings over time. Remember, it's not about depriving yourself, but about making informed and thoughtful decisions. Happy shopping!
Read Also:
5 Things To Consider When Shopping For Non-Alcoholic Bitters
The Future of Women’s Fashion: Shopping Online
8 Best Shopping Apps for 2019













 You should never tuck a pistol in your pants and count on the belt to keep it in place. You certainly do not want to carry a handgun in your pocket, because that could lead to an accidental discharge that lands you in the hospital and could trigger criminal charges. Instead, you need to obtain a dedicated concealment holster that enables you to carry your firearm securely and without tipping off others to its presence.
For example, a Glock 19 concealment holster should enable you to carry while securing the firearm comfortably. The holster might fit inside the waistband of your pants and have a hook and a belt loop to keep it in place. It also might fit outside the waistband, but you would need loose clothing to cover it – or do open carry where it is legal.
You also might try a shoulder holster that fits comfortably beneath a loose-fitting jacket or shirt, and a belly band holster could keep your firearms on your hip. A pocket or ankle holster could be useful for carrying a backup firearm, such as a snub-nose .38 or Ruger LCP. You might also use one type of holster during the hotter summer months and another during the colder winter weather.
You should never tuck a pistol in your pants and count on the belt to keep it in place. You certainly do not want to carry a handgun in your pocket, because that could lead to an accidental discharge that lands you in the hospital and could trigger criminal charges. Instead, you need to obtain a dedicated concealment holster that enables you to carry your firearm securely and without tipping off others to its presence.
For example, a Glock 19 concealment holster should enable you to carry while securing the firearm comfortably. The holster might fit inside the waistband of your pants and have a hook and a belt loop to keep it in place. It also might fit outside the waistband, but you would need loose clothing to cover it – or do open carry where it is legal.
You also might try a shoulder holster that fits comfortably beneath a loose-fitting jacket or shirt, and a belly band holster could keep your firearms on your hip. A pocket or ankle holster could be useful for carrying a backup firearm, such as a snub-nose .38 or Ruger LCP. You might also use one type of holster during the hotter summer months and another during the colder winter weather.