How to Protect Your Wood Flooring in a Busy Household

Wood Flooring

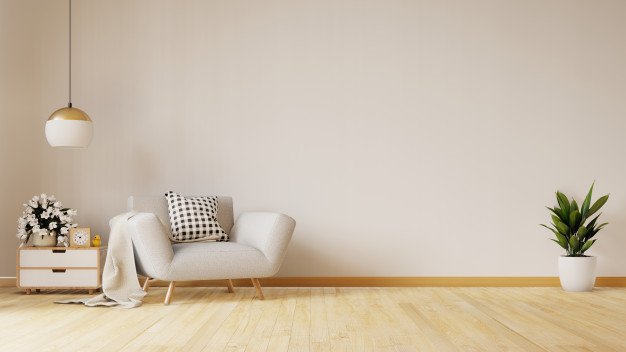
A busy household is one with a lot of love. Whether it is a lot of people all living together in one home or just neighbors and friends dropping by at all hours of the day and night, keeping up with a barrage of feet across your floors can be difficult. A stylish wood flooring might be exactly what you need in terms of aesthetics but what can you do in terms of protection? Keep reading to find out.

Choose the Right Floor:

Floor

Protecting the floor actually begins a long time before it is even laid. One of the most crucial decisions you can make when it comes to choosing the right flooring comes from which wood you pick. If you opt for a design which has been treated to be resistant then you know it will be a little longer lasting than something else you could choose.

You should also choose something on the neutral side so it will always be in style no matter how much you change the rest of the room about. The right color will blend in with everything and can even help to disguise stains depending on what you choose.

Enforce “Shoes Off”

Yes, you might have to be one of those households which enforces a shoes-off rule. If you want to maintain clean floors as often as possible, you need to ensure that no-one is trekking mud and dirt through your home on the soles of their shoes. Some people only like to use this rule when they have carpets, but it can also be used when you have wood flooring you want to keep pristine. Keep a collection of slippers just for guests if they aren’t comfortable walking around in just socks.

Use Protector Pads on Furniture:

Head to any hardware store or even your local supermarket, and you will be able to find a square of felt which you can cut up and used to cushion the feet of your furniture. This can be bought either in the pre-cut shapes or you can do it yourself. If you have furniture like chairs which frequently get dragged along your floor, this felt will help to protect the floor. Long scores and other damage on the floor can be extremely difficult to fix and you should instead try to focus on preventing such damage.

Put the pads on any furniture will be resting on the floor even if it will not be moved often. It might not be the most convenient for you to try to place the pads on your heavy dresser, but it will be worth it if it means your floor won’t be damaged. Just the natural shift of people walking around the house might be enough to cause it to move and damage your floors.

Wipe up Spillages ASAP:

Wood floors are great as they do not require that much in the way of maintenance but there is one thing you must be exceptionally vigilant about. This is spillages from liquids; something which might happen quite a lot in households with a lot of people. From drinks being dropped to vases getting knocked over, there is plenty of scope for things being spilled on your beautiful wooden floor.

If this spillage is left unattended, you can risk the wood warping and become irrevocably damaged. There is not really any way to correct wood once it has warped so it is easier to just be vigilant and clean up the spills as they happen instead. If you have young children, make sure that you instill in them the knowledge that spilling on the floor is not wrong if it is an accident, but it must be cleaned up as soon as possible.

Gentle, Regular Cleaning:

Floor cleaning

A wood floor can look beautiful, but you need to be very careful about what you use to clean it if you want it to remain as good as possible for the longest amount of time. First of all, a regular sweep will work wonders. Build one into your routine. If you do a daily clean down or tidy of the room with the wood floor just to keep things nice and neat, running around with a broom is not a massive addition to your cleaning routine.

When it comes to something a little more, all you need is a good microfibre mop. These are brilliant as you can really wring them out to ensure that they are merely damp as opposed to wet. You should not want to use anything too wet to avoid the warping problem mentioned above. A damp microfibre mop and a suitable cleaner which can be used on wood flooring are all you need to ensure that the wood is left sparkling clean.

Read more: Use Floor Polishing For Keeping Your Flooring Looking New

A Stylish Rug or Two:

If your wood floor is in somewhere with a lot of traffic, for example, a hallway or the kitchen, then you might want to take an extra precaution to protect the floor through the use of a rug. This will protect your floor from some additional wear and tear and can help to prevent those tell-tale marks which slowly appear from lots of feet trailing through the same area.

What’s more, it is incredibly easy to find rugs to match whatever style you might have in a room. With a load of different textures and designs to choose from, you can very easily find the perfect rug to match your room and rest knowing that the floor underneath will stay protected that little bit longer.

Find the Right Floor for You Today:

If you have been holding back on installing a wood floor because you think your household is too busy for it, you need to correct that mistake now. There are plenty of options for you even if you have a house bursting at the seams with loved ones! With the tips mentioned above, there is no reason why you cannot have a beautiful wood floor in your home even if you have visitors at all hours of the day and night.

Read Also:

Content Rally wrapped around an online publication where you can publish your own intellectuals. It is a publishing platform designed to make great stories by content creators. This is your era, your place to be online. So come forward share your views, thoughts and ideas via Content Rally.

View all posts

Leave a Reply

Your email address will not be published. Required fields are marked *

Related

Tiny Homes

5 Things You Should Know About Heating and Cooling Tiny Homes

Tiny homes are small-scale houses meant for simple living with a smaller carbon footprint. Tiny houses have special considerations because of limited space, especially concerning heating, ventilation, and air conditioning (HVAC). Here are some critical points for heating and cooling of a tiny home. Different Ways Your Tiny Homes Can Help You In Heating & Cooling    Make use of the tiny homes that can help you to achieve your heating and cooling in the correct order. Try to make use of the best Tiny homes that can help you in that.   How Much Heating and Cooling Is Needed? Heating a home of any size requires knowledge of heating systems. British Thermal Units (BTU) measures the energy it takes to raise the temperature of a pound of water by 1 degree Fahrenheit. It is used for heating and cooling, so calculate the BTUs of the home, and move on to heating and cooling options. Online calculators provide the BTU for your space, allowing you to make the best and most energy-efficient choice. Off the Grid or On? Another consideration for a tiny-home living is energy. Is the home tied to local utilities, or is it off the grid with its source of energy coming through solar or wind power? It's important to look at the needs and the amount of energy available in the house before looking at heating and cooling units. Heating Options Half splints are a solid choice for homes tied to the grid. These units provide both heating and cooling options and mount outside the home with professional installation. Consider the climate as these units struggle when temperatures drop under minus 5 degrees Fahrenheit. You don't want to service your unit in the dead of winter. Radiant floor mats are another option that saves space, warming the floor throughout the home. Electrical floor heaters are an affordable solution, allowing you to move the unit wherever it is needed. Homes off the grid may also use basic heating like wood stoves and propane heaters. Cooling Options Cooling options also include mini splints. These convenient HVAC units blend seamlessly into the home interior but do require professional installation. Roof-mounted AC units, like the ones seen on RVs, are another option. So long as the roof is flat, this option even allows minimal ductwork throughout the home. Packaged terminal air conditioners are those seen in hotel rooms, usually under the windows. This option is both more expensive and takes up prime real estate in a small home. Window AC units are budget-friendly and don't require professional installation. Depending on the heat extremes of the area, floor and desk fans are relatively inexpensive and adaptable. Ceiling fans are another choice, depending on the layout of the home, especially the height of the ceiling. Logistics for Temperature Management Weather extremes dictate the needs and options for heating, ventilation, and air conditioning (HVAC) of the home. A home in the Pacific Northwest can get away with a few desk fans during the summer, while in the desert of the Southwest, a house needs more powerful cooling. Owners of small homes usually look for highly efficient units to cool and heat the home with the least amount of energy necessary. Tiny homes allow minimal living, paring everything down to the bare essentials. Small-home living does not mean discomfort, as heating and cooling units create the perfect living space. Once you know the BTUs of the home, the climate of the area, and your utility considerations, deciding on which unit meets your needs is relatively simple. Read Also: 5 Features That Any Heating Service Should Have! Interiors To Reduce The Heat Build-Up In Your Homes 7 Specifications You Should Look For When Buying A Home Generator Don’t Get Caught In A Heatwave: 5 Signs That Your AC Is About To Go Out

READ MOREDetails
Homemade Carpet Cleaning

10 Trends About Homemade Carpet Cleaner You Should Know

There are a lot of do-it-yourself enthusiasts in the world. It’s because there are so many things you can make on your own without having to purchase expensive products. There are many homemade solutions that work just as well, if not better than anything you could buy from a store. The 10 trends below are homemade carpet cleaning solutions that can help you in a bind. 1. Food Stains: Dropping something like ketchup on your carpet can be frustrating because of its bright color and the concern that you’ll never fully remove the stain. There are many ways to remove this type of stain. A preferred method is to use a paper towel and a detergent made from liquid soap. After combining the detergent with water, dab it onto the stain gently and allow it to sit for 20 minutes. Then use another paper towel to remove excess water. You can also use a vinegar and water solution for this type of stain. Sometimes food stains are stubborn, so you might need to use the solution more than once. 2. Beverage Stains: There are so many different beverages that can be problematic when spilled on the carpet. This includes juice, coffee, wine, and just about anything else that has a dark color. A great way to remove beverage stains from carpet is by using a cloth soaked with warm water and blotting the area until the substance is completely removed. Sometimes water alone will remove the liquid if it’s taken care of immediately. However, there’s a chance that you’ll need a strong solution, which can also be made at home. You can simply add an equal part of white vinegar to the water before dabbing it onto the carpet. 3. Oil Stains: Oil stains on the carpet can come from a lot of different sources. Sometimes it’s from using creams and lotions that end up on the carpet. Perhaps there are stains from butter or some type of cooking oil. Many types of oils can be removed with a solution made from either liquid detergent and water or vinegar and water, depending on your preference. Once you’ve made your preferred solution, press down with a clot on the stain for just under a minute. It’s important not to scrub because that will enlarge the stain. 4. Tracked in Mud: It’s inevitable that mud will be tracked into your home, especially if you live in an area of the world where there is a lot of rain. That’s usually when you end up entering your home with shoes covered in dirt and mud. Depending on how much mud has been tracked in, the first step might be to sweep up or vacuum the area to eliminate as much mud as possible before applying a solution. Then you’ll need to create a solution with liquid detergent and warm water. This solution should be dabbed onto the carpet numerous times for less than a minute. You should be able to see the difference, but a true assessment will take place after it dries. 5. Chewing Gum: Removing gum from carpet can be tricky, especially if it’s been stuck for a while. A great way to remove it is by placing an ice cube onto the gum until it is completely frozen, which might take a few minutes. You can then break the frozen gum for removal. You’ll then need to use the homemade carpet cleaning solution of your choice to clean any remnants. 6. Pet Accidents: There are few things as concerning pet accidents that seem to occur just before you have company. A great way to remove both any stains and odor is with a vinegar and warm water solution. This mixture should be pressed into the carpet on the location of the accident. The amount of vinegar used depends on the stain, but equal parts of both vinegar and water will usually suffice. 7. Ink Stains: Don’t be intimidated by ink stains. Although they are sometimes difficult to remove, it is possible. Liquid detergent and hot water mixture is the best place to start. You can blot this solution onto the carpet with a cloth, let it sit for two minutes and then use paper towels to dry it. You may need to repeat this process. 8. Strong Odors: Removing odors from the carpet will usually start with vacuuming to ensure you’ve removed any dirt and particles that might be causing the odor. Once that’s done, you can sprinkle baking soda onto the carpet to freshen things up. The baking soda should be left overnight before vacuuming again. 9. Natural Fiber Carpets: Sometimes natural fibers are easier to clean, but they might require extra care. A highly effective solution that can be used for virtually any type of stain on natural fibers includes about two tablespoons of ammonia and a cup of warm water. You can also make a solution with a half cup of vinegar and the same amount of water. Whether or not you choose to use a spray bottle or a bowl is up to you. When using a spray bottle, be sure to spray lightly. 10. Synthetic Fiber Carpets: Removing stains from a synthetic carpet can be handled in several different ways. Prepare a solution that you can pour onto a cloth and gently apply to the carpet. It’s best not to pour the solution directly onto the carpet. You can try a cup of white vinegar mixed with two cups of water to remove the stain for a natural option. You can also try using any liquid detergent that you like combined with warm water. The mixture is half a teaspoon of detergent and two cups of water. These are all great ways to remove different types of carpet stains. You can also get help removing tough stains at carpestology.com.au. Read Also: Five Easy Steps When Cleaning Your Mattress 10 Ways To Preserve Your Carpet’s Beautiful Design

READ MOREDetails
Driveway

Updating the Driveway on Summer Time: What You Need To Know

Does your driveway look worn out? Or is it starting to fade and crack? If that’s the case, you should note that your driveway can affect the curb appeal of your property. Sadly, most people hold on to repairing their driveways until they start noticing major issues like water drainage problems and potholes. However, this should be the case. You should always schedule periodical driveway upgrades—especially during the summertime. Generally, summertime is the perfect period to update your driveway and address some of these issues. With that said, let’s look at some of the things to keep in mind when upgrading your driveway. Paving material The first thing you need to consider is the paving material. While concrete comes in various options, it can be quite difficult for you to find a pre-fab material that perfectly matches your budget. Here are some of the most common materials used when upgrading driveways: Asphalt pavement - This paving material tends to be less expensive than other types. However, asphalt can fill up with water rather easily, leading to drainage problems down the road. On the upside, asphalt pavements come in various textures and designs, allowing you to choose a layout that best fits your property. Pea gravel - Though this option is slightly more expensive than asphalt pavements, it’s far more durable. However, it also tends to be less aesthetically appealing. Concrete pavement - This paving material is typically the most expensive and durable choice for your driveway—especially since you can customize the layout and design as you like. On top of that, concrete comes in a wide range of textures and colors—so it’s easier to find something that perfectly matches your property. Drainage solutions If there are no major drainage issues on your property, then you’re all set to begin work on updating your driveway. However, before you start this process, it’s important that you first mark where each water outlet is located—such as drains and downspouts. This step isn’t 100% necessary; however, it makes sense because it can help prevent any work from happening near these areas—which could ultimately cause damage to both outlets and the new surface of your driveway. Also, note that if there’s stagnant water anywhere on your property after setting up temporary markers, then this means that there are some drainage issues on your property. Lastly, if you’re experiencing major issues with water drainage on the property—such as pooling or puddles—after completing updating your driveway, then it may be time to get in contact with a professional who will help encourage the proper flow of water throughout your property. Even though there are ways to fix these drainage problems on your own, it is best to leave these issues up to a professional. This is because they usually have more advanced tools at their disposal—which can make solving these types of problems much easier for them from the very beginning. Sealer Once you have marked the location of all necessary outlets, it’s time for you to mark off where new layers will be placed—which includes marking off where any new edges need to be placed around your driveway. Also, you should use spray paint or chalk to draw out how much space is required between each layer—this step helps ensure that you don’t accidentally apply any materials on top of one another during this part of the process. Then after applying the sealer, it needs at least 24 hours to dry up before applying any additional layers of paint. Add layers As mentioned before, you should create some space between each layer as you apply them on top of your existing driveway. If anything overlaps, then this could cause issues with both texture and color—and may even lead to added expense if extra materials need to be purchased for re-applying the materials properly onto the surface of your driveway. This is the main reason why you must use a large enough tarp to ensure that all materials are applied at a safe distance from one another. Once everything is dry or completely hardened, it’s time to add additional material around the edges of your property—this step helps ensure that water doesn’t run off the sides of your driveway when it rains. To make this part of the process easier, you should use a garden hose to help draw out where the edges will be placed to learn how much materials are needed. Then once that’s finished, it needs at least 24 hours (ideally longer) for everything to completely dry up before applying any sealer. There’s one more thing you need to know about updating your driveway. If there was ever a time when you experienced foundation damage on your property from natural elements—such as water, weeds, or vegetation—then get rid of all grass and weeds near the affected area before adding any new surface layers on top of paint on its own. The reason being is that these things will probably grow out of control on top of your driveway, which can lead to additional maintenance problems. Bottom Line According to the Florida asphalt paving experts from ABC Paving, upgrading your driveway around summertime doesn’t always need to cost a lot of money. Sometimes, it can be as simple as making sure you use the proper materials for protecting your existing driveway before adding new layers on top. Suppose there are any issues with drainage or standing water after doing so. In that case, getting in contact with a professional is usually the best solution—and this also applies regardless of whether you live in an urban area or rural location because everyone will benefit anyway. Read Also: Asphalt Pavement Maintenance Tips Floor Cutting Using Diamond Saw: What You Need To Know All You Need To Know About Concrete Repair Solutions And Services

READ MOREDetails